I had been looking for a banana bread recipe that actually tasted like something, not just a delivery vehicle for overripe fruit. For a while, I just accepted that homemade banana bread was going to be either too dense or too dry, or it would require dragging out the stand mixer and dirtying every bowl in the kitchen. You know the drill—you spot those sad, spotty bananas on the counter and feel obligated to do something, but the last thing you want is a sink full of dishes. So I kept making it anyway, because wasting bananas felt worse than the cleanup. But honestly? I wasn’t happy with the results. They were fine. Edible. The kind of bread you eat because it’s there, not because you’re excited about it. Then one Tuesday morning—not a special day, just a regular one—I decided to stop accepting “fine.” I wanted banana bread that was tender, moist, and deeply flavored without needing a mixer or a dozen bowls. Something you could throw together while the coffee was brewing. This version came from that quiet determination, and I haven’t looked back since.
Why You’ll Love This Recipe
This isn’t just another banana bread recipe you’ll bookmark and forget. This is the one you’ll actually make, over and over, because it delivers on every promise without any fuss. Here’s why it works:
- One Bowl, No Mixer: Everything comes together in a single bowl with nothing more than a whisk and a spatula. Less cleanup means more time enjoying that first warm slice.
- Perfectly Moist Every Time: The ratio of fat to fruit is dialed in so you get that tender, almost pudding-like crumb without any soggy spots. It stays moist for days—if it lasts that long.
- Pantry-Friendly Ingredients: You probably have everything you need right now. Butter, sugar, eggs, flour, baking soda, salt, and those sad bananas on your counter. No specialty flours or obscure extracts required.
- Foolproof for Beginners: If you can stir and pour, you can make this bread. There’s no creaming butter and sugar, no folding in stages, no worrying about over-mixing (within reason). It’s forgiving in the best way.
- Endlessly Customizable: I’ve made this with chocolate chips, walnuts, blueberries, and even a swirl of peanut butter. It handles additions like a champ, so you can make it your own every time.
What makes this recipe different from the dozens of others out there? It’s the method. By mashing the bananas first and then whisking the wet ingredients until they’re truly combined—not just barely mixed—you create an emulsion that gives the bread structure without needing a mixer. It’s a small shift in technique that makes a huge difference in texture. I learned this trick from a pastry chef friend who swore by hand-mixing for quick breads, and she was right. It’s the kind of recipe that makes you close your eyes after the first bite, not because it’s fancy, but because it’s exactly what you wanted.
What Ingredients You Will Need
This recipe uses simple, everyday ingredients to deliver that classic banana bread flavor and texture. Nothing fancy here—just the good stuff you probably already have in your pantry and fridge. The key is using ingredients at the right temperature and choosing the right bananas.
- 3 large ripe bananas, mashed (about 1 ½ cups / 360 ml) – The riper the better. You want them spotty brown and almost too soft to peel. The natural sugars in overripe bananas are what give this bread its deep, caramel-like sweetness. If your bananas aren’t quite there yet, you can roast them in a 300°F oven for 15 minutes to speed things up.
- ½ cup (113 g) unsalted butter, melted and slightly cooled – Butter gives the best flavor, but you can substitute with coconut oil or a neutral vegetable oil if needed. Just make sure it’s not piping hot when you add it to the eggs, or you’ll end up with scrambled eggs in your batter.
- ¾ cup (150 g) granulated sugar – Regular white sugar works beautifully here. You can swap in light brown sugar for a deeper, molasses-like flavor, but reduce the amount to ⅔ cup since brown sugar is more moist and compact.
- 2 large eggs, room temperature – Room temperature eggs blend more smoothly into the batter and help create a better emulsion. If you forgot to take them out of the fridge, place them in a bowl of warm water for 5 minutes.
- 1 teaspoon vanilla extract – Pure vanilla extract adds warmth and depth. Imitation vanilla works in a pinch, but pure is worth the splurge here since banana bread relies on simple flavors.
- 1 ½ cups (190 g) all-purpose flour – Spoon and level your flour for the most accurate measurement. Scooping directly from the bag can pack in too much flour, resulting in dry bread. For a whole wheat version, substitute up to half the flour with whole wheat pastry flour.
- 1 teaspoon baking soda – This is the only leavening agent you need. Make sure it’s fresh—if it doesn’t fizz when mixed with a little vinegar or lemon juice, toss it and buy a new box.
- ½ teaspoon salt – Salt balances the sweetness and enhances the banana flavor. I use fine sea salt, but regular table salt works just fine.
- Optional add-ins: ½ cup (90 g) chocolate chips, ½ cup (60 g) chopped walnuts, or ½ cup (80 g) fresh or frozen blueberries – Fold these in gently at the end. If using frozen fruit, toss it in a tablespoon of flour first to prevent it from sinking to the bottom.
Equipment Needed
The beauty of this recipe is how little equipment it requires. You don’t need a stand mixer, a hand mixer, or even a food processor. Just a few basics you probably already own:
- Large mixing bowl – Any medium-to-large bowl will do. I use a standard ceramic mixing bowl, but glass or stainless steel works just as well.
- Whisk – For combining the wet ingredients and smoothing out the bananas. A fork works in a pinch, but a whisk gives you a smoother, more even mixture.
- Rubber spatula – For folding in the dry ingredients and scraping down the sides of the bowl. A wooden spoon also works, but a spatula makes cleanup easier.
- 9×5-inch (23×13 cm) loaf pan – This is the standard size for banana bread. If you only have an 8×4-inch pan, your bread will be taller and可能需要 bake for 5-10 minutes longer. Grease it well with butter or non-stick spray, or line it with parchment paper for easy removal.
- Measuring cups and spoons – For accurate measurements. I prefer dry measuring cups for flour and sugar, and a liquid measuring cup for the melted butter.
- Cooling rack – Essential for letting the bread cool evenly after baking. If you don’t have one, you can use the grates from your oven (just make sure they’re clean and cool first).
If you don’t have a whisk, a fork will work, but you’ll need to spend a little extra time making sure the bananas are fully mashed and the eggs are well incorporated. I’ve made this bread with just a fork before, and it turned out fine—just not quite as smooth. A good rubber spatula is worth the investment, though; it makes scraping every last bit of batter into the pan so much easier.
Preparation Method
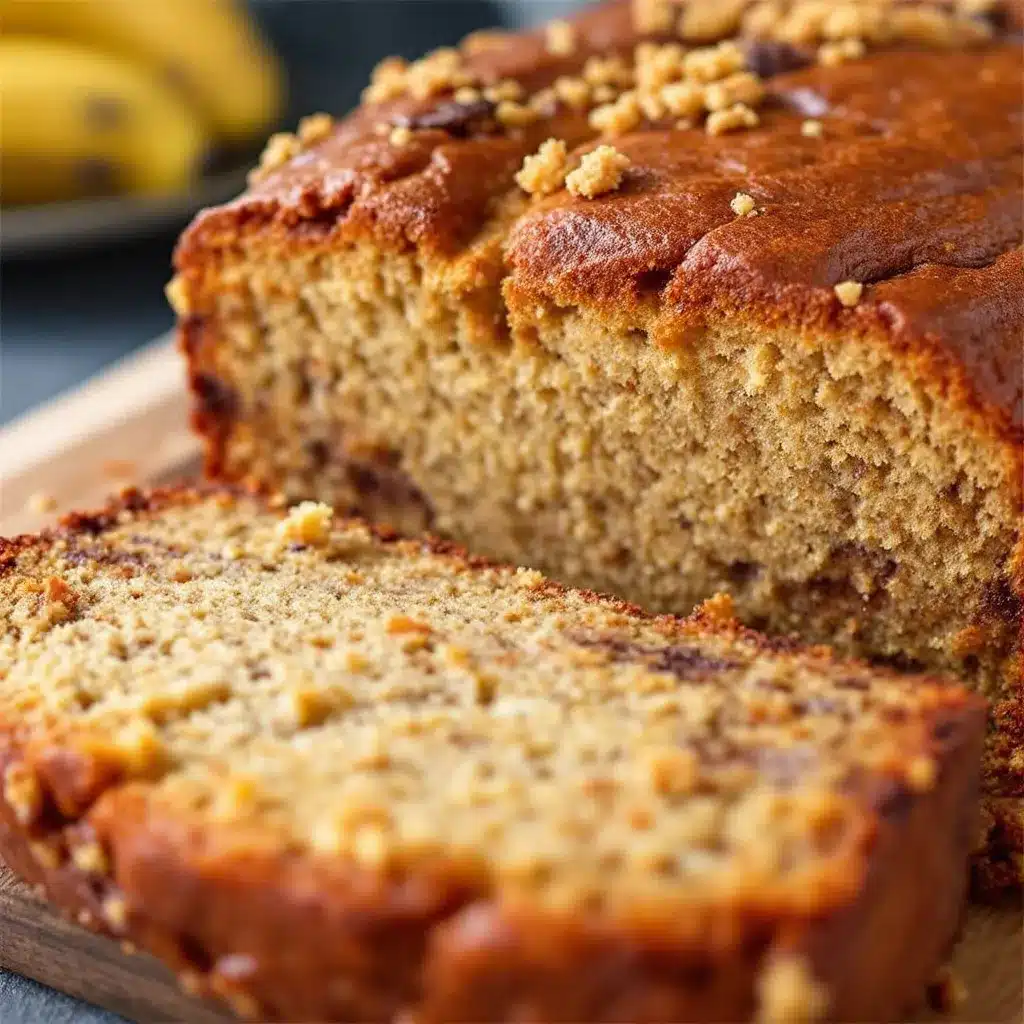
This method is designed to be as straightforward as possible. No complicated steps, no waiting around for butter to soften. Just mix, pour, and bake. Here’s how to do it:
- Preheat your oven to 350°F (175°C). Position the rack in the center of the oven. Grease a 9×5-inch loaf pan with butter or non-stick spray, or line it with parchment paper, leaving a little overhang on the long sides for easy lifting.
- Mash the bananas. In your large mixing bowl, add the three ripe bananas. Use a fork or a potato masher to mash them until they’re mostly smooth with a few small lumps remaining. You want some texture, not a completely smooth puree. This should take about 30 seconds. If you over-mash, don’t worry—it’ll still work.
- Add the wet ingredients. To the mashed bananas, add the melted butter (make sure it’s not hot), granulated sugar, eggs, and vanilla extract. Whisk everything together until it’s well combined and smooth. The mixture should look slightly glossy and uniform. This is where you want to be thorough—whisk for a good 30-45 seconds to make sure the eggs are fully incorporated and the sugar has started to dissolve. Don’t rush this step; it’s what gives the bread its tender crumb.
- Add the dry ingredients. Sprinkle the flour, baking soda, and salt over the wet mixture. Use your spatula to fold the dry ingredients into the wet ones. Stir gently, using a folding motion, just until you no longer see streaks of flour. A few small lumps are perfectly fine—over-mixing at this stage can make the bread tough. The batter should be thick but scoopable, similar to a thick muffin batter.
- Fold in any add-ins. If you’re using chocolate chips, nuts, or fruit, gently fold them in now. Use just a few strokes to distribute them evenly. If you’re using frozen fruit, toss it in a tablespoon of flour before adding to prevent sinking.
- Pour the batter into the prepared loaf pan. Use your spatula to scrape every last bit of batter into the pan. Spread it evenly with the back of the spatula. Tap the pan gently on the counter a few times to release any air bubbles.
- Bake for 55-65 minutes. Place the pan in the preheated oven and bake until the top is golden brown and a toothpick inserted into the center comes out clean or with just a few moist crumbs. If the top is browning too quickly (around the 40-minute mark), tent the pan loosely with aluminum foil. Every oven is different, so start checking at 50 minutes. My oven usually takes exactly 58 minutes.
- Cool in the pan for 10 minutes. Once done, remove the pan from the oven and place it on a cooling rack. Let it cool in the pan for 10 minutes. This allows the bread to set and makes it easier to remove without falling apart.
- Remove from the pan and cool completely. After 10 minutes, run a knife around the edges if needed, then lift the bread out using the parchment overhang (or invert it onto the rack). Let it cool completely on the rack before slicing. I know it’s tempting to cut into it right away, but warm banana bread is fragile and can be gummy inside. Waiting at least 30 minutes makes a huge difference.
Cooking Tips & Techniques
After making this recipe more times than I can count, I’ve picked up a few tricks that make the process smoother and the results more consistent. Here are my best tips:
Don’t over-mix the batter. This is the number one mistake people make with quick breads. Once you add the flour, stir only until it disappears. Over-mixing develops the gluten in the flour, which can make your banana bread tough and dense instead of tender. A few lumps are your friend here.
Use a kitchen scale for accuracy. If you have one, weighing your flour (190 grams) is more accurate than measuring by volume. Flour can settle in the bag, and scooping can give you up to 25% more flour than you need. I learned this the hard way after a batch that came out like a brick.
Check your baking soda’s freshness. Baking soda loses its potency over time, and old baking soda won’t give your bread the rise it needs. To test it, drop a teaspoon of baking soda into a small bowl of vinegar. If it fizzes vigorously, it’s good. If it barely bubbles, it’s time for a new box. I keep a fresh box just for baking and replace it every three months.
Let the butter cool slightly. If you add hot melted butter directly to the eggs, you’ll end up with scrambled eggs in your banana bread batter. Let the melted butter sit for 2-3 minutes before adding it to the bowl. It should be warm but not hot to the touch.
Use room temperature eggs. This is one of those tips that seems fussy but actually makes a difference. Cold eggs can seize the butter and make the batter lumpy. If you forgot to set them out, place them in a bowl of warm water for 5 minutes before cracking them.
Don’t slice until completely cool. I know, I know—the smell is intoxicating. But slicing into warm banana bread can make it gummy and cause it to crumble. Let it cool for at least an hour if you can. The texture improves dramatically as it sets.
Variations & Adaptations
One of the best things about this banana bread is how adaptable it is. You can change it up based on what you have on hand or what you’re craving. Here are some of my favorite variations:
- Chocolate Chip Banana Bread: Fold in ½ cup of semi-sweet or dark chocolate chips. The chocolate melts into little pockets of richness throughout the bread. I like using mini chocolate chips because they distribute more evenly. If you’re a fan of easy, no-fuss snacks, you might also enjoy these no-bake peanut butter granola bites for another quick treat.
- Nutty Banana Bread: Add ½ cup of chopped walnuts or pecans. Toast them lightly in a dry pan first for extra flavor. This is my husband’s favorite version—he says the crunch makes it feel more substantial.
- Blueberry Banana Bread: Gently fold in ½ cup of fresh or frozen blueberries. If using frozen, toss them in a tablespoon of flour first to prevent them from sinking to the bottom. The burst of tart berry against the sweet banana is fantastic.
- Vegan Banana Bread: Substitute the butter with coconut oil or a neutral vegetable oil, and use flax eggs (2 tablespoons ground flaxseed mixed with 6 tablespoons water, let sit for 5 minutes) instead of regular eggs. The texture will be slightly denser but still delicious.
- Gluten-Free Banana Bread: Swap the all-purpose flour with a 1:1 gluten-free baking flour blend. I’ve had good results with Bob’s Red Mill and King Arthur brands. Add an extra tablespoon of milk or water if the batter seems too thick.
- Spiced Banana Bread: Add 1 teaspoon of cinnamon, ½ teaspoon of nutmeg, and ¼ teaspoon of ground ginger to the dry ingredients. This gives the bread a warm, cozy flavor that’s perfect for fall. Pair it with a copycat pumpkin cream cheese muffins for a full autumn baking session.
Serving & Storage Suggestions
This banana bread is wonderful on its own, but a few simple additions can make it feel extra special. Here’s how I like to serve and store it:
Serving Temperature: Banana bread is best at room temperature or slightly warm. If you want to reheat a slice, pop it in the microwave for 10-15 seconds or toast it lightly in a toaster oven. The edges get slightly crisp while the inside stays soft—heavenly with a pat of butter.
Toppings & Pairings: A slice of this bread is perfect with a smear of salted butter, a drizzle of honey, or a dollop of Greek yogurt. For a dessert-like treat, top it with a scoop of vanilla ice cream and a drizzle of caramel sauce. It also pairs beautifully with a cup of coffee, a glass of cold milk, or a warm cup of tea. If you’re packing it for school lunches, try slicing it and pairing it with some peanut butter banana sushi roll-ups for a fun, kid-friendly combo.
Storage Instructions: Store leftover banana bread in an airtight container at room temperature for up to 4 days. The bread actually gets more moist and flavorful on the second day as the flavors meld together. If you live in a humid climate, you can store it in the refrigerator to prevent mold, but bring slices to room temperature before serving for the best texture.
Freezing Instructions: This banana bread freezes beautifully. Wrap the cooled loaf tightly in plastic wrap, then in a layer of aluminum foil, and freeze for up to 3 months. You can also freeze individual slices—just wrap each one in plastic wrap and place them in a freezer bag. To thaw, leave the wrapped bread at room temperature for a few hours or microwave a single slice for 20-30 seconds.
Flavor Development: One thing I’ve noticed is that this banana bread tastes even better the next day. The flavors deepen and the texture becomes more tender. So if you can resist eating it all on day one, you’re in for a treat on day two.
Nutritional Information & Benefits
Here’s the approximate nutritional breakdown for one slice of this banana bread (based on 10 slices, without any add-ins):
- Calories: 245
- Total Fat: 11g
- Saturated Fat: 6g
- Carbohydrates: 34g
- Fiber: 1.5g
- Sugar: 18g
- Protein: 4g
- Sodium: 260mg
Bananas are a good source of potassium, vitamin B6, and vitamin C. They also provide natural sweetness, which allows us to use a moderate amount of added sugar. The eggs add protein and healthy fats, while the butter contributes to the tender crumb. If you’re looking to make this bread a bit healthier, you can reduce the sugar to ½ cup or substitute half the butter with unsweetened applesauce. The texture will be slightly denser but still delicious.
This recipe is vegetarian-friendly and can be made vegan or gluten-free with the substitutions mentioned above. It contains dairy (butter) and gluten (flour) in its standard form, so adjust accordingly for dietary needs. For a lower-sugar option, you can use a sugar substitute like monk fruit sweetener, but note that the texture may be slightly different.
Conclusion
This one-bowl banana bread is the kind of recipe that becomes a staple in your kitchen—not because it’s fancy or complicated, but because it’s reliable and genuinely good. It delivers that perfect balance of moist crumb, deep banana flavor, and tender texture without requiring a mixer or a sink full of dishes. Whether you’re using up spotty bananas on a Tuesday morning or baking for a weekend brunch, this bread always delivers.
I love this recipe because it’s proof that you don’t need fancy equipment or complicated techniques to make something truly satisfying. It’s the kind of bread that makes your kitchen smell amazing, fills your home with warmth, and brings a smile to everyone who tries it. And honestly? That’s exactly what banana bread should do.
I’d love to hear how yours turns out! Leave a comment below and let me know if you tried any variations or add-ins. Did you go the classic route with walnuts, or did you load it up with chocolate chips? Share your creation on Pinterest and tag me—I can’t wait to see what you bake!
Frequently Asked Questions
Can I use frozen bananas for this recipe?
Absolutely! Frozen bananas work great. Just thaw them completely at room temperature or in the microwave, then drain off any excess liquid before mashing. The thawed bananas will be very soft and may be slightly more watery, but they’ll still work beautifully in this recipe.
Why did my banana bread sink in the middle?
A sunken middle usually means the bread was underbaked or the oven temperature was too low. Make sure your oven is properly preheated to 350°F and that you’re baking until a toothpick inserted in the center comes out clean. Opening the oven door too often during baking can also cause the bread to sink.
Can I make this recipe into muffins instead?
Yes, this batter works perfectly for muffins! Divide the batter among a greased or lined 12-cup muffin tin and bake at 350°F for 18-22 minutes, or until a toothpick inserted in the center comes out clean. You’ll get about 12 standard-sized muffins.
How do I know when my bananas are ripe enough?
Look for bananas that are spotty brown or even mostly brown on the outside. They should be soft to the touch and have a strong, sweet smell. The darker the peel, the sweeter and more flavorful your banana bread will be. If your bananas are still yellow, you can place them in a paper bag with an apple overnight to speed up ripening.
Can I reduce the sugar in this recipe?
Yes, you can reduce the sugar to ½ cup without significantly affecting the texture. If you reduce it further, the bread may be slightly less tender and the flavor less sweet. You can also substitute up to half the sugar with a natural sweetener like maple syrup or honey, but you’ll need to reduce the butter slightly to compensate for the added liquid.
Pin This Recipe!
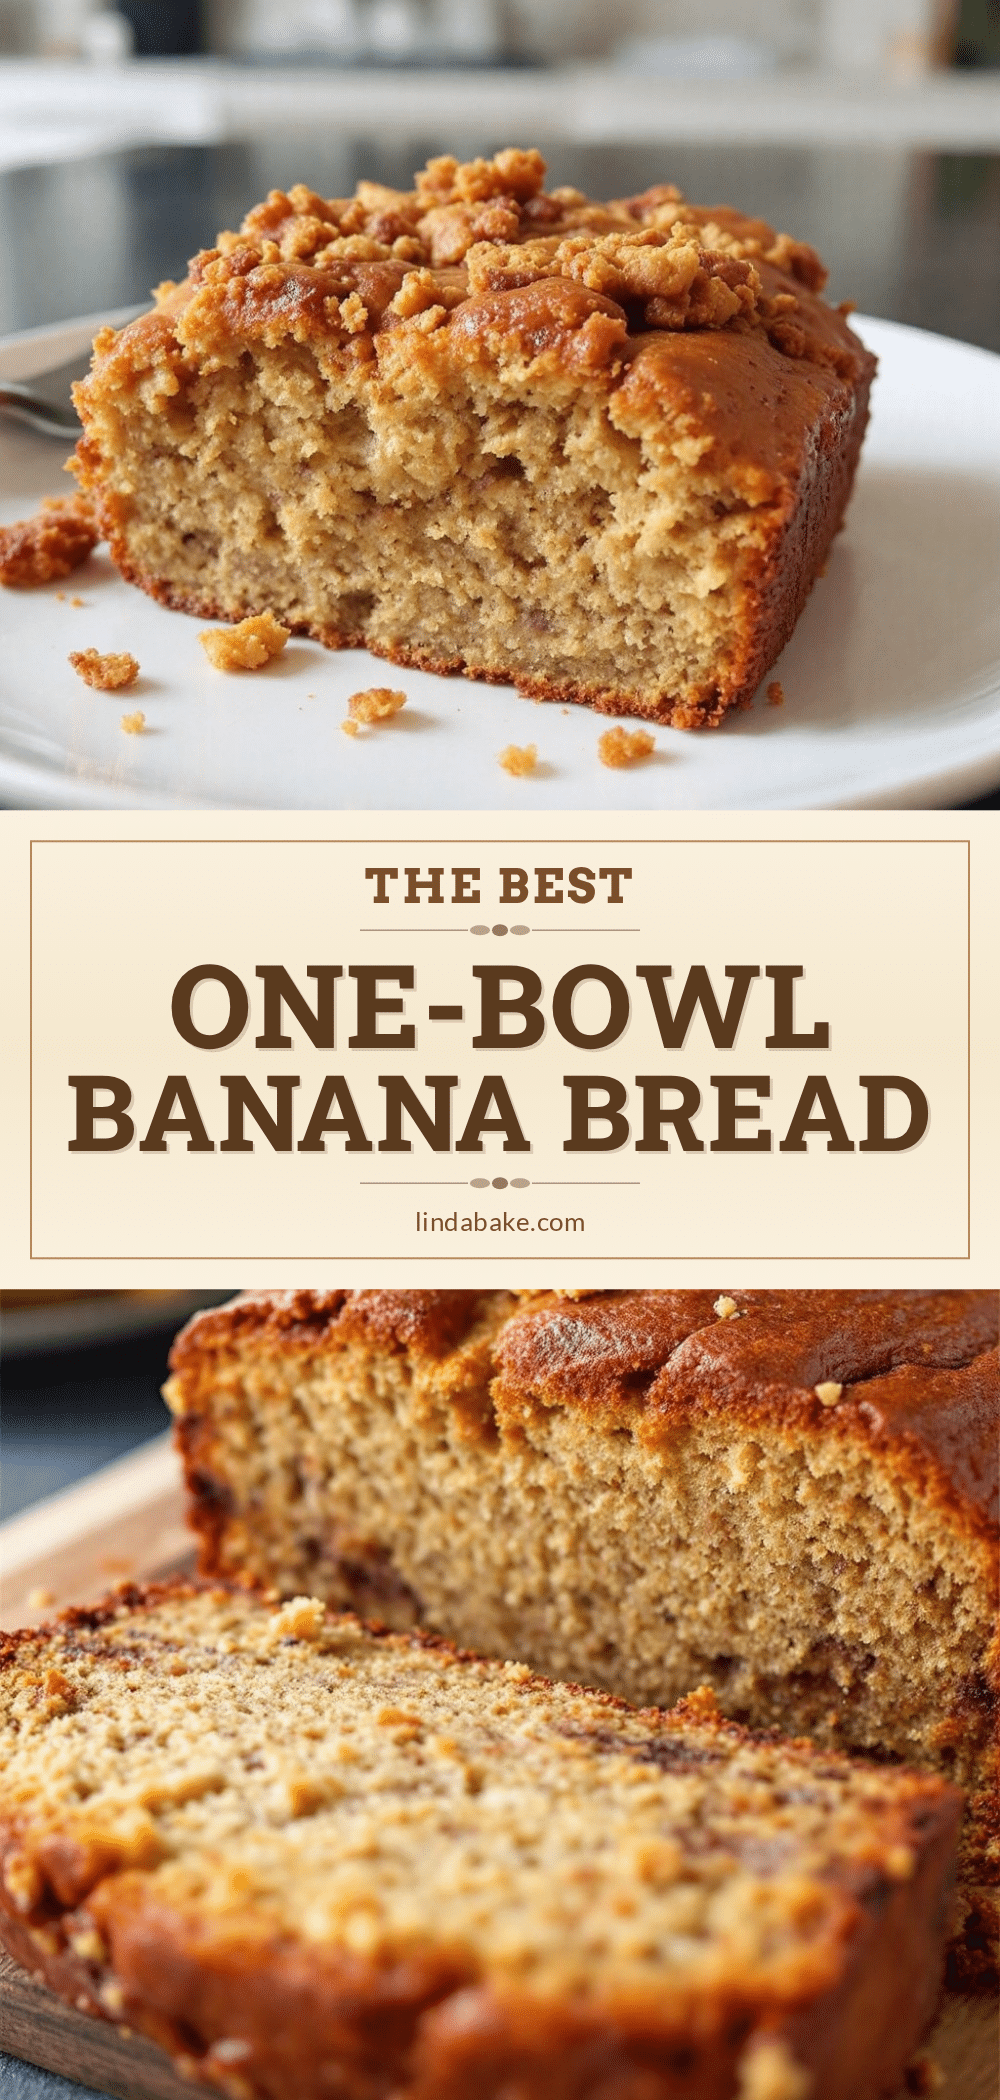
Best One-Bowl Banana Bread: Easy, Moist & No Mixer
This one-bowl banana bread is tender, moist, and deeply flavored without needing a mixer or a dozen bowls. It’s a foolproof recipe that delivers perfect results every time, using simple pantry ingredients.
- Prep Time: 15 minutes
- Cook Time: 55-65 minutes
- Total Time: 1 hour 10 minutes - 1 hour 20 minutes
- Yield: 10 servings 1x
- Category: Dessert
- Cuisine: American
Ingredients
- 3 large ripe bananas, mashed (about 1 ½ cups / 360 ml)
- ½ cup (113 g) unsalted butter, melted and slightly cooled
- ¾ cup (150 g) granulated sugar
- 2 large eggs, room temperature
- 1 teaspoon vanilla extract
- 1 ½ cups (190 g) all-purpose flour
- 1 teaspoon baking soda
- ½ teaspoon salt
- Optional add-ins: ½ cup (90 g) chocolate chips, ½ cup (60 g) chopped walnuts, or ½ cup (80 g) fresh or frozen blueberries
Instructions
- Preheat your oven to 350°F (175°C). Position the rack in the center of the oven. Grease a 9×5-inch loaf pan with butter or non-stick spray, or line it with parchment paper, leaving a little overhang on the long sides for easy lifting.
- Mash the bananas. In your large mixing bowl, add the three ripe bananas. Use a fork or a potato masher to mash them until they’re mostly smooth with a few small lumps remaining. This should take about 30 seconds.
- Add the wet ingredients. To the mashed bananas, add the melted butter (make sure it’s not hot), granulated sugar, eggs, and vanilla extract. Whisk everything together until it’s well combined and smooth. The mixture should look slightly glossy and uniform. Whisk for a good 30-45 seconds.
- Add the dry ingredients. Sprinkle the flour, baking soda, and salt over the wet mixture. Use your spatula to fold the dry ingredients into the wet ones. Stir gently, using a folding motion, just until you no longer see streaks of flour. A few small lumps are perfectly fine.
- Fold in any add-ins. If you’re using chocolate chips, nuts, or fruit, gently fold them in now. Use just a few strokes to distribute them evenly. If you’re using frozen fruit, toss it in a tablespoon of flour before adding to prevent sinking.
- Pour the batter into the prepared loaf pan. Use your spatula to scrape every last bit of batter into the pan. Spread it evenly with the back of the spatula. Tap the pan gently on the counter a few times to release any air bubbles.
- Bake for 55-65 minutes. Place the pan in the preheated oven and bake until the top is golden brown and a toothpick inserted into the center comes out clean or with just a few moist crumbs. If the top is browning too quickly (around the 40-minute mark), tent the pan loosely with aluminum foil.
- Cool in the pan for 10 minutes. Once done, remove the pan from the oven and place it on a cooling rack. Let it cool in the pan for 10 minutes.
- Remove from the pan and cool completely. After 10 minutes, run a knife around the edges if needed, then lift the bread out using the parchment overhang (or invert it onto the rack). Let it cool completely on the rack before slicing.
Notes
Don’t over-mix the batter. Use a kitchen scale for accuracy. Check your baking soda’s freshness. Let the butter cool slightly. Use room temperature eggs. Don’t slice until completely cool.
Nutrition
- Serving Size: 1 slice
- Calories: 245
- Sugar: 18
- Sodium: 260
- Fat: 11
- Saturated Fat: 6
- Carbohydrates: 34
- Fiber: 1.5
- Protein: 4
Keywords: banana bread, one-bowl banana bread, easy banana bread, moist banana bread, no mixer banana bread, quick bread


