The crumbly-then-chewy thing—that’s the whole point with these peanut butter granola bites. Honestly, that first press where the oats and peanut butter kind of melt together under your fingers, it is a very specific kind of satisfaction. I wasn’t even trying to make a snack recipe that day. I was staring into my pantry, feeling that mid-afternoon slump where you need something but nothing in the cabinet sounds good. You know the one. Not another apple. Not a sad handful of almonds. I wanted something that felt like a treat but wouldn’t leave me crashing an hour later.
So I grabbed the oats, the peanut butter, and a jar of honey that was getting sticky on the counter. I figured I’d just mix them together and see what happened. The first batch was a little too dry, honestly. Crumble city. The second batch? Too sticky. But the third time, I got that perfect balance where the mixture holds together without being a sticky mess on your hands. That’s the sweet spot. And that’s what this recipe is—a happy accident that turned into my go-to snack.
These no-bake peanut butter granola bites have become a staple in my kitchen. They’re the thing I make when I need something to grab on my way out the door. The thing that keeps me from buying overpriced protein bars. The thing that actually tastes good. Not just “good for a healthy snack” good, but genuinely, close-your-eyes-for-a-second good. And they only need five ingredients. Five. That’s it.
Why You’ll Love This Recipe
I have tested this recipe about a dozen times to get the texture just right. I’m a bit of a perfectionist when it comes to texture (you might have noticed). And these no-bake peanut butter granola bites are the result of all that trial and error. Here is why I think you will love them as much as I do:
- Quick & Easy : These come together in about 10 minutes of active time. No oven, no stovetop, no fuss. Just a bowl and your hands.
- Simple Ingredients : You likely have everything in your pantry right now. Oats, peanut butter, honey, and a couple of mix-ins. That is it.
- Perfect for Busy Days : Great for post-workout refueling, afternoon slumps, or packing in lunchboxes. They travel really well.
- Crowd-Pleaser : Kids love them. Adults love them. I brought a batch to a friend’s house and they were gone in ten minutes.
- Unbelievably Satisfying : The combination of oats and peanut butter is just comforting. It fills you up without weighing you down.
What makes this recipe different from the dozens of other no-bake bite recipes out there? It is the ratio. I’ve dialed in the exact balance of wet to dry ingredients so the bites hold their shape perfectly without being too dense or too crumbly. And I use old-fashioned rolled oats, not quick oats, for that chewier texture that makes these bites feel more substantial. This isn’t just another version—it is the version I keep coming back to.
These bites are the kind of snack that makes you feel like you have your life together. You know? Like you planned ahead. Like you care about yourself. And honestly, sometimes that is exactly what we need.
What Ingredients You Will Need
This recipe uses simple, wholesome ingredients to deliver that perfect chewy texture and rich peanut butter flavor. Most of these are pantry staples, so you might not even need a trip to the store.
- Old-Fashioned Rolled Oats: (2 cups) These are the backbone of the recipe. I recommend using old-fashioned rolled oats rather than quick oats for a chewier, more substantial texture. Quick oats will work in a pinch, but the bites will be softer and less satisfying. I personally prefer Bob’s Red Mill or Quaker for consistent results.
- Creamy Peanut Butter: (1 cup) Use a natural, no-stir peanut butter for the best flavor and texture. I like the kind where the only ingredients are peanuts and salt. Avoid the sugary, hydrogenated oil kind—it will make the bites greasy and overly sweet. If your natural peanut butter has separated oil on top, stir it really well before measuring.
- Honey: (1/3 cup) This is the binder and the sweetener. It helps the oats stick together and adds a gentle floral sweetness. Local honey is lovely if you have it, but any liquid honey works. For a vegan option, use maple syrup or agave nectar (though the texture will be slightly softer).
- Mini Chocolate Chips: (1/2 cup) These little bursts of chocolate make every bite feel like a treat. I use semi-sweet mini chips because they distribute evenly and melt slightly against the peanut butter. Dark chocolate chips work great too. If you are dairy-free, look for Enjoy Life brand.
- Flaxseed Meal: (2 tablespoons) This is my secret ingredient. It adds a subtle nutty flavor, a boost of fiber and omega-3s, and helps bind the mixture together. You can omit it or substitute with chia seeds if needed, but the texture will be slightly different. I keep mine in the fridge to keep it fresh.
- Pinch of Salt: (optional, but recommended) If your peanut butter is unsalted, add a generous pinch of flaky sea salt. It really makes the flavors pop.
That is it. Five main ingredients (six if you count the salt). No weird additives, no expensive superfood powders. Just real food that comes together in minutes.
Equipment Needed
You do not need much for this recipe. That is part of the beauty of it. Here is what you will need:
- Large Mixing Bowl: Any medium-to-large bowl works. I use a ceramic one because it feels nice, but glass or stainless steel is fine.
- Measuring Cups and Spoons: For accuracy. I have a set of stainless steel ones that have lasted me years.
- Rubber Spatula or Wooden Spoon: For mixing everything together. A spatula is great for scraping the sides of the bowl.
- Baking Sheet or Large Plate: To hold the bites while they chill. Line it with parchment paper or wax paper for easy cleanup.
- Cookie Scoop or Tablespoon: For portioning the bites evenly. I use a 1.5-tablespoon cookie scoop for uniform bites. If you don’t have one, a regular tablespoon works fine—just make sure the bites are roughly the same size so they chill evenly.
- Parchment Paper or Wax Paper: For lining the baking sheet. It keeps the bites from sticking and makes cleanup a breeze.
That is genuinely everything. No food processor. No mixer. No special gadgets. Just your hands and a few basic tools. I love recipes like this because they prove you don’t need a fancy kitchen to make good food.
Preparation Method
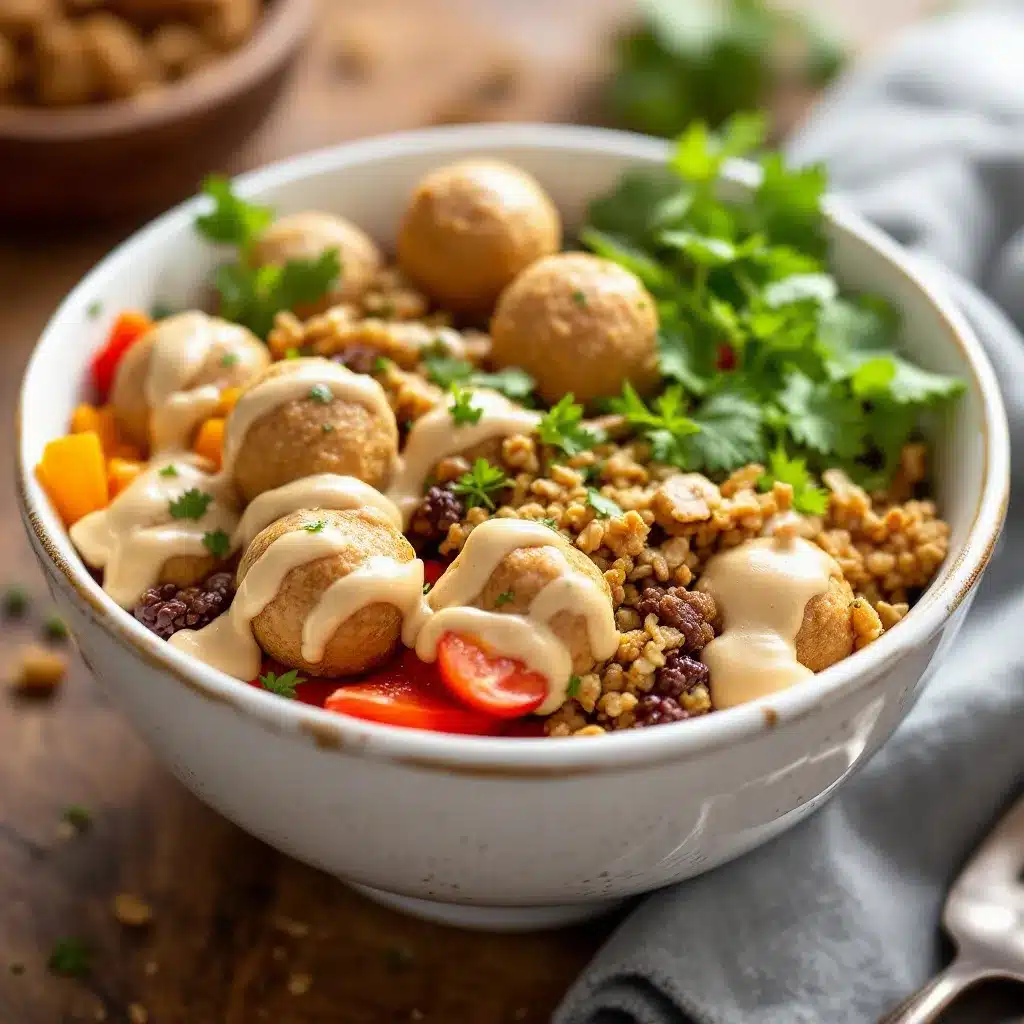
This is the easy part. The whole process takes about 10 minutes of active time, plus 30 minutes of chilling. Here is how to do it:
- Mix the dry ingredients. In your large mixing bowl, combine 2 cups of old-fashioned rolled oats, 2 tablespoons of flaxseed meal, and a pinch of salt (if using). Give it a quick stir with your spatula to distribute everything evenly. This step ensures the flaxseed meal doesn’t clump up later.
- Add the wet ingredients. Add 1 cup of creamy peanut butter and 1/3 cup of honey to the bowl. Don’t worry if it looks like a mess at first—it will come together. Use your spatula to start folding everything together. At first, it will look dry and crumbly. That is normal. Keep mixing.
- Get your hands in there. This is the most important step. Once the mixture is partially combined, use your clean hands to knead it together. Squeeze the mixture in your fists. Press it against the sides of the bowl. The warmth of your hands will help the peanut butter and honey soften and bind everything together. This takes about 2 minutes of active squeezing and pressing. The mixture should hold together when you squeeze a clump in your palm. If it crumbles apart, add another tablespoon of honey or peanut butter.
- Fold in the chocolate chips. Sprinkle 1/2 cup of mini chocolate chips over the mixture. Use your hands or the spatula to gently fold them in until they are evenly distributed. Try not to overmix at this point, or the chocolate chips might start melting from the warmth of your hands. Just a few folds until they are scattered throughout.
- Portion the bites. Line your baking sheet or plate with parchment paper. Using your cookie scoop or a tablespoon, scoop out portions of the mixture. Roll each portion between your palms to form a smooth ball. Aim for about 1.5 tablespoons per bite. You should get around 18 to 20 bites depending on how big you make them. I like them golf-ball sized—big enough to be satisfying, small enough to eat in two bites.
- Chill and set. Place the baking sheet in the refrigerator for at least 30 minutes. This step is non-negotiable. The bites need time to firm up so they hold their shape. If you try to eat them right away, they will be too soft and crumbly. After 30 minutes, they will be perfectly firm and chewy.
- Enjoy. Once chilled, the bites are ready to eat. They will be firm but still tender, with that perfect crumbly-then-chewy texture I mentioned earlier.
A few notes: If the mixture feels too dry and won’t hold together, add a little more honey or peanut butter. If it feels too sticky and wet, add a few more oats. The humidity in your kitchen and the exact consistency of your peanut butter can affect the texture, so trust your hands more than the measurements. You are looking for a mixture that holds together when squeezed but isn’t sticky on your fingers.
Cooking Tips & Techniques
I have made these no-bake peanut butter granola bites more times than I can count, and I have learned a few things along the way. Here are my best tips:
Use room temperature ingredients. Cold peanut butter straight from the fridge is harder to mix and won’t bind as well. Let it sit on the counter for 15-20 minutes before you start. Same goes for the honey—if it is crystallized, warm the jar in a bowl of hot water for a few minutes to loosen it up.
Don’t skip the hand-mixing step. I know it is tempting to just stir everything with a spoon, but your hands are the best tool here. The warmth of your palms softens the peanut butter and honey just enough to create a cohesive mixture. Plus, you can feel when the texture is right. It is a sensory thing that a spatula just can’t replicate.
Chill the bowl if your hands are warm. This is a tip I learned the hard way. If you have naturally warm hands (like me), the mixture can get a bit greasy as you work it. Pop the bowl in the fridge for 5 minutes before rolling the bites. It makes a big difference.
Wet your hands slightly. If the mixture is sticking to your palms while rolling, lightly dampen your hands with water. It helps the mixture release without adding extra moisture. Just don’t use too much water, or the bites will be soggy.
Make them uniform. Use a cookie scoop for consistent sizing. This ensures they all chill at the same rate and look nice on a platter. Plus, it makes portion control easier if you are counting calories or macros.
Let them rest after chilling. The bites are best after they have chilled for at least 30 minutes, but they are even better after an hour. The flavors meld together, and the texture becomes perfectly chewy. If you can wait, wait.
Variations & Adaptations
One of the best things about this recipe is how adaptable it is. I have tried several variations, and they all turned out great. Here are some ideas to make these bites your own:
Chocolate Peanut Butter Bliss: Swap the mini chocolate chips for dark chocolate chunks and add a tablespoon of cocoa powder to the dry ingredients. It makes them taste like a healthier version of a peanut butter cup. I made this version for a friend who is obsessed with chocolate, and she said they were “dangerously good.”
Crunchy Peanut Butter Version: Use crunchy peanut butter instead of creamy for extra texture. You get little bits of peanut in every bite. It is a small change that makes a big difference if you love that crunch.
Vegan & Gluten-Free Option: Use maple syrup instead of honey, and certified gluten-free oats. Most oats are naturally gluten-free, but they can be cross-contaminated during processing. Look for the certified label if you need to be strict. I have made this version for a vegan friend, and she couldn’t tell the difference.
Tropical Twist: Add 1/4 cup of dried, unsweetened coconut flakes and 1/4 cup of chopped dried mango. It gives the bites a summery, tropical vibe. This is my go-to version in the summer when I want something light and bright.
Spiced Chai: Add 1 teaspoon of chai spice blend (cinnamon, cardamom, ginger, cloves) to the dry ingredients. It pairs beautifully with the peanut butter and honey. This version is perfect for fall.
Nut-Free Option: Use sunflower seed butter or tahini instead of peanut butter. The texture will be slightly different, but it still works. Just make sure your sunflower seed butter is well-stirred, as the oil separation can be dramatic.
Feel free to experiment. That is half the fun of a recipe like this. If you try something creative, I would love to hear about it in the comments.
Serving & Storage Suggestions
These no-bake peanut butter granola bites are incredibly versatile when it comes to serving. Here is how I like to enjoy them:
Serving Temperature: Serve them straight from the fridge for the best texture. They are firm, chewy, and satisfying. At room temperature, they soften slightly and become more tender. Both are good, but I prefer them cold.
Presentation: Arrange them on a small platter or in a mason jar for a cute, grab-and-go snack. They look great on a charcuterie board alongside fresh fruit, cheese, and nuts. For a party, I sometimes dust them with a little cocoa powder or flaky sea salt for a more polished look.
Pairings: These bites pair beautifully with a glass of cold milk, a cup of coffee, or a mug of hot tea. They also go well with a side of fresh berries for a more balanced snack. If you are feeling indulgent, warm one up in the microwave for 10 seconds and serve it with a scoop of vanilla ice cream. Trust me on this.
Storage: Store the bites in an airtight container in the refrigerator for up to two weeks. They will stay fresh and chewy. Do not leave them at room temperature for more than a few hours, especially in warm weather, as the honey can cause them to soften too much.
Freezer Storage: These freeze beautifully. Place the bites in a single layer on a baking sheet and freeze for an hour. Then transfer them to a freezer-safe bag or container. They will keep for up to three months. To eat, let them thaw in the fridge for about 30 minutes, or enjoy them frozen for a cold, chewy treat. I love eating them straight from the freezer on a hot day.
Flavor Development: The flavors actually get better after a day or two in the fridge. The oats absorb some of the moisture from the honey and peanut butter, and the chocolate chips firm up. If you can make them a day ahead, do it.
Nutritional Information & Benefits
These no-bake peanut butter granola bites are a great source of energy and nutrients. Here is an approximate breakdown per bite (based on 18 bites):
- Calories: ~180
- Protein: 7g
- Carbohydrates: 20g
- Fiber: 3g
- Fat: 9g
- Sugar: 8g
Health Benefits: The oats provide complex carbohydrates and fiber for sustained energy. The peanut butter offers healthy fats and protein to keep you full. Flaxseed meal adds omega-3 fatty acids and extra fiber. And the chocolate chips? Well, they provide antioxidants and a little happiness. Everything in moderation, right?
Dietary Considerations: This recipe is naturally vegetarian. With simple substitutions (maple syrup for honey, certified gluten-free oats), it can be vegan and gluten-free. It is nut-free if you use sunflower seed butter. The bites are also dairy-free if you use dairy-free chocolate chips. Always check labels if you are cooking for someone with allergies.
Allergens: Contains peanuts (if using peanut butter). May contain traces of gluten, dairy, and tree nuts depending on the brands you use. I always recommend checking labels carefully.
I like these bites because they feel like a treat but actually provide real nutritional value. They are not empty calories. They are fuel you can feel good about eating.
Conclusion
These no-bake peanut butter granola bites have become a staple in my kitchen for a reason. They are quick, easy, and made with ingredients I always have on hand. They satisfy that craving for something sweet and chewy without the guilt. And they are endlessly adaptable, so you can make them your own.
I love that this recipe came from a moment of pantry frustration. It reminds me that sometimes the best things come from just working with what you have. No fancy techniques. No complicated steps. Just good food made with intention.
If you make these bites, I would love to hear how they turn out. Did you stick with the classic version? Did you try one of the variations? Or did you come up with something completely new? Leave a comment below and let me know. Your feedback helps me create better recipes, and I genuinely love hearing from you.
And if you enjoyed this recipe, you might also like my Easy Matcha Green Tea Tiramisu Parfaits for another quick, no-bake treat. Or, for something savory, check out my Spicy Korean-Mexican Street Corn Dip—it is a total crowd-pleaser.
Happy snacking, friends. Go make something good.
Frequently Asked Questions
Can I use quick oats instead of rolled oats?
Yes, you can, but the texture will be different. Quick oats are more finely processed and will create a softer, less chewy bite. If you prefer a more tender texture, go for it. But for that classic, satisfying chew, I recommend old-fashioned rolled oats.
Can I make these without chocolate chips?
Absolutely. You can omit the chocolate chips entirely, or substitute them with dried fruit like raisins, cranberries, or chopped dates. You could also add chopped nuts, seeds, or shredded coconut. The recipe is very forgiving.
How long do these bites last at room temperature?
They are best stored in the refrigerator. At room temperature, they will soften and can become sticky, especially in warm weather. If you are taking them on a picnic or packing them in a lunchbox, use an ice pack to keep them cool. They are fine at room temperature for a few hours, but I would not push it beyond that.
Can I use a different nut butter?
Yes! Almond butter, cashew butter, or sunflower seed butter all work well. Just keep in mind that different nut butters have different consistencies. If your nut butter is very runny, you may need to add a few extra oats. If it is very thick, you might need a little extra honey. Trust your hands and adjust as needed.
Why are my bites crumbly and falling apart?
This usually means the mixture is too dry. Add a little more honey or peanut butter, one tablespoon at a time, and mix well. The mixture should hold together when you squeeze it in your palm. If it crumbles, it needs more binder. Also, make sure you are chilling them for at least 30 minutes before eating—that step is crucial for them to hold their shape.
Pin This Recipe!
Easy No-Bake Peanut Butter Granola Bites: 5-Ingredient Snack

These no-bake peanut butter granola bites are a quick, easy, and satisfying snack made with just five simple ingredients. Perfect for busy days, they offer a perfect balance of chewy oats and rich peanut butter flavor.
- Prep Time: 10 minutes
- Cook Time: 0 minutes
- Total Time: 40 minutes (includes 30 minutes chilling)
- Yield: 18-20 bites 1x
- Category: Snack
- Cuisine: American
Ingredients
- 2 cups old-fashioned rolled oats
- 1 cup creamy peanut butter (natural, no-stir)
- 1/3 cup honey
- 1/2 cup mini chocolate chips
- 2 tablespoons flaxseed meal
- Pinch of salt (optional, if peanut butter is unsalted)
Instructions
- In a large mixing bowl, combine 2 cups old-fashioned rolled oats, 2 tablespoons flaxseed meal, and a pinch of salt (if using). Stir to distribute evenly.
- Add 1 cup creamy peanut butter and 1/3 cup honey to the bowl. Use a spatula to start folding everything together until partially combined.
- Using clean hands, knead the mixture together for about 2 minutes. Squeeze and press until the mixture holds together when squeezed in your palm. If too dry, add another tablespoon of honey or peanut butter.
- Sprinkle 1/2 cup mini chocolate chips over the mixture and gently fold them in until evenly distributed.
- Line a baking sheet or plate with parchment paper. Using a cookie scoop or tablespoon, portion out about 1.5 tablespoons of mixture per bite and roll into smooth balls. You should get 18-20 bites.
- Place the baking sheet in the refrigerator for at least 30 minutes to firm up.
- Once chilled, the bites are ready to eat. Store in an airtight container in the refrigerator.
Notes
Use room temperature ingredients for easier mixing. If mixture is too dry, add more honey or peanut butter; if too sticky, add more oats. Chill for at least 30 minutes for best texture. Bites can be stored in the refrigerator for up to 2 weeks or frozen for up to 3 months.
Nutrition
- Serving Size: 1 bite
- Calories: 180
- Sugar: 8
- Sodium: 80
- Fat: 9
- Saturated Fat: 2
- Carbohydrates: 20
- Fiber: 3
- Protein: 7
Keywords: no-bake, peanut butter, granola bites, healthy snack, 5-ingredient, easy snack, gluten-free option, vegan option


