I ruined Halloween cupcakes for three years straight before I figured out what I was doing wrong. Not in a cute, “oh they were a little lopsided” kind of way. I mean dry, crumbly black cakes that tasted like ash and disappointment. The cream cheese frosting would slide right off, and the spiderweb design looked like a sad toddler drew it with a fork. Honestly, I almost gave up on black velvet entirely. But then my niece asked me to make something “spooky and fancy” for her Halloween party, and I couldn’t say no. So I went back to the kitchen, determined to crack the code on a cupcake that was actually moist, actually flavorful, and actually black without tasting like a chemistry experiment.
The problem was always the same. Too much black food coloring made the batter bitter and the texture dense. Too little, and you got a sad grayish-brown cake that looked more like a muddy sidewalk than something Halloween-worthy. The cream cheese frosting was another beast entirely. It would either be too runny to pipe or too stiff to spread into anything resembling a web. I spent one entire October weekend testing batches. My kitchen looked like a gothic bakery exploded. But somewhere around batch four, something clicked. I swapped my approach to the cocoa powder, adjusted the vinegar ratio, and found a way to get that deep, true black color without destroying the cake’s soul. These Perfect Black Velvet Halloween Cupcakes with Cream Cheese Spiderweb are the result of all those failures. And honestly, they’re the cupcakes I wish I’d had from the start.
They’re not just for Halloween, either. I’ve made them for a gothic-themed birthday party, a costume contest watch party, and even a Tuesday because sometimes you just need a little drama. The cake is tender, the tangy cream cheese frosting cuts through the richness perfectly, and that spiderweb design is way easier than it looks. You don’t need a piping bag or a steady hand. Just a fork, some patience, and a willingness to get a little frosting on your fingers. Trust me on this one.
Why You’ll Love This Recipe
Let me tell you why these cupcakes have become my most-requested Halloween recipe. It’s not just because they look impressive on a dessert table. It’s because they actually taste as good as they look. And let’s face it, that’s not always the case with themed treats.
- Unbelievably Moist Cake: The secret is a combination of buttermilk, vinegar, and a specific ratio of oil to butter. This isn’t a dry, crumbly black cake. It’s velvet, through and through. The texture is soft, tender, and stays that way for days.
- No Artificial Bitter Aftertaste: I tested a bunch of black food coloring methods. Some turned the batter a beautiful dark gray but left a metallic taste. Others were just too weak. I finally landed on a technique that uses a specific black cocoa powder blend and a minimal amount of gel coloring. The result is a deep, dark cake that tastes like rich chocolate, not chemicals.
- That Cream Cheese Spiderweb is Foolproof: I promise you don’t need to be a pastry chef to pull this off. The design uses a simple fork-drag technique that looks intricate but takes about ten seconds per cupcake. It’s the kind of decoration that makes people say “wow” while you secretly grin because it was so easy.
- Perfect for Halloween Parties: These are the star of the dessert table. They’re dramatic, festive, and they fit the spooky theme without being overly complicated. I brought a batch to a neighborhood potluck last year, and they disappeared before the punch bowl was even set up.
- Crowd-Pleaser for All Ages: Kids love the spooky look. Adults love the sophisticated flavor. Even people who claim they “don’t like themed desserts” have been caught sneaking a second one. The tangy cream cheese frosting balances the rich chocolate cake in a way that feels grown-up, not gimmicky.
This isn’t just another Halloween cupcake recipe. It’s the one I wish I had years ago. The one that doesn’t sacrifice flavor for aesthetics. The one that makes you feel like a baking rockstar without spending hours in the kitchen.
What Ingredients You Will Need
This recipe uses simple, everyday ingredients to create something that looks and tastes far more complex than its parts. You probably already have most of these in your pantry. Let’s break down each one and why it matters.
For the Black Velvet Cupcakes
- All-Purpose Flour (1 ½ cups / 190g): The base of the cake. I use unbleached all-purpose flour for a slightly sturdier crumb that holds up well to the moisture in the batter.
- Granulated Sugar (1 cup / 200g): Adds sweetness and helps with browning (even though we’re going for black, the sugar still plays a role in texture).
- Unsweetened Cocoa Powder (¼ cup / 25g): I use a mix of regular unsweetened cocoa and a tablespoon of black cocoa powder. The black cocoa gives that deep, Oreo-cookie color without needing a ton of food coloring. You can find it online or at specialty baking stores. If you can’t find black cocoa, just use regular unsweetened cocoa—the cake will be a very dark brown instead of jet black, but it will still taste great.
- Baking Soda (1 teaspoon): This reacts with the vinegar and buttermilk to create lift. Don’t skip it.
- Salt (½ teaspoon): Balances the sweetness and enhances the chocolate flavor.
- Vegetable Oil (½ cup / 120ml): Keeps the cake incredibly moist. I prefer a neutral oil like canola or grapeseed. Don’t use olive oil here—the flavor is too strong.
- Buttermilk (½ cup / 120ml, room temperature): Adds tanginess and activates the baking soda. If you don’t have buttermilk, you can make a quick substitute by adding 1 ½ teaspoons of lemon juice or white vinegar to ½ cup of whole milk. Let it sit for 5 minutes until it curdles slightly.
- Large Eggs (2, room temperature): Provide structure and richness. Room temperature eggs emulsify better into the batter, giving you a smoother, more even crumb.
- White Vinegar (1 teaspoon): Reacts with the baking soda for extra lift. It sounds weird, but trust me. You won’t taste it.
- Vanilla Extract (1 teaspoon): Enhances the chocolate flavor. Use pure vanilla extract if you can.
- Black Gel Food Coloring (about 1-2 teaspoons): This is key. Gel coloring is much more concentrated than liquid drops, so you need less of it. Start with 1 teaspoon and add more until you reach your desired shade. I recommend the brand AmeriColor or Wilton.
For the Cream Cheese Spiderweb Frosting
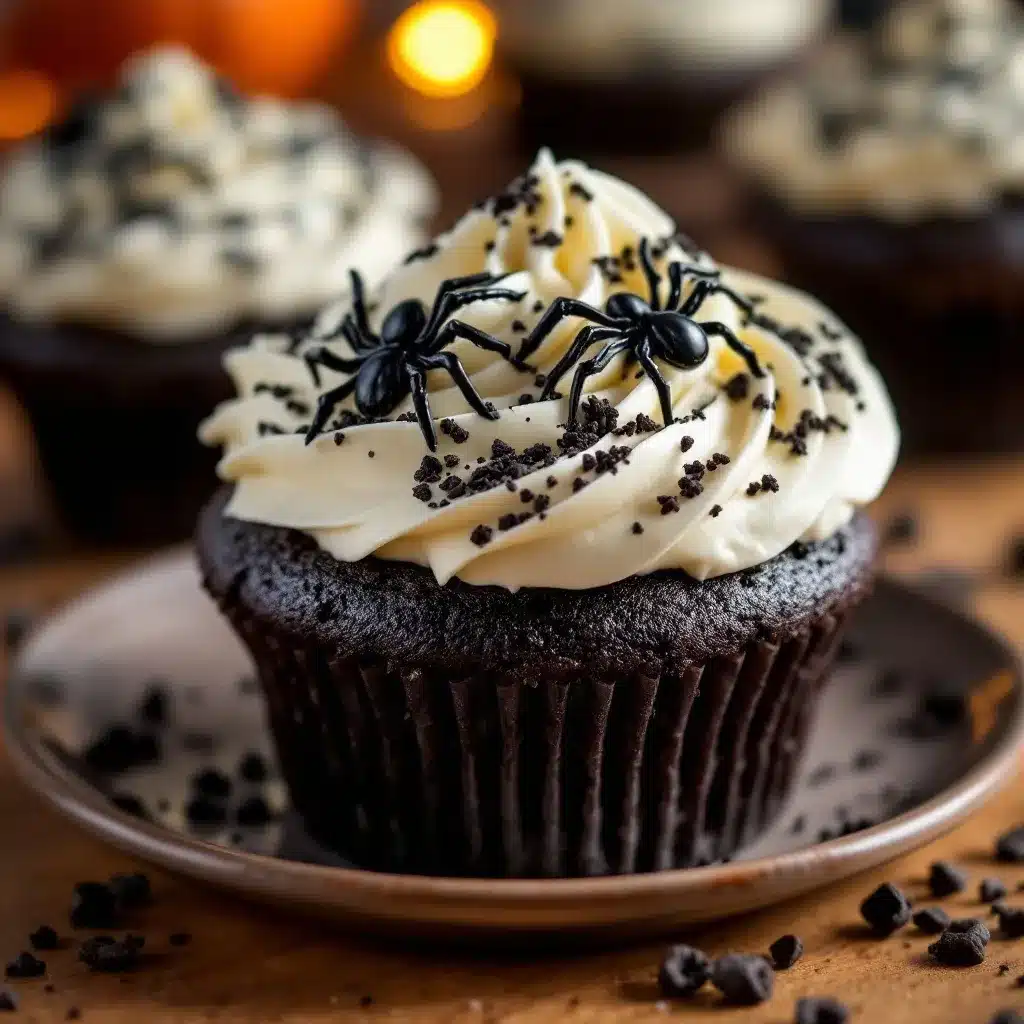
- Cream Cheese (8 oz / 226g, softened): Use full-fat block cream cheese, not the spreadable kind in a tub. The block style has less water content, which means a thicker, more stable frosting.
- Unsalted Butter (½ cup / 113g, softened): Adds richness and helps the frosting hold its shape.
- Powdered Sugar (3 cups / 360g, sifted): Sweetens and thickens the frosting. Sifting is important to avoid lumps.
- Vanilla Extract (1 teaspoon): For flavor.
- Pinch of Salt: Balances the sweetness.
- Heavy Cream or Milk (1-2 tablespoons, as needed): Adjusts the consistency. You want the frosting thick enough to pipe but soft enough to spread smoothly.
For the Spiderweb Decoration
- Black Sanding Sugar or Sprinkles (optional, for garnish): Adds a little sparkle and crunch. Totally optional, but fun.
- Edible Glitter (optional): Because Halloween deserves a little shimmer.
Equipment Needed
You don’t need a professional bakery setup for these. Here’s what you’ll need to pull it off.
- Standard 12-Cup Muffin Pan: This recipe makes exactly 12 cupcakes. If you only have a 6-cup pan, you’ll need to bake in batches.
- Paper Cupcake Liners: I like using black or orange liners for extra Halloween flair. If you’re feeling fancy, you can find spiderweb-printed liners online.
- Mixing Bowls: You’ll need at least two medium-sized bowls—one for dry ingredients, one for wet.
- Electric Hand Mixer or Stand Mixer: A hand mixer works perfectly for the frosting. You can also whisk the cake batter by hand if you’re feeling strong, but a mixer makes it easier.
- Rubber Spatula: For scraping down the sides of the bowl and folding in the food coloring.
- Cooling Rack: Essential for letting the cupcakes cool completely before frosting. If you frost them while they’re warm, the cream cheese frosting will melt into a sad puddle.
- Piping Bag or Resealable Plastic Bag: For the frosting. A piping bag with a round tip (like Wilton 1A or 12) gives you more control, but a plastic bag with the corner snipped off works just fine.
- Fork or Toothpick: For creating the spiderweb design. A fork is my preferred tool because it creates multiple lines at once.
- Small Offset Spatula: Optional, but helpful for spreading the frosting evenly before you do the web.
Preparation Method
Alright, let’s get to the fun part. Follow these steps carefully, and you’ll have a batch of show-stopping Halloween cupcakes.
Step 1: Preheat and Prep
Preheat your oven to 350°F (175°C). Line your muffin pan with 12 cupcake liners. Set them aside. This is a small step, but it makes the whole process smoother. I once forgot to preheat and ended up waiting around with a bowl of batter getting warm. Don’t be me.
Step 2: Mix the Dry Ingredients
In a medium bowl, whisk together the all-purpose flour, granulated sugar, cocoa powder, baking soda, and salt. Make sure there are no lumps in the cocoa powder. Whisking aerates the flour and ensures everything is evenly distributed. Set this bowl aside.
Step 3: Mix the Wet Ingredients
In a separate, larger bowl, whisk together the vegetable oil, buttermilk, eggs, white vinegar, and vanilla extract. Whisk until the eggs are fully incorporated and the mixture is smooth and slightly pale. This should take about 30 seconds. The vinegar and buttermilk will start reacting with each other, which is exactly what we want.
Step 4: Combine Wet and Dry
Pour the dry ingredients into the wet ingredients. Stir with a rubber spatula or wooden spoon until just combined. Do not overmix. A few small lumps are totally fine. Overmixing will develop the gluten and make the cupcakes tough. You want a thick, smooth batter that looks like dark chocolate pudding.
Step 5: Add the Black Food Coloring
Now for the magic. Add 1 teaspoon of black gel food coloring to the batter. Stir it in thoroughly. The batter will look like a dark gray at this point. Add another ½ teaspoon and stir again. Keep adding until you reach your desired shade of black. I usually end up using about 2 teaspoons total. The color will deepen slightly as the cupcakes bake, so don’t panic if it looks a little lighter than you want at this stage. Remember, you’re going for a rich, dark black, not a pitch-black void. A deep charcoal is perfect.
Step 6: Fill the Liners
Divide the batter evenly among the 12 cupcake liners. Each liner should be about ⅔ full. An ice cream scoop or a measuring cup with a spout makes this step much cleaner. I use a ¼-cup measure and it’s just about perfect.
Step 7: Bake
Bake for 18-22 minutes, or until a toothpick inserted into the center of a cupcake comes out clean or with a few moist crumbs. The tops should spring back when lightly touched. My oven runs a little hot, so I check at 18 minutes. Rotate the pan halfway through baking if your oven has hot spots. Let the cupcakes cool in the pan for 5 minutes, then transfer them to a wire rack to cool completely. Do not skip this cooling step. If you frost them while they’re even slightly warm, the cream cheese frosting will turn into a slippery mess.
Step 8: Make the Cream Cheese Frosting
While the cupcakes are cooling, make the frosting. In a large bowl, beat the softened cream cheese and butter together with an electric mixer on medium speed until smooth, creamy, and completely combined. This takes about 2-3 minutes. Scrape down the sides of the bowl with a spatula. Add the sifted powdered sugar, one cup at a time, beating on low speed after each addition. Once all the sugar is in, add the vanilla extract and a pinch of salt. Beat on medium-high speed for another 2 minutes until the frosting is light, fluffy, and spreadable. If the frosting seems too thick, add a tablespoon of heavy cream or milk. If it seems too thin, add a little more powdered sugar. You want a consistency that holds its shape when piped but is still soft enough to spread.
Step 9: Frost the Cupcakes
Once the cupcakes are completely cool, it’s time to frost. Spoon the cream cheese frosting into a piping bag fitted with a round tip (or a resealable plastic bag with the corner snipped off). Pipe a generous swirl of frosting onto the center of each cupcake. You want a nice, thick layer—about ½ inch tall. Don’t worry about making it perfect. The spiderweb will cover any imperfections.
Step 10: Create the Spiderweb Design
Here’s the part that looks complicated but is actually the easiest. Take a fork (or a toothpick) and gently drag it from the center of the frosting outwards toward the edge of the cupcake. Do this in four or five evenly spaced directions. Then, drag the fork from the edge back toward the center, creating a crosshatch pattern. The frosting will naturally separate into a web-like design. You can also use a toothpick to draw concentric circles in the frosting before dragging the fork outward for a more classic web look. Practice on one cupcake first. I promise, it clicks after the first try.
Step 11: Garnish and Serve
If you’re using black sanding sugar or edible glitter, sprinkle it over the spiderweb while the frosting is still soft. It’ll stick and add a beautiful, spooky shimmer. Serve immediately or refrigerate until ready to serve. These cupcakes are best enjoyed within 24 hours of frosting.
Cooking Tips & Techniques
I’ve made a lot of mistakes with this recipe so you don’t have to. Here are the biggest lessons I’ve learned.
Don’t Overmix the Batter. I know I said this already, but it’s worth repeating. Overmixing develops gluten, which makes the cupcakes tough and dense. You want a tender, velvety crumb. Mix until the flour is just incorporated, then stop. A few streaks of flour are better than a tough cake.
Room Temperature Ingredients Matter. Cold eggs and cold buttermilk won’t emulsify properly into the batter. They’ll create a lumpy, uneven texture. Take your eggs and buttermilk out of the fridge about 30 minutes before you start baking. If you forget, you can place the eggs in a bowl of warm water for 5 minutes.
Gel Coloring is Non-Negotiable. Liquid food coloring will not give you a true black. It will also add too much liquid to the batter, throwing off the moisture balance. Gel coloring is concentrated and works beautifully. Start with a little and add more until you’re happy with the shade.
The Fork Technique is Your Friend. I have tried piping spiderwebs with a tiny round tip. I have tried using a toothpick to draw each individual strand. Nothing works as well or as quickly as a simple fork. The tines create multiple lines at once, and the spacing is naturally even. It’s a game-changer.
Chill the Frosting if Needed. If your cream cheese frosting feels too soft to hold the spiderweb pattern, pop it in the fridge for 10-15 minutes. It will firm up just enough to hold its shape when you drag the fork through it.
Watch Your Oven. Every oven is different. Your cupcakes might be done at 18 minutes or need the full 22. Start checking at the 15-minute mark if your oven runs hot. The toothpick test is your best friend.
Variations & Adaptations
This recipe is wonderfully adaptable. Here are some ways to make it your own.
Gluten-Free Version
Swap the all-purpose flour for a 1:1 gluten-free baking flour blend that contains xanthan gum. I’ve used Bob’s Red Mill 1:1 Baking Flour with great results. The texture will be slightly more delicate, but the flavor is still spot on.
Dairy-Free Version
Use a dairy-free buttermilk substitute (like almond milk mixed with lemon juice) and a dairy-free cream cheese alternative (like Kite Hill or Tofutti). Use vegan butter in the frosting. The frosting will be slightly softer, so you may need to chill it before piping the spiderweb.
Spicy Chocolate Variation
Add ½ teaspoon of cayenne pepper and ½ teaspoon of cinnamon to the dry ingredients. The warmth of the spices pairs beautifully with the rich chocolate and tangy cream cheese. It’s like a Mexican hot chocolate in cupcake form.
Mint Chocolate Twist
Add ½ teaspoon of peppermint extract to the cake batter. For the frosting, swap the vanilla extract for peppermint extract. Garnish with a small piece of dark chocolate or a candy eyeball for a spooky, refreshing flavor combo.
Pumpkin Spice Version
For a fall-inspired twist, replace ¼ cup of the buttermilk with pumpkin puree. Add 1 teaspoon of pumpkin pie spice to the dry ingredients. The pumpkin adds moisture and a subtle earthy sweetness that complements the chocolate. You can find my copycat pumpkin cream cheese muffins for more fall baking inspiration.
Serving & Storage Suggestions
These cupcakes are best served at room temperature. The cream cheese frosting softens nicely, and the cake is at its most tender and flavorful. If you’ve refrigerated them, let them sit on the counter for about 20 minutes before serving.
For a Halloween party, arrange them on a black cake stand or a platter lined with fake spiderwebs. They pair beautifully with a hot cup of coffee or a glass of cold milk. If you’re serving them alongside other treats, they’re a great addition to a dessert table that also features something savory like creamy buffalo chicken dip or loaded pulled pork nachos.
To store, place the frosted cupcakes in an airtight container. They will keep in the refrigerator for up to 3 days. The cake will stay moist, but the frosting may firm up a bit. Let them come to room temperature before serving for the best texture.
You can also freeze the unfrosted cupcakes. Wrap each cooled cupcake tightly in plastic wrap, then place them in a freezer-safe bag. They’ll keep for up to 2 months. When you’re ready to serve, thaw them at room temperature, then make the frosting and decorate. This is a great way to get ahead of the Halloween party prep.
Leftover frosting can be stored in the refrigerator for up to a week. Use it to frost cookies, brownies, or even spread on a slice of banana bread. It’s too good to waste.
Nutritional Information & Benefits
Let’s be real. These are cupcakes. They’re a treat, not a health food. But that doesn’t mean they can’t have some redeeming qualities. Here’s the estimated nutritional breakdown for one cupcake (with frosting).
| Nutrient | Amount per Cupcake |
|---|---|
| Calories | ~380 |
| Fat | ~22g |
| Saturated Fat | ~10g |
| Carbohydrates | ~44g |
| Sugar | ~34g |
| Protein | ~5g |
| Sodium | ~280mg |
These values are estimates and will vary based on the specific brands and substitutions you use. The cream cheese and butter in the frosting provide a small amount of calcium and vitamin A. The cocoa powder contains antioxidants called flavonoids, which have been linked to heart health. So, you know, it’s practically a health food. (I’m kidding. Mostly.)
For a slightly lighter version, you can reduce the sugar in the frosting by using a sugar-free powdered sugar alternative, or use a lower-fat cream cheese. The texture will be slightly different, but it’s an option if you’re watching your intake.
If you’re serving these at a party, it’s a good idea to label them with a note about potential allergens. This recipe contains wheat (gluten), dairy, and eggs.
Conclusion
These Perfect Black Velvet Halloween Cupcakes with Cream Cheese Spiderweb are everything I wanted my Halloween baking to be. They’re dramatic without being difficult. They’re rich without being heavy. And they’re the kind of treat that makes people stop and say, “Wait, you made these?” The cake is tender and deeply chocolatey, the frosting is tangy and smooth, and that spiderweb design is the kind of simple trick that looks like a million bucks. I’ve made these for costume parties, for classroom celebrations, and for no reason at all except that I wanted a little spooky joy in my kitchen. They deliver every single time.
I encourage you to make these your own. Swap in the mint variation for a holiday party. Add the pumpkin spice twist for a fall gathering. Or just stick with the classic black velvet and let the spiderweb do all the talking. Whatever you choose, I’d love to hear about it. Drop a comment below and tell me how your batch turned out. Did you try a different variation? Did the fork technique work for you? Share a photo on social media and tag me so I can see your spooky creations. And if you’re looking for more easy, crowd-pleasing recipes for your next gathering, check out my no-bake peanut butter granola bites or my mango jalapeño agua fresca for a refreshing non-alcoholic drink option. Happy Halloween, and happy baking.
Frequently Asked Questions
Can I make these cupcakes ahead of time?
Absolutely. You can bake the cupcakes up to 2 days in advance and store them unfrosted in an airtight container at room temperature. Make the frosting and decorate them on the day you plan to serve them for the best presentation. You can also freeze the unfrosted cupcakes for up to 2 months.
Why did my black velvet cupcakes turn out gray instead of black?
This usually happens when you don’t use enough food coloring or when you use liquid food coloring instead of gel. Gel coloring is much more concentrated. Start with 1 teaspoon of black gel coloring and add more until you reach your desired shade. The color will also deepen slightly as the cupcakes bake.
My cream cheese frosting is too runny. How do I fix it?
Runny cream cheese frosting is usually caused by the cream cheese being too soft or having too much moisture. Make sure you’re using full-fat block cream cheese, not the spreadable kind. If the frosting is already runny, try chilling it in the refrigerator for 15-20 minutes to firm it up. You can also beat in a little more sifted powdered sugar, one tablespoon at a time, until it reaches the right consistency.
Can I use a different type of frosting?
Yes, you can. A classic vanilla buttercream or a chocolate buttercream would also work beautifully with the black velvet cake. The cream cheese frosting is my favorite because its tanginess cuts through the richness of the chocolate, but feel free to use whatever you like best. A simple dusting of powdered sugar would also work for a less sweet option.
How do I get the spiderweb design to look clean and defined?
The key is having the frosting at the right consistency. It should be thick enough to hold its shape when piped but soft enough to spread smoothly when you drag the fork through it. If the frosting is too stiff, the web lines will be jagged. If it’s too soft, the web will collapse. Practice on one cupcake first to get a feel for the technique. A fork with four tines works best for creating even, clean lines.
Pin This Recipe!
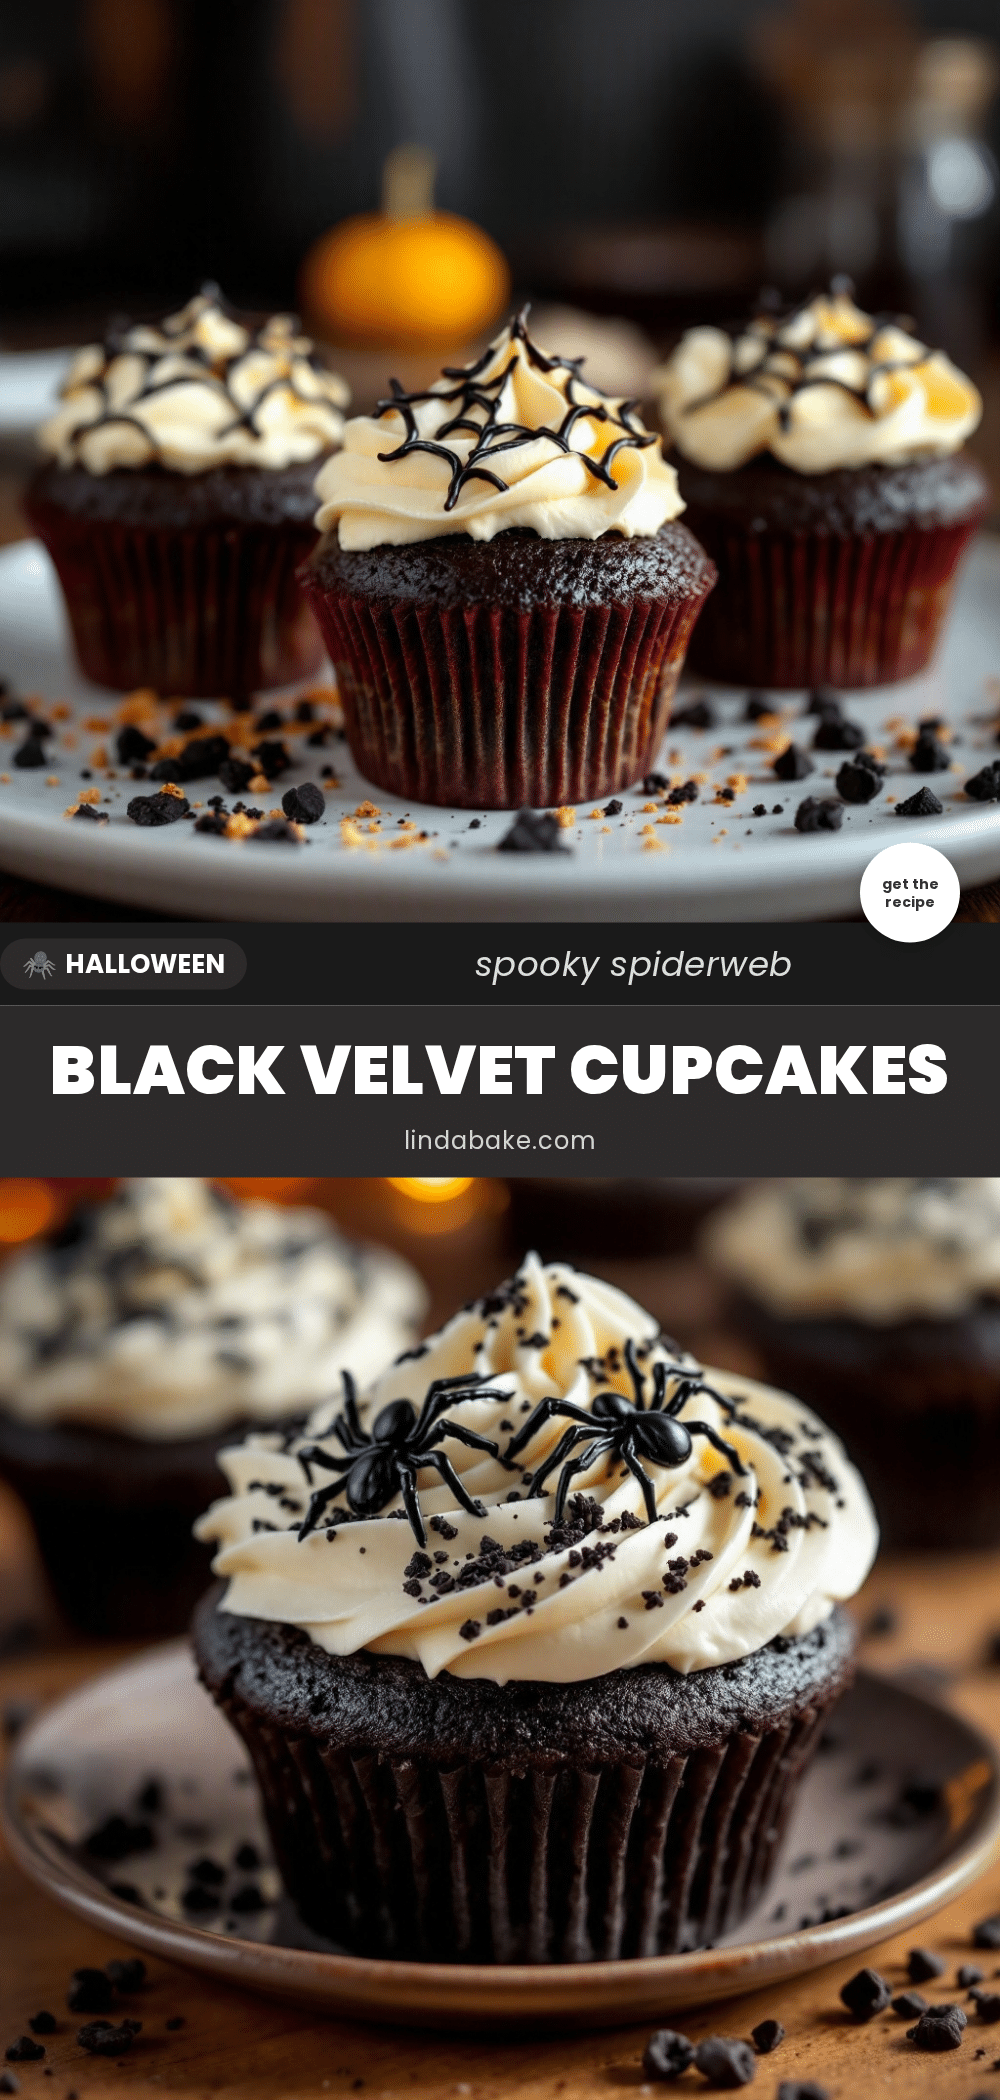
Perfect Black Velvet Halloween Cupcakes: Easy Cream Cheese Spiderweb
These Perfect Black Velvet Halloween Cupcakes with Cream Cheese Spiderweb are tender, deeply chocolatey, and topped with a tangy cream cheese frosting featuring a foolproof spiderweb design. They’re dramatic without being difficult, making them the star of any Halloween dessert table.
- Prep Time: 20 minutes
- Cook Time: 20 minutes
- Total Time: 40 minutes
- Yield: 12 cupcakes 1x
- Category: Dessert
- Cuisine: American
Ingredients
- 1 ½ cups (190g) all-purpose flour
- 1 cup (200g) granulated sugar
- ¼ cup (25g) unsweetened cocoa powder (mix of regular and black cocoa, if available)
- 1 teaspoon baking soda
- ½ teaspoon salt
- ½ cup (120ml) vegetable oil
- ½ cup (120ml) buttermilk, room temperature
- 2 large eggs, room temperature
- 1 teaspoon white vinegar
- 1 teaspoon vanilla extract
- 1–2 teaspoons black gel food coloring
- 8 oz (226g) cream cheese, softened
- ½ cup (113g) unsalted butter, softened
- 3 cups (360g) powdered sugar, sifted
- 1 teaspoon vanilla extract
- Pinch of salt
- 1–2 tablespoons heavy cream or milk (as needed)
- Black sanding sugar or sprinkles (optional, for garnish)
- Edible glitter (optional)
Instructions
- Preheat oven to 350°F (175°C). Line a 12-cup muffin pan with cupcake liners.
- In a medium bowl, whisk together flour, sugar, cocoa powder, baking soda, and salt.
- In a separate larger bowl, whisk together vegetable oil, buttermilk, eggs, white vinegar, and vanilla extract until smooth and slightly pale.
- Pour dry ingredients into wet ingredients. Stir with a rubber spatula until just combined (do not overmix; a few lumps are fine).
- Add 1 teaspoon black gel food coloring and stir thoroughly. Add more gel coloring (up to 2 teaspoons total) until desired shade of black is reached.
- Divide batter evenly among the 12 liners, filling each about ⅔ full.
- Bake for 18-22 minutes, or until a toothpick inserted into the center comes out clean or with a few moist crumbs. Cool in pan for 5 minutes, then transfer to a wire rack to cool completely.
- For the frosting: In a large bowl, beat cream cheese and butter with an electric mixer on medium speed until smooth and creamy (2-3 minutes).
- Add sifted powdered sugar, one cup at a time, beating on low after each addition. Add vanilla extract and pinch of salt. Beat on medium-high for 2 minutes until light and fluffy. Add heavy cream or milk if needed to adjust consistency.
- Once cupcakes are completely cool, spoon frosting into a piping bag fitted with a round tip (or a resealable plastic bag with corner snipped). Pipe a generous swirl onto each cupcake.
- To create spiderweb: Use a fork to gently drag from the center of the frosting outward toward the edge in 4-5 evenly spaced directions. Then drag from the edge back toward the center to create a crosshatch pattern.
- If desired, sprinkle with black sanding sugar or edible glitter while frosting is still soft. Serve immediately or refrigerate.
Notes
Do not overmix the batter to avoid tough cupcakes. Use room temperature ingredients for best emulsification. Gel food coloring is essential for true black color without bitterness. For the spiderweb, ensure frosting is thick enough to hold shape but soft enough to spread. Chill frosting for 10-15 minutes if too soft. Cupcakes are best enjoyed within 24 hours of frosting.
Nutrition
- Serving Size: 1 cupcake
- Calories: 380
- Sugar: 34
- Sodium: 280
- Fat: 22
- Saturated Fat: 10
- Carbohydrates: 44
- Fiber: 1
- Protein: 5
Keywords: Halloween cupcakes, black velvet cupcakes, cream cheese frosting, spiderweb cupcakes, spooky desserts, easy Halloween recipe


