I figured a pumpkin dessert without eggs would be a sad, dense, almost pudding-like compromise. It took about one bite of these creamy no-egg pumpkin pie bars to realize how wrong I was — and honestly, how relieved I was to be wrong.
The first batch I made was purely out of desperation. I had a can of pumpkin puree, a box of gingersnaps, and absolutely no eggs in the fridge. My daughter had just polished off the last ones for breakfast (don’t judge), and I was staring down a serious pumpkin craving. So I did what any reasonable person would do — I winged it. And somehow, the texture came out creamier than any traditional pumpkin pie I’d ever made. No cracking. No weeping. No fuss.
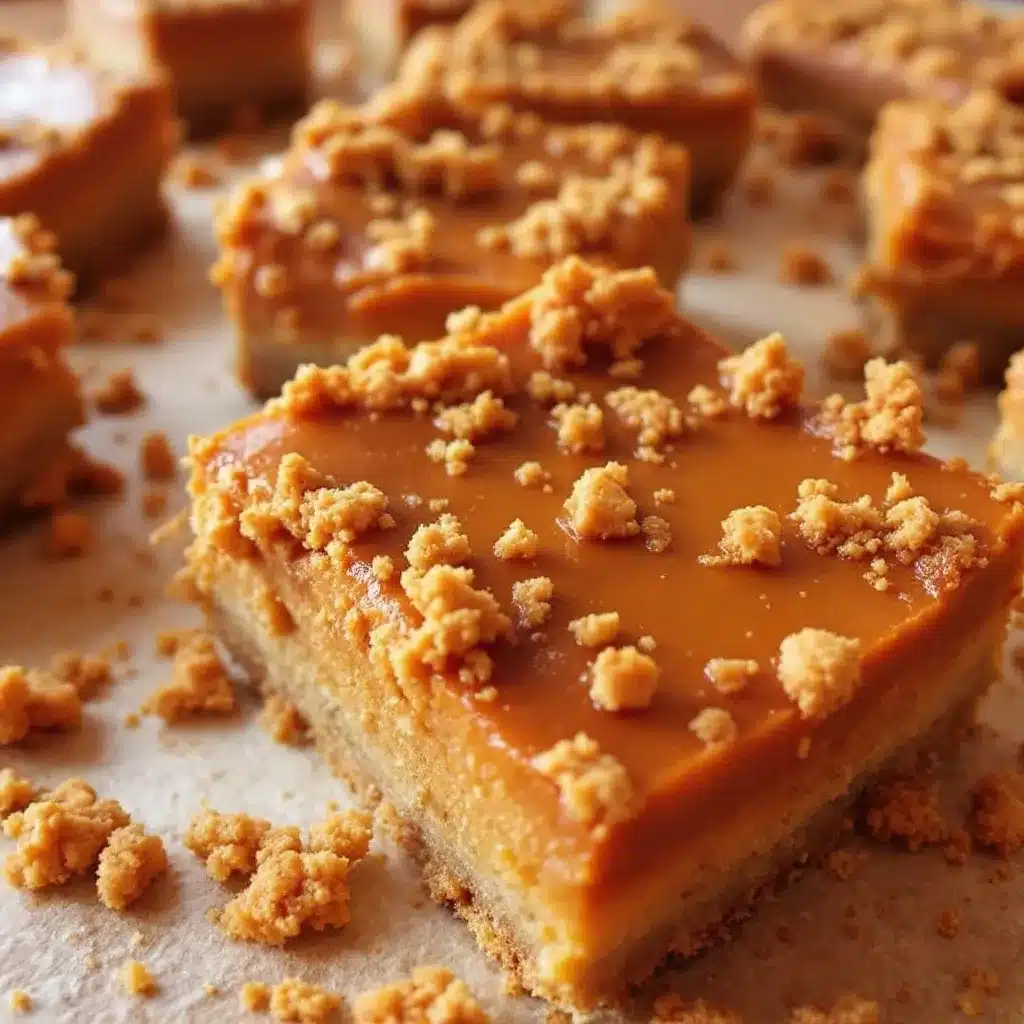
These bars have this almost silky, custard-like center that sets up perfectly thanks to a little cornstarch and some good old-fashioned evaporated milk. The gingersnap crust adds this warm, spicy crunch that just works with the smooth filling. It’s the kind of dessert that makes you forget you’re missing anything.
I’ve made these for Thanksgiving, for random Tuesday cravings, and for friends who can’t have eggs. Every single time, someone asks for the recipe. And I love telling them, “There’s no eggs in it.” The look on their faces? Priceless.
So if you’ve ever been burned by a cracked pumpkin pie or just need a dessert that works with whatever you’ve got in the pantry, these bars are about to become your new fall staple. Trust me on this one.
Why You’ll Love This Recipe
Let me tell you why these creamy no-egg pumpkin pie bars keep showing up on my counter year after year.
- No Eggs Required — This is the obvious one, but it’s worth repeating. Whether you’re out of eggs, dealing with an allergy, or just want a lighter dessert, these bars deliver that rich, creamy texture without a single egg.
- Gingersnap Crust That Actually Stays Put — I’ve tried graham cracker crusts, shortbread crusts, and even pretzel crusts for pumpkin desserts. Nothing beats the warm, spicy kick of crushed gingersnaps mixed with melted butter. It holds together beautifully and adds this extra layer of flavor that makes the filling sing.
- Perfect for Any Occasion — These bars work for Thanksgiving dessert tables, potlucks, office parties, or just a quiet night in with a cup of tea. They’re sturdy enough to travel, fancy enough to impress, and simple enough to throw together on a whim.
- No Cracking, No Weeping, No Drama — Traditional pumpkin pies are notorious for cracking on top or leaving that watery layer between the crust and filling. These bars? They set up smooth and clean every single time. The texture is almost like a firm pumpkin cheesecake, but way easier to make.
- Make-Ahead Friendly — These bars actually taste better the next day. The flavors meld together, the crust softens just slightly, and the whole thing becomes even more decadent. You can make them a day or two ahead and still serve something that tastes freshly baked.
I’ve tested this recipe at least a dozen times, tweaking the cornstarch ratio, trying different milks, and even experimenting with different gingersnap brands. This version is the one that consistently gets the best texture and flavor. It’s not just another pumpkin bar recipe — it’s the one you’ll come back to again and again.
What Ingredients You Will Need
This recipe keeps things simple with pantry-friendly ingredients that come together in no time. Here’s what you’ll need and why each one matters.
For the Gingersnap Crust
- 2 cups crushed gingersnap cookies (about 7 ounces or 200 grams) — I prefer Nabisco or Anna’s brand for that perfect balance of spice and sweetness. You want them finely crushed, almost like sand, for a crust that holds together well.
- 6 tablespoons unsalted butter, melted (85 grams) — This binds the crumbs and adds richness. If you use salted butter, just skip any extra salt in the crust.
- 2 tablespoons granulated sugar (25 grams) — Just a touch to balance the spiciness of the gingersnaps.
- Pinch of salt — Trust me, even sweet crusts need a little salt to round out the flavors.
For the Pumpkin Filling
- 1 can (15 ounces or 425 grams) pumpkin puree — Not pumpkin pie filling! Make sure you grab pure pumpkin puree. Libby’s is my go-to for consistent texture and flavor.
- 1 can (12 ounces or 354 ml) evaporated milk — This is the secret to that silky, creamy texture without eggs. Regular milk won’t give you the same richness, so don’t substitute here.
- 3/4 cup packed brown sugar (150 grams) — Light or dark works, but dark brown sugar adds deeper molasses notes that pair beautifully with the gingersnaps.
- 1/4 cup granulated sugar (50 grams) — Adds just enough sweetness without overwhelming the pumpkin.
- 3 tablespoons cornstarch (24 grams) — This is our egg replacement. Cornstarch thickens the filling and gives it that firm, sliceable texture.
- 1 teaspoon vanilla extract — Pure vanilla, not imitation, if you can swing it.
- 1 1/2 teaspoons pumpkin pie spice — Store-bought is fine, but I usually make my own with cinnamon, nutmeg, ginger, and a pinch of cloves.
- 1/2 teaspoon ground cinnamon — Because you can never have too much cinnamon in a pumpkin dessert.
- 1/4 teaspoon salt — Balances the sweetness and brings out the pumpkin flavor.
One thing I’ve learned the hard way — make sure your evaporated milk is at room temperature before mixing. Cold milk can cause the cornstarch to clump, and nobody wants lumpy pumpkin bars. Just let it sit on the counter for about 15 minutes while you prep the crust.
Equipment Needed
You don’t need any fancy gadgets for this recipe, which is part of why I love it so much.
- 9×9-inch square baking pan (or 8×8 if you want slightly thicker bars) — Metal pans work best for even baking. Glass pans can work too, but you might need to add 5-10 minutes to the baking time.
- Food processor or zip-top bag and rolling pin — For crushing the gingersnaps. I’ve done both methods, and honestly, the bag-and-rolling-pin approach gives me a little arm workout and feels more satisfying.
- Medium mixing bowl — For the crust ingredients.
- Large mixing bowl — For the filling.
- Whisk — A good whisk is essential for getting that filling smooth and lump-free.
- Rubber spatula — For scraping every last bit of filling into the pan. Waste not, want not.
- Parchment paper — This is non-negotiable if you want clean, easy-to-remove bars. Leave some overhang on two sides for lifting.
- Measuring cups and spoons — For accuracy. Baking is a science, even when it’s easy.
If you don’t have a 9×9 pan, you can use a standard 9-inch pie dish. The bars will be a little thinner, but they’ll still taste amazing. Just check for doneness a few minutes earlier.
Preparation Method
Alright, let’s get baking. This recipe comes together in about 15 minutes of active prep time, then the oven does the rest of the work.
- Preheat your oven to 350°F (175°C). Line your 9×9 baking pan with parchment paper, leaving about 2 inches of overhang on two opposite sides. This creates little handles for lifting the bars out later.
- Make the crust. In your food processor, pulse the gingersnap cookies until they turn into fine crumbs. You should have about 2 cups. Pour the crumbs into a medium bowl, add the sugar and salt, then pour in the melted butter. Stir with a fork until every crumb is coated and the mixture looks like wet sand.
- Press the crust into the pan. Dump the crumb mixture into your prepared pan and press it down firmly with the bottom of a measuring cup or a flat glass. Make sure it’s even and compact — this is what keeps your crust from falling apart when you cut the bars. Bake for 8 minutes, then set aside to cool slightly while you make the filling.
- Mix the dry ingredients for the filling. In a large bowl, whisk together the brown sugar, granulated sugar, cornstarch, pumpkin pie spice, cinnamon, and salt. Make sure there are no lumps in the cornstarch — this is important for a smooth filling.
- Add the wet ingredients. Pour in the pumpkin puree, evaporated milk, and vanilla extract. Whisk everything together until the mixture is completely smooth and silky. Scrape the bottom and sides of the bowl to make sure everything is incorporated. The mixture will be thinner than traditional pumpkin pie filling — that’s totally normal.
- Pour the filling over the crust. Slowly pour the pumpkin mixture over the pre-baked crust. It should spread evenly on its own, but you can give the pan a gentle tilt if needed. Tap the pan on the counter a few times to release any air bubbles.
- Bake the bars. Place the pan in the preheated oven and bake for 40-45 minutes. The edges should look set and slightly puffed, but the center will still jiggle a tiny bit when you shake the pan. That’s exactly what you want — it will continue to set as it cools.
- Cool completely. This is the hardest part, I know. Let the bars cool on a wire rack for about 1 hour at room temperature, then transfer to the refrigerator and chill for at least 3 hours, preferably overnight. The filling needs this time to fully set and develop that creamy texture.
- Slice and serve. Once fully chilled, lift the bars out of the pan using the parchment paper overhang. Place on a cutting board and slice into 9 even squares (or 16 if you want smaller portions). A sharp knife works best — wipe it clean between cuts for neat edges.
One thing I always tell people — don’t rush the chilling step. I once tried to cut these after only an hour in the fridge, and let’s just say it was more of a pumpkin pile than a pumpkin bar. Patience pays off here.
Cooking Tips & Techniques
After making these bars more times than I can count, I’ve picked up a few tricks that make all the difference.
Don’t overbake. This is the number one mistake people make with eggless pumpkin desserts. Because there’s no egg to signal doneness, it’s tempting to keep baking until the center looks completely firm. But the filling will continue to set as it cools, so pull it out while the center still has a slight wobble. Overbaked bars can turn grainy and dry — exactly what we’re trying to avoid.
Room temperature ingredients matter. I know, I know, nobody plans ahead perfectly. But if your evaporated milk is cold, it can cause the cornstarch to seize up and create lumps. Set your milk out on the counter while you preheat the oven and make the crust. Twenty minutes is all it takes.
Press the crust firmly. This is one of those steps where you really can’t be too aggressive. Use the bottom of a flat measuring cup and really pack those crumbs down. A loose crust will crumble when you try to cut the bars, and nobody wants a crustless pumpkin bar.
Let the bars chill overnight if you can. The texture is noticeably better after a full night in the fridge. The flavors meld together, the filling firms up perfectly, and the bars slice like a dream. I’ve made these for Thanksgiving two days ahead, and they were even better than fresh.
Use a sharp knife for clean cuts. Run your knife under hot water, wipe it dry, then slice. Clean the blade between each cut for those picture-perfect squares. It takes an extra minute, but the results are worth it.
I once forgot to add the cornstarch to a batch — just completely spaced it. The bars never set properly and turned into this weird pumpkin soup situation. Learn from my mistakes: double-check your dry ingredients before you start mixing.
Variations & Adaptations
One of the best things about this recipe is how flexible it is. Here are some of my favorite variations.
Dairy-Free Version — Swap the evaporated milk for full-fat coconut milk (the kind in a can, not the carton). The texture will be slightly different — a little richer and more tropical — but it’s absolutely delicious. My dairy-free friends rave about this version.
Gluten-Free Option — Use gluten-free gingersnap cookies for the crust. There are several good brands out there, or you can make your own with gluten-free flour. The filling itself is naturally gluten-free, so this is an easy swap.
Spice It Up — If you like things on the warmer side, add a pinch of cayenne pepper or an extra teaspoon of fresh grated ginger to the filling. The heat plays beautifully against the sweet, creamy pumpkin and the spicy crust.
Chocolate Lover’s Twist — Melt 1/2 cup of dark chocolate chips and drizzle it over the cooled bars. Or sprinkle chocolate chips over the crust before pouring in the filling for a hidden chocolate layer. Trust me, chocolate and pumpkin are a match made in heaven.
Maple Pecan Variation — Replace 1/4 cup of the brown sugar with maple syrup (reduce the evaporated milk by about 2 tablespoons to compensate for the extra liquid). Top the baked bars with toasted pecans for a crunchy, nutty finish.
I personally love the maple pecan version for fall gatherings. It feels a little more special than the classic, and the pecans add this wonderful texture contrast against the smooth filling.
Serving & Storage Suggestions
These bars are versatile enough to serve in so many ways.
Serving Temperature — I prefer these bars chilled straight from the fridge. The filling is firm and creamy, almost like a pumpkin cheesecake. But if you like a softer texture, let them sit at room temperature for about 15 minutes before serving.
Toppings — A dollop of whipped cream is the classic choice, and for good reason. The light, airy cream balances the dense, creamy bar perfectly. You can also drizzle with caramel sauce, sprinkle with cinnamon, or add a dusting of powdered sugar for a prettier presentation.
What to Serve With Them — These bars pair beautifully with a hot cup of coffee, a chai latte, or even a glass of cold milk. For a dessert spread, they go great alongside copycat pumpkin cream cheese muffins or a simple apple crisp.
Storage — Keep the bars in an airtight container in the refrigerator for up to 5 days. Place a sheet of parchment paper between layers if you’re stacking them. I’ve found they actually taste better on day two or three, as the flavors continue to meld.
Freezing — These bars freeze beautifully. Wrap individual slices tightly in plastic wrap, then place them in a freezer-safe bag or container. They’ll keep for up to 3 months. To thaw, just transfer to the refrigerator overnight. The texture stays remarkably creamy — no ice crystals or weird separation.
Reheating — I usually eat these cold, but if you want a warm dessert, pop a slice in the microwave for about 15-20 seconds. It softens the filling slightly without making it runny. Not recommended for the whole pan, though — just reheat individual servings.
Nutritional Information & Benefits
Here’s a rough estimate for one bar (based on 9 servings):
- Calories: Approximately 310
- Fat: 14g
- Carbohydrates: 44g
- Protein: 5g
- Fiber: 2g
- Sugar: 28g
These numbers will vary based on the exact brands you use and whether you make any substitutions. For a lighter version, you can reduce the sugar by about 1/4 cup, but the texture will be slightly less firm.
Health Benefits — Pumpkin is packed with vitamin A, fiber, and antioxidants. It’s great for eye health, immune function, and even skin health. The gingersnap crust adds a little warmth from ginger, which can aid digestion. And since there are no eggs, this recipe is naturally lower in cholesterol than traditional pumpkin pie.
Dietary Considerations — This recipe is egg-free and can easily be made dairy-free or gluten-free with the substitutions mentioned above. It’s not low-carb or keto-friendly due to the sugars and crust, but it’s a wonderful option for anyone avoiding eggs.
Allergen Notes — Contains dairy (butter, evaporated milk) and gluten (gingersnap cookies). Check your cookie brand if you have specific sensitivities.
I personally love that this dessert feels indulgent without being overly heavy. It’s the kind of treat that satisfies your sweet tooth without leaving you feeling sluggish.
Conclusion
These creamy no-egg pumpkin pie bars have become my go-to fall dessert for so many reasons. They’re easy enough for a weeknight craving, impressive enough for a holiday table, and forgiving enough for even the most distracted baker. The gingersnap crust adds that perfect spicy crunch, and the filling is silky, rich, and completely egg-free.
What I love most about this recipe is how it proves you don’t need complicated techniques or hard-to-find ingredients to make something truly special. Sometimes the best desserts come from working with what you have — and maybe a little bit of happy accident.
I’d love to hear how these turn out for you! Did you try any variations? Did you serve them at a gathering? Drop a comment below and let me know. And if you’re looking for more easy, crowd-pleasing desserts, check out our no-bake peanut butter granola bites or matcha green tea tiramisu parfaits for more no-fuss treats.
Happy baking, friends. And remember — sometimes the best recipes come from the moments you least expect them.
Frequently Asked Questions
Can I use pumpkin pie filling instead of pumpkin puree?
No, I wouldn’t recommend it. Pumpkin pie filling already has sugar and spices added, which will throw off the balance of this recipe. Stick with pure pumpkin puree for the best results.
Why did my bars turn out watery?
This usually happens if the bars weren’t baked long enough or if they weren’t chilled properly. Make sure the center has just a slight jiggle when you pull them from the oven, and give them at least 3 hours in the fridge to set fully.
Can I use a different cookie for the crust?
Absolutely! Graham crackers, vanilla wafers, or even shortbread cookies work well. Just add a little extra ginger and cinnamon to the crust to mimic that spicy gingersnap flavor.
How do I know when the bars are done baking?
The edges should look set and slightly puffed, while the center should still jiggle slightly when you gently shake the pan. A toothpick inserted near the center should come out mostly clean with just a few moist crumbs.
Can I make these bars in a different size pan?
Yes, but you’ll need to adjust the baking time. An 8×8 pan will give you thicker bars that need about 5 extra minutes in the oven. A 9×13 pan will give you thinner bars that bake in about 30 minutes. Keep an eye on them and check for doneness early.
Pin This Recipe!
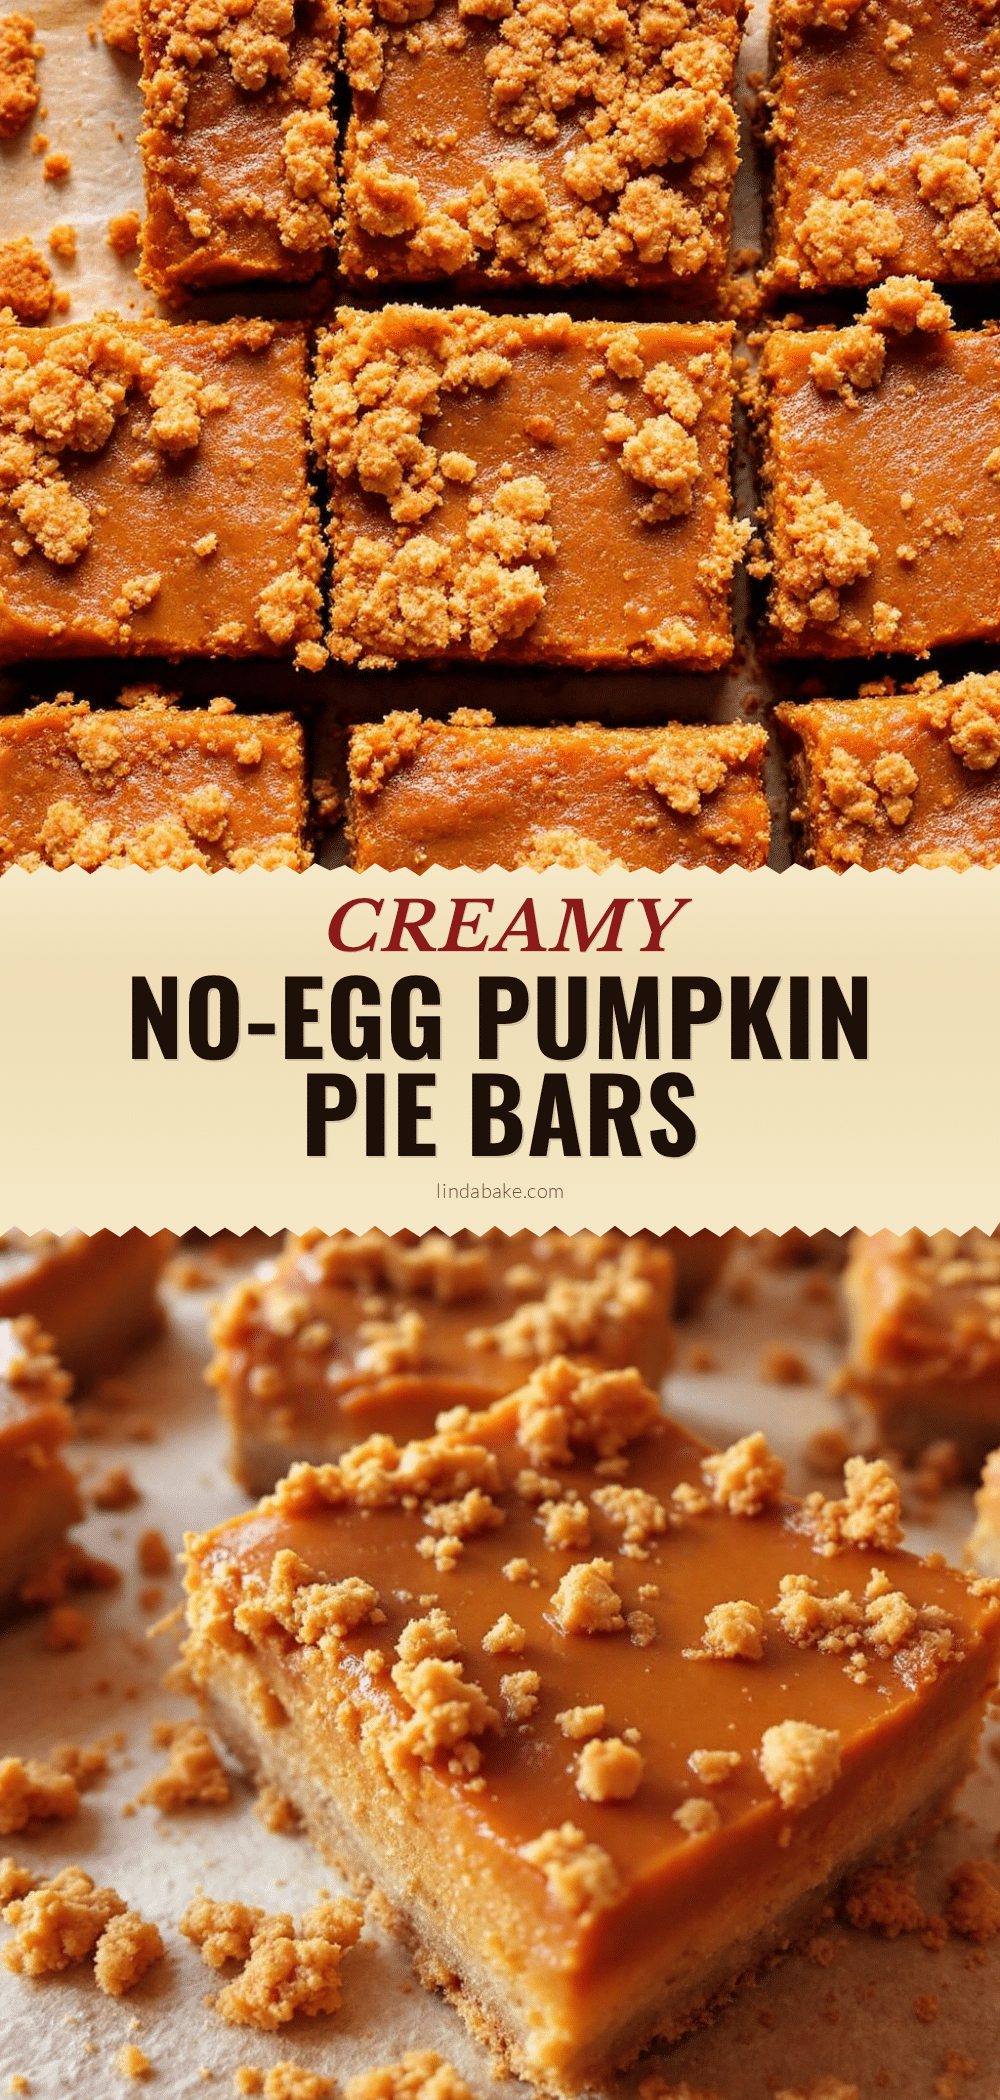
Easy No-Egg Pumpkin Pie Bars with Gingersnap Crust
These creamy no-egg pumpkin pie bars feature a silky, custard-like filling and a warm, spicy gingersnap crust. They’re perfect for any occasion, from Thanksgiving to a quiet night in, and they set up smooth and clean every time without cracking or weeping.
- Prep Time: 15 minutes
- Cook Time: 40-45 minutes
- Total Time: 4 hours 55 minutes (including chilling)
- Yield: 9 servings 1x
- Category: Dessert
- Cuisine: American
Ingredients
- 2 cups crushed gingersnap cookies (about 7 ounces or 200 grams)
- 6 tablespoons unsalted butter, melted (85 grams)
- 2 tablespoons granulated sugar (25 grams)
- Pinch of salt
- 1 can (15 ounces or 425 grams) pumpkin puree
- 1 can (12 ounces or 354 ml) evaporated milk
- 3/4 cup packed brown sugar (150 grams)
- 1/4 cup granulated sugar (50 grams)
- 3 tablespoons cornstarch (24 grams)
- 1 teaspoon vanilla extract
- 1 1/2 teaspoons pumpkin pie spice
- 1/2 teaspoon ground cinnamon
- 1/4 teaspoon salt
Instructions
- Preheat your oven to 350°F (175°C). Line your 9×9 baking pan with parchment paper, leaving about 2 inches of overhang on two opposite sides.
- Make the crust: In a food processor, pulse the gingersnap cookies until they turn into fine crumbs. Pour the crumbs into a medium bowl, add the sugar and salt, then pour in the melted butter. Stir with a fork until every crumb is coated and the mixture looks like wet sand.
- Press the crust into the pan: Dump the crumb mixture into your prepared pan and press it down firmly with the bottom of a measuring cup or a flat glass. Bake for 8 minutes, then set aside to cool slightly while you make the filling.
- Mix the dry ingredients for the filling: In a large bowl, whisk together the brown sugar, granulated sugar, cornstarch, pumpkin pie spice, cinnamon, and salt.
- Add the wet ingredients: Pour in the pumpkin puree, evaporated milk, and vanilla extract. Whisk everything together until the mixture is completely smooth and silky.
- Pour the filling over the crust: Slowly pour the pumpkin mixture over the pre-baked crust. Tap the pan on the counter a few times to release any air bubbles.
- Bake the bars: Place the pan in the preheated oven and bake for 40-45 minutes. The edges should look set and slightly puffed, but the center will still jiggle a tiny bit when you shake the pan.
- Cool completely: Let the bars cool on a wire rack for about 1 hour at room temperature, then transfer to the refrigerator and chill for at least 3 hours, preferably overnight.
- Slice and serve: Once fully chilled, lift the bars out of the pan using the parchment paper overhang. Place on a cutting board and slice into 9 even squares (or 16 if you want smaller portions).
Notes
Don’t overbake; the center should still jiggle slightly when done. Use room temperature evaporated milk to prevent cornstarch clumps. Press the crust firmly for clean slices. Chill overnight for best texture. Use a sharp knife for clean cuts.
Nutrition
- Serving Size: 1 bar
- Calories: 310
- Sugar: 28
- Fat: 14
- Carbohydrates: 44
- Fiber: 2
- Protein: 5
Keywords: no-egg pumpkin pie bars, eggless pumpkin dessert, gingersnap crust pumpkin bars, creamy pumpkin bars, easy pumpkin dessert


