I want pancakes right now and I have everything except buttermilk. That’s the thought that hit me at 7:42 on a Saturday morning, standing in front of my fridge with the door open, cold air washing over my feet. The sourdough starter discard jar was sitting there on the top shelf, looking at me like it knew something I didn’t. And honestly, it did. Because that jar of unfed, bubbly discard was about to solve my pancake problem in a way buttermilk never could.
Here’s the thing about keeping a sourdough starter alive—you end up with discard. Lots of it. And for the longest time, I felt guilty throwing it away, like I was wasting potential. Then I started experimenting, and let me tell you, that discard makes pancakes that are actually better than anything I ever made with buttermilk. They’re tangy in that subtle way that makes you take another bite just to figure out what that flavor is. They’re fluffy, like cloud-fluffy, with edges that get crispy in butter.
I’ve tested these fluffy sourdough starter discard pancakes at least a dozen times now, tweaking ratios and testing cooking temperatures until I got it exactly right. The first batch was too dense. The second batch was too sour. But somewhere around batch number seven, everything clicked. The texture was light, the flavor was balanced, and my kids actually asked for seconds. That’s when I knew I had something worth sharing.
This recipe isn’t complicated. It uses ingredients you probably already have, and it turns something you might otherwise toss into breakfast gold. No special techniques, no fuss—just really good pancakes that make your kitchen smell amazing.
Why You’ll Love This Recipe
These aren’t just another pancake recipe. They’re the ones you’ll actually want to make on a Tuesday morning when you’re tired and hungry and need something that works. I’ve spent enough time in my kitchen testing pancake batters to know what separates good from great, and this one delivers every single time.
- Quick & Easy : From mixing to eating in under 20 minutes. No waiting for the batter to rest, no complicated steps. Just whisk, pour, flip, eat.
- Simple Ingredients : You need flour, egg, milk, butter, sugar, baking soda, salt, and that jar of sourdough discard sitting in your fridge. That’s it.
- Perfect for Using Up Discard : If you maintain a sourdough starter, you know the struggle of accumulating discard. This recipe uses a full cup of it, which means less guilt and more pancakes.
- Crowd-Pleaser : My kids inhale these. My husband requests them. Even my mother-in-law, who’s picky about breakfast, asked for the recipe. They’re that good.
- Unbelievably Fluffy : The combination of sourdough discard and baking soda creates a reaction that makes these pancakes light and airy in a way regular pancakes just can’t match.
What makes this recipe different from every other pancake recipe you’ve seen? It’s the technique. Most discard pancake recipes turn out dense and gummy because they don’t account for the hydration level of the starter. I figured out that letting the discard sit at room temperature for a bit and using exactly the right amount of baking soda makes all the difference. The pancakes rise beautifully, the tang is mellow, and the texture is spot-on.
These pancakes are the kind that make you close your eyes after the first bite. They’re comfort food at its finest—simple, satisfying, and made from something you already have. No stress, no fancy ingredients, just really good breakfast energy.
What Ingredients You Will Need
This recipe uses simple, everyday ingredients to create pancakes that taste anything but ordinary. The magic happens when the sourdough discard meets the baking soda—that chemical reaction creates bubbles that make these pancakes incredibly light and fluffy.
- 1 cup (240g) sourdough starter discard – Unfed, straight from the fridge works perfectly. If your discard is very thick, let it sit at room temperature for 15 minutes to loosen up. I use my discard at any stage—it doesn’t need to be active or bubbly for this recipe to work.
- 1 cup (125g) all-purpose flour – Regular all-purpose flour gives the best texture. I’ve tried this with whole wheat pastry flour and it works, but the pancakes are denser. For the fluffiest results, stick with all-purpose. King Arthur Flour is my go-to brand for consistent results.
- 1 tablespoon granulated sugar – Just enough to balance the tang of the sourdough without making the pancakes sweet. You can use honey or maple syrup instead, but reduce the milk slightly to compensate for the extra liquid.
- 1 teaspoon baking soda – This is non-negotiable. The baking soda reacts with the acid in the sourdough discard to create lift. Make sure your baking soda is fresh—test it by dropping a pinch into vinegar; it should fizz vigorously.
- 1/2 teaspoon salt – Fine sea salt works best. Don’t skip this—it enhances the flavor and balances the tanginess of the sourdough.
- 1 large egg – Room temperature egg incorporates more easily into the batter. If you forgot to take it out of the fridge, place it in a bowl of warm water for 5 minutes.
- 1/2 cup (120ml) whole milk – Whole milk gives the richest flavor, but 2% or even oat milk work fine. For dairy-free, I’ve had good results with unsweetened almond milk, though the pancakes are slightly less tender.
- 2 tablespoons unsalted butter, melted and cooled – Plus more for the pan and for serving. The butter adds richness and helps create those crispy golden edges. If using salted butter, reduce the added salt to 1/4 teaspoon.
- 1 teaspoon vanilla extract – Pure vanilla extract adds warmth and depth. Imitation vanilla works in a pinch, but pure is worth the splurge here.
Ingredient Selection Tips: For the best results, use sourdough discard that’s been refrigerated for up to a week. Discard that’s been sitting out at room temperature for more than 24 hours will produce a more sour pancake, which some people love. If you prefer a milder tang, use discard that’s no more than 3-4 days old.
Substitution Guidance: For a gluten-free version, use a 1:1 gluten-free flour blend that contains xanthan gum. Cup4Cup and Bob’s Red Mill both work well. Reduce the milk to 1/3 cup as gluten-free flours absorb less liquid. For a dairy-free version, use melted coconut oil instead of butter and your favorite plant-based milk.
Equipment Needed
You don’t need fancy equipment to make these pancakes, which is exactly how I like my breakfast recipes. Here’s what you’ll need:
- Large mixing bowl – Any medium-to-large bowl works. I use a ceramic mixing bowl because it doesn’t react with the acidic discard.
- Whisk – A standard wire whisk is perfect. A fork works in a pinch, but you’ll get a smoother batter with a whisk.
- Non-stick skillet or griddle – A 10-inch non-stick skillet works great for making 3-4 pancakes at a time. If you have an electric griddle, even better—you can cook more pancakes at once and they’ll cook more evenly. I use my cast iron skillet sometimes, but you need to make sure it’s well-seasoned to prevent sticking.
- Spatula – A thin, flexible metal spatula works best for flipping. I’ve broken too many pancakes with thick plastic spatulas to recommend them.
- Measuring cups and spoons – For accuracy. I know some people eyeball it, but for pancakes, precise measurements make a noticeable difference in texture.
- 1/4 cup measuring cup or ladle – For portioning the batter onto the griddle. A 1/4 cup measure gives you perfectly sized pancakes every time.
- Butter knife – For spreading butter on the cooked pancakes. Not strictly necessary, but highly recommended.
Budget-Friendly Options: If you don’t have a non-stick skillet, a well-seasoned cast iron pan works beautifully once you get the temperature right. Just make sure to use enough butter. And if you don’t have a whisk, two forks held together work surprisingly well for mixing batter.
Preparation Method
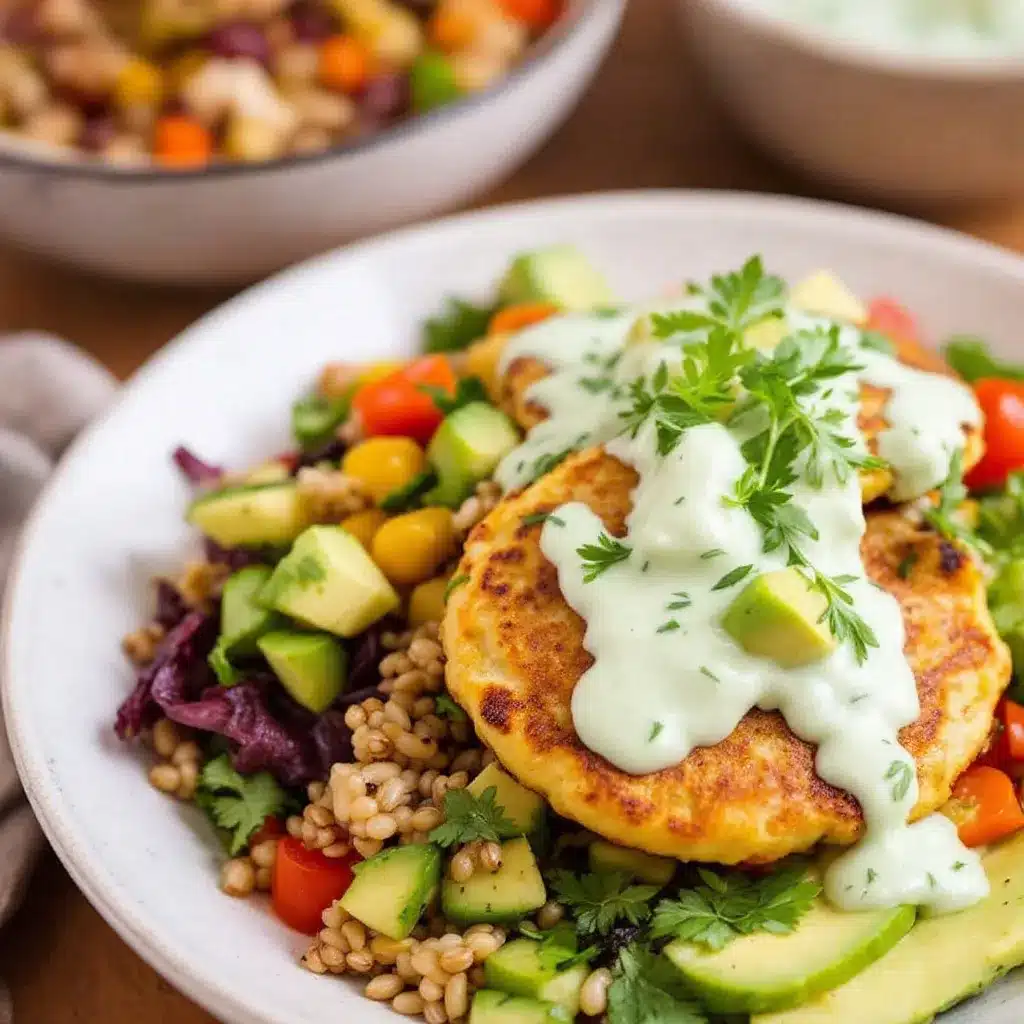
Making these pancakes is straightforward, but a few key details make the difference between good pancakes and great ones. Follow these steps and you’ll have perfect pancakes every time.
- Preheat your skillet or griddle over medium heat (350°F if using an electric griddle). This is important—if the pan is too hot, the pancakes will burn on the outside before the inside cooks through. Too cool, and they’ll spread too thin and turn out dense. Test the temperature by flicking a drop of water onto the surface; it should sizzle and evaporate immediately.
- In a large mixing bowl, whisk together the flour, sugar, baking soda, and salt. Make sure the baking soda is evenly distributed throughout the dry ingredients. I sometimes use a fork to break up any lumps in the flour. Set the bowl aside.
- In a separate medium bowl or large liquid measuring cup, whisk together the sourdough discard, egg, milk, melted butter, and vanilla extract. Whisk until the mixture is smooth and the egg is fully incorporated. The discard might look a bit lumpy at first—keep whisking until it’s homogeneous. If your discard was refrigerated, this mixture will be cold, which is fine.
- Pour the wet ingredients into the dry ingredients and stir gently with a spatula or whisk until just combined. Here’s the most important rule of pancake batter: do not overmix. Stop stirring when you no longer see streaks of dry flour. A few small lumps are perfectly fine—they’ll cook out. Overmixing develops gluten, which makes pancakes tough and rubbery.
- Let the batter rest for 3-5 minutes. This allows the baking soda to react with the sourdough discard and creates bubbles that make the pancakes fluffy. You’ll see small bubbles forming on the surface of the batter—that’s exactly what you want. Don’t skip this step.
- Add a pat of butter to your hot skillet and swirl to coat the surface. The butter should melt and sizzle gently. If it browns immediately, your pan is too hot—reduce the heat slightly and let it cool for a minute before adding batter.
- Pour 1/4 cup of batter onto the skillet for each pancake. Leave about 2 inches of space between pancakes to allow for spreading. The batter will be thick and slightly bubbly—that’s a good sign. If your batter seems too thick, add a tablespoon of milk and stir gently.
- Cook until bubbles form on the surface of the pancakes and the edges look set, about 2-3 minutes. You’ll see small bubbles popping and staying open on the surface. The edges should look slightly dry and matte rather than glossy. The bottom should be golden brown—lift a corner gently with your spatula to check.
- Flip the pancakes and cook for another 1-2 minutes. The second side cooks faster because the pan is already hot. The pancakes should be golden brown on both sides and puffed up nicely. Press gently on the center—they should spring back.
- Transfer cooked pancakes to a plate and keep warm in a 200°F oven while you cook the remaining batter. Don’t stack them directly on top of each other or they’ll steam and lose their crispy edges. Place them in a single layer on a baking sheet in the oven, or separate layers with a clean kitchen towel.
- Repeat with remaining batter, adding more butter to the pan between batches as needed. You should get about 8-10 pancakes from this recipe, depending on how generous you are with your 1/4 cup measure.
Troubleshooting Tip: If your first pancake turns out weird, don’t panic. The first pancake is always a test pancake. Use it to adjust your heat and technique. If it’s too dark, lower the heat. If it’s pale and doughy, increase the heat slightly. This is normal, and the remaining pancakes will be perfect.
Cooking Tips & Techniques
After making these pancakes more times than I can count, I’ve learned a few things the hard way. Here are my best tips to get perfect results every time.
Don’t overmix the batter. I cannot stress this enough. Mix until the flour is just incorporated and stop. Those small lumps are your friends—they ensure the pancakes stay tender. Overmixed batter develops gluten, and gluten makes pancakes chewy and dense instead of light and fluffy.
Use room temperature ingredients. Cold ingredients don’t mix as evenly, which can lead to uneven cooking. If you forgot to take the egg and milk out of the fridge, place them in a bowl of warm water for 5-10 minutes before using. The sourdough discard can be used straight from the fridge, but letting it sit at room temperature for 15 minutes helps it incorporate more smoothly.
Watch your heat. Medium heat is usually perfect, but every stovetop is different. If you’re using a gas stove, medium might be lower than you think. Electric stoves tend to run hotter. The key is to find the temperature where the pancakes cook through without burning. If you’re unsure, err on the side of slightly lower heat—you can always cook them a bit longer.
Let the batter rest. That 3-5 minute rest is crucial. It gives the baking soda time to react with the sourdough discard, creating bubbles that make the pancakes fluffy. I’ve tried skipping this step when I was in a hurry, and the pancakes were noticeably flatter and denser. It’s worth the wait.
Use enough butter in the pan. Don’t be shy with the butter. It adds flavor, helps create those crispy golden edges, and prevents sticking. If you’re using a non-stick pan, you might be tempted to use less butter. Don’t. The butter is part of what makes these pancakes special.
Flip only once. Resist the urge to flip the pancakes multiple times. Flipping more than once deflates the bubbles and makes the pancakes dense. Wait until the bubbles on the surface have popped and the edges look set, then flip once and cook until done.
My biggest failure: The first time I made these, I used active, bubbly starter instead of discard. The pancakes were incredibly sour—almost inedible. I learned that active starter has more acid, which makes the pancakes too tangy. Discard is the way to go here. It has a milder flavor that balances perfectly with the other ingredients.
Variations & Adaptations
This recipe is incredibly versatile. Here are some of my favorite ways to change it up depending on what I’m craving or what I have on hand.
Blueberry Sourdough Pancakes: Fold 1 cup of fresh or frozen blueberries into the batter just before cooking. If using frozen blueberries, don’t thaw them first—add them straight from the freezer. The cold berries will create little pockets of jammy fruit in the pancakes. I love this version in the summer when blueberries are in season.
Whole Wheat Version: Substitute half the all-purpose flour with whole wheat flour. The pancakes will be slightly denser and nuttier in flavor, but still delicious. Add an extra tablespoon of milk to compensate for the whole wheat flour’s extra absorbency. This is my go-to when I want to pretend I’m being healthy.
Vegan Adaptation: Replace the egg with a flax egg (1 tablespoon ground flaxseed mixed with 3 tablespoons water, let sit for 5 minutes). Use melted coconut oil instead of butter, and unsweetened almond or oat milk instead of dairy milk. The pancakes will be slightly less fluffy but still really good. I’ve made this version for friends with egg allergies and they loved it.
Savory Sourdough Pancakes: Reduce the sugar to 1 teaspoon and add 1/2 cup of shredded cheddar cheese, 2 tablespoons of chopped chives, and a pinch of black pepper to the batter. These are amazing topped with a fried egg and hot sauce for breakfast, or served alongside soup for dinner. This is my secret weapon for using up extra discard.
Chocolate Chip Sourdough Pancakes: Fold 1/2 cup of mini chocolate chips into the batter. The mini chips distribute more evenly than regular-sized chips. This version is dangerously good—my kids request it for birthday breakfasts. I use dark chocolate chips for a slightly less sweet option.
Spiced Apple Sourdough Pancakes: Add 1 teaspoon of cinnamon and 1/4 teaspoon of nutmeg to the dry ingredients. Fold in 1/2 cup of finely diced apple (I prefer Honeycrisp or Granny Smith). These taste like fall in pancake form. Top with maple syrup and a sprinkle of cinnamon for maximum cozy vibes.
Serving & Storage Suggestions
These pancakes are best served hot off the griddle, but they’re also surprisingly good reheated. Here’s everything you need to know about serving and storing them.
Serving Temperature: Serve these pancakes warm, straight from the skillet or after a brief stint in a 200°F oven. Cold pancakes lose their fluffy texture and the butter won’t melt properly. If you’re serving a crowd, keep the cooked pancakes in a single layer on a baking sheet in a warm oven until you’re ready to eat.
Toppings: Classic butter and maple syrup is always a winner, but don’t stop there. Fresh berries, sliced bananas, a drizzle of honey, whipped cream, or a dusting of powdered sugar all work beautifully. For a savory twist, try a pat of butter and a sprinkle of flaky sea salt. I personally love them with a generous pat of salted butter and a drizzle of warm maple syrup.
Complementary Dishes: These pancakes pair perfectly with crispy bacon or breakfast sausage for a hearty morning meal. A side of scrambled eggs rounds things out nicely. For a brunch spread, serve them alongside fresh fruit salad and a pitcher of mimosas. If you’re looking for more lunchbox inspiration, check out these easy turkey and cheese sushi roll-ups for a fun twist on lunch.
Beverage Pairings: A hot cup of coffee is the classic choice, but these pancakes also go great with a cold glass of milk or a warm mug of chai tea. For a special treat, try them with a vanilla latte or a hot chocolate.
Storage Instructions: Store leftover pancakes in an airtight container in the refrigerator for up to 3 days. Place a piece of parchment paper between layers to prevent sticking. For longer storage, freeze the pancakes in a single layer on a baking sheet, then transfer to a freezer-safe bag or container. They’ll keep for up to 2 months.
Reheating Methods: The toaster is my favorite way to reheat these pancakes—it crisps up the edges perfectly. Toast on a medium setting until warm and slightly crispy. Alternatively, reheat in a 350°F oven for 5-7 minutes, or in the microwave for 30-45 seconds (though the texture won’t be as good). Avoid reheating in the microwave if you want to preserve the crispy edges.
Flavor Development: These pancakes actually taste better the next day, believe it or not. The sourdough flavor mellows and deepens overnight, creating a more complex taste. If you have leftovers, I highly recommend trying them toasted the next morning with a pat of butter.
Nutritional Information & Benefits
While these pancakes are definitely a treat, they do offer some nutritional benefits thanks to the sourdough fermentation process. Here’s what you need to know.
Estimated Nutritional Values (per pancake, based on 8 pancakes):
- Calories: 145
- Total Fat: 5g
- Saturated Fat: 3g
- Cholesterol: 35mg
- Sodium: 310mg
- Total Carbohydrates: 21g
- Dietary Fiber: 1g
- Sugars: 4g
- Protein: 4g
Health Benefits of Sourdough: The fermentation process in sourdough breaks down some of the gluten and phytic acid in the flour, making the nutrients more bioavailable. This means your body can more easily absorb the iron, zinc, and magnesium present in the flour. Sourdough also has a lower glycemic index compared to regular bread, which means it won’t spike your blood sugar as dramatically.
Dietary Considerations: This recipe contains gluten, dairy, and eggs. For gluten-free and vegan options, see the variations section above. These pancakes are relatively low in sugar compared to many pancake recipes, making them a better choice for those watching their sugar intake.
Potential Allergens: This recipe contains wheat (gluten), dairy (butter, milk), and eggs. If you’re serving these to someone with allergies, be sure to check your sourdough starter—if it was fed with wheat flour, it contains gluten.
My Personal Take: I don’t pretend these are health food, but I feel good about feeding them to my family because they’re made with real ingredients and the fermentation adds some nutritional value. Plus, they’re so much better than boxed pancake mix that it’s not even a competition.
Conclusion
These fluffy sourdough starter discard pancakes have become a staple in my kitchen for good reason. They turn something you might otherwise throw away into something genuinely delicious. The tangy flavor, the fluffy texture, the crispy edges—everything about them just works.
I love that this recipe is forgiving enough for a lazy Saturday morning but impressive enough to serve to guests. You can dress them up with fancy toppings or keep them simple with butter and syrup. They work for breakfast, brunch, or even breakfast-for-dinner nights. And honestly, anything that helps me use up my sourdough discard without guilt is a winner in my book.
If you make these pancakes, I’d love to hear how they turn out. Leave a comment below and let me know if you tried any variations or if you have your own favorite way to use sourdough discard. Don’t forget to share your pancake photos on social media and tag me—I love seeing what you’re cooking up in your kitchens.
Here’s to delicious breakfasts, happy bellies, and never wasting sourdough discard again. Happy cooking, friends!
Frequently Asked Questions
Can I use active sourdough starter instead of discard?
You can, but the pancakes will be significantly more sour. Active starter has more acid, which can throw off the flavor balance. If you only have active starter, reduce the amount by 2 tablespoons and add 2 tablespoons of milk to maintain the right consistency. For the best results, stick with discard.
Why are my pancakes dense and flat?
This usually happens for one of three reasons: overmixing the batter (which develops gluten), not letting the batter rest (which allows the baking soda to react), or using old baking soda (which won’t create enough lift). Check your baking soda by dropping a pinch into vinegar—it should fizz vigorously. If it doesn’t, it’s time for a new box.
Can I make the batter ahead of time?
I don’t recommend it. The baking soda starts reacting as soon as it hits the acidic discard, so the batter loses its lift over time. If you need to prep ahead, mix the dry ingredients and wet ingredients separately and combine them just before cooking. The pancakes are best made fresh.
How do I get perfectly round pancakes?
Use a 1/4 cup measuring cup to portion the batter, and pour it slowly into the center of the pan. The batter will naturally spread into a circle. Don’t try to spread it with the back of the cup—that deflates the bubbles. If you want perfectly uniform pancakes, use a squeeze bottle or a piping bag to portion the batter.
Can I freeze these pancakes?
Absolutely! Cook the pancakes, let them cool completely, then freeze them in a single layer on a baking sheet. Once frozen, transfer to a freezer-safe bag or container. They’ll keep for up to 2 months. Reheat directly from frozen in the toaster or oven—no need to thaw first. They’re perfect for busy mornings when you need breakfast in a hurry.
Looking for more easy recipes that make the most of simple ingredients? Try these easy peanut butter banana sushi roll-ups for a fun snack idea, or these creamy no-mayo chicken salad wraps for a quick lunch option. And if you’re in the mood for something sweet, these easy matcha green tea tiramisu parfaits come together in just 10 minutes.
Pin This Recipe!
Easy Fluffy Sourdough Starter Discard Pancakes Recipe
Turn your sourdough discard into incredibly fluffy, tangy pancakes that are better than buttermilk pancakes. Quick, easy, and made with simple ingredients.
- Prep Time: 10 minutes
- Cook Time: 10 minutes
- Total Time: 20 minutes
- Yield: 4 servings 1x
- Category: Breakfast
- Cuisine: American
Ingredients
- 1 cup (240g) sourdough starter discard
- 1 cup (125g) all-purpose flour
- 1 tablespoon granulated sugar
- 1 teaspoon baking soda
- 1/2 teaspoon salt
- 1 large egg
- 1/2 cup (120ml) whole milk
- 2 tablespoons unsalted butter, melted and cooled
- 1 teaspoon vanilla extract
Instructions
- Preheat your skillet or griddle over medium heat (350°F if using an electric griddle). Test the temperature by flicking a drop of water onto the surface; it should sizzle and evaporate immediately.
- In a large mixing bowl, whisk together the flour, sugar, baking soda, and salt. Set aside.
- In a separate medium bowl or large liquid measuring cup, whisk together the sourdough discard, egg, milk, melted butter, and vanilla extract until smooth and homogeneous.
- Pour the wet ingredients into the dry ingredients and stir gently with a spatula or whisk until just combined. Do not overmix; a few small lumps are fine.
- Let the batter rest for 3-5 minutes until small bubbles form on the surface.
- Add a pat of butter to your hot skillet and swirl to coat the surface.
- Pour 1/4 cup of batter onto the skillet for each pancake, leaving about 2 inches of space between pancakes.
- Cook until bubbles form on the surface and the edges look set, about 2-3 minutes.
- Flip the pancakes and cook for another 1-2 minutes until golden brown on both sides and puffed up.
- Transfer cooked pancakes to a plate and keep warm in a 200°F oven while you cook the remaining batter.
- Repeat with remaining batter, adding more butter to the pan between batches as needed. Makes about 8-10 pancakes.
Notes
For best results, use sourdough discard that’s been refrigerated for up to a week. Discard that’s been sitting out at room temperature for more than 24 hours will produce a more sour pancake. If you prefer a milder tang, use discard that’s no more than 3-4 days old. Do not overmix the batter; lumps are okay. Let the batter rest for 3-5 minutes to allow the baking soda to react with the discard. Use enough butter in the pan for crispy edges. Flip only once.
Nutrition
- Serving Size: 2 pancakes
- Calories: 290
- Sugar: 8
- Sodium: 620
- Fat: 10
- Saturated Fat: 6
- Carbohydrates: 42
- Fiber: 2
- Protein: 8
Keywords: sourdough discard pancakes, fluffy pancakes, sourdough starter discard, easy pancake recipe, discard recipe


