My husband did not trust the air fryer for chicken thighs. He said it was a gadget that would dry things out, that skinless thighs needed a cast iron skillet or nothing at all. I’d nod along while secretly plotting my proof. The thing is, I wanted crispy air fryer chicken thighs without the mess of flour or breadcrumbs—something fast, something that didn’t require a dredging station on a Tuesday night. So I bought a pack of bone-in, skin-on thighs, patted them dry like my life depended on it, and tossed them in the basket with nothing but salt and a little oil. The first batch came out okay. Edible, but not life-changing. The skin was crispy in patches, chewy in others, and I felt a little smug that he might be right.
But I’m stubborn. So I tried again. This time, I let the chicken rest uncovered in the fridge for a few hours before cooking. That simple step—letting the skin dry out completely—changed everything. The skin turned shatteringly crisp, the meat stayed juicy, and there was zero breading involved. I slid a thigh onto his plate without saying a word. He took a bite, paused, and asked for the recipe. That moment, right there, was the quiet victory I needed.
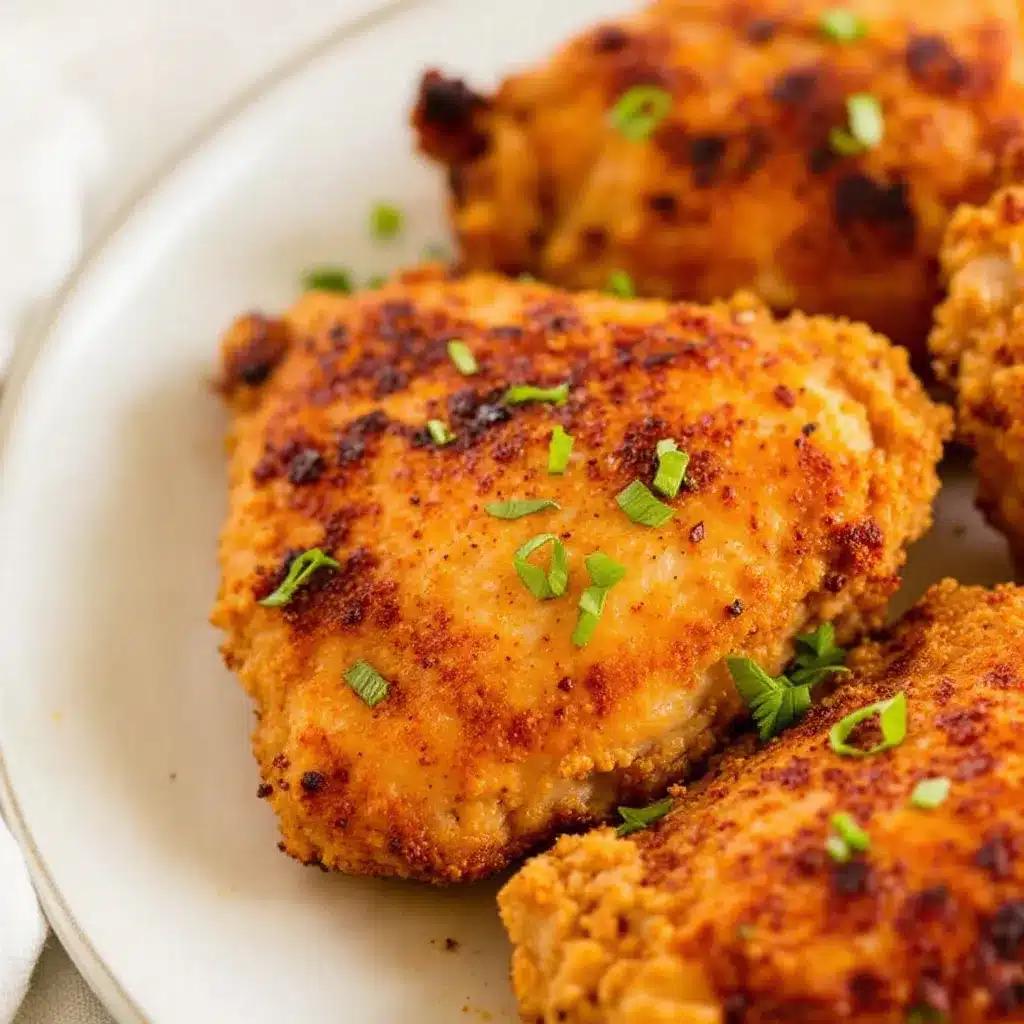
These crispy air fryer chicken thighs (no breading) have become our go-to weeknight dinner. They come together in under 30 minutes, use ingredients you already have, and honestly, they taste like they took way more effort than they actually did. If you’ve been skeptical about getting crispy skin without flour or breadcrumbs, I get it. I was too. But this method works, and it works every single time.
Why You’ll Love This Recipe
This isn’t just another chicken recipe—it’s the kind that makes you look forward to leftovers. Here’s why it stands out:
- Quick & Easy: From fridge to plate in under 30 minutes. Perfect for those nights when you need dinner on the table fast but still want something that feels special.
- Simple Ingredients: No breading, no flour, no complicated marinades. Just chicken, oil, and seasonings you probably already have in your pantry.
- Crowd-Pleaser: My kids devour these, my in-laws ask for the recipe, and even my husband—the original skeptic—requests them weekly. That’s a win in my book.
- Unbelievably Crispy: The skin gets so crispy it crackles when you bite into it. And because there’s no breading, you get pure chicken flavor without any gummy or soggy texture.
- Healthier Option: Air frying uses a fraction of the oil compared to traditional frying, so you get that satisfying crunch without the guilt.
- Versatile: These chicken thighs work with just about any seasoning blend you love. I’ve made them with everything from simple salt and pepper to bold harissa spice.
What makes this recipe different from the rest is the technique. Most no-breading air fryer chicken recipes skip the crucial step of drying the skin beforehand. That one extra step—letting the chicken rest uncovered in the fridge—makes all the difference between okay chicken and absolutely phenomenal chicken. It’s the kind of trick you learn after a few failed batches, and once you know it, you’ll never go back.
Honestly, this recipe is comfort food reimagined. It’s faster, healthier, and somehow even more satisfying than the breaded version. Perfect for impressing guests without breaking a sweat, or turning a simple Tuesday dinner into something you’ll actually look forward to.
What Ingredients You Will Need
This recipe uses simple, wholesome ingredients to deliver bold flavor and that perfect crispy texture. Most of these are pantry staples, so you probably have everything on hand already.
- Bone-in, skin-on chicken thighs (4-6 thighs, about 2 pounds) — The bone and skin are essential here. The bone keeps the meat moist during cooking, and the skin is what gets that amazing crispy texture. I prefer thighs from Bell & Evans or Mary’s Free Range for the best flavor and texture.
- Avocado oil (1-2 tablespoons) — This has a high smoke point, which is perfect for air frying at high temperatures. You can also use grapeseed oil or light olive oil, but avoid extra-virgin olive oil as it can burn.
- Kosher salt (1 teaspoon) — I use Diamond Crystal brand because it’s less salty by volume, giving you more control. If using table salt, reduce to ¾ teaspoon.
- Black pepper (½ teaspoon, freshly ground) — Freshly ground pepper makes a noticeable difference here.
- Garlic powder (1 teaspoon) — Adds savory depth without burning. I prefer Simply Organic brand for its consistent quality.
- Onion powder (½ teaspoon) — Complements the garlic powder beautifully. Optional but recommended.
- Paprika (1 teaspoon) — Use sweet paprika for mild flavor or smoked paprika for a deeper, almost bacon-like taste. I personally love smoked paprika in this recipe.
- Optional seasonings: Cayenne pepper (¼ teaspoon for heat), dried thyme (½ teaspoon), or Italian seasoning (1 teaspoon). Feel free to experiment based on what you have.
Ingredient Selection Tips: Look for chicken thighs that are roughly the same size so they cook evenly. The skin should be intact without any tears. If the thighs are particularly large (over 8 ounces each), you may need to add a few minutes to the cooking time. For the best results, avoid skinless thighs—the skin is what creates that incredible crispy texture we’re after.
Substitution Guidance: You can use chicken drumsticks or wings with the same method, just adjust cooking time accordingly. For a dairy-free option, this recipe is already dairy-free. If you’re watching sodium, reduce the salt to ½ teaspoon and add more herbs for flavor.
Equipment Needed
You don’t need much for this recipe, which is part of the beauty. Here’s what you’ll need:
- Air fryer (any brand works — I use a Cosori Pro II 5.8-quart model, but a Ninja or Instant Pot Vortex works great too)
- Tongs — For flipping the chicken without piercing the skin. Silicone-tipped tongs are ideal to avoid scratching the air fryer basket.
- Paper towels — For patting the chicken completely dry. This step is non-negotiable for crispy skin.
- Small bowl — For mixing your seasoning blend.
- Baking sheet or large plate — To hold the seasoned chicken before it goes into the air fryer.
- Instant-read thermometer (optional but highly recommended) — Ensures your chicken reaches a safe internal temperature of 165°F without overcooking. My favorite is the ThermoPro TP19 — it’s affordable and reads in seconds.
- Wire rack (optional) — If you have time, placing the seasoned chicken on a wire rack over a baking sheet in the fridge helps dry the skin even more.
Budget-Friendly Tip: If you don’t have an air fryer yet, you can achieve similar results using a convection oven or a regular oven set to 425°F with the convection setting on. The cooking time will be longer (about 25-30 minutes), but the technique remains the same.
Preparation Method
Step 1: Dry the Chicken (The Most Important Step)
Start by patting the chicken thighs completely dry with paper towels. I mean really dry — you want no visible moisture on the skin. This is the single most important step for achieving crispy skin without breading. If you have time, place the dried thighs on a wire rack set over a baking sheet and refrigerate uncovered for 2-4 hours. This allows the skin to dry out even further. If you’re short on time, just pat them very dry and proceed.
Step 2: Season Generously
In a small bowl, mix together the kosher salt, black pepper, garlic powder, onion powder, and paprika. Drizzle the avocado oil over the chicken thighs and rub it in evenly with your hands. Then sprinkle the seasoning mixture over both sides of each thigh, making sure to get some under the skin if possible. Don’t be shy with the seasoning — the skin is where all the flavor lives.
Step 3: Preheat the Air Fryer
Preheat your air fryer to 400°F (200°C) for 3-5 minutes. Preheating ensures the chicken starts cooking immediately, which helps the skin crisp up rather than steam. If your air fryer doesn’t have a preheat function, just run it empty for 3 minutes at 400°F.
Step 4: Arrange in the Basket
Place the seasoned chicken thighs skin-side down in the air fryer basket. Make sure they’re in a single layer with a little space between each piece — overcrowding will trap steam and prevent crisping. Depending on the size of your air fryer, you may need to cook in batches. I usually fit 4-5 thighs in my 5.8-quart basket.
Step 5: Air Fry
Cook at 400°F for 12 minutes. After 12 minutes, carefully flip the thighs using tongs (be gentle — the skin should be starting to crisp). Cook for another 10-12 minutes, or until the internal temperature reaches 175-185°F in the thickest part of the thigh, away from the bone. I personally aim for 180°F because dark meat stays juicy even at higher temperatures, and the extra time helps the skin get even crispier.
Sensory Cue: At the 12-minute mark, the skin should look golden brown and slightly puffed. When you flip them, you should hear a faint crackling sound — that’s the skin crisping up. The kitchen will smell like roasted chicken with a hint of smokiness from the paprika.
Step 6: Rest Before Serving
Remove the chicken thighs from the air fryer and let them rest on a cutting board or plate for 5 minutes. This allows the juices to redistribute, ensuring every bite is moist and flavorful. Don’t skip this step — I learned the hard way that cutting into them too early results in a puddle of juice on the board and drier meat.
Pro Tip: If you want extra-crispy skin, after flipping at the 12-minute mark, increase the temperature to 420°F for the remaining cooking time. Just keep an eye on them to prevent burning. I do this when I’m feeling fancy and want that extra shatter factor.
Cooking Tips & Techniques
Over the years, I’ve made plenty of mistakes with air fryer chicken. Here are the lessons I learned so you don’t have to repeat them:
- Don’t skip the drying step. I know I’ve said this already, but it bears repeating. Moisture is the enemy of crispy skin. If you’re in a rush, pat the chicken dry with paper towels, then let it sit at room temperature for 15 minutes before seasoning. Every bit of moisture you remove helps.
- Use the right oil. Avocado oil or grapeseed oil have high smoke points (over 400°F), which means they won’t burn during air frying. Olive oil can work, but it has a lower smoke point and may give the chicken a slightly bitter taste if cooked at high heat.
- Don’t overcrowd the basket. This was my biggest mistake early on. When the basket is too full, steam builds up and the skin stays soft. Leave at least half an inch between each thigh. If you need to cook in batches, keep the first batch warm in a 200°F oven while the second batch cooks.
- Flip halfway through. Flipping ensures even cooking and helps both sides get crispy. I set a timer on my phone so I don’t forget.
- Check temperature early. Different air fryers run at different temperatures. Start checking the internal temperature at the 18-minute mark (if cooking 4-5 thighs) to avoid overcooking. Once you know your air fryer’s quirks, you can adjust accordingly.
- Let it rest. I know it’s tempting to dig in immediately, but resting for 5 minutes makes a real difference. The juices settle, the skin stays crispy, and every bite is better.
Multitasking Strategy: While the chicken cooks, I like to whip up a quick side dish. Something like a simple cucumber salad or roasted vegetables works perfectly. If I’m really organized, I’ll start the side dish when I flip the chicken, so everything finishes at the same time.
Variations & Adaptations
One of the best things about this recipe is how adaptable it is. Here are some of my favorite variations:
- Spicy Buffalo Style: After cooking, toss the crispy thighs in buffalo sauce (mix ¼ cup hot sauce with 2 tablespoons melted butter). Serve with blue cheese dip and celery sticks. This is my go-to game-day snack.
- Herb and Lemon: Add 1 teaspoon dried rosemary and 1 teaspoon dried thyme to the seasoning mix. Squeeze fresh lemon juice over the cooked thighs before serving. The brightness cuts through the richness beautifully.
- Honey Garlic Glaze: In the last 3 minutes of cooking, brush the thighs with a mixture of 2 tablespoons honey, 1 tablespoon soy sauce, and 2 minced garlic cloves. Watch carefully to prevent burning. This version is sweet, savory, and absolutely addictive.
- Harissa Spiced: Replace the paprika with 1 tablespoon harissa paste mixed with the oil before seasoning. This gives the chicken a smoky, slightly spicy North African flavor. I love serving this with couscous and roasted vegetables.
- Lower Sodium Option: Reduce salt to ½ teaspoon and increase the garlic powder, onion powder, and paprika to compensate. Add a pinch of cayenne for extra flavor without the sodium.
- Air Fryer Chicken Drumsticks: Use the same method but cook drumsticks for 18-22 minutes total, flipping halfway. The skin gets just as crispy, and they’re perfect for kids.
Personal Variation: My current favorite is the honey garlic glaze variation. I stumbled on it by accident when I was trying to use up some leftover honey, and now I make it at least once a month. The combination of crispy skin and sticky-sweet glaze is irresistible.
Serving & Storage Suggestions
Serving: These chicken thighs are best served immediately while the skin is still crispy. I like to serve them on a warm platter with a sprinkle of fresh parsley or chives for color. They pair beautifully with simple sides like roasted broccoli, mashed potatoes, or a crisp green salad with lemon vinaigrette.
Complementary Dishes: For a complete meal, try serving these thighs with coconut curry pulled pork for an unexpected but delicious surf-and-turf twist. Or keep it simple with steamed rice and sautéed greens. The chicken also works great sliced over salads or tucked into tacos with fresh salsa.
Storage: Leftover chicken thighs can be stored in an airtight container in the refrigerator for up to 4 days. The skin will soften during storage, but don’t worry — you can re-crisp it easily.
Reheating: The best way to reheat these thighs and restore crispiness is in the air fryer. Preheat to 375°F and cook for 3-5 minutes until heated through and the skin is crispy again. You can also reheat in a 400°F oven for 8-10 minutes. Avoid microwaving, as it will make the skin rubbery.
Freezing: Cooked chicken thighs freeze well for up to 3 months. Let them cool completely, then wrap individually in plastic wrap and place in a freezer bag. To reheat, thaw overnight in the refrigerator, then re-crisp in the air fryer at 375°F for 5-7 minutes.
Flavor Development: Interestingly, the flavors actually deepen after a day in the fridge. The seasoning melds with the meat, making leftovers almost better than the original. I often make extra just so I can have them cold on salads the next day.
Nutritional Information & Benefits
Here’s the approximate nutritional breakdown per serving (based on 4 servings with skin):
| Nutrient | Amount per Serving |
|---|---|
| Calories | 320-350 |
| Protein | 28-30g |
| Fat | 22-25g |
| Saturated Fat | 6-7g |
| Carbohydrates | 1-2g |
| Fiber | 0g |
| Sugar | 0g |
| Sodium | 500-600mg |
Health Benefits: Chicken thighs are an excellent source of high-quality protein, which is essential for muscle repair and satiety. They also contain important B vitamins, particularly B6 and B12, which support energy metabolism and brain function. The skin provides healthy fats that help absorb fat-soluble vitamins. By air frying instead of deep frying, you significantly reduce the amount of oil absorbed, making this a healthier alternative to traditional fried chicken.
Dietary Considerations: This recipe is naturally gluten-free, dairy-free, and low-carb (keto-friendly). It contains no added sugars and is Whole30-compliant if you use a compliant oil. The only potential allergen is the chicken itself, so it’s suitable for most dietary needs.
Personal Wellness Perspective: I love that this recipe lets me enjoy crispy, satisfying chicken without the heaviness of breading or deep frying. It’s the kind of meal that feels indulgent but actually fits into a balanced diet. For me, that’s the sweet spot — food that tastes like a treat but leaves you feeling good afterward.
Conclusion
If you’ve been on the fence about air fryer chicken, or if you’ve tried recipes that promised crispy skin but delivered soggy disappointment, give this one a shot. The technique is simple — dry the skin, season well, don’t overcrowd — but it makes all the difference. These crispy air fryer chicken thighs (no breading) have become a staple in my kitchen, and I have a feeling they’ll become one in yours too.
What I love most about this recipe is how forgiving it is. Once you understand the basic method, you can tweak the seasonings, try different glazes, or swap in drumsticks without worrying about the outcome. It’s the kind of recipe that builds confidence in the kitchen, and that’s a beautiful thing.
I’d love to hear how yours turn out. Did you try a variation? Discover a new favorite seasoning blend? Drop a comment below — I read every single one, and your ideas often inspire my next kitchen experiment. Happy cooking, friends!
Frequently Asked Questions
Can I use boneless, skinless chicken thighs?
You can, but the results will be different. Without the skin, you won’t get that crispy exterior. Boneless, skinless thighs will cook faster (about 12-15 minutes total) and will be more tender but not crispy. If you’re looking for a quick, juicy chicken option without the crunch, it works great. Just adjust cooking time and temperature accordingly.
Why isn’t my chicken skin getting crispy?
There are a few common culprits: the skin wasn’t dried thoroughly before cooking, the air fryer basket was overcrowded, or the cooking temperature was too low. Make sure you pat the chicken completely dry with paper towels, leave space between each thigh in the basket, and cook at 400°F or higher. Also, avoid using too much oil — a light coating is all you need.
Can I make this recipe in a conventional oven?
Absolutely. Preheat your oven to 425°F (220°C) with the convection setting on if available. Place the seasoned chicken thighs on a wire rack set over a baking sheet (this allows air to circulate underneath). Bake for 25-30 minutes, flipping halfway through, until the internal temperature reaches 175-180°F. The skin won’t be quite as crispy as the air fryer version, but it’s still delicious.
How do I prevent the chicken from sticking to the air fryer basket?
Make sure you lightly oil both the chicken and the air fryer basket. I spray the basket with a little avocado oil spray before adding the chicken. Also, don’t move the chicken around during the first 12 minutes — let it cook undisturbed so the skin can crisp and naturally release from the basket. If it’s sticking, it probably needs another minute or two before flipping.
Can I marinate the chicken beforehand?
Yes, but be careful with marinades that contain sugar or acid (like lemon juice or vinegar), as they can burn at high temperatures. If you want to marinate, do it for 2-4 hours, then pat the chicken dry before seasoning and cooking. For best results, stick with dry rubs or oil-based marinades. If you’re looking for another easy dinner idea, check out our harissa lamb meatballs for a completely different flavor profile that also comes together in under 30 minutes.
Pin This Recipe!

Crispy Air Fryer Chicken Thighs: Easy No Breading Recipe

These crispy air fryer chicken thighs (no breading) come together in under 30 minutes, using simple ingredients for shatteringly crisp skin and juicy meat. A foolproof weeknight dinner that will convert even the biggest skeptics.
- Prep Time: 15 minutes
- Cook Time: 22-24 minutes
- Total Time: 37-39 minutes
- Yield: 4 servings 1x
- Category: Main Course
- Cuisine: American
Ingredients
- 4–6 bone-in, skin-on chicken thighs (about 2 pounds)
- 1–2 tablespoons avocado oil (or grapeseed oil, light olive oil)
- 1 teaspoon kosher salt (or 3/4 teaspoon table salt)
- 1/2 teaspoon freshly ground black pepper
- 1 teaspoon garlic powder
- 1/2 teaspoon onion powder
- 1 teaspoon paprika (sweet or smoked)
- Optional: 1/4 teaspoon cayenne pepper, 1/2 teaspoon dried thyme, 1 teaspoon Italian seasoning
Instructions
- Pat the chicken thighs completely dry with paper towels. For best results, place on a wire rack over a baking sheet and refrigerate uncovered for 2-4 hours to dry the skin further.
- In a small bowl, mix together the kosher salt, black pepper, garlic powder, onion powder, and paprika.
- Drizzle the avocado oil over the chicken thighs and rub it in evenly. Sprinkle the seasoning mixture over both sides of each thigh, getting some under the skin if possible.
- Preheat the air fryer to 400°F (200°C) for 3-5 minutes.
- Place the seasoned chicken thighs skin-side down in the air fryer basket in a single layer with space between each piece. Cook in batches if necessary.
- Air fry at 400°F for 12 minutes. Carefully flip the thighs using tongs and cook for another 10-12 minutes, until the internal temperature reaches 175-185°F (aim for 180°F).
- Remove the chicken from the air fryer and let rest for 5 minutes before serving.
Notes
For extra-crispy skin, after flipping at the 12-minute mark, increase the temperature to 420°F for the remaining cooking time. Do not overcrowd the basket—leave at least half an inch between thighs. If using a conventional oven, bake at 425°F on a wire rack for 25-30 minutes, flipping halfway.
Nutrition
- Serving Size: 1 chicken thigh
- Calories: 320350
- Sodium: 500600
- Fat: 2225
- Saturated Fat: 67
- Carbohydrates: 12
- Protein: 2830
Keywords: air fryer chicken thighs, crispy chicken thighs, no breading chicken, easy chicken recipe, weeknight dinner, gluten-free chicken, keto chicken


