My husband took a bite, stopped chewing, and just looked at the fork for a second. That’s the kind of quiet reaction that tells you more than any compliment ever could. He asked for a second slice before he’d even finished the first, which honestly, never happens with pumpkin desserts in our house. I’d been tinkering with this creamy no-bake pumpkin pie with gingersnap crust for weeks, trying to get that perfect set without turning on the oven, and watching him go back for more felt like a small victory.
The thing about no-bake pies is they can sometimes feel heavy or overly rich, you know? But this one has this light, mousse-like texture that just melts. It’s not too sweet either, which is my biggest pet peeve with most pumpkin desserts. The gingersnap crust adds this warm, spicy crunch that makes every bite interesting. I wasn’t trying to reinvent the wheel—I just wanted a pumpkin pie that didn’t require me to babysit an oven for hours during the busy holiday season.
This recipe honestly started because I had a can of pumpkin puree staring at me from the pantry and a serious aversion to turning on the oven during an unseasonably warm October afternoon. Sometimes the best recipes come from pure laziness, and I’m not ashamed to admit it. The first version was good, but the second version—the one with the slightly adjusted cream cheese ratio and that extra pinch of cinnamon—that’s the one that made him stop chewing.
Why You’ll Love This Recipe
Let me tell you why this creamy no-bake pumpkin pie with gingersnap crust has earned a permanent spot in my holiday rotation. It’s not just another pumpkin pie recipe—it’s the one that solves all your Thanksgiving dessert problems without adding stress to your day.
- No Oven Required : Your oven is already working overtime with the turkey and sides. This pie chills in the fridge while everything else bakes, freeing up precious space and time.
- Simple Ingredients : You probably have most of these in your kitchen right now. Cream cheese, pumpkin puree, whipped topping, and a few spices—that’s really all it takes.
- Make-Ahead Friendly : This pie actually gets better after sitting overnight. Make it a day or two before your gathering and cross one thing off your to-do list.
- Crowd-Pleaser : I’ve served this to pumpkin pie purists and skeptics alike, and it disappears every single time. Even my friend who claims she “doesn’t like pumpkin” asked for the recipe.
- Unbelievably Creamy : The texture is what sets this apart. It’s silky smooth without being heavy, like a cloud made of pumpkin spice.
What makes this different from all those other no-bake pumpkin pies out there? It’s the cream cheese base that gives it structure without making it dense. Most recipes use too much cream cheese and end up tasting like cheesecake, or they skip it entirely and end up with a wobbly mess. This version hits that sweet spot where you get the richness of pumpkin pie with the lightness of a mousse. It’s comfort food reimagined—easier, faster, but with the same soul-soothing satisfaction that makes you close your eyes after the first bite.
What Ingredients You Will Need
This creamy no-bake pumpkin pie with gingersnap crust uses simple, wholesome ingredients to deliver that bold pumpkin flavor and silky texture without any fuss. Most of these are pantry staples, especially during the fall baking season.
- Gingersnap cookies – About 2 cups crushed (roughly 40 cookies). I prefer Nabisco brand for their consistent crunch and spice level. You want a fine crumb, almost like sand, for the best crust texture.
- Unsalted butter – 6 tablespoons, melted. Using unsalted lets you control the salt level in the crust. If you only have salted butter, just skip adding any extra salt.
- Granulated sugar – 2 tablespoons, for the crust. This balances the spicy gingersnaps and helps the crust hold together better.
- Cream cheese – 8 ounces (one block), softened to room temperature. This is crucial for that creamy texture. Philadelphia brand gives the smoothest results, but any full-fat block cream cheese works.
- Pumpkin puree – 1 cup (not pumpkin pie filling). Libby’s is my go-to because it’s consistently thick and not watery. Look for 100% pure pumpkin on the label.
- Powdered sugar – 1/2 cup, sifted if you have the patience. It dissolves more easily than granulated and keeps the filling silky smooth.
- Pumpkin pie spice – 1 teaspoon. You can use store-bought or make your own with cinnamon, nutmeg, ginger, and cloves. I actually prefer making my own blend because I like extra cinnamon.
- Vanilla extract – 1 teaspoon. Pure vanilla makes a difference here, but imitation works in a pinch.
- Whipped topping – 1 1/2 cups (like Cool Whip), thawed. This is what gives the pie its light, airy texture. Homemade whipped cream works too, but it won’t hold its shape as long.
- Optional garnish – Extra whipped cream, a sprinkle of cinnamon, and a few crushed gingersnaps for that pretty presentation.
For the best results, make sure your cream cheese is truly at room temperature. Cold cream cheese will leave you with lumpy filling, and nobody wants that. I usually take it out of the fridge about an hour before I start baking—or in this case, before I start mixing!
Equipment Needed
You don’t need fancy equipment for this creamy no-bake pumpkin pie with gingersnap crust, which is part of why I love it so much. Here’s what you’ll need:
- 9-inch pie plate – A standard glass or ceramic pie dish works perfectly. I’ve used my grandmother’s old Pyrex dish for years, and it’s never let me down.
- Food processor or zip-top bag – For crushing the gingersnaps. A food processor gives the most consistent crumbs, but a rolling pin and a sturdy zip-top bag work just as well. It’s actually kind of therapeutic to smash them manually.
- Electric mixer – A hand mixer or stand mixer works for the filling. You could technically whisk by hand, but your arm will thank you for using a mixer.
- Measuring cups and spoons – Standard set for accurate measurements. I cannot stress enough how important precise measuring is for no-bake recipes.
- Spatula – A rubber spatula for scraping the bowl clean and smoothing the filling into the crust.
- Plastic wrap – For covering the pie while it chills. Press it directly onto the surface to prevent a skin from forming.
If you don’t have a food processor, don’t let that stop you. I’ve made this crust countless times using the bag-and-rolling-pin method, and it turns out great every time. The crumbs might be a little more uneven, but that just adds character.
Preparation Method
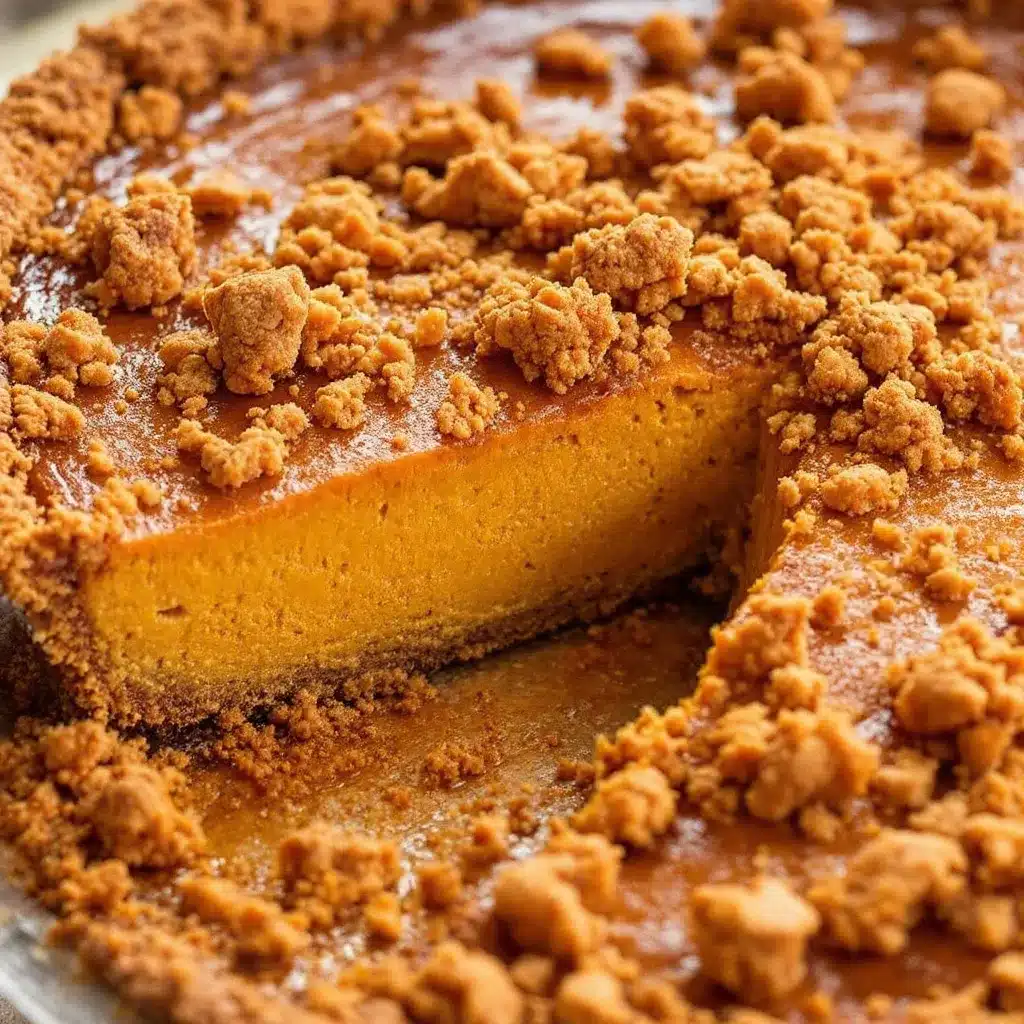
Making this creamy no-bake pumpkin pie with gingersnap crust is surprisingly straightforward. Let me walk you through each step so you get perfect results every time.
- Make the crust – Start by crushing your gingersnap cookies into fine crumbs. If using a food processor, pulse until you have about 2 cups of fine crumbs. If using the bag method, place cookies in a zip-top bag and go to town with a rolling pin. Transfer crumbs to a medium bowl, add the melted butter and 2 tablespoons of granulated sugar, and stir until everything looks like wet sand. Press this mixture firmly into your 9-inch pie plate, making sure to go up the sides. Use the bottom of a measuring cup to really pack it down—this prevents your crust from falling apart later. Pop it in the fridge while you make the filling.
- Soften the cream cheese – This step matters more than you think. Take your cream cheese out of the fridge about an hour before starting. If you forgot, cut it into small cubes and microwave it in 10-second bursts until it’s soft but not melting. You want it to give slightly when you press it.
- Beat the cream cheese – In a large bowl, beat the softened cream cheese with an electric mixer until it’s completely smooth and fluffy, about 2 minutes. Scrape down the sides of the bowl at least once. Any lumps here will show up in your final pie, so take your time.
- Add the pumpkin and sugar – Add the pumpkin puree, powdered sugar, pumpkin pie spice, and vanilla extract to the cream cheese. Beat on medium speed until everything is well combined and smooth, about 1-2 minutes. The mixture should be a beautiful orange color and smell like fall in a bowl.
- Fold in the whipped topping – This is where the magic happens. Gently fold in the thawed whipped topping using a spatula. Don’t just stir it in—use a folding motion, cutting through the center and bringing the mixture up from the bottom. This keeps all that air in the whipped topping, which is what gives your pie its light, mousse-like texture. Fold until you don’t see any white streaks, but don’t overmix.
- Fill the crust – Pour the filling into your chilled gingersnap crust. Use your spatula to spread it evenly, smoothing the top as much as possible. Give the pie plate a gentle tap on the counter to release any air bubbles.
- Chill – Cover the pie loosely with plastic wrap and refrigerate for at least 6 hours, but overnight is better. I know it’s tempting to dig in sooner, but the pie needs that time to set properly. The filling will be soft and sliceable after 6 hours, but 24 hours gives you those clean, beautiful slices.
- Garnish and serve – Before serving, add a dollop of whipped cream, a sprinkle of cinnamon, and some crushed gingersnaps on top. This pie is best served cold, straight from the fridge.
One thing I learned the hard way—don’t rush the chilling time. The first time I made this, I was impatient and tried to serve it after only 4 hours. The slices were a mess, and the crust crumbled everywhere. Trust the process, friends. Your patience will be rewarded.
Cooking Tips & Techniques
After making this creamy no-bake pumpkin pie with gingersnap crust more times than I care to count, I’ve picked up a few tricks that make a real difference.
Don’t skip the crust pressing step. I cannot tell you how many times I’ve been lazy about really packing the crust down, only to have it fall apart when I tried to serve the pie. Use the bottom of a measuring cup or a flat-bottomed glass and really apply some pressure. The crust should feel solid, not crumbly, when you’re done.
Temperature matters more than you think. Cold cream cheese equals lumpy filling, and over-softened cream cheese equals runny filling. Aim for that Goldilocks zone where it’s soft but still holds its shape. If your kitchen is cold, give it extra time on the counter. If it’s warm, check it after 45 minutes.
Here’s a mistake I made more than once: adding the whipped topping too aggressively. I used to just stir it in like I was making cake batter, and the pie would come out dense and heavy. The folding motion is actually important here. You want to preserve those air bubbles that make the filling light and fluffy.
For the cleanest slices, use a sharp knife dipped in hot water. Wipe the blade dry between cuts, and you’ll get those Instagram-worthy slices every time. This works for any no-bake pie, not just this one.
Multitasking tip: While your crust is chilling in the fridge, make the filling. While the filling is setting up, you can clean up your kitchen or start working on another dish. This pie actually fits beautifully into a busy cooking schedule because most of the work happens in the fridge.
Variations & Adaptations
One of the best things about this creamy no-bake pumpkin pie with gingersnap crust is how adaptable it is. Here are some variations I’ve tried and loved.
Gluten-free version: Swap the gingersnap cookies for gluten-free gingersnaps. Most major brands now offer a gluten-free option, and they work exactly the same way. The texture might be slightly different, but honestly, I couldn’t tell the difference in a blind taste test.
Dairy-free adaptation: Use dairy-free cream cheese (Kite Hill is my favorite) and a coconut-based whipped topping. The flavor changes slightly—you’ll get a hint of coconut—but it’s still delicious. Just make sure your dairy-free cream cheese is softened properly, as it can be a bit firmer than regular cream cheese.
Extra-spicy version: If you’re like me and love that warm, spicy kick, add an extra 1/2 teaspoon of cinnamon and a pinch of cayenne pepper to the filling. The cayenne doesn’t make it spicy in a hot way—it just adds this subtle warmth that lingers in the background. I did this on a whim one Thanksgiving, and now I can’t go back.
Individual servings: Instead of one large pie, make these in small mason jars or ramekins. Layer the crust and filling for a pretty parfait effect. These are perfect for parties where people might want different desserts, and they’re adorable to look at.
Chocolate twist: Melt 2 ounces of dark chocolate and drizzle it over the crust before adding the filling. The chocolate and ginger combination is surprisingly good, and it adds a little something extra for chocolate lovers.
Serving & Storage Suggestions
This creamy no-bake pumpkin pie with gingersnap crust is best served cold, straight from the fridge. I like to take it out about 10 minutes before serving, just to take the chill off slightly, but it should still be firm when you slice it.
Presentation tips: A dollop of freshly whipped cream on each slice makes everything look more intentional. Add a light dusting of cinnamon or pumpkin pie spice, and maybe a whole gingersnap cookie leaning against the slice for that bakery-style presentation. If you’re feeling fancy, drizzle some caramel sauce over the top—the combination of pumpkin, ginger, and caramel is absolutely heavenly.
What to serve with it: This pie pairs beautifully with a hot cup of coffee or spiced apple cider. For a full dessert spread, I love serving it alongside my easy matcha green tea tiramisu parfaits for a fun contrast in flavors. The lightness of the tiramisu parfaits balances the richness of the pumpkin pie perfectly.
Storage: Cover the pie tightly with plastic wrap or transfer slices to an airtight container. It will keep in the refrigerator for up to 5 days, though honestly, it never lasts that long in my house. The flavors actually deepen and meld together after a day or two, so leftovers are even better.
Freezing instructions: This pie freezes beautifully! Wrap the entire pie (or individual slices) tightly in plastic wrap, then in aluminum foil. Freeze for up to 3 months. When you’re ready to serve, thaw it in the refrigerator overnight. The texture will be just as creamy and delicious as the day you made it.
Reheating note: This is a no-bake pie, so you don’t want to heat it up. If you prefer your pumpkin desserts warm, I’d recommend making a spicy Korean Mexican street corn dip for a warm appetizer instead, and saving this pie for the cold, creamy finish to your meal.
Nutritional Information & Benefits
While this creamy no-bake pumpkin pie with gingersnap crust is definitely a treat, it does have some nutritional highlights worth mentioning.
Per slice (based on 8 servings): approximately 320 calories, 18g fat, 35g carbohydrates, 4g protein, 2g fiber, 22g sugar. These are estimates and will vary based on your specific ingredients.
Health highlights: Pumpkin is packed with vitamin A, which is great for your eyesight and immune system. It’s also a good source of fiber, which helps with digestion and keeps you feeling full. The cream cheese adds calcium and protein, while the ginger in the crust has anti-inflammatory properties. So while I wouldn’t call this a health food, it’s certainly not the worst thing you could eat for dessert!
Dietary considerations: This recipe contains dairy (cream cheese, butter, whipped topping) and gluten (gingersnap cookies). It’s vegetarian-friendly. For a gluten-free option, use gluten-free gingersnaps. For a dairy-free option, use dairy-free cream cheese and coconut whipped topping as mentioned in the variations section.
I personally love that this pie feels indulgent without being overly heavy. It’s the kind of dessert that satisfies your sweet tooth without leaving you in a sugar coma, which is exactly what I want after a big holiday meal.
Conclusion
Look, I get it—there are about a million pumpkin pie recipes out there, and most of them are perfectly fine. But this creamy no-bake pumpkin pie with gingersnap crust is something special. It’s the pie that made my husband stop chewing, that won over my pumpkin-skeptic friend, and that has become the most requested dessert at our family gatherings.
What I love most about this recipe is how forgiving it is. You don’t need to be a pastry chef to pull it off. You don’t need to worry about a cracked filling or a soggy crust. It’s practically foolproof, which is exactly what you want when you’re already stressed about hosting a holiday meal. And if you’re looking for other easy crowd-pleasers, my easy cold pepperoni pasta salad is another no-fuss recipe that always gets rave reviews.
So go ahead—give this recipe a try. Customize it however you like, make it your own, and don’t forget to save room for a second slice. I’d love to hear how it turns out for you! Drop a comment below and let me know if your family loved it as much as mine does. And if you come up with a fun variation, please share it—I’m always looking for new ideas to try.
Frequently Asked Questions
Can I use pumpkin pie filling instead of pumpkin puree?
I wouldn’t recommend it. Pumpkin pie filling already has sugar and spices added, which would throw off the sweetness and spice levels in this recipe. Stick with 100% pure pumpkin puree for the best results.
How far in advance can I make this pie?
You can make this pie up to 3 days ahead of time. In fact, it actually tastes better after a day or two because the flavors have time to meld together. Just keep it covered in the refrigerator.
My pie didn’t set properly. What went wrong?
This usually happens for one of three reasons: your cream cheese wasn’t softened enough (leading to lumps that prevent proper setting), your whipped topping wasn’t fully thawed (which adds too much liquid), or you didn’t chill it long enough. Give it at least 6 hours, but overnight is best.
Can I make this into a vegan pie?
Absolutely! Use dairy-free cream cheese, coconut cream (chilled and whipped) instead of Cool Whip, and vegan butter in the crust. Make sure your gingersnaps are vegan-friendly too. The texture will be slightly different, but it’s still delicious.
How do I get clean slices without the crust falling apart?
Make sure you really pack the crust down firmly when you’re making it. Use the bottom of a measuring cup to press it into the pie plate. Also, let the pie chill for the full recommended time—a well-chilled pie slices much more cleanly than one that’s only been in the fridge for a few hours.
Pin This Recipe!
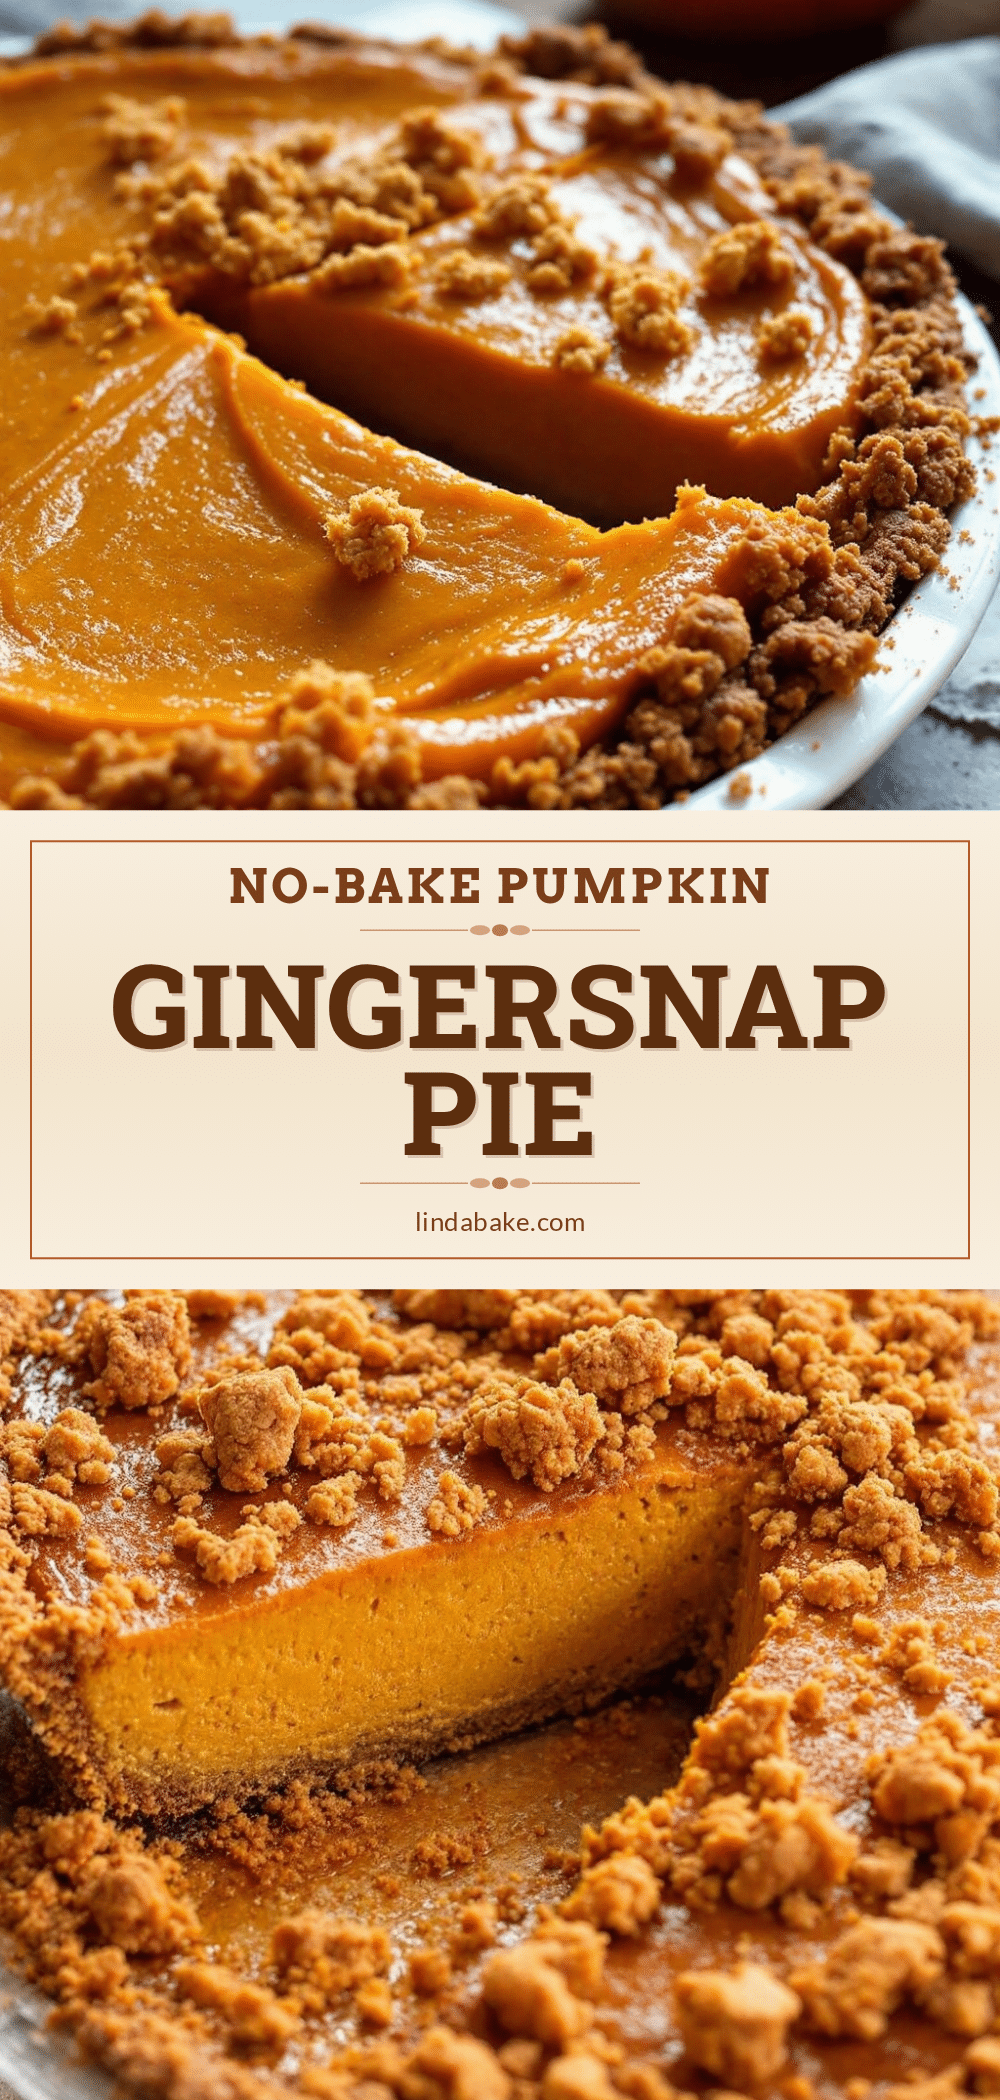
Creamy No-Bake Pumpkin Pie with Easy Gingersnap Crust
A light, mousse-like no-bake pumpkin pie with a crunchy gingersnap crust. Perfect for holiday gatherings, this easy recipe requires no oven and can be made ahead.
- Prep Time: 20 minutes
- Cook Time: 0 minutes
- Total Time: 6 hours 20 minutes (includes chilling)
- Yield: 8 servings 1x
- Category: Dessert
- Cuisine: American
Ingredients
- 2 cups crushed gingersnap cookies (about 40 cookies)
- 6 tablespoons unsalted butter, melted
- 2 tablespoons granulated sugar
- 8 ounces cream cheese, softened to room temperature
- 1 cup pumpkin puree (not pumpkin pie filling)
- 1/2 cup powdered sugar, sifted
- 1 teaspoon pumpkin pie spice
- 1 teaspoon vanilla extract
- 1 1/2 cups whipped topping (like Cool Whip), thawed
- Optional garnish: extra whipped cream, cinnamon, crushed gingersnaps
Instructions
- Make the crust: Crush gingersnap cookies into fine crumbs (about 2 cups). In a medium bowl, combine crumbs with melted butter and 2 tablespoons granulated sugar. Press firmly into a 9-inch pie plate, going up the sides. Use the bottom of a measuring cup to pack it down. Refrigerate while making the filling.
- Soften the cream cheese: Take cream cheese out of fridge about 1 hour before starting, or microwave in 10-second bursts until soft but not melting.
- Beat the cream cheese: In a large bowl, beat softened cream cheese with an electric mixer until smooth and fluffy, about 2 minutes. Scrape down sides.
- Add pumpkin and sugar: Add pumpkin puree, powdered sugar, pumpkin pie spice, and vanilla extract. Beat on medium speed until well combined and smooth, about 1-2 minutes.
- Fold in whipped topping: Gently fold in thawed whipped topping using a spatula, using a folding motion to preserve air bubbles. Fold until no white streaks remain.
- Fill the crust: Pour filling into chilled crust. Spread evenly and smooth the top. Tap pie plate gently on counter to release air bubbles.
- Chill: Cover loosely with plastic wrap and refrigerate for at least 6 hours, preferably overnight.
- Garnish and serve: Before serving, add whipped cream, cinnamon, and crushed gingersnaps. Serve cold.
Notes
Don’t rush the chilling time—at least 6 hours, but overnight is best for clean slices. For gluten-free, use gluten-free gingersnaps. For dairy-free, use dairy-free cream cheese and coconut whipped topping. The pie can be frozen for up to 3 months.
Nutrition
- Serving Size: 1 slice
- Calories: 320
- Sugar: 22
- Sodium: 280
- Fat: 18
- Saturated Fat: 10
- Carbohydrates: 35
- Fiber: 2
- Protein: 4
Keywords: no-bake pumpkin pie, gingersnap crust, pumpkin dessert, Thanksgiving dessert, easy pumpkin pie, no oven pumpkin pie


