“Wait, you didn’t bake that?” Sarah asked, her fork hovering halfway to her mouth. She stared at the square on her plate like it might suddenly sprout legs and run away. The kitchen was quiet except for the hum of the refrigerator and the distant sound of traffic outside. I just smiled and took a bite of the creamy, caramel-swirled treat.
It was one of those rare moments where skepticism turns into pure, unadulterated joy. Sarah had expected a dense, heavy cake. Instead, she got something that melted on her tongue like butter. She looked around the table, then back at me, and said, “You have to teach me how to do this.” And honestly, I couldn’t blame her. This creamy no-bake Biscoff cheesecake bars recipe is the kind of dessert that solves problems.
It solves the problem of not wanting to turn on the oven in July. It solves the problem of needing a dessert that looks fancy but actually takes ten minutes of active effort. It even solves the problem of what to bring to a potluck when you want to impress without sweating. I remember standing there, watching Sarah close her eyes after that first bite. It wasn’t just good. It was the kind of good that makes you forget about your diet for at least an hour.
That night, the recipe stopped being just my secret weapon. It became a shared experience. We talked about how easy it was, how simple the ingredients were, and how much better it tasted than anything from a store. I realized then that this wasn’t just about sugar and cream cheese. It was about connection. It was about bringing people together over something sweet and simple. If you make this, you’ll understand why it stuck with me. It’s not just a recipe; it’s a memory maker.
Why You’ll Love This Recipe
Let’s be honest for a second. Not all desserts are created equal. Some are too heavy, some are too sweet, and some just leave you feeling sluggish. This creamy no-bake Biscoff cheesecake bars recipe hits that perfect sweet spot that keeps you coming back for more. I’ve tested this version dozens of times, tweaking the ratios and the techniques, until I landed on what I can confidently say is the best version out there. It’s not just another copycat attempt; it’s an upgrade.
- Quick & Easy: You won’t believe how fast this comes together. With no baking required, you’re looking at about 15 minutes of prep time before it needs to chill. It’s perfect for those busy weeknights when you want a treat but don’t have hours to spare.
- Simple Ingredients: You probably have most of this in your kitchen already. Cream cheese, butter, sugar, and Biscoff cookies. No fancy grocery trips needed. It’s accessible, practical, and surprisingly delicious.
- Perfect for Any Occasion: Whether it’s a last-minute dinner party, a holiday gathering, or just a Tuesday night craving, these bars fit the bill. They hold their shape well, making them great for potlucks or office treats.
- Crowd-Pleaser: Kids love the sweetness, and adults appreciate the sophisticated, slightly spicy notes of the speculoos cookies. It’s a crowd-pleaser that gets rave reviews from everyone, regardless of age.
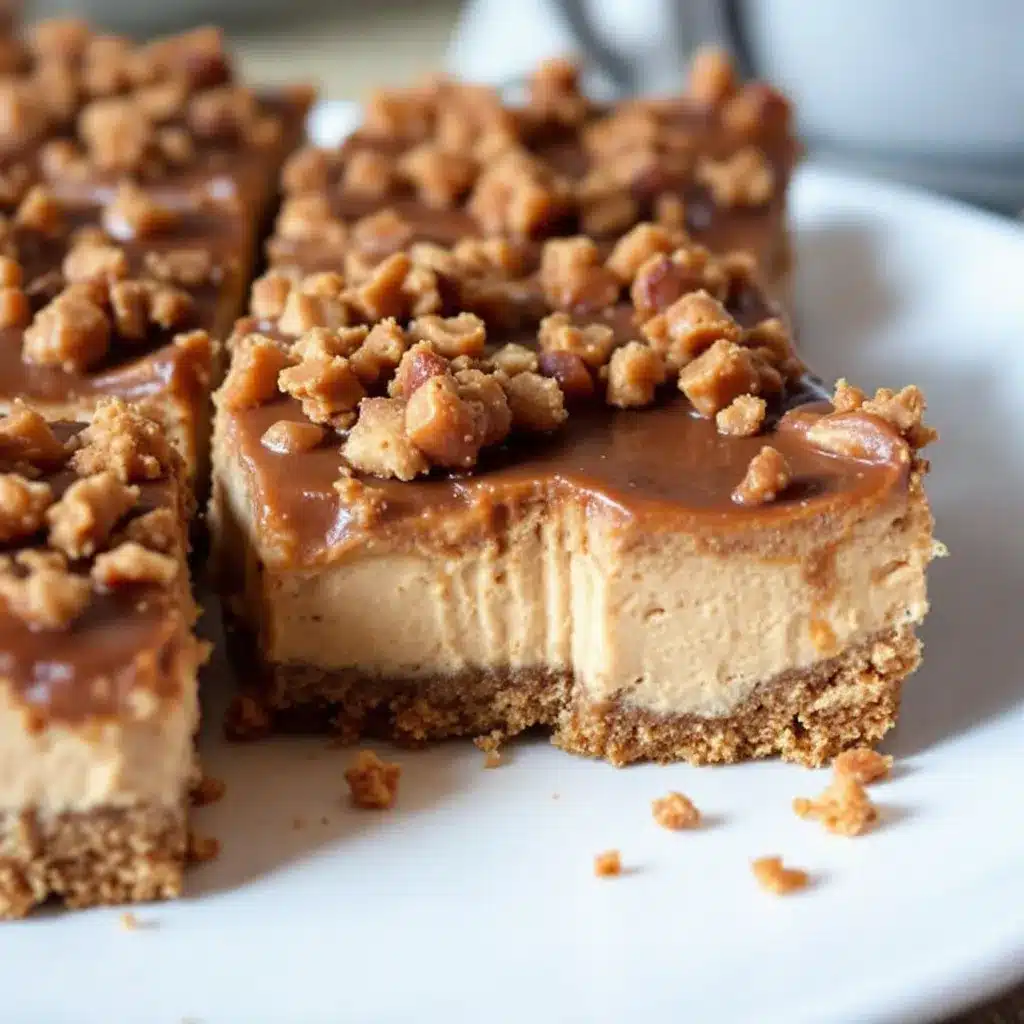
- Unbelievably Delicious: The texture is silky, smooth, and rich. The crunch from the crust provides a nice contrast to the soft filling. It’s comfort food reimagined—richer than a standard cheesecake but lighter on the stomach.
What makes this recipe different from the rest is the balance. Many no-bake recipes can taste too icy or overly sweet. By using softened cream cheese and whipping it correctly, we get a texture that rivals traditional baked cheesecake. Plus, the Biscoff spread adds a depth of flavor that plain cookie crumbs just can’t match. It’s the kind of dessert that makes you close your eyes after the first bite. It’s soul-soothing satisfaction in a square.
What Ingredients You Will Need
This recipe relies on a handful of high-quality, simple ingredients to deliver bold flavor and satisfying texture without the fuss. The magic here lies in the quality of the Biscoff products and the cream cheese. Don’t skimp on the butter, either—it’s what gives the crust its rich, shortbread-like quality. Let’s break down what you need and why each component matters.
For the Crust
- Biscoff Cookies: About 2 cups of crushed cookies. I recommend using Lotus Biscoff Speculoos cookies because they have the perfect balance of cinnamon, ginger, and caramel. You can find them in most grocery stores now, usually in the cookie aisle.
- Unsalted Butter: 1/2 cup (115g), melted. Using unsalted butter allows you to control the saltiness. If you only have salted butter, reduce any added salt in the recipe.
- Granulated Sugar: 2 tablespoons. This helps bind the crust and adds a bit of sweetness to complement the spicy cookies.
For the Cheesecake Filling
- Full-Fat Cream Cheese: 16 oz (450g), softened to room temperature. This is crucial. If the cream cheese is cold, you’ll get lumps. I use Philadelphia brand because it has a consistent texture and melts smoothly. Look for bricks, not tubs, as tubs often contain additives that affect the texture.
- Heavy Whipping Cream: 1 cup (240ml), cold. This provides the light, airy structure. It must be cold to whip properly.
- Biscoff Cookie Butter (Spread): 1/2 cup (120g). This is the star of the show. It adds the signature flavor and a lovely swirl pattern. Make sure it’s smooth; if it’s separated, stir it well before measuring.
- Confectioners’ Sugar: 1 cup (120g). This dissolves easily into the cream cheese mixture, ensuring no gritty sugar crystals remain in your bars.
- Vanilla Extract: 1 teaspoon. Pure vanilla adds warmth and rounds out the spices in the Biscoff spread.
- Salt: A pinch. Just a small pinch to balance the sweetness.
If you need substitutions, you can use dairy-free cream cheese alternatives, though the texture might be slightly different. For the cookies, you can make your own speculoos if you’re feeling ambitious, but store-bought is totally fine. In summer, fresh berries make a great topping, but they aren’t necessary for the recipe itself.
Equipment Needed
You don’t need a lot of fancy gadgets to make these bars. In fact, keeping it simple is part of the appeal. Here is what you’ll need to get started.
- 9×9 Inch Baking Pan: A standard square pan works best. Line it with parchment paper, leaving an overhang on the sides. This is the secret to easy removal. You don’t want to be digging it out with a spatula.
- Food Processor or Ziplock Bag: To crush the cookies. A food processor makes quick work of it, but if you don’t have one, put the cookies in a heavy-duty ziplock bag and crush them with a rolling pin. It’s good exercise, honestly.
- Mixer: A hand mixer or stand mixer is helpful for whipping the cream cheese and heavy cream. Doing this by hand is possible but requires serious arm strength. I learned this the hard way one time. Don’t be like me.
- Spatula: A rubber spatula is essential for folding the ingredients together without deflating the mixture.
- Knife: A sharp chef’s knife for cutting the bars. Dip it in hot water between cuts for clean edges.
If you don’t have a 9×9 pan, you can use an 8×8 pan, but the bars will be thicker. You might need to adjust the chilling time. Also, having a good non-stick pan helps, but the parchment paper is your real best friend here.
Preparation Method
Making these bars is straightforward, but attention to detail makes all the difference. Follow these steps closely for the best results.
- Prepare the Pan: Line your 9×9 inch baking pan with parchment paper. Leave an overhang on the long sides so you can lift the bars out later. Spray the parchment with non-stick spray for extra insurance.
- Crush the Cookies: Place the Biscoff cookies in a food processor. Pulse until they resemble fine sand. If using a bag, crush them until there are no large chunks left. You want a uniform texture for the crust.
- Make the Crust: In a medium bowl, mix the cookie crumbs, melted butter, and sugar. Stir until the mixture looks like wet sand. Press this mixture firmly into the bottom of the prepared pan. Use the bottom of a glass to pack it down tightly. A loose crust will crumble when you cut it.
- Whip the Cream: In a large bowl, beat the cold heavy cream until stiff peaks form. This means when you lift the beaters, the cream stands up straight. Be careful not to over-whip it into butter.
- Beat the Cream Cheese: In a separate bowl, beat the softened cream cheese, confectioners’ sugar, vanilla extract, and salt until smooth and creamy. This should take about 2-3 minutes. Scrape down the sides of the bowl to ensure everything is incorporated.
- Combine: Gently fold the whipped cream into the cream cheese mixture. Do this in two additions. Use a spatula and fold gently from the bottom up. You want to keep as much air in the mixture as possible for that light, fluffy texture.
- Add the Biscoff Spread: Stir the Biscoff cookie butter into the cheesecake mixture until fully combined. The mixture should be a uniform light brown color.
- Assemble: Pour the filling over the crust. Smooth the top with a spatula. If you want a swirled effect, dollop extra Biscoff spread on top and drag a knife through it. It looks beautiful and adds extra flavor.
- Chill: Cover the pan with plastic wrap and refrigerate for at least 4 hours, but overnight is best. The longer it chills, the firmer it sets and the better the flavors meld.
- Cut and Serve: Once set, lift the bars out of the pan using the parchment overhang. Use a sharp knife to cut into squares. Clean the knife between cuts for neat edges.
The total active time is about 20 minutes. The rest is waiting. And waiting is the hardest part.
Cooking Tips & Techniques
Even though this is a no-bake recipe, there are techniques that can save you from common pitfalls. I’ve made my fair share of mistakes, so you don’t have to.
First, room temperature cream cheese is non-negotiable. If it’s cold, you will get lumps. Plan ahead and take it out of the fridge at least an hour before you start. If you’re in a rush, you can microwave it in 5-second bursts, but watch it closely. You don’t want it to melt.
Second, don’t skip the stiff peaks when whipping the cream. If your whipped cream is soft, your cheesecake filling will be runny and won’t hold its shape. The structure of the dessert relies on the air bubbles in the whipped cream.
Third, pressing the crust firmly is key. I’ve seen people press it lightly, and then the crust falls apart when sliced. Pack it in like you mean it. It should feel solid.
Also, be gentle when folding. Over-mixing can deflate the cream, leading to dense bars. You want a light, airy texture. Fold until just combined.
Finally, patience during the chilling phase. If you cut it too soon, it will be messy. Let it set completely. The flavors also improve after a day in the fridge, so if you can wait, do it.
Variations & Adaptations
While the classic version is my favorite, there are ways to tweak this recipe to suit your tastes or dietary needs.
- Gluten-Free Option: Use gluten-free Biscoff-style cookies or any gluten-free shortbread cookies. Make sure to check the label on the cookie butter as well, as some brands may contain gluten.
- Dairy-Free Version: Substitute the cream cheese with a dairy-free alternative like Tofutti or Miyoko’s. Use coconut cream instead of heavy whipping cream. Note that the texture will be slightly different, but still delicious.
- Extra Crunch: Add chopped nuts to the crust. Pecans or walnuts pair beautifully with the cinnamon flavor of the Biscoff cookies.
- Fruit Swirl: Add a layer of raspberry or strawberry jam between the crust and the filling. The tartness cuts through the richness of the cheesecake.
- Chocolate Twist: Drizzle melted chocolate over the top before chilling. It adds a nice contrast to the caramel flavor.
I once tried adding a layer of peanut butter in the middle, and it was amazing. The saltiness of the peanut butter balanced the sweetness perfectly. Don’t be afraid to experiment.
Serving & Storage Suggestions
These bars are best served chilled. They taste incredible straight from the fridge. You can serve them with a dollop of whipped cream and a few fresh berries for a pop of color and freshness.
They pair well with a cup of hot coffee or tea. The spices in the Biscoff cookies complement the warmth of the beverage. They are also a great addition to a dessert charcuterie board.
For storage, keep the bars in an airtight container in the refrigerator for up to 5 days. They actually taste better on day two as the flavors meld. You can also freeze them. Wrap individual bars in plastic wrap and then place them in a freezer-safe bag. They will keep for up to 3 months. Thaw them in the fridge overnight before serving.
To reheat, I don’t recommend it. These bars are best enjoyed cold. If you must, let them sit at room temperature for 10 minutes to soften slightly.
Nutritional Information & Benefits
While this is a dessert and should be enjoyed in moderation, it’s good to know what you’re eating. Each bar contains approximately 250 calories, with 15g of fat, 25g of carbohydrates, and 4g of protein.
The cream cheese provides calcium and protein. The Biscoff cookies offer some iron and B vitamins, though they are high in sugar. Using full-fat ingredients helps with satiety, so you might find yourself eating less than you think.
For those with dietary restrictions, remember to check labels for allergens. This recipe contains dairy, gluten, and potentially nuts depending on your cookie choice. Always verify with specific brands.
From a wellness perspective, I believe in balance. Enjoying a rich, creamy dessert like this can bring joy and comfort. It’s about savoring the moment rather than counting every calorie. Treat yourself, but do it mindfully.
Conclusion
This creamy no-bake Biscoff cheesecake bars recipe is more than just a dessert. It’s a testament to the power of simple ingredients and thoughtful preparation. It’s easy, it’s delicious, and it’s sure to become a staple in your recipe rotation.
I encourage you to try it and make it your own. Add your favorite toppings, adjust the sweetness, or share it with friends. The best part of cooking is sharing it with others.
If you make this recipe, please leave a comment below. I love hearing how it turned out for you. Share your photos on social media and tag me. Let’s inspire each other to cook and create.
Thank you for reading. I hope this recipe brings you as much joy as it has brought me. Happy baking—or rather, happy no-baking!
Frequently Asked Questions
Can I use a different type of cookie?
Yes, you can use any shortbread or ginger snap cookies. However, Biscoff cookies have a unique spiced caramel flavor that is hard to replicate. If you use a different cookie, the taste will be different but still good.
Do I have to use heavy cream?
Heavy cream is used to create the light, airy texture. If you don’t have it, you can try using Greek yogurt, but the texture will be denser and tangier. It won’t be as fluffy.
Can I make these bars ahead of time?
Absolutely. In fact, making them a day ahead is recommended. They taste better after the flavors have had time to meld in the fridge.
How do I store leftover bars?
Store them in an airtight container in the refrigerator for up to 5 days. You can also freeze them for up to 3 months.
Why is my cheesecake runny?
This usually happens if the cream cheese wasn’t softened enough, the whipped cream was over-mixed, or the bars weren’t chilled long enough. Make sure to follow the chilling time carefully.
Pin This Recipe!
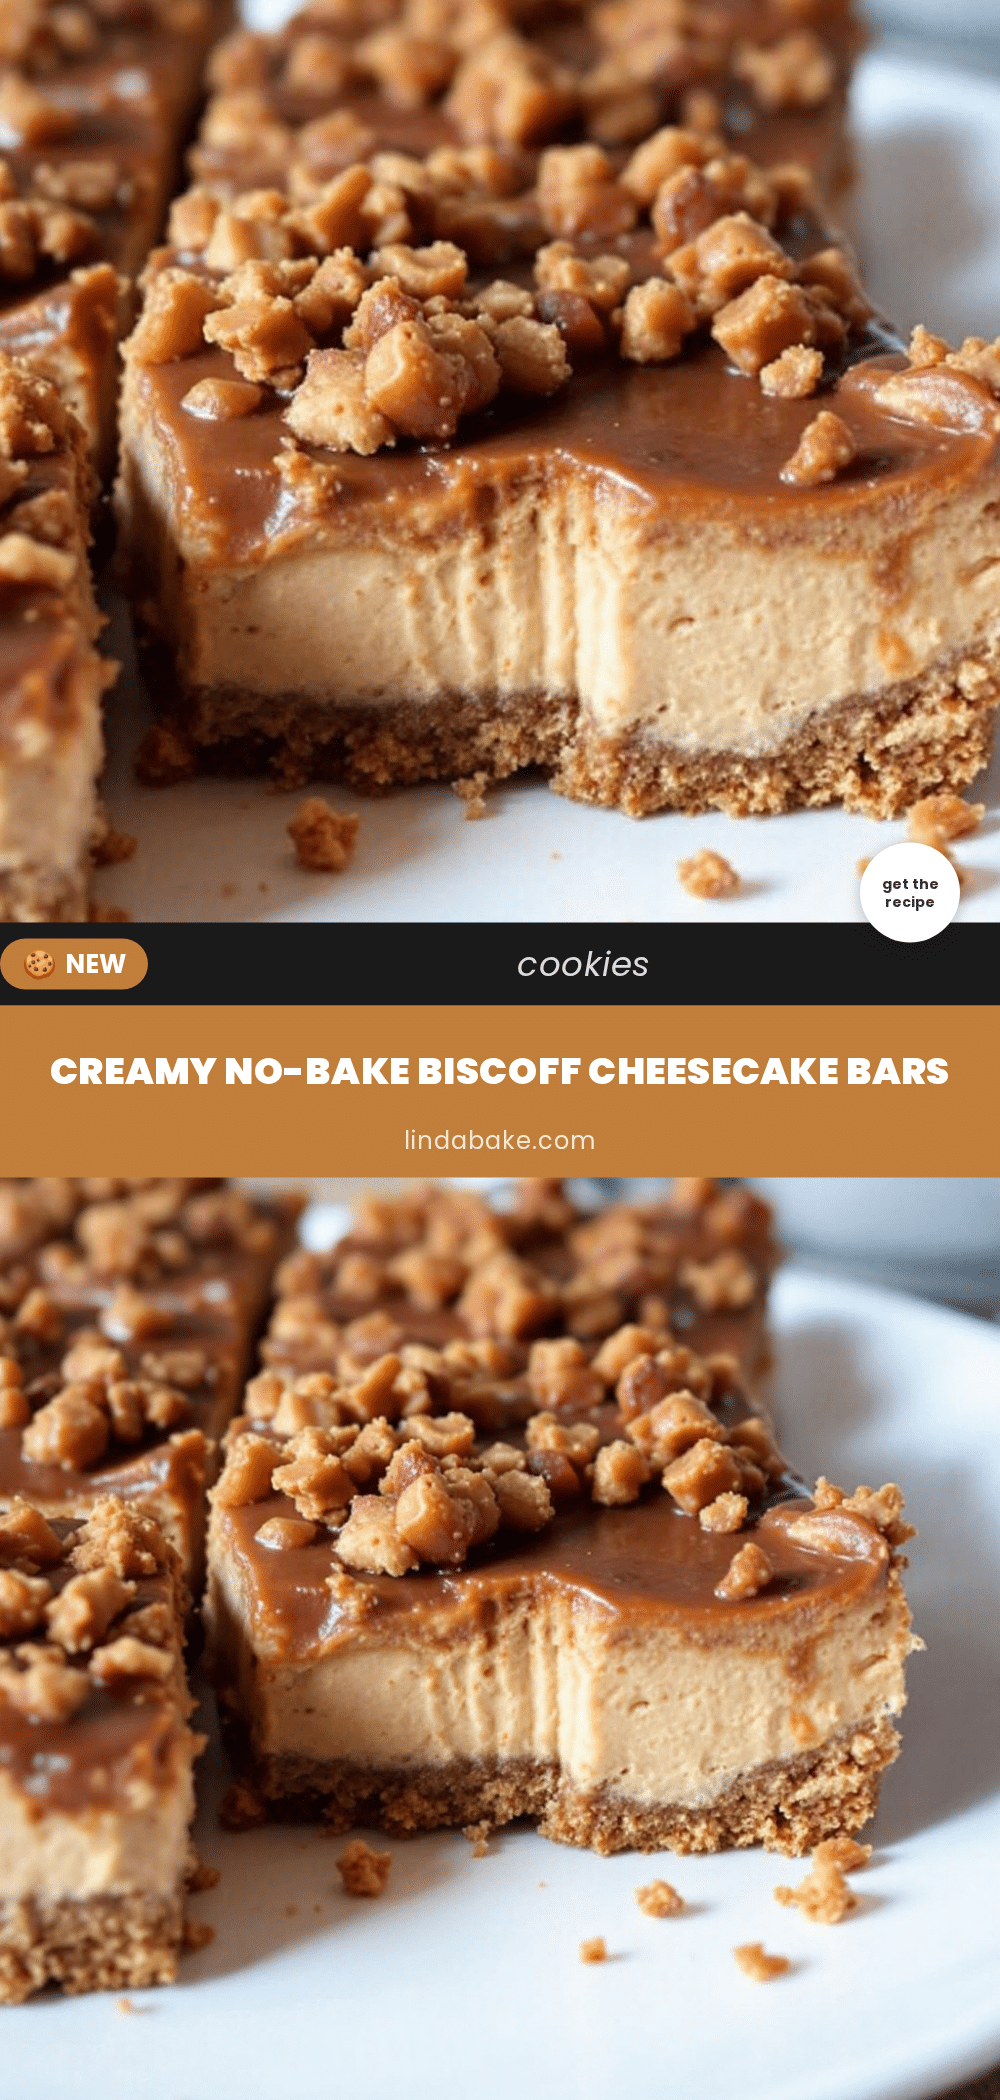
Creamy No-Bake Biscoff Cheesecake Bars
A rich, creamy, and no-bake dessert featuring a crunchy Biscoff cookie crust and a smooth, whipped cream cheese filling swirled with cookie butter. Perfect for busy weeknights or potlucks.
- Prep Time: 15 minutes
- Cook Time: 0 minutes
- Total Time: 4 hours 15 minutes
- Yield: 16 servings 1x
- Category: Dessert
- Cuisine: American
Ingredients
- 2 cups Biscoff Cookies (crushed)
- 1/2 cup (115g) Unsalted Butter (melted)
- 2 tablespoons Granulated Sugar
- 16 oz (450g) Full-Fat Cream Cheese (softened)
- 1 cup (240ml) Heavy Whipping Cream (cold)
- 1/2 cup (120g) Biscoff Cookie Butter (Spread)
- 1 cup (120g) Confectioners’ Sugar
- 1 teaspoon Vanilla Extract
- A pinch of Salt
Instructions
- Line a 9×9 inch baking pan with parchment paper, leaving an overhang on the sides, and spray with non-stick spray.
- Crush the Biscoff cookies in a food processor or ziplock bag until they resemble fine sand.
- In a medium bowl, mix the cookie crumbs, melted butter, and sugar until it resembles wet sand.
- Press the crust mixture firmly into the bottom of the prepared pan using the bottom of a glass.
- In a large bowl, beat the cold heavy cream until stiff peaks form.
- In a separate bowl, beat the softened cream cheese, confectioners’ sugar, vanilla extract, and salt until smooth and creamy.
- Gently fold the whipped cream into the cream cheese mixture in two additions.
- Stir the Biscoff cookie butter into the cheesecake mixture until fully combined.
- Pour the filling over the crust and smooth the top. Optionally, dollop extra Biscoff spread on top and swirl with a knife.
- Cover with plastic wrap and refrigerate for at least 4 hours, or overnight.
- Lift the bars out of the pan using the parchment overhang and cut into squares with a sharp knife.
Notes
Ensure cream cheese is softened to room temperature to avoid lumps. Whip heavy cream to stiff peaks for proper structure. Press the crust firmly to prevent crumbling. For clean cuts, dip the knife in hot water between slices. Bars taste better after sitting in the fridge overnight.
Nutrition
- Serving Size: 1 bar
- Calories: 250
- Sugar: 18
- Sodium: 180
- Fat: 15
- Saturated Fat: 9
- Carbohydrates: 25
- Fiber: 1
- Protein: 4
Keywords: Biscoff, cheesecake, no-bake, dessert, cookie butter, Lotus, easy recipe, potluck, crowd-pleaser


