Late October, and the only thing I want is a pan of these brown butter pumpkin bars. The kitchen is dark except for the stove light, and I’m standing there watching butter foam and turn amber in a saucepan. It’s a quiet ritual I’ve come to depend on—the way the nutty smell fills the house and tells everyone something good is happening. I didn’t grow up making these bars. I stumbled onto the idea after a failed attempt at pumpkin pie left me with half a can of puree and a stubborn refusal to let it go to waste.
That first batch was fine. Edible, even. But they were missing that deep, almost toasty flavor that makes you close your eyes after the first bite. So I started playing around. I browned the butter (because why not?), swapped in a little extra cinnamon, and added a pinch of cloves that my grandmother used to put in everything. The cream cheese frosting came later, after I realized these bars needed something tangy to cut through the sweetness.
Now I make them every fall, sometimes twice if I’m being honest. They’re the kind of dessert that doesn’t demand attention—it just sits there on the counter, and suddenly half the pan is gone. The recipe has stuck because it’s simple enough for a Tuesday night but impressive enough for a Thanksgiving table. And honestly, that brown butter smell is worth the extra five minutes. You can trust me on that.
Why You’ll Love This Recipe
I’ve tested this recipe more times than I’d like to admit. The first few batches were dry, or too dense, or the frosting slid off like it had somewhere better to be. But after trial and error—and a few overly honest comments from my family—I landed on a version that actually works. These brown butter pumpkin bars are the kind of dessert that disappears fast, and here’s why people keep coming back for more.
- Quick & Easy : From start to finish, you’re looking at about 45 minutes. That includes cooling time. No complicated steps, no stand mixer required.
- Simple Ingredients : You probably have most of this in your pantry right now. Pumpkin puree, flour, sugar, eggs, butter, and cream cheese. No fancy grocery trips needed.
- Perfect for Fall Gatherings : These bars are great for potlucks, Thanksgiving dessert tables, or just a cozy weekend treat. They travel well and don’t need refrigeration until after you slice them.
- Crowd-Pleaser : I’ve brought these to three different events this season, and every single time someone asks for the recipe. Kids love them. Adults love them. Even my picky uncle who “doesn’t do pumpkin” ate two.
- Unbelievably Delicious : The brown butter adds a nutty, caramel-like depth that regular butter just can’t match. Paired with the tangy cream cheese frosting, it’s the kind of flavor combination that feels way more sophisticated than it actually is.
What makes this recipe different from the rest is the technique. Most pumpkin bar recipes are fine, but they lack that something. Browning the butter is a small step that changes everything. It takes maybe five extra minutes, and the payoff is huge. Plus, the cream cheese frosting is perfectly balanced—not too sweet, not too tangy, just right.
This isn’t just another pumpkin dessert. It’s the one you’ll make every year, the one people will ask you to bring, the one that makes you look like you spent hours in the kitchen when you really didn’t. That’s the kind of recipe worth keeping around.
What Ingredients You Will Need
This recipe uses simple, wholesome ingredients to deliver bold flavor and satisfying texture without the fuss. Most of these are pantry staples, and the ones that aren’t are easy to find at any grocery store. Here’s what you’ll need and why each one matters.
- Unsalted butter, 1 cup (2 sticks, 226g) — Browning the butter is the secret here. Unsalted gives you control over the salt level. I prefer Kerrygold for its richer flavor, but any good-quality butter works.
- All-purpose flour, 2 cups (250g) — Provides structure. Spoon and level it for accuracy—scooping directly from the bag packs in too much.
- Granulated sugar, 1 ½ cups (300g) — Sweetens the bars and helps with browning. Don’t reduce it, or the texture will suffer.
- Light brown sugar, ½ cup (100g), packed — Adds moisture and a hint of molasses flavor that pairs beautifully with pumpkin.
- Pumpkin puree, 1 can (15 oz or 425g) — Not pumpkin pie filling. Make sure you grab 100% pure pumpkin puree. Libby’s is my go-to for consistent results.
- Large eggs, 3 — Room temperature is best. They incorporate more evenly and help the bars rise properly.
- Vegetable oil, ½ cup (120ml) — Keeps the bars incredibly moist. You can substitute melted coconut oil if preferred.
- Vanilla extract, 2 teaspoons — Pure vanilla extract makes a difference. Imitation works in a pinch, but the flavor won’t be as deep.
- Baking powder, 2 teaspoons — Leavening agent that helps the bars rise and stay light.
- Baking soda, 1 teaspoon — Works with the acidity of the pumpkin and brown sugar for a tender crumb.
- Salt, ½ teaspoon — Balances the sweetness and enhances all the flavors.
- Ground cinnamon, 2 teaspoons — The backbone of the spice blend. Use a fresh jar for the best flavor.
- Ground nutmeg, ½ teaspoon — Adds warmth. Freshly grated is lovely, but pre-ground works fine.
- Ground ginger, ½ teaspoon — Gives a subtle kick that cuts through the richness.
- Ground cloves, ¼ teaspoon — A little goes a long way. This is the spice my grandmother always used.
For the Cream Cheese Frosting
- Cream cheese, 8 oz (226g), softened — Full-fat is non-negotiable here. Low-fat versions make the frosting too runny. Philadelphia is my preferred brand.
- Unsalted butter, ¼ cup (½ stick, 57g), softened — Adds richness and helps the frosting hold its shape.
- Powdered sugar, 2 cups (240g) — Sift it first to avoid lumps. You can adjust the amount depending on how sweet you like it.
- Vanilla extract, 1 teaspoon — Enhances the flavor. I use the same bottle from the bar recipe.
- Pinch of salt — Just a tiny pinch to balance the sweetness.
Substitution Guidance
If you’re gluten-sensitive, swap the all-purpose flour with a 1:1 gluten-free baking blend. I’ve tested this with Bob’s Red Mill, and it works well. For a dairy-free version, use plant-based butter and dairy-free cream cheese—just note that the frosting will be slightly softer.
Equipment Needed
You don’t need a fancy kitchen to make these bars. Here’s what you’ll need and a few tips from my own experience.
- 9×13-inch baking pan — Metal pans work best for even baking. Glass pans tend to hold heat longer, which can overbake the edges.
- Medium saucepan — For browning the butter. A light-colored pan helps you see the color change clearly.
- Large mixing bowls (2) — One for dry ingredients, one for wet. I use glass bowls because they don’t retain smells.
- Whisk — For mixing the dry ingredients and smoothing out the batter.
- Spatula — A silicone spatula is ideal for scraping every last bit of brown butter out of the pan.
- Hand mixer or stand mixer — For the frosting. You can do it by hand with a whisk and some elbow grease, but a mixer makes it much easier.
- Parchment paper — Line the pan for easy removal. Trust me on this one—it saves so much cleanup.
- Cooling rack — Lets air circulate so the bars cool evenly. If you don’t have one, a wire oven rack works in a pinch.
- Offset spatula — For spreading the frosting smoothly. A butter knife works too, but an offset spatula gives you that bakery-style finish.
I’ve made these bars with budget-friendly tools and never had an issue. The only thing I wouldn’t skip is the parchment paper. I learned that lesson the hard way after spending twenty minutes scrubbing a pan.
Preparation Method
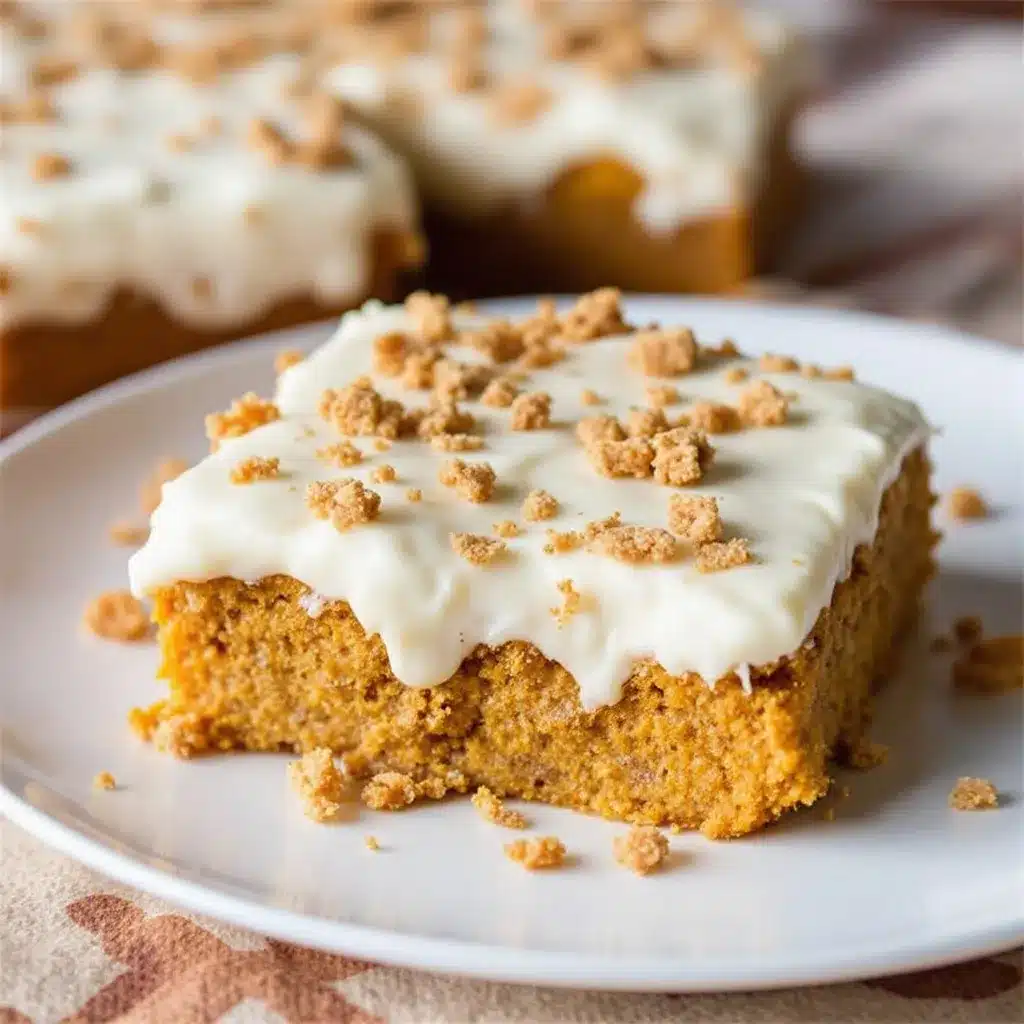
Preheat your oven to 350°F (175°C). Line your 9×13-inch baking pan with parchment paper, leaving some overhang on the long sides. This will make lifting the bars out later a breeze. Lightly grease the parchment with cooking spray or a thin layer of butter.
Step 1: Brown the Butter
Place the 1 cup of unsalted butter in a medium saucepan over medium heat. Let it melt completely, then continue cooking, swirling the pan occasionally. The butter will start to foam, then the foam will subside, and you’ll see small brown specks forming at the bottom. This takes about 5-7 minutes. Watch closely—it can go from browned to burnt very quickly. Once it smells nutty and looks amber, remove it from the heat immediately. Pour it into a large mixing bowl to stop the cooking process. Let it cool for about 10 minutes.
Step 2: Mix the Wet Ingredients
To the bowl with the browned butter, add the granulated sugar and packed brown sugar. Whisk until combined—it will look like wet sand. Add the pumpkin puree, eggs, vegetable oil, and vanilla extract. Whisk until smooth and fully incorporated. The mixture should be glossy and a deep orange color.
Step 3: Combine the Dry Ingredients
In a separate large bowl, whisk together the all-purpose flour, baking powder, baking soda, salt, cinnamon, nutmeg, ginger, and cloves. Make sure there are no clumps. This step is important for even distribution of the leavening agents and spices.
Step 4: Combine Wet and Dry
Pour the wet ingredients into the dry ingredients. Fold gently with a spatula until just combined. Do not overmix—a few streaks of flour are okay. Overmixing will develop the gluten and make the bars tough. The batter will be thick and slightly fluffy.
Step 5: Bake
Pour the batter into the prepared pan and spread it evenly with your spatula. Bake for 25-30 minutes, or until a toothpick inserted in the center comes out clean or with a few moist crumbs. The edges should be lightly golden and pulling away from the sides of the pan. Let the bars cool in the pan on a wire rack for 15 minutes, then lift them out using the parchment overhang and let them cool completely. This is crucial—warm bars will melt the frosting.
Step 6: Make the Frosting
While the bars cool, make the frosting. In a medium bowl, beat the softened cream cheese and butter together until smooth and creamy, about 2 minutes. Add the sifted powdered sugar, vanilla extract, and a pinch of salt. Beat on low speed until combined, then increase to medium and beat for another 2 minutes until light and fluffy. If the frosting seems too soft, refrigerate it for 15 minutes before spreading.
Step 7: Frost and Slice
Once the bars are completely cool, spread the cream cheese frosting evenly over the top using an offset spatula. For clean slices, refrigerate the frosted bars for at least 30 minutes before cutting. Use a sharp knife and wipe it clean between cuts. I usually get 24 bars from one pan, but you can cut them larger if you prefer.
Cooking Tips & Techniques
I’ve made this recipe enough times to know exactly where things can go wrong. Here are the lessons I learned the hard way so you don’t have to.
Don’t Walk Away from the Butter
Browning butter is easy, but it happens fast. The first time I tried it, I got distracted by my phone and ended up with burnt butter that smelled like regret. Stay at the stove, swirl the pan, and trust your nose. When it smells nutty and looks like melted caramel, you’re done.
Room Temperature Ingredients Matter
I know it’s tempting to use cold eggs straight from the fridge, but room temperature ingredients emulsify better. The result is a smoother batter and a more even crumb. If you’re short on time, place the eggs in a bowl of warm water for 5 minutes.
Don’t Overmix the Batter
This is the number one mistake I see in pumpkin bar recipes. Overmixing develops gluten, and too much gluten makes bars dense and rubbery. Mix until the flour disappears, then stop. A few lumps are fine.
Check for Doneness Early
Ovens vary, so start checking at 25 minutes. Insert a toothpick in the center—if it comes out clean or with a few moist crumbs, they’re done. If it’s wet batter, give them another 3 minutes. I once overbaked a batch by 5 minutes, and they were dry enough to use as doorstops.
Cool Completely Before Frosting
This is non-negotiable. Warm bars will turn your beautiful cream cheese frosting into a melty mess. I usually make the bars in the morning and frost them after lunch. If you’re in a hurry, pop them in the fridge for 20 minutes to speed up the cooling process.
Variations & Adaptations
One of the best things about this recipe is how adaptable it is. Here are a few variations I’ve tried and loved.
Gluten-Free Version
Swap the all-purpose flour with a 1:1 gluten-free baking blend. I’ve tested this with King Arthur Flour’s measure-for-measure blend, and the texture is nearly identical. Add an extra tablespoon of milk to the batter if it seems too thick.
Vegan Version
Use plant-based butter for both the bars and the frosting. Replace the eggs with flax eggs (2 tablespoons ground flaxseed mixed with 6 tablespoons water, let sit for 5 minutes). For the frosting, use dairy-free cream cheese like Kite Hill. The texture will be slightly softer, but the flavor is still fantastic.
Spice It Up
If you like things spicy, add ¼ teaspoon of cayenne pepper to the dry ingredients. It doesn’t make the bars hot—it just adds a subtle warmth that complements the pumpkin. I tried this on a whim last year, and now it’s my preferred version.
Add Mix-Ins
Fold in ½ cup of chopped pecans or walnuts before baking for some crunch. Or sprinkle ¼ cup of pepitas (pumpkin seeds) on top of the frosting for a pretty finish. I’ve also added ½ cup of white chocolate chips, which was a huge hit with my niece.
Make It a Cake
Pour the batter into two 8-inch round cake pans and bake for 20-22 minutes. Layer with the cream cheese frosting for a stunning pumpkin cake. This is my go-to for Thanksgiving when I want something that looks fancy but isn’t complicated.
Serving & Storage Suggestions
These bars are best served chilled or at room temperature. I prefer them straight from the fridge—the frosting firms up nicely and the flavors seem more pronounced. If you’re serving them at a party, let them sit out for 15 minutes to take the chill off.
What to Serve With Them
A cup of hot coffee or spiced chai is the perfect companion. For a dessert spread, pair these bars with my best copycat pumpkin cream cheese muffins for a double dose of pumpkin goodness. They also go well with a scoop of vanilla ice cream or a dollop of whipped cream.
Storage Instructions
Store the frosted bars in an airtight container in the refrigerator for up to 5 days. Place a sheet of parchment paper between layers to prevent sticking. If you’re storing them unfrosted, they’ll keep at room temperature in a sealed container for up to 3 days.
Freezing Instructions
These bars freeze beautifully. Freeze them unfrosted, wrapped tightly in plastic wrap and then foil, for up to 3 months. When you’re ready to serve, thaw them in the refrigerator overnight, then frost and enjoy. I’ve also frozen frosted bars—just place them in a single layer on a baking sheet, freeze until solid, then wrap individually. Thaw in the fridge for a few hours.
Reheating Tips
If you prefer warm bars, microwave a single piece for 10-15 seconds. Be careful not to overheat, or the frosting will melt. For a larger batch, warm them in a 300°F (150°C) oven for about 5 minutes.
Nutritional Information & Benefits
Here’s the approximate nutritional breakdown for one bar (based on 24 servings). Keep in mind this is an estimate and will vary based on the specific ingredients you use.
| Nutrient | Amount per Bar |
|---|---|
| Calories | 285 |
| Total Fat | 15g |
| Saturated Fat | 8g |
| Cholesterol | 55mg |
| Sodium | 180mg |
| Total Carbohydrates | 36g |
| Dietary Fiber | 1g |
| Total Sugars | 25g |
| Protein | 3g |
| Vitamin A | 45% DV |
| Calcium | 4% DV |
| Iron | 6% DV |
Pumpkin is packed with vitamin A, which supports eye health and immune function. The cream cheese frosting adds calcium, and the eggs provide protein. While these bars are definitely a treat, they’re not empty calories. I feel good about serving them to my family because I know exactly what’s in them. If you’re watching your sugar intake, you can reduce the frosting amount or use a sugar substitute in the bars—though I haven’t tested that myself.
This recipe contains dairy, eggs, and gluten. For allergen-friendly options, check the variations section above.
Conclusion
These brown butter pumpkin bars are the kind of recipe that earns a permanent spot in your fall rotation. They’re simple enough to make on a random Tuesday, but impressive enough to bring to a holiday gathering. The brown butter adds a depth of flavor that feels special without being fussy, and the cream cheese frosting is the perfect finishing touch.
I love that this recipe is forgiving. You can adjust the spices, add mix-ins, or make it gluten-free, and it still works. It’s become my go-to for fall baking, and I hope it becomes yours too. There’s something deeply satisfying about pulling a pan of these out of the oven, watching the frosting set in the fridge, and slicing into that first perfect bar.
If you make these, I’d love to hear about it. Drop a comment below and let me know how they turned out—did you add any variations? Did they disappear as fast as mine always do? Share your photos on Pinterest and tag me so I can see your creations. Happy baking, and here’s to the season of pumpkin everything.
Frequently Asked Questions
Can I use pumpkin pie filling instead of pumpkin puree?
No, I don’t recommend it. Pumpkin pie filling is pre-sweetened and spiced, which will throw off the sugar and spice balance in this recipe. Stick with 100% pure pumpkin puree for the best results.
Why did my cream cheese frosting turn out runny?
This usually happens when the cream cheese or butter is too soft. Make sure they’re softened but still cool to the touch. If your frosting is already runny, pop it in the fridge for 15-20 minutes to firm up before spreading.
Can I make these bars ahead of time?
Absolutely. You can bake the bars a day ahead and store them unfrosted at room temperature. Frost them the day you plan to serve. They also freeze well—see the storage section for details.
How do I get clean slices?
Refrigerate the frosted bars for at least 30 minutes before cutting. Use a sharp knife and wipe it clean with a damp paper towel between each cut. This gives you those bakery-style edges.
Can I skip the brown butter?
You can, but you’ll lose a lot of flavor. Brown butter adds a nutty, caramel-like depth that regular butter can’t match. If you’re short on time, use melted unsalted butter instead, but know that the bars won’t taste quite as special. If you love quick and easy treats, you might also enjoy my easy no-bake peanut butter granola bites for another simple snack option.
Pin This Recipe!
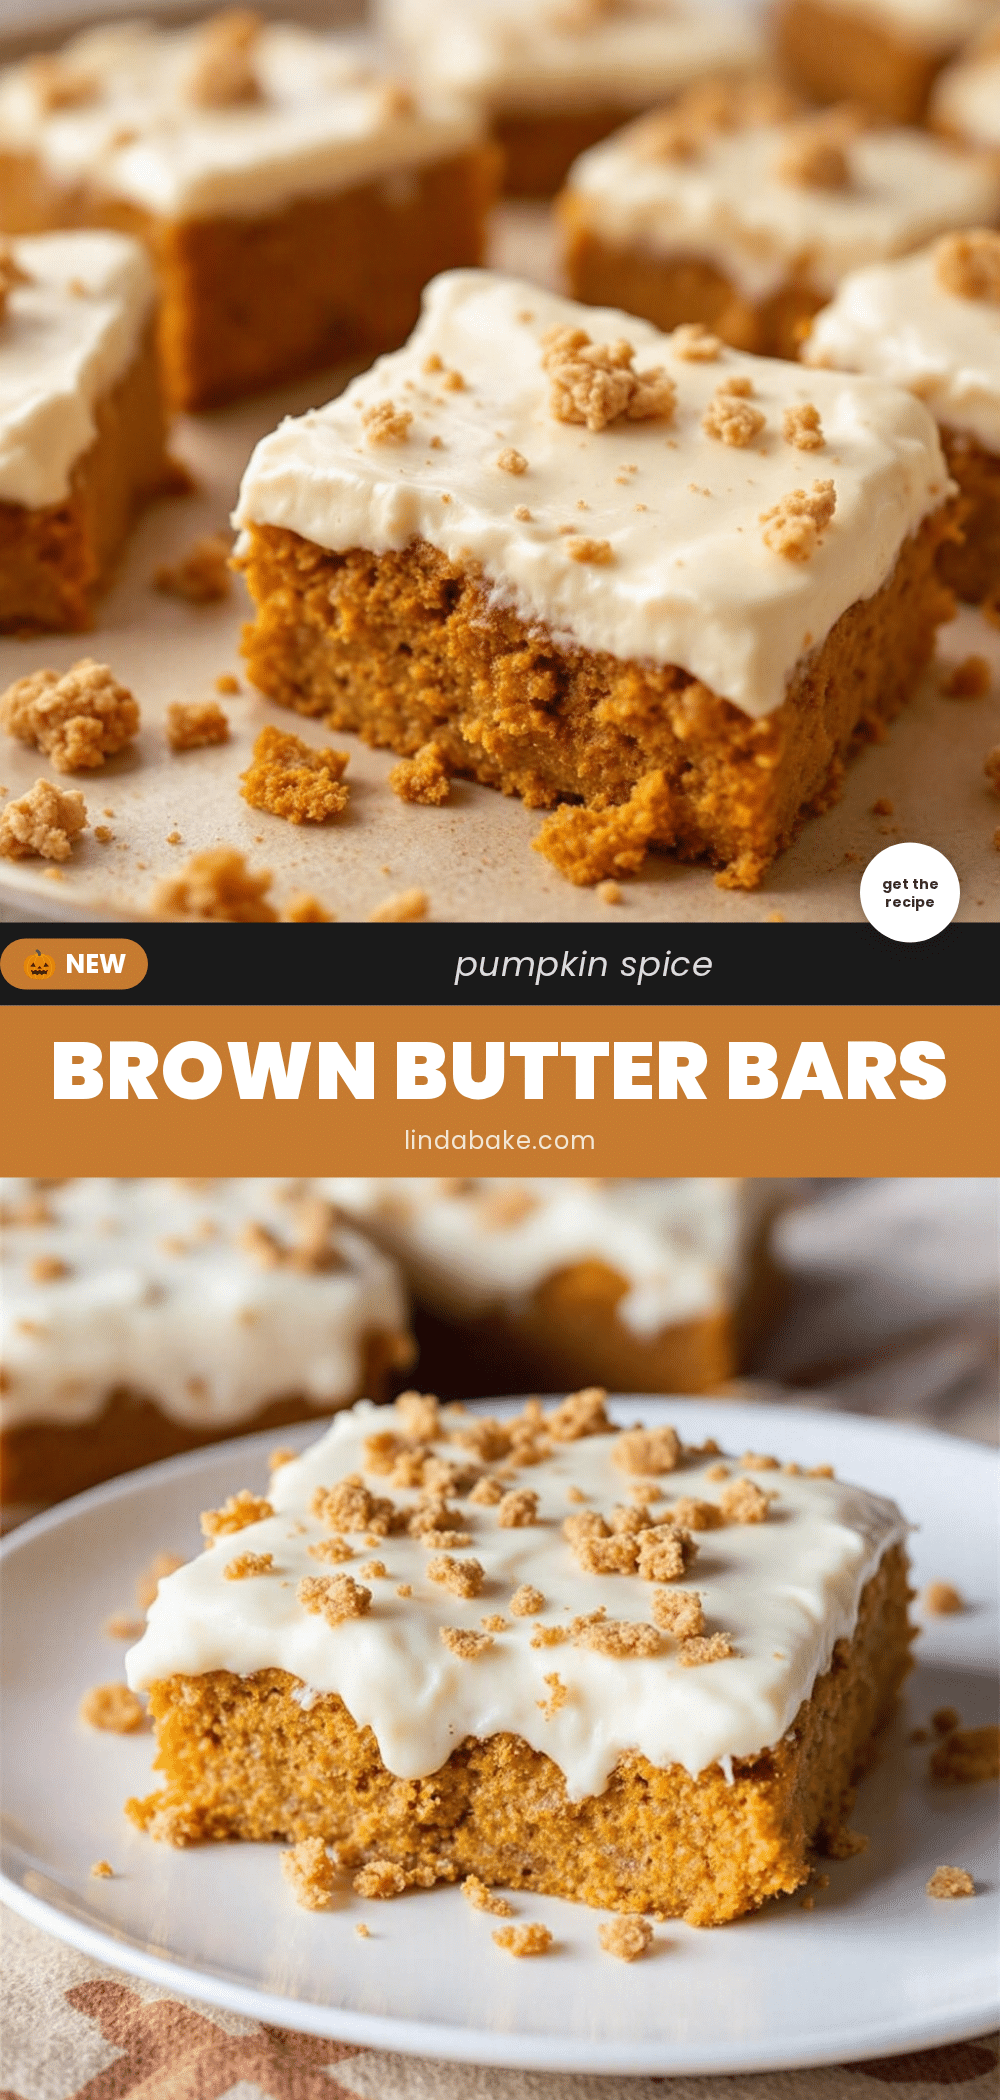
Best Brown Butter Pumpkin Bars with Cream Cheese Frosting
These brown butter pumpkin bars are the ultimate fall dessert—simple enough for a Tuesday night but impressive enough for a Thanksgiving table. The nutty brown butter and tangy cream cheese frosting create an irresistible flavor combination that will have everyone asking for the recipe.
- Prep Time: 15 minutes
- Cook Time: 30 minutes
- Total Time: 45 minutes
- Yield: 24 bars 1x
- Category: Dessert
- Cuisine: American
Ingredients
- 1 cup (2 sticks, 226g) unsalted butter
- 2 cups (250g) all-purpose flour
- 1 ½ cups (300g) granulated sugar
- ½ cup (100g) light brown sugar, packed
- 1 can (15 oz or 425g) pumpkin puree (100% pure, not pumpkin pie filling)
- 3 large eggs, room temperature
- ½ cup (120ml) vegetable oil
- 2 teaspoons vanilla extract
- 2 teaspoons baking powder
- 1 teaspoon baking soda
- ½ teaspoon salt
- 2 teaspoons ground cinnamon
- ½ teaspoon ground nutmeg
- ½ teaspoon ground ginger
- ¼ teaspoon ground cloves
- 8 oz (226g) cream cheese, softened
- ¼ cup (½ stick, 57g) unsalted butter, softened
- 2 cups (240g) powdered sugar, sifted
- 1 teaspoon vanilla extract
- Pinch of salt
Instructions
- Preheat oven to 350°F (175°C). Line a 9×13-inch baking pan with parchment paper, leaving overhang on the long sides. Lightly grease the parchment.
- Brown the butter: Place 1 cup unsalted butter in a medium saucepan over medium heat. Melt completely, then continue cooking, swirling occasionally, until butter foams, then subsides and brown specks form at the bottom (about 5-7 minutes). When it smells nutty and looks amber, remove from heat immediately. Pour into a large mixing bowl to stop cooking. Let cool for 10 minutes.
- Mix wet ingredients: To the bowl with browned butter, add granulated sugar and brown sugar. Whisk until combined (like wet sand). Add pumpkin puree, eggs, vegetable oil, and vanilla extract. Whisk until smooth and glossy.
- Combine dry ingredients: In a separate large bowl, whisk together flour, baking powder, baking soda, salt, cinnamon, nutmeg, ginger, and cloves until no clumps remain.
- Combine wet and dry: Pour wet ingredients into dry ingredients. Fold gently with a spatula until just combined (a few streaks of flour are okay). Do not overmix.
- Bake: Pour batter into prepared pan and spread evenly. Bake for 25-30 minutes, until a toothpick inserted in the center comes out clean or with a few moist crumbs. Cool in pan on a wire rack for 15 minutes, then lift out using parchment overhang and cool completely.
- Make frosting: In a medium bowl, beat softened cream cheese and butter until smooth and creamy (about 2 minutes). Add sifted powdered sugar, vanilla extract, and a pinch of salt. Beat on low until combined, then medium for 2 minutes until light and fluffy. Refrigerate 15 minutes if too soft.
- Frost and slice: Once bars are completely cool, spread frosting evenly over top. Refrigerate frosted bars for at least 30 minutes before cutting. Use a sharp knife, wiping clean between cuts. Cut into 24 bars.
Notes
Don’t walk away from the butter while browning—it can burn quickly. Room temperature ingredients emulsify better. Do not overmix the batter. Cool bars completely before frosting. For clean slices, refrigerate frosted bars for at least 30 minutes before cutting.
Nutrition
- Serving Size: 1 bar
- Calories: 285
- Sugar: 25
- Sodium: 180
- Fat: 15
- Saturated Fat: 8
- Carbohydrates: 36
- Fiber: 1
- Protein: 3
Keywords: pumpkin bars, brown butter, cream cheese frosting, fall dessert, pumpkin dessert, Thanksgiving dessert, easy pumpkin bars


