It was 4:15 PM on a Tuesday. The house was quiet, which usually means trouble. I had just finished vacuuming the hallway and realized my brain had completely short-circuited regarding party prep. The kids were excited about the Halloween decorations they’d hung up earlier, but the food situation? Total disaster. There was no time to bake. No time to cook. And definitely no time to go to the store because the nearest grocery store was a twenty-minute drive and the sun was already dipping below the horizon.
I looked at the fruit bowl. It was sad. A few bruised apples and some bananas that were turning into mush. I needed something festive, something healthy that wouldn’t make me feel like a bad parent for serving sugar bombs, and something that looked like I had actually tried. You know that feeling when you’re scrambling to create magic out of thin air? That was me.
I grabbed a melon baller and a paring knife. Honestly, it felt ridiculous at first. Making a fruit tray? Really? But then I remembered that pumpkin patch idea I’d seen years ago. It wasn’t about fancy plating or expensive ingredients. It was about shape and color. I started scooping orange flesh. Then I grabbed some green grapes. And suddenly, the chaos in my head stopped. The rhythmic scooping of the melon, the careful placement of the stems, the way the light hit the dewy fruit—it was meditative.
By the time the doorbell rang, I had a little patch of edible pumpkins sitting on the counter. The kids screamed. Not in a scary way, but in a “Mom, you did it!” way. They didn’t even realize they were eating fruit until after they’d eaten three “pumpkins” each. That’s the thing about this easy ham and cream cheese pinwheels style of prep—when it looks fun, kids eat it. I stood there wiping melon juice off my hands, listening to the neighbors’ kids giggle in the entryway, and realized I hadn’t stressed once. This recipe saved my evening. It turned a panic attack into a proud parent moment. And now, I make it every single year because it works.
Why You’ll Love This Recipe
Let’s be real for a second. Most fruit platters are boring. They’re just a pile of sliced stuff that turns brown if you look at it wrong. This Cute Halloween Fruit Tray Pumpkin Patch is different. It’s not just fruit; it’s a tiny landscape you build on a plate. I’ve tested this with three different types of melons, two kinds of grapes, and even some watermelon rind, and the result is always the same: empty plates and happy faces.
Here is why this recipe is worth your time:
- Quick & Easy: You don’t need any cooking skills. Just a melon baller and a knife. You can assemble the entire patch in under fifteen minutes. Perfect for those last-minute dinner party guests or school parties where you promised something “healthy.”
- Simple Ingredients: No fancy grocery trips needed. You likely already have cantaloupe, honeydew, and grapes in your kitchen. It’s pantry-staple friendly, especially if you buy pre-cut melon to save time.
- Perfect for Halloween: It captures the spooky season spirit without the artificial coloring or excessive sugar. It’s festive, adorable, and totally kid-approved.
- Crowd-Pleaser: Adults love the presentation, and kids love the “game” of eating a pumpkin. It’s a win-win. I’ve served this at work potlucks and it disappears faster than the copycat pumpkin cream cheese muffins.
- Unbelievably Delicious: The texture combo is next-level. The juicy cantaloupe contrasts with the crisp green grapes. It’s sweet, refreshing, and feels like a treat rather than a chore.
What makes this recipe stand out from the rest? It’s the attention to detail. Most people just slice fruit. Here, we are sculpting. We are creating little orange mounds with green vine accents. It’s the difference between a plain sandwich and a gourmet wrap. This isn’t just another fruit bowl; it’s your best version of a healthy snack. It’s the kind of recipe that makes you close your eyes after the first bite of sweet, chilled cantaloupe and think, “This is actually really good.” It’s comfort food reimagined—lighter, faster, but with that same soul-soothing satisfaction of a seasonal treat. It’s perfect for impressing guests without stress, or turning a simple meal into something memorable.
What Ingredients You Will Need
This recipe uses simple, wholesome ingredients to deliver bold flavor and satisfying texture without the fuss. The beauty of the Pumpkin Patch is that it relies on natural colors. You don’t need food dye or artificial flavors. The orange comes from nature, and the green comes from nature. Here is what you need to gather your supplies.
For the Pumpkins (The Orange Mounds)
- Cantaloupe: One medium-sized melon. You want one that is ripe but still firm. If it’s too soft, it will collapse. I prefer the smaller, sweeter varieties. Look for a melon that smells sweet at the stem end. (Adds richness and sweetness)
- Alternative: If cantaloupe is out of season or too expensive, honeydew melon dyed with a drop of orange gel food coloring works, but fresh orange flesh is best. Watermelon rind (the orange part just under the red skin) can also be used, but it’s less sweet.
For the Vines and Leaves (The Green Accents)
- Green Grapes: One large bunch. Seedless is mandatory. There is nothing worse than biting into a pumpkin vine and hitting a seed. I recommend red globe grapes if you want a deeper color, but standard green seedless are classic. (Provides crunch and tartness)
- Mini Bell Pepper (Optional): One small green mini bell pepper. You can cut thin strips from this to use as larger, sturdier vines. This adds a nice savory crunch that balances the sweet fruit. (Adds visual height and structure)
- Apple or Pear Slices: Thinly sliced green apple (like Granny Smith) cut into leaf shapes. You can use a small cookie cutter for perfect shapes, or just slice them by hand. (Adds crispness and a tart bite)
For the Base and Garnish
- Lettuce or Mint Leaves: A bed of green leaf lettuce or fresh mint sprigs to place under the pumpkins. This grounds the presentation and makes the orange pop. (Adds freshness and color contrast)
- Whipped Cream or Yogurt (Optional): For a “frosting” effect on the pumpkins. Use plain Greek yogurt for a healthier option, or heavy cream with a touch of sugar for indulgence. (Adds creaminess)
- Chocolate Chips or Pretzel Sticks: Tiny chocolate chips for the stems, or pretzel sticks broken in half for a rustic vine look. (Adds texture and salty-sweet contrast)
Pro Tip: I always buy one extra bunch of grapes. You’ll use them for the vines, but you’ll also want extra for snacking while you work. Trust me. And if you’re short on time, buy pre-cut melon cubes and just shape them with your hands into little mounds. It’s not as perfect, but it’s still cute and totally acceptable.
Equipment Needed
You don’t need a fancy kitchen to make this. In fact, the simpler the tools, the better. Here is what you’ll need to get the job done.
- Melon Baller: This is the most important tool. A standard melon baller creates perfect little spheres. If you don’t have one, a small ice cream scoop works, but the spheres will be larger. A teaspoon can work in a pinch, but the shape won’t be as round. I recommend the OXO Good Grips melon baller because it’s easy to clean and doesn’t slip.
- Sharp Paring Knife: You need a small, sharp knife for trimming the grapes and cutting the apple leaves. A dull knife will crush the melon balls. Keep it clean and dry for best results.
- Large Serving Platter: A flat, wide platter works best. A slate board looks rustic and modern, or a white ceramic platter makes the colors pop. Avoid deep bowls; you want to display the pumpkins, not bury them.
- Paper Towels: Fruit is wet. You need to pat the melon balls dry before assembling, or they will slide around and look messy. Keep a stack handy.
- Bowl for Discards: Have a separate bowl for the melon scraps. You can save these for smoothies later, but keep them away from your clean assembly area.
Budget-Friendly Tip: If you don’t have a melon baller, you can use a sturdy teaspoon. It won’t be perfect, but it’s free. Also, check your local dollar store for small plastic platters if you are making this for a big party. It’s all about the presentation, not the price tag of the plate.
Preparation Method
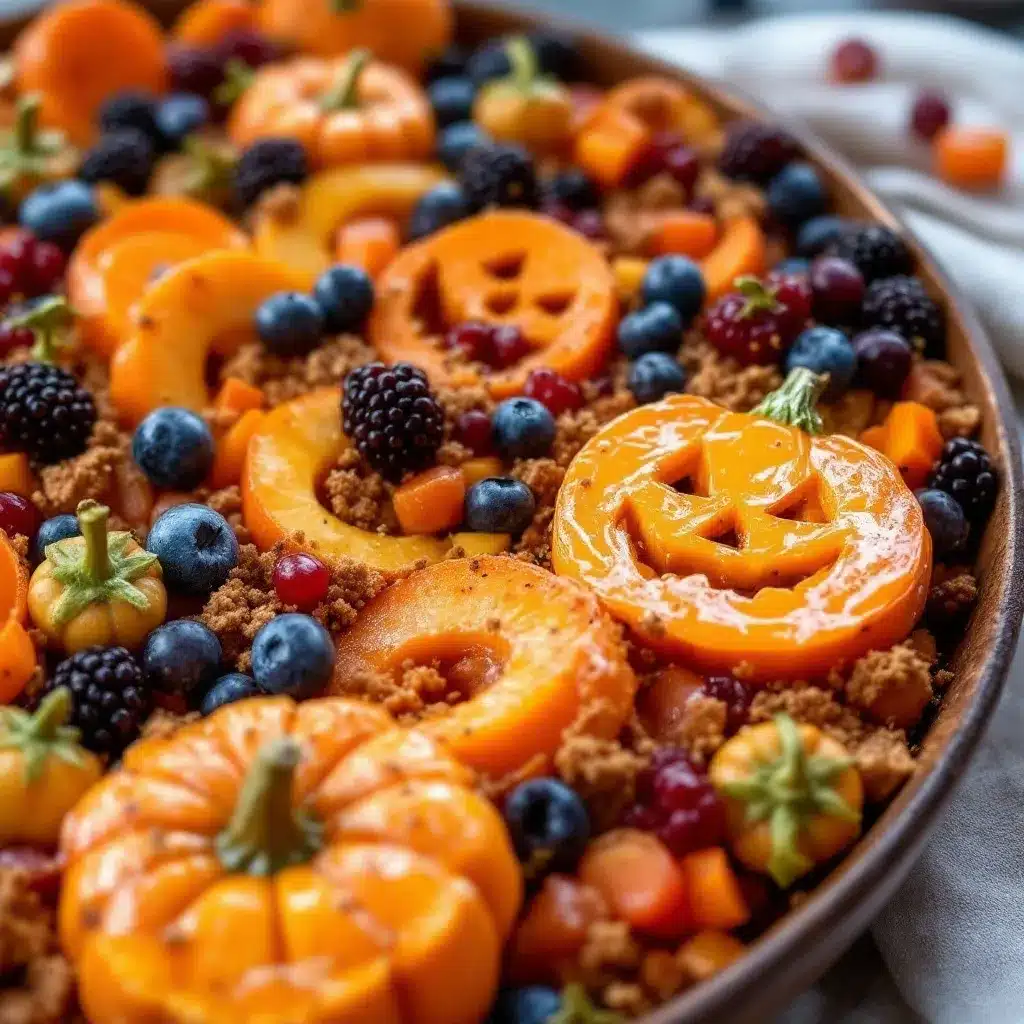
Let’s get into the nitty-gritty. This process is straightforward, but timing is everything. You want to assemble this as close to serving time as possible to prevent browning or sogginess.
Step 1: Prep the Melon (10 minutes)
Wash the cantaloupe thoroughly. Cut it in half and scoop out the seeds with a spoon. Using your melon baller, scoop out balls of flesh. Try to make them all roughly the same size—about 1.5 inches in diameter. If some are bigger, that’s okay, but consistency helps the look. Place the melon balls in a bowl of ice water for 5 minutes. This keeps them crisp and cold. Remove them and pat them completely dry with paper towels. Wet melon = slippery melon = sad pumpkin.
Step 2: Prepare the Greens (5 minutes)
Wash and dry the green grapes. Remove them from the stems. If you are using the mini bell pepper, wash it and slice it into thin, long strips for vines. For the apple leaves, slice the green apple thinly and use a small leaf-shaped cookie cutter, or just slice them into rough leaf shapes with your paring knife. Dry everything thoroughly. Moisture is the enemy of a good presentation.
Step 3: Assemble the Pumpkins (15 minutes)
Take your dried melon balls. If you are using whipped cream or yogurt, dip the top of each melon ball into the cream and swirl it around to create a little “frosting” peak. If you aren’t using cream, just set the balls aside. Take two or three grapes and skewer them onto a toothpick or a small piece of pretzel stick to create a stem. Press this gently into the top of the melon ball. If using bell pepper strips, tuck a small piece under the melon ball to look like a vine curling around.
Step 4: Arrange the Patch (5 minutes)
Lay down your bed of lettuce or mint leaves on your serving platter. This is your “grass.” Arrange the pumpkins on top of the greens. Cluster them together like a real patch. Don’t space them out evenly; nature is messy. Tuck the apple leaves around the base of the pumpkins. Add extra grape vines between the pumpkins to fill in gaps. If you have extra grapes, scatter them around the platter to look like fallen fruit.
Step 5: Final Touches
Check for any loose pieces. Add a final dusting of mint if you want a pop of bright green. Serve immediately. If you need to wait, cover the platter loosely with plastic wrap and refrigerate for up to 2 hours. Do not leave it out for more than 2 hours, especially if you used dairy.
Cooking Tips & Techniques
Even though there is no “cooking” involved, there are techniques that separate a amateur fruit tray from a pro one.
Keep it Cold: Temperature is key. Warm fruit tastes bland. Keep your melon balls in the fridge until the last minute. If you are making this for a party, put the platter in the fridge 30 minutes before serving. The cold fruit will be firmer and more refreshing.
Pat Dry, Always: I cannot stress this enough. After washing your fruit, dry it. Then dry it again. Water droplets make the platter look wet and unappealing. It also makes the cream slide off. Use paper towels and press gently.
Color Contrast: The orange of the cantaloupe needs to pop against the green. If your cantaloupe is pale, choose a darker green grape. If your grapes are pale, choose a bright orange melon. This contrast makes the dish visually striking.
Stem Security: When adding the stem (grape or pretzel), press it in firmly. If it falls out, the pumpkin looks deflated. A little cream or yogurt can act as glue to hold the stem in place.
Multitasking: While the melon balls are chilling in the ice water, prep the grapes and apples. Use that time efficiently. Don’t wait for one step to finish before starting the next.
Avoid Browning: If you are using apples or pears, toss them in a little lemon juice to prevent browning. This keeps the green leaves looking fresh and vibrant.
Personal Failure: I once made this with watermelon rind because I was out of cantaloupe. It was too watery and collapsed within an hour. Lesson learned: stick to firm melons. Also, I once used regular grapes with seeds. The kids complained. Never again. Seedless is non-negotiable.
Variations & Adaptations
This recipe is flexible. You can adapt it to suit different dietary needs or seasonal availability.
Dairy-Free Option: Skip the whipped cream entirely. The natural sweetness of the melon is enough. If you want a creamy element, use coconut yogurt or a dairy-free cream cheese frosting. It holds up well and adds a nice tang.
Vegan Option: This recipe is naturally vegan if you skip the dairy cream. Just ensure your grapes and melon are washed and prepped with clean utensils. You can add dark chocolate chips for the stems instead of pretzels.
Gluten-Free Option: This recipe is naturally gluten-free. Just ensure your pretzel sticks are certified gluten-free if you are using them for stems. Most standard pretzels contain wheat.
Seasonal Variation: In the summer, you can add watermelon cubes as “weeds” around the patch. In the fall, add some dried cranberries for a tart, rustic touch. You can also use persimmons for the pumpkins if you are feeling adventurous, though they are softer.
Flavor Twist: Add a drizzle of balsamic glaze over the pumpkins before serving. The acidity cuts through the sweetness and adds a gourmet touch. It sounds weird, but it works.
Personal Variation: I sometimes add a few blueberries as “bugs” crawling on the leaves. It adds a pop of purple and makes the patch feel alive. Kids love finding the “bugs.”
Serving & Storage Suggestions
Serving: Serve this tray chilled. It’s best at room temperature for flavor, but cold for texture. Place it on the buffet table as a centerpiece. It looks great next to the easy no-bake peanut butter granola bites for a balanced snack spread. Pair it with cold lemonade or iced tea.
Storage: Store any leftovers in an airtight container in the refrigerator for up to 2 days. The melon balls may soften slightly, but they will still be tasty. Do not freeze this tray, as the texture will become mushy upon thawing.
Reheating: Do not reheat this dish. It is meant to be eaten cold. If you have leftover melon balls, add them to smoothies instead.
Flavor Development: The flavors meld nicely over time. The mint and grape add a subtle aroma that enhances the melon. However, the visual appeal is best on the day of preparation.
Nutritional Information & Benefits
This fruit tray is a healthy snack option. Cantaloupe is low in calories but high in Vitamin A and Vitamin C. It’s hydrating and refreshing. Grapes provide antioxidants and fiber. This snack is naturally gluten-free, dairy-free (if you skip the cream), and vegan. It’s a great way to get kids to eat fruit without them realizing it. I love this recipe because it feels indulgent but is actually packed with nutrients. It’s a guilt-free treat that supports overall wellness. One serving (2 pumpkins and a few grapes) is approximately 80-100 calories, depending on size. It’s a perfect afternoon snack to keep energy levels stable.
Conclusion
This Cute Halloween Fruit Tray Pumpkin Patch is more than just a snack. It’s a way to bring joy to your family with minimal effort. It’s easy, healthy, and incredibly cute. I encourage you to try it this Halloween. Customize it with your favorite fruits and make it your own. I love this recipe because it turns a simple ingredient into a memorable experience. It’s the kind of thing that makes people smile. Please try it out and let me know how it goes. Share your photos on social media and tag me. I’d love to see your creations. And if you need more easy party ideas, check out the easy cold pepperoni pasta salad for a savory option. Enjoy your pumpkin patch!
FAQs
Can I make this fruit tray ahead of time?
Yes, you can prepare the melon balls and grapes a few hours in advance. Store them in separate airtight containers in the fridge. Assemble the tray just before serving to keep the presentation fresh and prevent sogginess.
What if I don’t have a melon baller?
You can use a small ice cream scoop or a sturdy teaspoon. The spheres won’t be perfect, but they will still look like little pumpkins. You can also cut the melon into small cubes and round the edges with a knife.
Can I use other fruits for the pumpkins?
Yes, you can use honeydew melon dyed with orange food coloring, or even small oranges peeled and shaped. However, cantaloupe is the best choice for color and flavor.
How long does the fruit tray last?
The assembled tray is best served immediately. If stored in the fridge, it will last up to 2 days. The melon may soften, and the grapes may wrinkle, so it’s best to make it fresh.
Is this recipe gluten-free?
Yes, this recipe is naturally gluten-free. Just ensure that any garnishes like pretzel sticks or chocolate chips are certified gluten-free if you have celiac disease or a sensitivity.
Pin This Recipe!
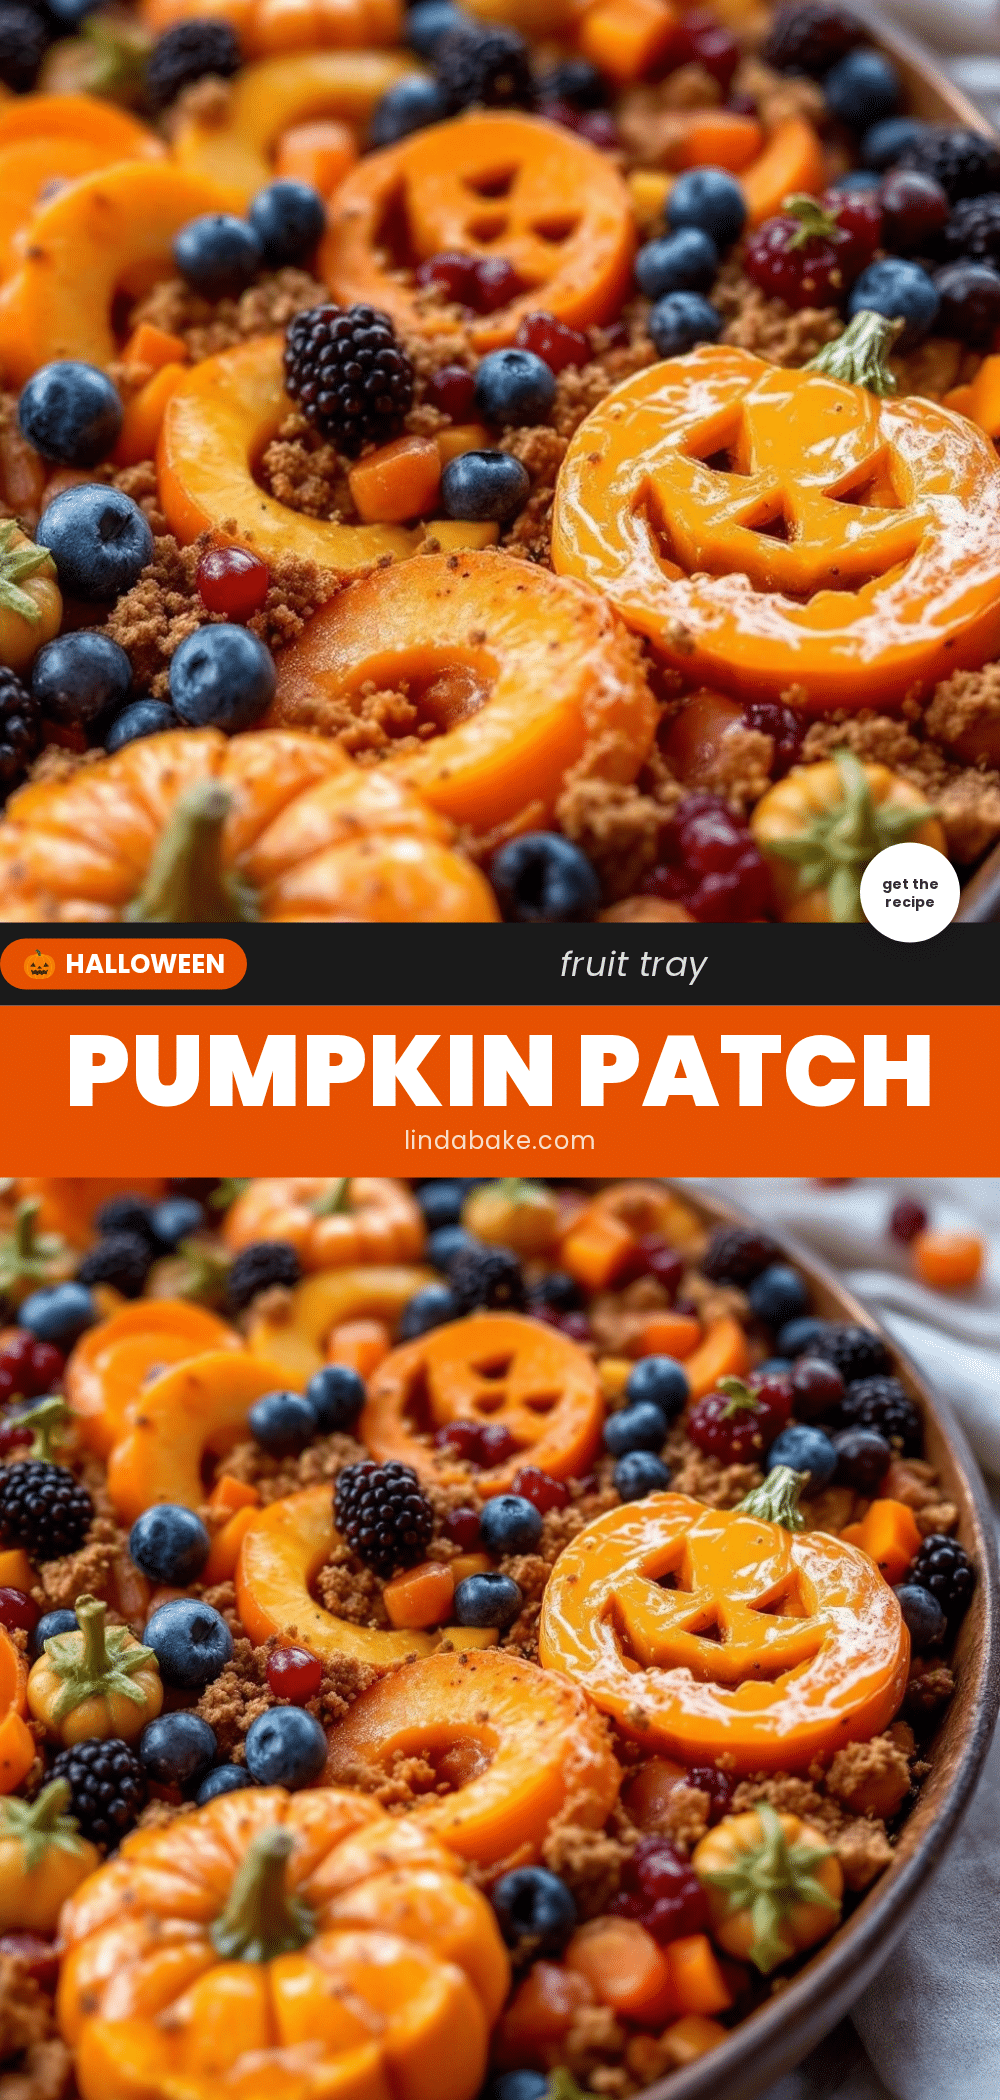
Cute Halloween Fruit Tray: Easy Pumpkin Patch Idea
A festive, no-bake Halloween snack featuring cantaloupe melon balls shaped like pumpkins with grape vines and apple leaves, perfect for kids and parties.
- Prep Time: 30 minutes
- Cook Time: 0 minutes
- Total Time: 30 minutes
- Yield: 4 servings 1x
- Category: Snack
- Cuisine: American
Ingredients
- 1 medium cantaloupe (ripe but firm)
- 1 large bunch seedless green grapes
- 1 small green mini bell pepper (optional, for vines)
- 1 green apple (like Granny Smith), sliced into leaf shapes
- Lettuce or mint leaves (for base)
- Whipped cream or Greek yogurt (optional, for frosting)
- Chocolate chips or pretzel sticks (for stems)
- Ice water (for chilling melon)
Instructions
- Wash the cantaloupe, cut in half, remove seeds, and scoop out flesh into 1.5-inch balls using a melon baller.
- Place melon balls in ice water for 5 minutes to keep them crisp, then remove and pat completely dry with paper towels.
- Wash and dry green grapes, removing them from stems. Slice mini bell pepper into thin strips for vines if using.
- Slice green apple thinly and cut into leaf shapes using a cookie cutter or knife.
- Dip the top of each dried melon ball into whipped cream or yogurt to create a ‘frosting’ effect (optional).
- Skewer 2-3 grapes onto a toothpick or pretzel stick to create a stem and press gently into the top of a melon ball.
- Tuck a small piece of bell pepper strip under the melon ball to look like a vine curling around.
- Lay a bed of lettuce or mint leaves on a large serving platter.
- Arrange the pumpkins in clusters on the greens, tucking apple leaves around the base and scattering extra grapes.
- Serve immediately or cover loosely and refrigerate for up to 2 hours.
Notes
Pat fruit dry thoroughly to prevent slipping and sogginess. Use seedless grapes to avoid seeds in the ‘vines’. If using apples, toss with lemon juice to prevent browning. Do not freeze, as texture will become mushy.
Nutrition
- Serving Size: 2 melon pumpkins and
- Calories: 90
- Sugar: 18
- Sodium: 5
- Fat: 0.5
- Carbohydrates: 22
- Fiber: 1.5
- Protein: 1
Keywords: Halloween, fruit tray, pumpkin patch, healthy snack, kid-friendly, no-bake, cantaloupe, grapes, party food


