My mom did not trust oats in snack bars. She had this thing about them—thought they’d turn out either too crumbly or too dense, like cardboard disguised as a treat. I remember her standing in the kitchen, holding a box of store-bought granola bars, shaking her head. “Why mess with a good thing?” she’d say. But I had this nagging feeling that homemade could be different. I wanted something chewy, not dry. Something with real apple chunks, not just flavoring. So one afternoon, while she was out running errands, I decided to prove her wrong.
The first batch came out okay. Edible, but not life-changing. The oats were a little too prominent, the apples a little too mushy. I tweaked the ratio, swapped honey for brown sugar, added a pinch more cinnamon. The second batch? Closer. But still not that perfect, bendy, soft-yet-holds-together texture I was after. It took me four tries to get it right. Four batches of chewy baked apple cinnamon oat snack bars that ranged from “meh” to “hey, that’s pretty good” before I landed on the one that made my mom pause mid-bite and say, “Okay, I get it now.”
That moment stuck with me. Not because she admitted I was right (though, let’s be honest, that was satisfying), but because these bars had quietly become something more than just a snack. They became my go-to for busy mornings, afternoon slumps, and those 3 PM moments when you need something that feels like a hug but doesn’t require an oven preheat. They’re not fancy. They’re not trying to be. But they’re the kind of thing you reach for without thinking—and that’s exactly the point.
Why You’ll Love This Recipe
These chewy baked apple cinnamon oat snack bars are the kind of recipe that makes you wonder why you ever bought packaged bars. They come together in about 30 minutes, use ingredients you probably already have, and taste like fall in the best possible way. But let me break down exactly why they’ve earned a permanent spot in my kitchen.
- Quick & Easy: From mixing bowl to cooling rack in under 30 minutes. No complicated steps, no weird techniques. Just stir, press, bake, and eat.
- Simple Ingredients: Oats, apples, cinnamon, butter, brown sugar—that’s basically it. No weird preservatives, no ingredient list that reads like a chemistry textbook.
- Perfect for Meal Prep: Make a batch on Sunday and you’ve got breakfast or snacks sorted for the week. They’re sturdy enough to toss in a lunchbox without falling apart.
- Crowd-Pleaser: Kids love them, adults love them, and even my mom—the original skeptic—asks for them now. They’re not too sweet, not too bland, just right.
- Unbelievably Chewy: The texture is the star here. Soft, bendy, with just enough bite from the oats and little pockets of tender apple. It’s the texture I chased through those first four batches, and I finally nailed it.
What makes these different from every other oat bar recipe out there? It’s the balance. The oats stay chewy instead of turning into mush because of how we prep the apples. The cinnamon isn’t shy, but it doesn’t overpower. And the sweetness comes from real apples and a touch of brown sugar, not corn syrup or artificial stuff. These bars feel good to eat—and I don’t just mean emotionally. They’re filling enough to keep you going without weighing you down.
Honestly, these bars are the reason I stopped buying packaged snacks altogether. Once you taste how good homemade can be, it’s hard to go back. And if you’re someone who loves quick, no-fuss recipes that actually deliver, you’re going to want these in your rotation.
What Ingredients You Will Need
This recipe uses simple, everyday ingredients that come together to create something genuinely better than store-bought. No fancy health food store runs required. Here’s what you’ll need:
For the Bars
- Rolled oats – 2 cups (180g). Not instant, not steel-cut. Old-fashioned rolled oats give the best chewy texture. I prefer Bob’s Red Mill or Quaker old-fashioned.
- Apple – 1 large (about 200g), peeled and finely diced. I like Honeycrisp or Fuji for sweetness, but Granny Smith works too if you want a little tartness. (adds natural sweetness and moisture)
- Unsalted butter – 1/3 cup (75g), melted. You can use salted butter if that’s what you have, just skip the added salt later.
- Brown sugar – 1/3 cup (70g), packed. Light or dark both work. Dark gives a deeper, almost caramel-like flavor.
- Honey or maple syrup – 2 tablespoons (30ml). Honey helps with binding; maple syrup adds a subtle woodsy sweetness.
- Egg – 1 large, room temperature. This is the glue that holds everything together.
- Cinnamon – 1 teaspoon. I go a little heavy here because I love cinnamon, but adjust to your taste.
- Vanilla extract – 1 teaspoon. Pure if you have it, imitation is fine too.
- Salt – 1/4 teaspoon. Just enough to balance the sweetness.
- Baking powder – 1/2 teaspoon. Helps the bars rise just a tiny bit so they’re not too dense.
Optional Add-Ins
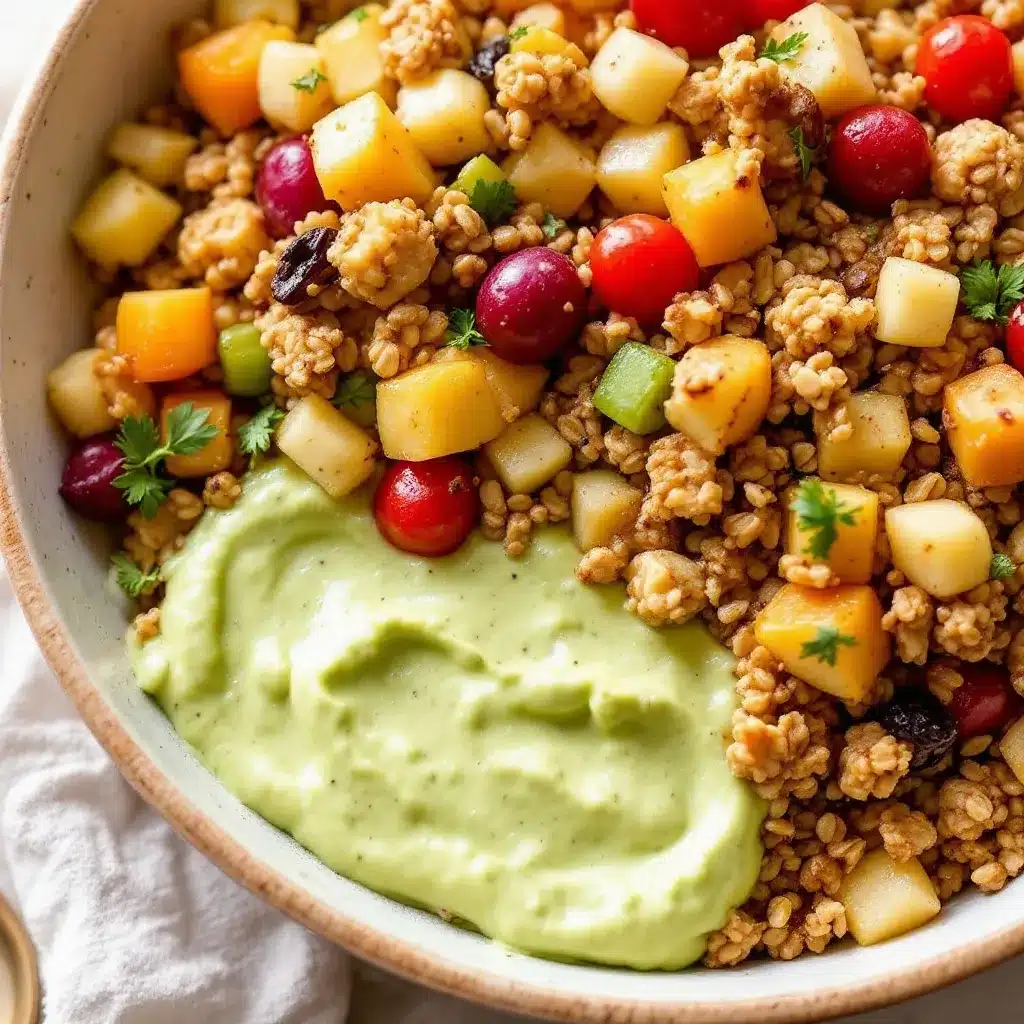
- Chopped walnuts or pecans – 1/3 cup (40g). Adds crunch and makes them feel more substantial.
- Dried cranberries or raisins – 1/4 cup (30g). For extra chewiness and a pop of tartness.
- Chocolate chips – 1/4 cup (45g). Because sometimes you need chocolate in your oat bars. No judgment.
A quick note on ingredient selection: For the best texture, make sure your apple is diced small—think pea-sized or smaller. Big chunks of apple can release too much moisture and make the bars soggy. Also, if you’re using a really juicy apple variety, you might want to pat the diced pieces dry with a paper towel before mixing. Trust me on this one.
If you need substitutions, here are a few that work well: Use coconut oil instead of butter for a dairy-free version. Swap the egg for a flax egg (1 tablespoon ground flaxseed mixed with 3 tablespoons water, let sit for 5 minutes). And if you’re gluten-sensitive, certified gluten-free oats are widely available now—just make sure the label says gluten-free.
Equipment Needed
You don’t need a fancy kitchen to make these bars. Here’s what you’ll actually use:
- 8×8-inch baking pan – This is the sweet spot for getting bars that are thick enough to be satisfying but not too thick. A 9×9 works too, though your bars will be slightly thinner and may bake a few minutes faster.
- Parchment paper – Non-negotiable. Line your pan with parchment, leaving some overhang on two sides. It makes lifting the bars out so much easier. I learned this the hard way after a stuck-bar disaster.
- Mixing bowls – One large, one medium. Nothing fancy.
- Whisk and spatula – A whisk for the wet ingredients, a sturdy spatula for folding everything together.
- Chef’s knife and cutting board – For dicing that apple into tiny pieces.
- Measuring cups and spoons – Standard set. I prefer metal measuring cups for dry ingredients; they’re more accurate.
- Cooling rack – Helps the bars cool evenly so they don’t get soggy on the bottom.
If you don’t have an 8×8 pan, you can use a loaf pan and adjust the baking time slightly—just keep an eye on it. And if you’re really in a pinch, a muffin tin works too; you’ll just get cute little bar bites instead of traditional bars. Bake them for about 12-15 minutes instead.
Preparation Method
Let’s get into the actual making of these chewy baked apple cinnamon oat snack bars. I’ve tested this method multiple times, so follow along and you’ll get perfect bars every time.
- Preheat and prep. Preheat your oven to 350°F (175°C). Line your 8×8 baking pan with parchment paper, leaving about 2 inches of overhang on two opposite sides. This is your lifting handle later. Lightly grease the parchment with a tiny bit of butter or non-stick spray.
- Prep the apple. Peel your apple, then dice it into very small pieces—about 1/4-inch cubes. Think the size of a small pea. Too big and they’ll release too much moisture; too small and they’ll disappear into the bars. Set the diced apple aside on a paper towel to absorb any excess juice while you prepare the rest.
- Mix the dry ingredients. In a large bowl, combine 2 cups rolled oats, 1/2 teaspoon baking powder, 1 teaspoon cinnamon, and 1/4 teaspoon salt. Give it a quick whisk to distribute everything evenly. I like to use my fingers to break up any clumps of oats that might have formed.
- Mix the wet ingredients. In a medium bowl, whisk together 1/3 cup melted butter (cooled slightly so it doesn’t cook the egg), 1/3 cup packed brown sugar, 2 tablespoons honey, 1 large egg, and 1 teaspoon vanilla extract. Whisk until smooth and the sugar has mostly dissolved—about 30 seconds of vigorous whisking.
- Combine wet and dry. Pour the wet mixture into the dry mixture. Fold gently with a spatula until just combined. Don’t overmix; you want the oats to stay intact, not turn into paste. The batter will look thick and a little shaggy—that’s perfect.
- Fold in the apples. Add the diced apple (and any optional add-ins like nuts or dried fruit at this point). Fold gently until the apple pieces are evenly distributed. The batter will seem a bit loose, but that’s okay. The oats will absorb moisture as they bake.
- Press into the pan. Transfer the mixture to your prepared pan. Use the back of a spatula (or lightly wet your fingers) to press it down evenly. Press firmly—this is key for bars that hold together. You want the surface to be flat and compact, not fluffy.
- Bake. Place the pan on the middle rack of your preheated oven. Bake for 18-22 minutes. At 18 minutes, start checking. The edges should be golden brown and slightly pulling away from the pan. The center should look set and feel firm to a light touch. A toothpick inserted in the center should come out clean or with just a few moist crumbs—not wet batter.
- Cool completely. This is the hardest part, I know. Let the bars cool in the pan on a wire rack for at least 20 minutes. Then use the parchment overhang to lift the entire block out onto the cooling rack. Let it cool completely—another 20-30 minutes—before slicing. If you cut too early, they’ll crumble. I’ve done it. It’s sad. Be patient.
- Slice and serve. Use a sharp knife to cut into 9 even bars (3 rows by 3 rows). For cleaner cuts, wipe the knife clean between slices. If you want smaller bars for little hands, cut into 12 pieces instead.
Cooking Tips & Techniques
After making these chewy baked apple cinnamon oat snack bars more times than I can count, I’ve picked up a few tricks that make a real difference. Here’s what I wish someone had told me from the start.
Don’t skip the parchment paper overhang. I know it seems like an extra step, but the first time you try to pry a stuck bar out of the pan with a spatula, you’ll understand. The overhang lets you lift the whole block out cleanly, and you get perfectly intact bars. Worth every second.
Press the mixture down firmly. This is probably the most common mistake. If you don’t press the oat mixture into the pan with some authority, your bars will be loose and crumbly. Use the back of a measuring cup or a flat-bottomed glass to really compact it. Think of it like making a graham cracker crust—you want it dense and even.
Watch your oven like a hawk toward the end. Ovens vary wildly. My old oven would bake these in 18 minutes flat. My current one takes 22. Start checking at 18 minutes, and if the edges are browning faster than the center, rotate the pan halfway through. Overbaked bars turn dry and hard, and nobody wants that.
Let them cool fully before slicing. I know the smell is intoxicating. I know you want a warm bar right now. But if you cut into them while they’re still warm, they’ll fall apart. The oats need time to set and absorb the remaining moisture. Trust the process. Your patience will be rewarded with clean, perfect squares.
Use room temperature ingredients. Cold egg straight from the fridge can seize up the melted butter. Let your egg sit out for 15-20 minutes before starting. Same goes for the butter—melt it, then let it cool for a minute before mixing with the egg. Nobody wants scrambled eggs in their oat bars.
Double the batch if you’re smart. These bars disappear fast. I always make a double batch now and freeze half. They thaw beautifully, and having a stash in the freezer means I’m never more than 10 minutes away from a homemade snack.
Variations & Adaptations
One of the best things about this recipe is how flexible it is. Here are some variations I’ve tried and loved:
Apple Cinnamon with a Crunch: Add 1/3 cup chopped walnuts or pecans along with the apples. The nuts toast as the bars bake, adding a lovely crunch that contrasts with the chewy oats. I made this version for a fall potluck and got three requests for the recipe.
Blueberry Lemon Oat Bars: Swap the apple for 1 cup fresh or frozen blueberries (don’t thaw if frozen) and replace the cinnamon with 1 teaspoon lemon zest. The blueberries burst as they bake, creating little jammy pockets. These are amazing for spring and summer.
Vegan Version: Replace the butter with melted coconut oil (refined for neutral flavor), and use a flax egg instead of a regular egg. Use maple syrup instead of honey to keep it fully plant-based. The texture is slightly different—a little more tender—but still delicious. I’ve made these for vegan friends and they disappeared in minutes.
Gluten-Free: Use certified gluten-free rolled oats. That’s literally the only change. Everything else is naturally gluten-free. Just double-check your baking powder label to be safe.
Lower Sugar: Cut the brown sugar down to 1/4 cup and use a very sweet apple like Honeycrisp or Gala. You can also replace the honey with a sugar-free maple syrup alternative. The bars will be less sweet but still satisfying, especially if you add raisins for natural sweetness.
Pumpkin Spice Version: Replace the diced apple with 1/2 cup pumpkin puree (not pumpkin pie filling) and add 1/2 teaspoon pumpkin pie spice along with the cinnamon. Reduce the butter to 1/4 cup since the pumpkin adds moisture. These are perfect for cozy fall mornings.
My personal favorite variation? The one with dark chocolate chips and a pinch of flaky sea salt on top before baking. The salty-sweet combo with the chewy oats and melty chocolate is next-level. I won’t tell anyone if you make that your go-to.
Serving & Storage Suggestions
These chewy baked apple cinnamon oat snack bars are incredibly versatile when it comes to serving. Here’s how I like to enjoy them:
Serving temperature: They’re fantastic at room temperature, but if you want to take them to the next level, warm one up in the microwave for about 10 seconds. It softens the apples and makes the whole bar taste freshly baked. For a breakfast treat, split one in half, toast it lightly in a skillet with a pat of butter, and drizzle with a little extra honey. Trust me on this one.
What to serve with them: On their own, these bars are a complete snack. But if you’re building a bigger spread, they pair beautifully with a hot cup of coffee or chai tea. For a kid-friendly lunchbox, pack one alongside some fresh fruit and a cheese stick. They also make a great post-workout snack—the oats provide slow-release energy, and the apples give you a little natural sugar boost.
Storage instructions: Store the bars in an airtight container at room temperature for up to 5 days. Place a sheet of parchment paper between layers if you’re stacking them to prevent sticking. If your kitchen runs warm or humid, pop them in the fridge—they’ll keep for up to a week there.
Freezing: These bars freeze beautifully. Wrap each bar individually in plastic wrap, then place them in a freezer-safe bag or container. They’ll keep for up to 3 months. To thaw, just leave one out at room temperature for about 20 minutes, or microwave for 15-20 seconds. I keep a stash in my freezer at all times for emergency snack situations.
Reheating: Microwave for 10-15 seconds for a warm-from-the-oven feel. If you’re reheating from frozen, go for 20-25 seconds. For a crispier exterior, pop them in a toaster oven at 300°F for about 5 minutes.
Flavor development: Here’s a little secret—these bars actually taste better the next day. The flavors meld together overnight, and the texture becomes even more cohesive. So if you can resist eating them all on day one, you’re in for a treat on day two. I’ve taken them to picnics and brunches the day after baking, and they always get rave reviews.
Nutritional Information & Benefits
I’m not a nutritionist, but I’ve done my research on these ingredients. Here’s a rough breakdown per bar (based on 9 bars, using the base recipe without add-ins):
| Nutrient | Amount Per Bar |
|---|---|
| Calories | 195 |
| Total Fat | 9g |
| Saturated Fat | 5g |
| Cholesterol | 35mg |
| Sodium | 95mg |
| Total Carbohydrates | 27g |
| Dietary Fiber | 3g |
| Sugars | 12g |
| Protein | 4g |
Health benefits of key ingredients: Oats are packed with beta-glucan, a type of soluble fiber that helps lower cholesterol and keeps you feeling full longer. Apples provide vitamin C and antioxidants, especially in the skin (though we’re peeling them here for texture). Cinnamon has anti-inflammatory properties and may help regulate blood sugar. And the brown sugar? Well, it makes life worth living. Everything in moderation.
Dietary considerations: This recipe is vegetarian. For gluten-free, use certified gluten-free oats. For dairy-free, swap the butter with coconut oil. For vegan, use a flax egg and maple syrup. The base recipe contains gluten (oats), dairy (butter), and eggs—so keep that in mind for allergies.
These bars aren’t health food, but they’re a far cry from processed snack bars loaded with preservatives and artificial ingredients. They’re real food, made with real ingredients, and they fuel you without the junk. That’s a win in my book.
Conclusion
These chewy baked apple cinnamon oat snack bars have become a staple in my kitchen for good reason. They’re quick, they’re forgiving, and they taste like something you’d actually want to eat—not just something you tolerate because it’s “healthy.” The combination of chewy oats, tender apple pieces, and warm cinnamon is simple but satisfying in a way that never gets old.
What I love most about this recipe is how adaptable it is. You can dress it up with nuts and chocolate, keep it simple with just apples and cinnamon, or swap in seasonal fruit depending on what you have. It’s the kind of recipe that works with your life, not against it. And honestly, that’s rare.
I’d love to hear how these turn out for you. Did you add nuts? Swap the apples for something else? Bake them for a party and watch them disappear? Drop a comment below and let me know—your variations might inspire someone else’s next batch. And if you’re looking for more easy snack ideas, you might enjoy our easy peanut butter banana sushi roll-ups for kids or these easy cold pepperoni pasta salad perfect for school lunches for more lunchbox inspiration.
Happy baking, friends. And remember—the best bars are the ones you share. Or don’t. I won’t judge if you keep the whole batch for yourself.
Frequently Asked Questions
Can I use quick oats instead of rolled oats?
You can, but the texture will be different. Quick oats are more finely chopped and will absorb moisture faster, resulting in a softer, less chewy bar. If that’s what you prefer, go for it. But for that classic chewy texture, rolled oats are the way to go.
Why did my bars turn out crumbly?
Most likely one of three things: you didn’t press the mixture firmly enough into the pan, you cut them too early before they cooled completely, or the apple was too wet and threw off the moisture balance. Next time, press firmly, be patient with cooling, and pat your diced apple dry with a paper towel.
Can I make these without eggs?
Absolutely. Use a flax egg (1 tablespoon ground flaxseed mixed with 3 tablespoons water, let sit for 5 minutes) as a replacement. The texture will be slightly more tender and less sturdy, but they’ll still hold together nicely.
How do I make these bars less sweet?
Cut the brown sugar down to 1/4 cup and use a very sweet apple variety like Honeycrisp or Fuji. You can also replace the honey with a sugar-free maple syrup alternative. The bars will still be sweet enough to satisfy, just not overly so.
Can I use frozen apples instead of fresh?
I wouldn’t recommend it. Frozen apples release a lot of extra water as they thaw, which can make your bars soggy and prevent them from setting properly. Stick with fresh apples for the best texture. If you only have frozen, thaw them first, pat them very dry, and reduce the butter slightly to compensate for the extra moisture.
Pin This Recipe!
Chewy Baked Apple Cinnamon Oat Snack Bars

These chewy baked apple cinnamon oat snack bars are quick, easy, and made with simple ingredients. Perfect for meal prep, they offer a deliciously balanced texture with real apple chunks and warm cinnamon.
- Prep Time: 10 minutes
- Cook Time: 20 minutes
- Total Time: 30 minutes
- Yield: 9 bars 1x
- Category: Snack
- Cuisine: American
Ingredients
- 2 cups (180g) rolled oats
- 1 large apple (about 200g), peeled and finely diced
- 1/3 cup (75g) unsalted butter, melted
- 1/3 cup (70g) packed brown sugar
- 2 tablespoons (30ml) honey or maple syrup
- 1 large egg, room temperature
- 1 teaspoon cinnamon
- 1 teaspoon vanilla extract
- 1/4 teaspoon salt
- 1/2 teaspoon baking powder
- 1/3 cup (40g) chopped walnuts or pecans (optional)
- 1/4 cup (30g) dried cranberries or raisins (optional)
- 1/4 cup (45g) chocolate chips (optional)
Instructions
- Preheat oven to 350°F (175°C). Line an 8×8-inch baking pan with parchment paper, leaving overhang on two sides. Lightly grease the parchment.
- Peel and dice the apple into small 1/4-inch cubes. Place on a paper towel to absorb excess moisture.
- In a large bowl, whisk together rolled oats, baking powder, cinnamon, and salt.
- In a medium bowl, whisk together melted butter, brown sugar, honey, egg, and vanilla extract until smooth.
- Pour the wet mixture into the dry mixture and fold with a spatula until just combined. Do not overmix.
- Fold in the diced apple and any optional add-ins (nuts, dried fruit, chocolate chips) until evenly distributed.
- Transfer the mixture to the prepared pan and press down firmly and evenly with a spatula or wet fingers.
- Bake for 18-22 minutes, until edges are golden and center is set. A toothpick inserted in the center should come out clean or with a few moist crumbs.
- Cool in the pan on a wire rack for 20 minutes, then lift out using the parchment overhang and cool completely (another 20-30 minutes) before slicing.
- Slice into 9 or 12 bars using a sharp knife, wiping the blade clean between cuts.
Notes
For best texture, dice apple very small and pat dry. Press mixture firmly into pan. Let bars cool completely before slicing to prevent crumbling. Bars taste even better the next day. Store in an airtight container at room temperature for up to 5 days, or freeze for up to 3 months.
Nutrition
- Serving Size: 1 bar
- Calories: 195
- Sugar: 12
- Sodium: 95
- Fat: 9
- Saturated Fat: 5
- Carbohydrates: 27
- Fiber: 3
- Protein: 4
Keywords: apple cinnamon oat bars, chewy snack bars, homemade granola bars, easy oat bars, healthy snack bars


