For a few Octobers, I just accepted that sugar cookie cutouts weren’t going to hold their shape. The edges would blur into a ghost that looked more like a blob, and the icing would slide right off the sides before it had a chance to set. I tried different recipes, chilled the dough for hours, and still ended up with cookies that looked fine but felt like a compromise. It was the kind of frustration that made me wonder if the perfectly sharp Halloween cookies I saw online were just good photography and better lighting.
Then I started paying closer attention to the ratios. Not in a scientific way — just a slow, patient kind of noticing. I wanted a cookie that tasted like butter and vanilla, not just a vehicle for icing. And I wanted the icing to dry hard enough that you could stack them in a treat bag without smudging a single spiderweb. That meant testing batches, accepting a few failures, and eventually landing on a method that just worked. No chilling drama, no spreading surprises.
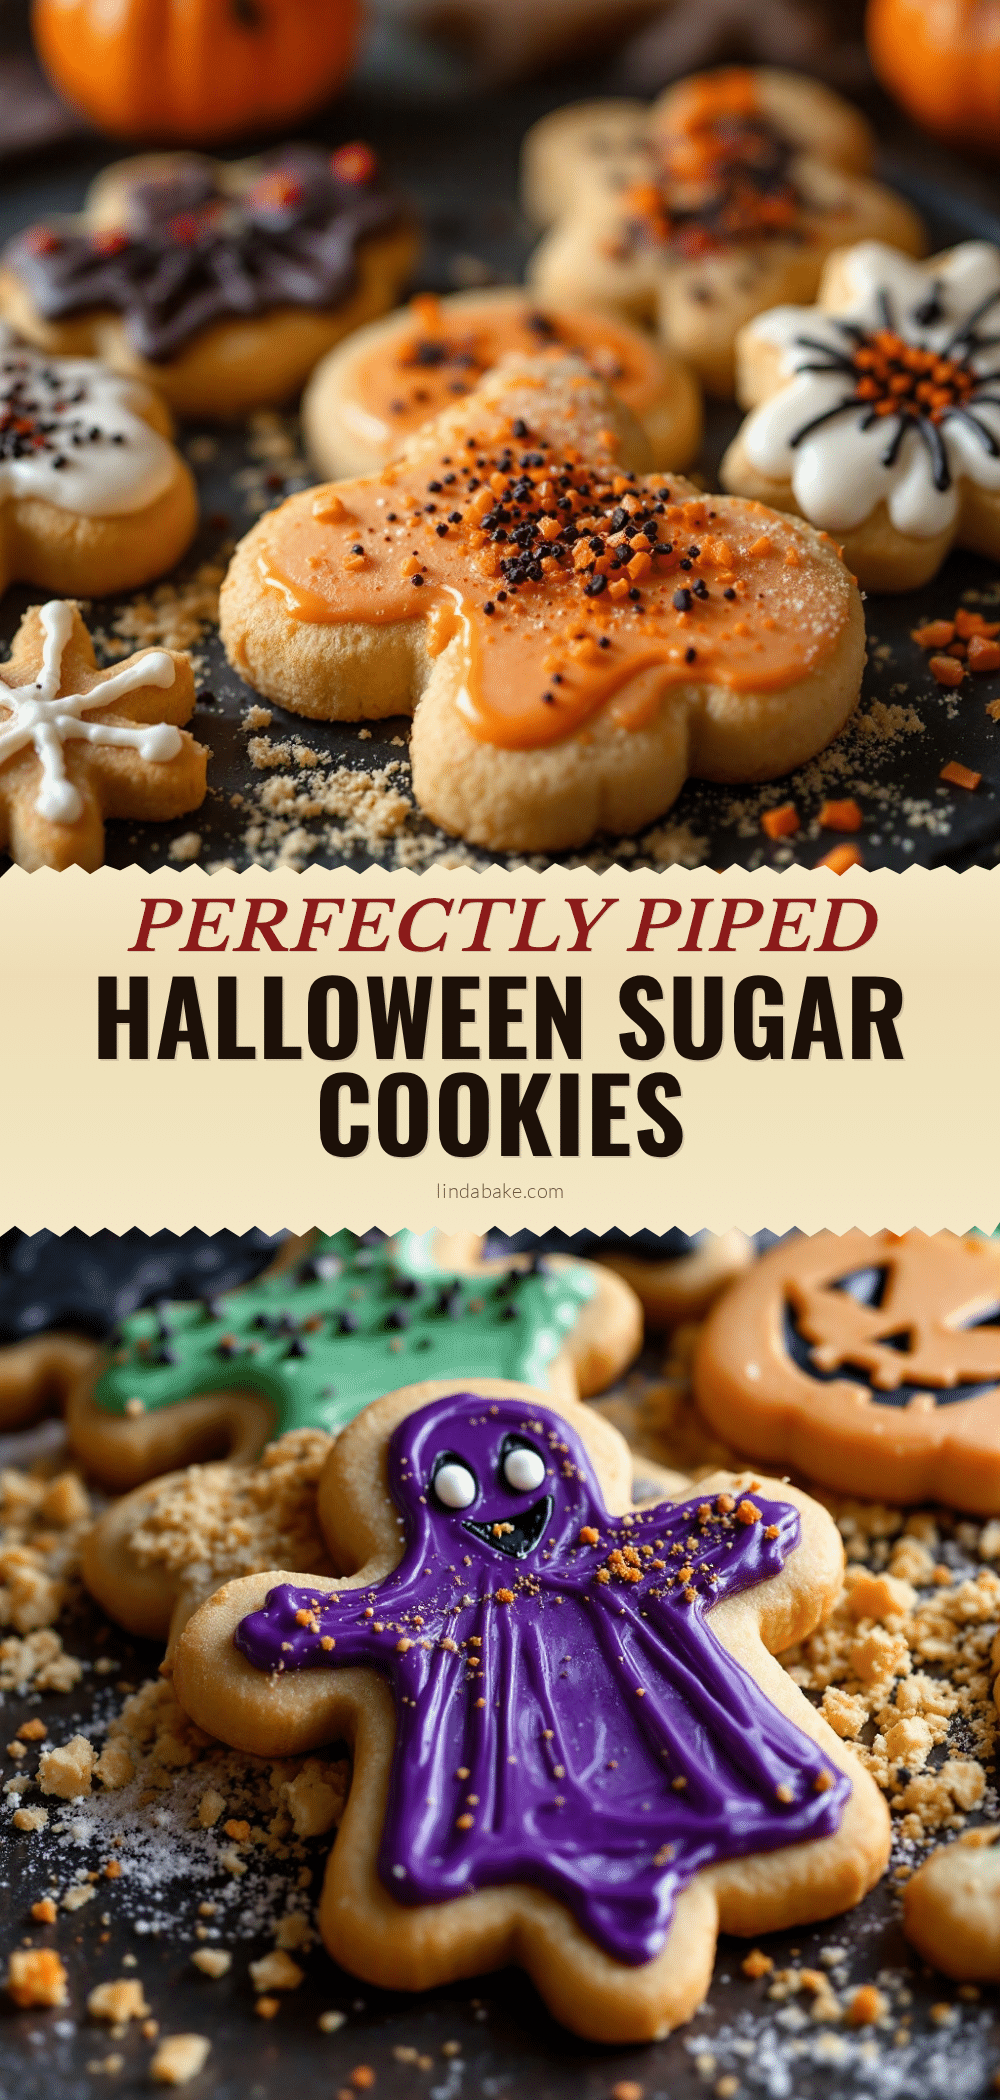
These Halloween sugar cookies are the result of that quiet persistence. They’re the kind you can hand to a kid and trust they’ll still look like a pumpkin by the time the party starts. The dough rolls out clean, the edges stay crisp, and the royal icing dries to a finish that feels almost professional — without requiring a pastry degree. It took me a while to get here, but honestly, that’s what makes this recipe feel like mine.
Why You’ll Love This Recipe
This isn’t just another sugar cookie recipe that promises a lot and delivers a flat, flavorless disc. I’ve tested this one until the texture and taste felt right — buttery, tender, and sturdy enough for detailed decorating. Here’s what makes it stand out:
- No Spreading, No Stress – The dough holds its shape beautifully, even with intricate cutters. No chilled panic required.
- Simple Pantry Ingredients – You probably have everything already. No weird extracts or specialty flours.
- Perfect for Halloween Baking – Whether you’re making a batch for a school party or a quiet night of decorating with cocoa, these cookies deliver.
- Royal Icing That Actually Hardens – It dries to a smooth, glossy finish that won’t smudge when stacked or bagged.
- Crowd-Pleasing Flavor – The vanilla and almond combo is subtle but unmistakable. Kids and adults both reach for seconds.
What makes this recipe different from others is the technique of creaming the butter just enough — not too much, not too little — and the precise balance of flour that keeps the cookies tender without making them fragile. It’s the kind of cookie that makes you close your eyes after the first bite, even if you’re just testing one at the counter alone. It’s comfort baking reimagined — simpler, more reliable, but with the same soul-soothing satisfaction.
What Ingredients You Will Need
This recipe uses simple, wholesome ingredients to deliver a sugar cookie that’s both sturdy for decorating and tender to the bite. Most of these are pantry staples, which makes this an easy last-minute project.
- Unsalted butter, softened – 1 cup (2 sticks). I prefer using Land O’Lakes for consistent results. The butter should be soft enough to leave a dent when pressed, but not greasy or melted.
- Granulated sugar – 1 cup. Standard white sugar works perfectly here. No need for superfine or organic.
- Large egg – 1, room temperature. Cold egg can seize the butter mixture, so let it sit out for 15 minutes.
- Vanilla extract – 1½ teaspoons. Pure vanilla makes a difference, but a good quality imitation works fine too.
- Almond extract – ½ teaspoon (optional, but highly recommended). It adds a subtle nutty warmth that makes the cookies taste bakery-style.
- All-purpose flour – 2½ cups, spooned and leveled. I use King Arthur for consistent protein content. Too much flour makes cookies dense, so measure carefully.
- Baking powder – 1 teaspoon. Helps the cookies puff just slightly without losing their shape.
- Salt – ½ teaspoon. Balances the sweetness and enhances flavor.
For the Royal Icing:
- Powdered sugar – 3 cups, sifted. Sifting prevents lumps that can clog piping tips.
- Meringue powder – 2 tablespoons. This is what makes the icing dry hard. You can find it at craft stores or online. (If you’re avoiding meringue powder, you can use pasteurized egg whites, but meringue powder is more forgiving.)
- Water – 4 to 5 tablespoons. Add slowly — the consistency should be thick enough to hold a ribbon trail for a few seconds.
- Vanilla extract – ½ teaspoon (optional, for flavor).
- Gel food coloring – I recommend Wilton or Americolor gels. Liquid food coloring can thin the icing too much.
Equipment Needed
You don’t need a professional bakery setup to make these cookies shine, but a few specific tools make the job much easier.
- Stand mixer or hand mixer – A stand mixer with the paddle attachment is ideal, but a hand mixer works fine. I’ve used both, and the key is just to cream the butter and sugar until light and fluffy — about 2 minutes.
- Rolling pin with thickness rings – This is a game-changer. If you don’t have one, use two wooden dowels or even stacked popsicle sticks on either side of the dough to ensure even thickness.
- Halloween cookie cutters – Ghosts, pumpkins, bats, cats — whatever suits your vibe. Sharp cutters make cleaner edges.
- Baking sheets – Light-colored, rimmed sheets work best. Dark sheets can cause the bottoms to brown too quickly.
- Parchment paper or silicone baking mats – Parchment is cheap and disposable; silicone mats are reusable. Both prevent sticking and promote even baking.
- Piping bags and tips – I use disposable piping bags and a Wilton #2 or #3 tip for outlining and flooding. You can also use a squeeze bottle for flooding larger areas.
- Toothpicks or scribe tool – For popping air bubbles and spreading icing into tight corners.
- Cooling rack – Essential for letting cookies cool completely before icing. Never ice warm cookies.
Preparation Method

This method is broken down into clear steps so you can follow along without second-guessing. Take your time, especially with the chilling and cooling stages.
- Cream the butter and sugar. In the bowl of a stand mixer fitted with the paddle attachment, beat the softened butter and granulated sugar on medium speed until light and fluffy, about 2 minutes. Scrape down the sides halfway through. You want the mixture to look pale and slightly aerated. (Don’t over-cream — that can cause spreading.)
- Add the egg and extracts. Add the room-temperature egg, vanilla extract, and almond extract (if using). Beat on low until just combined. The mixture might look a little curdled — that’s okay. Scrape the bowl again.
- Combine dry ingredients. In a separate bowl, whisk together the flour, baking powder, and salt. Add the dry mixture to the wet mixture in two additions, mixing on low after each until just incorporated. The dough should come together in a soft, cohesive mass. If it feels sticky, add an extra tablespoon of flour, but no more than that.
- Divide and chill. Turn the dough out onto a lightly floured surface. Divide it in half, shape each half into a flat disc, wrap tightly in plastic wrap, and refrigerate for at least 1 hour. (I’ve chilled it overnight with great results.) The dough needs to be firm enough to roll without sticking.
- Preheat and prepare. Preheat your oven to 350°F (175°C). Line two baking sheets with parchment paper or silicone mats.
- Roll and cut. On a lightly floured surface, roll one disc of dough to about ¼-inch thickness. (Use thickness rings if you have them.) Cut out your Halloween shapes and transfer them to the prepared baking sheets, spacing them about 1 inch apart. Gather the scraps, re-roll, and cut again. The second roll might produce slightly tougher cookies, so use them for simpler shapes.
- Chill the cutouts. Place the baking sheets with the cutouts in the refrigerator for 10 to 15 minutes before baking. This is the secret to sharp edges — it firms up the butter so the cookies hold their shape in the oven.
- Bake. Bake for 8 to 10 minutes, rotating the pans halfway through. The cookies should be just set around the edges and barely golden on the bottom. They will look pale on top — that’s what you want. Overbaking leads to dry cookies.
- Cool completely. Let the cookies cool on the baking sheet for 5 minutes, then transfer them to a cooling rack to cool completely. Do not attempt to ice warm cookies, or the icing will slide right off.
- Make the royal icing. In a clean bowl, combine the sifted powdered sugar and meringue powder. Add 4 tablespoons of water and the vanilla extract. Beat on low until combined, then increase to medium-high and beat for 4 to 5 minutes, until the icing is thick, glossy, and holds stiff peaks. Add more water, a teaspoon at a time, if the icing is too thick.
- Color and consistency. Divide the icing into bowls and tint with gel food coloring. For outlining, leave the icing thick (stiff peaks). For flooding, thin the icing with water, a few drops at a time, until it flows like honey and a ribbon settles back into itself within 10 seconds.
- Decorate. Fill piping bags fitted with small round tips. Outline each cookie first, then flood the inside with thinned icing. Use a toothpick to spread the icing into corners and pop any air bubbles. Let the base color dry for at least 1 hour before adding details like dots, stripes, or faces.
- Let the icing set. Allow the decorated cookies to dry, uncovered, at room temperature for 4 to 6 hours, or overnight. The icing should be hard to the touch before stacking or storing.
Cooking Tips & Techniques
I’ve made plenty of mistakes with sugar cookies, and I’m sharing them so you don’t have to repeat them. One time, I skipped the second chill before baking because I was in a hurry. The result was a sheet of ghost-shaped blobs that looked more like melted snowmen. Never again. That extra 10 minutes in the fridge is non-negotiable for clean edges.
Another common mistake is overworking the dough. When you re-roll scraps, handle them gently. Over-kneading develops gluten, which makes the cookies tough and prone to shrinking. If your scraps feel warm and sticky, pop them in the fridge for 15 minutes before rolling again.
For royal icing, the consistency is everything. If your outlining icing is too thin, it will run off the cookie. If your flooding icing is too thick, it won’t self-level and you’ll end up with lumpy surfaces. Test a small amount on the back of a spoon — it should flow slowly and settle into a smooth puddle. You can always add more water, but you can’t take it out, so add it drop by drop.
Timing matters, too. I like to bake the cookies one day and decorate them the next. It breaks the project into manageable chunks and ensures the cookies are completely cool. If you’re decorating with kids, keep the designs simple — a single color flood with a few sprinkles is plenty for little hands.
Variations & Adaptations
One of the best things about this recipe is how adaptable it is. You can switch things up depending on the occasion or dietary needs.
- Gluten-Free Version – Substitute the all-purpose flour with a 1:1 gluten-free baking flour blend that contains xanthan gum. I’ve tested this with King Arthur Measure for Measure, and the texture is remarkably close. Chill the dough a little longer (about 30 minutes extra) to help it hold together.
- Different Flavors – Swap the almond extract for lemon, orange, or peppermint extract. For a citrusy twist, add 1 teaspoon of finely grated lemon or orange zest to the dough. For a chocolate version, replace ¼ cup of the flour with unsweetened cocoa powder.
- No Royal Icing – If you don’t want to fuss with piping bags, simply sprinkle the unbaked cookies with colored sanding sugar or sparkling sugar before baking. It’s quick, pretty, and kids love the crunch.
- Vegan Adaptation – Use vegan butter (I like Miyoko’s or Earth Balance) and a flax egg (1 tablespoon ground flaxseed mixed with 3 tablespoons water, let sit for 5 minutes). For the royal icing, use aquafaba (the liquid from a can of chickpeas) instead of meringue powder — 3 tablespoons of aquafaba whipped to stiff peaks, then folded into the powdered sugar.
- Mini Cookie Option – Use small cutters for bite-sized cookies perfect for treat bags or party platters. Reduce the baking time to 6 to 7 minutes.
Serving & Storage Suggestions
These cookies are best served at room temperature. The royal icing should be fully set — hard and glossy — before you plate them. I like to arrange them on a platter by color or shape, grouping all the ghosts together and all the pumpkins together. It makes for a striking Halloween display.
They pair beautifully with a glass of cold milk, a warm cup of spiced chai, or even a hot apple cider. If you’re serving them at a party, consider arranging them on a tiered stand for a festive centerpiece. They also work great as edible party favors — just wrap each cookie in a clear cellophane bag tied with orange or black ribbon.
For storage, place the decorated cookies in an airtight container, layered between sheets of parchment paper. They will stay fresh at room temperature for up to 1 week. Do not refrigerate them, as the moisture can soften the royal icing. If you need to store them longer, you can freeze the undecorated baked cookies for up to 3 months. Thaw them at room temperature, then decorate as usual.
The flavors actually improve after a day or two — the butter and vanilla deepen, and the almond note becomes more pronounced. So don’t worry if you need to bake them ahead of time.
Nutritional Information & Benefits
While these are definitely a treat, they’re made with simple, recognizable ingredients. Each cookie (based on a 2-inch pumpkin cutter) contains approximately 120 calories, 5 grams of fat, 18 grams of carbohydrates, and 1 gram of protein. The exact numbers will vary depending on the size of your cutters and how much icing you use.
The butter provides a small amount of vitamin A, and the egg adds protein and B vitamins. The real benefit here is the joy of baking from scratch — you control the quality of the ingredients, and there are no preservatives or artificial flavors. If you’re using gel food coloring, look for natural options made from plant-based sources. I’ve used India Tree natural food colors with good results.
For those with dietary restrictions, the gluten-free and vegan variations mentioned above allow more people to enjoy these cookies without compromise. As always, be mindful of potential allergens: dairy, eggs, wheat, and (in the royal icing) meringue powder, which is derived from egg whites.
Conclusion
These Halloween sugar cookies are the kind of recipe that earns a permanent spot in your fall rotation. They’re reliable, forgiving, and genuinely delicious — not just a pretty face. Whether you’re decorating with your kids for a rainy afternoon or preparing a batch for a costume party, the process is as enjoyable as the result.
I love that this recipe gives me the freedom to be creative without the fear of failure. The dough behaves, the icing sets, and the cookies taste like childhood. If you try them, I’d love to hear how they turn out. Did you add a splash of orange extract? Did you go all out with five colors or keep it simple with black and white? Share your creations in the comments below — and don’t forget to tag a friend who needs a little Halloween baking inspiration.
Happy haunting, and happy baking.
Frequently Asked Questions
Can I skip the chilling step before baking?
I don’t recommend it. Chilling the cutouts for 10 to 15 minutes before baking firms up the butter and prevents the cookies from spreading. Without it, your shapes will lose their definition.
How do I fix royal icing that’s too thick?
Add water one drop at a time, stirring well after each addition. The icing should be thick enough to hold a ribbon trail for a few seconds but thin enough to spread smoothly. If it gets too thin, add more sifted powdered sugar.
Can I use liquid food coloring instead of gel?
You can, but liquid coloring adds extra moisture to the icing, which can thin it out and affect the drying time. Gel food coloring is more concentrated and won’t change the consistency. For the best results, stick with gel.
How far in advance can I make these cookies?
You can bake the cookies up to a week in advance and store them in an airtight container at room temperature. Decorate them a day or two before serving. The undecorated cookies also freeze well for up to 3 months.
Why did my cookies turn out tough?
Tough cookies are usually the result of overmixing the dough or overbaking. Mix the dough just until the flour is incorporated, and bake only until the edges are set. Also, be gentle when re-rolling scraps to avoid developing too much gluten.
Pin This Recipe!
Perfect Halloween Sugar Cookies with Royal Icing

Buttery, tender sugar cookies that hold their shape perfectly, topped with a glossy royal icing that dries hard. Ideal for Halloween decorating with crisp edges and a delicious vanilla-almond flavor.
- Prep Time: 1 hour 30 minutes
- Cook Time: 10 minutes
- Total Time: 2 hours (plus chilling and drying time)
- Yield: 24 cookies (depending on cutter size) 1x
- Category: Dessert
- Cuisine: American
Ingredients
- 1 cup (2 sticks) unsalted butter, softened
- 1 cup granulated sugar
- 1 large egg, room temperature
- 1½ teaspoons vanilla extract
- ½ teaspoon almond extract (optional)
- 2½ cups all-purpose flour, spooned and leveled
- 1 teaspoon baking powder
- ½ teaspoon salt
- 3 cups powdered sugar, sifted
- 2 tablespoons meringue powder
- 4 to 5 tablespoons water
- ½ teaspoon vanilla extract (optional, for icing)
- Gel food coloring (Wilton or Americolor recommended)
Instructions
- Cream the butter and sugar: In a stand mixer fitted with the paddle attachment, beat softened butter and granulated sugar on medium speed until light and fluffy, about 2 minutes. Scrape down the sides halfway through.
- Add the egg and extracts: Add room-temperature egg, vanilla extract, and almond extract (if using). Beat on low until just combined. Scrape the bowl again.
- Combine dry ingredients: In a separate bowl, whisk together flour, baking powder, and salt. Add to wet mixture in two additions, mixing on low after each until just incorporated. The dough should be soft and cohesive. If sticky, add an extra tablespoon of flour.
- Divide and chill: Turn dough onto a lightly floured surface. Divide in half, shape into flat discs, wrap in plastic wrap, and refrigerate for at least 1 hour (or overnight).
- Preheat and prepare: Preheat oven to 350°F (175°C). Line two baking sheets with parchment paper or silicone mats.
- Roll and cut: On a lightly floured surface, roll one disc to about ¼-inch thickness. Cut out Halloween shapes and transfer to prepared baking sheets, spacing 1 inch apart. Gather scraps, re-roll, and cut again.
- Chill the cutouts: Place baking sheets with cutouts in the refrigerator for 10 to 15 minutes before baking.
- Bake: Bake for 8 to 10 minutes, rotating pans halfway through. Cookies should be just set around the edges and barely golden on the bottom.
- Cool completely: Let cookies cool on baking sheet for 5 minutes, then transfer to a cooling rack to cool completely.
- Make the royal icing: In a clean bowl, combine sifted powdered sugar and meringue powder. Add 4 tablespoons water and vanilla extract. Beat on low until combined, then increase to medium-high and beat for 4 to 5 minutes until thick, glossy, and holds stiff peaks. Add more water a teaspoon at a time if too thick.
- Color and consistency: Divide icing into bowls and tint with gel food coloring. For outlining, keep icing thick (stiff peaks). For flooding, thin with water a few drops at a time until it flows like honey and a ribbon settles back into itself within 10 seconds.
- Decorate: Fill piping bags with small round tips. Outline each cookie, then flood the inside with thinned icing. Use a toothpick to spread icing into corners and pop air bubbles. Let base color dry for at least 1 hour before adding details.
- Let the icing set: Allow decorated cookies to dry, uncovered, at room temperature for 4 to 6 hours or overnight until hard to the touch.
Notes
Chilling the cutouts before baking is essential for sharp edges. For royal icing, consistency is key: outlining icing should be thick, flooding icing should flow like honey. Bake cookies one day and decorate the next for best results. Store decorated cookies in an airtight container at room temperature for up to 1 week. Undecorated cookies can be frozen for up to 3 months.
Nutrition
- Serving Size: 1 cookie (2-inch pum
- Calories: 120
- Sugar: 12
- Sodium: 50
- Fat: 5
- Saturated Fat: 3
- Carbohydrates: 18
- Protein: 1
Keywords: Halloween sugar cookies, royal icing, cut-out cookies, decorated cookies, Halloween baking, sugar cookie recipe


