Third time in five days I made this no-bake peanut butter icebox cake, and this time I finally remembered to chill the bowl before whipping the cream. That little detail — the one you always read but never think matters — actually made the layers set up firmer, cleaner, less like a sweet mudslide and more like actual cake. I stood there at the counter, spatula in hand, scraping the last streaks of peanut butter filling from the mixing bowl, and thought: okay, this is the one. This is the version I would bring to someone’s house without apologizing.
Look, I am not a baker. I say that not as a humblebrag but as a confession. Ovens intimidate me — the preheating, the timing, the way you commit to something for forty minutes and hope it works out. So when my sister texted asking what I was bringing to the lake house for Labor Day weekend, I panicked for exactly three seconds before remembering this cake existed. It requires zero oven time. Zero anxiety about doneness. Just a little patience while it chills in the fridge, which honestly is the hardest part.
The funny thing about this no-bake peanut butter icebox cake is how it looks like you tried really hard. The layers stack up tall and clean, the chocolate ganache on top sets into this glossy shell, and when you cut into it, people actually gasp. I have watched it happen. The first time I made it for a cookout, someone asked if I went to culinary school. I laughed and told them the truth: I just really like peanut butter and have the attention span of a gnat when it comes to standing over a hot stove.
This dessert has become my Labor Day signature because it does exactly what you need it to do — it sits in the fridge while you enjoy the last long weekend of summer, and when you pull it out after the burgers are gone, it delivers. No stress, no last-minute oven timer, no sweat dripping into the frosting. Just cold, creamy, peanut butter-chocolate perfection that makes everyone at the table go quiet for a minute. That is the kind of dessert worth making three times in five days to get right.
Why You Will Love This Recipe
Let me be honest with you about why this no-bake peanut butter icebox cake has earned a permanent spot in my summer dessert rotation. I tested it at three different gatherings — a backyard barbecue, a casual dinner with friends, and that lake house Labor Day weekend — and it performed flawlessly every single time. No melting, no sliding, no soggy layers. Just clean slices and empty plates.
- No Oven Required: When it is 90 degrees outside and you are already sweating from flipping burgers, the last thing you want is to turn on your oven. This cake comes together entirely on the stovetop and in the fridge. Your kitchen stays cool, and so do you.
- Simple Pantry Ingredients: Heavy cream, cream cheese, peanut butter, powdered sugar, vanilla extract, and chocolate graham crackers. That is it. You probably have most of these in your kitchen right now, which means you can make this cake on a whim without a special trip to the store.
- Perfect for Labor Day: This dessert is made for the last hurrah of summer. It travels well, feeds a crowd, and tastes even better when you make it a day ahead. You can assemble it Friday night and forget about it until Monday afternoon.
- Crowd-Pleaser Guaranteed: I have yet to meet someone who does not love this cake. Kids devour it. Adults go back for seconds. Even my friend who claims she does not like sweets ate two slices and asked for the recipe.
- Unbelievably Creamy Texture: The combination of whipped cream and cream cheese creates a filling that is light, airy, and rich all at once. It is not heavy like some no-bake desserts can be. It practically melts in your mouth.
What makes this recipe different from the dozens of other icebox cakes out there is the method. I whip the cream separately before folding it into the cream cheese mixture, which gives the filling structure without needing gelatin or pudding mix. The chocolate graham crackers soften just enough overnight to create a cake-like texture, but they still hold their shape when you slice into them. It is the kind of dessert that makes people ask, “Wait, this is no-bake?” and you get to smile and say yes.
Honestly, this is the dessert I turn to when I want to impress people without actually trying that hard. It looks like you spent hours in the kitchen. It tastes like something from a fancy bakery. But really, you just layered cookies and filling in a pan and let the fridge do the work. That is my favorite kind of cooking — the kind where you look like a hero but barely broke a sweat.
What Ingredients You Will Need
This no-bake peanut butter icebox cake uses simple, everyday ingredients, but each one plays a specific role in creating that perfect creamy texture and rich flavor. Here is what you need and why each ingredient matters.
For the Peanut Butter Filling:
- 2 cups heavy whipping cream — This is the backbone of the filling. You want it cold straight from the fridge. I have tried using Cool Whip in a pinch, and it works, but freshly whipped cream gives a lighter, more luxurious texture that is worth the extra two minutes of whisking.
- 16 ounces cream cheese, softened — Full-fat cream cheese is non-negotiable here. The low-fat version makes the filling runny and sad. Let it sit on the counter for about 30 minutes before you start so it blends smoothly without lumps.
- 1 cup creamy peanut butter — I use Jif or Skippy for this recipe because they are stable and consistent. Natural peanut butter that separates can make the filling greasy. If you want to use natural, stir it really well and expect a slightly different texture.
- 1 ½ cups powdered sugar — This sweetens the filling and helps stabilize it. Do not try to substitute granulated sugar — it will make the filling grainy and it will not dissolve properly.
- 2 teaspoons vanilla extract — Pure vanilla makes a difference here. The imitation stuff has a chemical aftertaste that cuts through the peanut butter in a bad way.
For the Layers:
- 1 box (about 14 ounces) chocolate graham crackers — You need about 24 full sheets. I have used regular honey graham crackers before, and it works, but the chocolate version makes this taste like a grown-up Reese’s cup. Nabisco makes a good one, but store brands work fine too.
For the Chocolate Ganache Topping:
- 1 cup semi-sweet chocolate chips — Ghirardelli is my go-to for ganache because they melt smoothly and taste rich without being too sweet. But honestly, any good-quality chocolate chip will work.
- ½ cup heavy cream — This gets heated and poured over the chocolate to create a silky ganache. Do not substitute milk here — you need the fat content for the right consistency.
Optional Garnishes:
- Crushed peanuts — Adds crunch and makes it look fancy.
- Flaky sea salt — Trust me on this one. A sprinkle of salt on top balances the sweetness and makes the peanut butter flavor pop.
- Chocolate shavings — Because why not?
A quick note on ingredient temperature: this matters more than you think. Cold cream whips better. Room temperature cream cheese blends smoother. If your cream cheese is too cold, you will end up with little white lumps in your filling that never quite go away. I learned this the hard way when I made this cake for a dinner party and had to explain that the lumps were “texture.” They were not texture. They were rushed cream cheese.
Equipment Needed
You do not need fancy equipment to make this no-bake peanut butter icebox cake, which is part of its charm. Here is what you will need:
- 9×13-inch baking dish — Glass or ceramic works best. Metal can work, but the cake might slide around a bit. I use a Pyrex dish and it works perfectly.
- Electric hand mixer or stand mixer — You can whip the cream by hand with a whisk, but your arm will hate you. A hand mixer makes this job about thirty times easier.
- Large mixing bowls — You need at least two. One for whipping the cream and one for the cream cheese mixture.
- Spatula — For spreading the filling evenly. A rubber spatula works best.
- Small saucepan — For heating the cream for the ganache. You can also use the microwave, but the saucepan gives you more control.
- Plastic wrap or aluminum foil — To cover the cake while it chills.
If you do not have a 9×13 dish, you can use a 9×9 square pan and make a taller, smaller cake. Just adjust the number of layers. I have also made this in a springform pan for a round version that looks extra impressive. The technique stays the same — just cut the graham crackers to fit your pan.
One tip: chill your mixing bowl and beaters in the freezer for about 10 minutes before whipping the cream. It makes a noticeable difference in how quickly the cream whips up and how stable it stays. I started doing this after reading it in a baking blog years ago, and now I never skip it.
Preparation Method
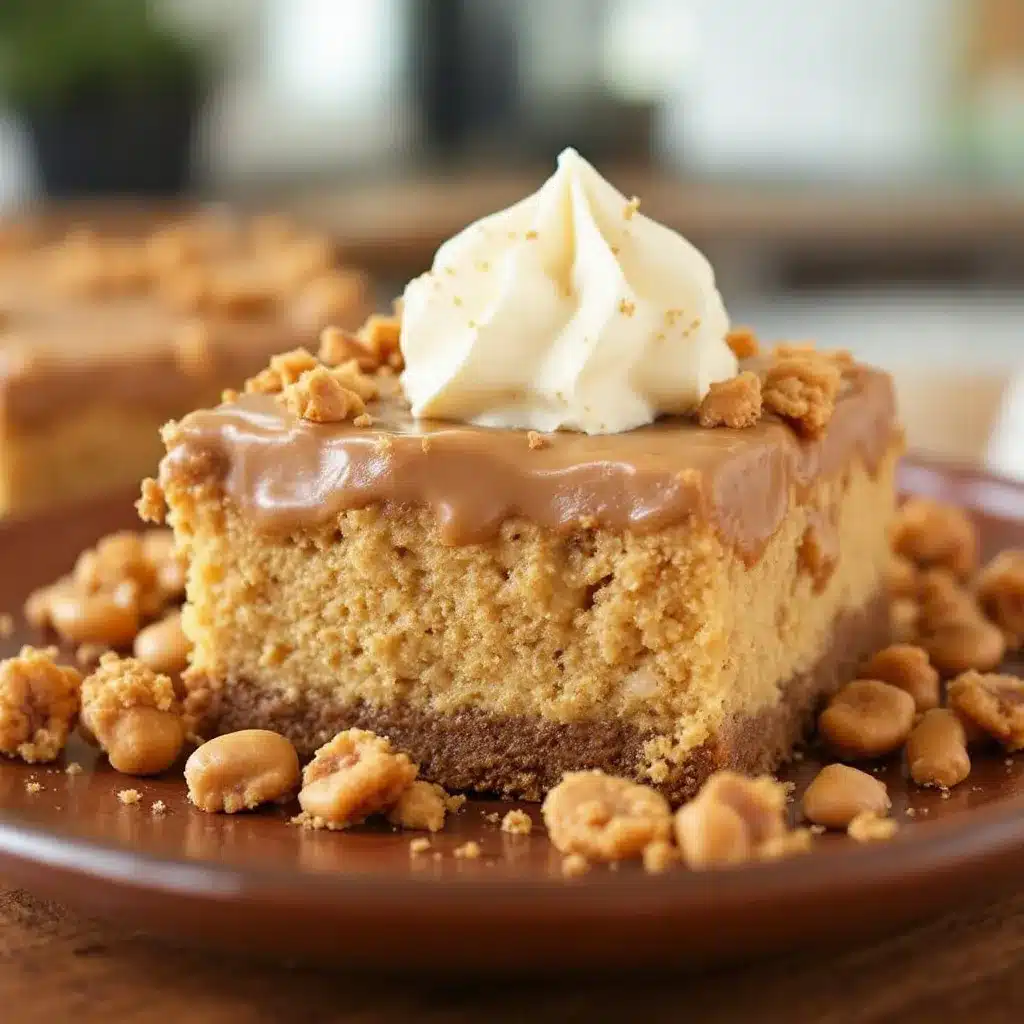
Making this no-bake peanut butter icebox cake is straightforward, but the order of steps matters. Here is exactly how I do it.
Step 1: Whip the cream.
Pour the 2 cups of cold heavy cream into your chilled mixing bowl. Beat on medium-high speed until soft peaks form — about 3 to 4 minutes. You want the cream to hold its shape when you lift the beaters, but not be stiff and butter-like. Set this aside in the fridge while you make the filling.
Step 2: Make the peanut butter filling.
In another large bowl, beat the softened cream cheese with an electric mixer until smooth and fluffy, about 2 minutes. Add the peanut butter and beat until combined. Then add the powdered sugar and vanilla extract and beat again until everything is smooth. Scrape down the sides of the bowl with a spatula to make sure there are no hidden lumps.
Step 3: Fold in the whipped cream.
Take the whipped cream out of the fridge. Add about one-third of it to the peanut butter mixture and fold it in gently with your spatula. This first addition loosens up the mixture so the rest folds in easier. Add the remaining whipped cream and fold until no white streaks remain. Be gentle here — you want to keep the air in the cream so the filling stays light.
Step 4: Layer the cake.
Spread a thin layer of the peanut butter filling on the bottom of your 9×13 dish — just enough to cover the bottom. This helps the first layer of graham crackers stick. Arrange a single layer of chocolate graham crackers on top, breaking pieces as needed to fill gaps. Spread about one-third of the remaining filling evenly over the crackers. Repeat the layers — crackers, filling, crackers, filling — until you have three layers of crackers and three layers of filling. End with a layer of filling on top.
Step 5: Make the ganache.
Place the chocolate chips in a heatproof bowl. Heat the ½ cup of heavy cream in a small saucepan over medium heat until it just starts to simmer — small bubbles around the edges, not a full boil. Pour the hot cream over the chocolate chips and let it sit for 2 minutes without stirring. Then whisk gently until the chocolate is completely melted and the ganache is smooth and glossy. Let it cool for about 5 minutes, then pour it over the top layer of the cake. Spread it evenly with a spatula.
Step 6: Chill the cake.
Cover the dish with plastic wrap or foil and refrigerate for at least 6 hours, but overnight is better. The graham crackers need time to soften and absorb moisture from the filling. I have made the mistake of cutting into this cake too early, and the layers slide apart like a Jenga tower. Give it the full time.
Step 7: Garnish and serve.
Before serving, sprinkle crushed peanuts and flaky sea salt on top if you are using them. Cut into squares with a sharp knife, wiping the blade clean between cuts for neat slices. Serve cold straight from the fridge.
A few notes from my trial runs: if your filling seems too soft when you are spreading it, do not panic. It will firm up as it chills. Also, do not skip the thin layer of filling on the bottom of the dish. Without it, the bottom crackers stay dry and crunchy instead of softening into cake-like layers. I skipped it once and regretted it.
Cooking Tips & Techniques
After making this no-bake peanut butter icebox cake more times than I care to count, I have picked up a few tricks that make the process smoother and the results more consistent.
Temperature is everything. Cold cream whips better. Room temperature cream cheese blends better. I cannot stress this enough. If your cream cheese is cold, you will end up with lumps. If your cream is warm, it will not whip properly. Plan ahead and take the cream cheese out of the fridge about 30 minutes before you start.
Do not over-whip the cream. I made this mistake once when I got distracted by my phone. The cream turned into butter in about 30 seconds. It was a sad, greasy mess. Stop whipping when the cream holds soft peaks that flop over slightly when you lift the beaters.
Use a serrated knife to cut the cake. A regular chef’s knife can squish the layers together. A serrated knife saws through cleanly. I learned this trick from a pastry chef friend, and it makes a noticeable difference in how the slices look.
Let the ganache cool before pouring. If you pour hot ganache over the cold filling, it can melt the top layer and create a muddy mess. Let it sit for 5 minutes after whisking. It should be warm but not hot.
Make it a day ahead. This cake actually tastes better after 24 hours in the fridge. The flavors meld together, the crackers soften perfectly, and the texture becomes uniform. I always make this the day before I need it. It saves me stress on the day of the party and tastes better anyway.
One more thing — if you are bringing this cake to a cookout or potluck, assemble it in a disposable aluminum pan. That way you do not have to worry about getting your dish back. I learned this after losing three good Pyrex dishes to friends who “forgot” to return them.
Variations & Adaptations
This no-bake peanut butter icebox cake is incredibly adaptable. Here are some variations I have tried and loved.
Chocolate Peanut Butter Cup Version: Chop up about 8 regular-sized Reese’s cups and sprinkle them between the layers along with the filling. It adds little pockets of chocolate and peanut butter that melt in your mouth. I made this for a friend’s birthday and it was gone in 15 minutes.
Gluten-Free Adaptation: Use gluten-free chocolate graham crackers or gluten-free chocolate cookies. I have used Schar brand chocolate cookies and they work beautifully. The texture is slightly different but still delicious.
Vegan Version: Use dairy-free cream cheese, coconut cream instead of heavy cream, and vegan chocolate chips. I tested this for a vegan friend and it worked surprisingly well. The coconut cream needs to be chilled overnight before whipping, and the texture is slightly less stable, but the flavor is still great.
Peanut Butter and Jelly Twist: Swirl in about ½ cup of strawberry jam between the layers. The tartness of the jam cuts through the richness of the peanut butter filling. I did this for a summer picnic and it was a huge hit. Use seedless jam for smoother layers.
Lower Sugar Option: Reduce the powdered sugar to 1 cup and use sugar-free chocolate graham crackers. The filling will be less sweet but still creamy and satisfying. I have made this version for my dad who watches his sugar intake, and he did not complain once.
If you like this kind of easy, no-fuss dessert, you might also enjoy this easy matcha green tea tiramisu parfaits that come together in 10 minutes flat. Or for something completely different but equally crowd-pleasing, try this spicy Korean-Mexican street corn dip that always disappears first at parties.
Serving & Storage Suggestions
This no-bake peanut butter icebox cake is best served cold, straight from the fridge. I like to take it out about 10 minutes before serving so it softens slightly, but not much longer than that or the layers can start to slide.
For presentation, I garnish with crushed salted peanuts, a sprinkle of flaky sea salt, and a few chocolate shavings. It looks impressive without much effort. You can also drizzle extra melted peanut butter on top for that Instagram-worthy finish.
This cake pairs beautifully with a cold glass of milk, a hot cup of coffee, or even a scoop of vanilla ice cream on the side. If you are serving it after a heavy Labor Day meal, keep the portions reasonable — this is a rich dessert.
Storage: Cover the dish tightly with plastic wrap or transfer slices to an airtight container. The cake will keep in the refrigerator for up to 5 days. The texture actually stays surprisingly good for several days — the crackers remain soft and the filling stays creamy.
Freezing: You can freeze this cake for up to 3 months. Wrap the entire dish tightly in plastic wrap, then a layer of aluminum foil. Thaw overnight in the refrigerator before serving. Do not thaw at room temperature or the texture can become watery. I have frozen individual slices wrapped in plastic wrap for quick desserts, and they thaw perfectly.
One note on leftovers: the ganache can develop a slight sheen or bloom after a few days in the fridge. This is normal and does not affect the taste. If it bothers you, just dust the top with cocoa powder before serving.
Nutritional Information & Benefits
I am not a nutritionist, but I can give you a rough estimate of what is in a slice of this no-bake peanut butter icebox cake. Based on 12 servings, each slice contains approximately:
- Calories: 480
- Fat: 34g
- Saturated Fat: 17g
- Carbohydrates: 38g
- Sugar: 26g
- Protein: 10g
- Sodium: 320mg
This is not health food, let us be real. But peanut butter does provide protein and healthy fats, and the cream cheese adds calcium. The chocolate graham crackers offer a little fiber. If you are looking for a lighter option, the lower sugar variation cuts the sugar by about a third.
For those with dietary concerns, this recipe contains dairy, gluten, peanuts, and soy (in the chocolate). It is not suitable for vegans unless you use the adaptations I mentioned earlier.
My personal philosophy on desserts like this: they are meant to be enjoyed in moderation as part of a balanced diet. I do not stress about the numbers when I make this for a holiday gathering. I focus on the joy of sharing something delicious with people I care about. That is worth every calorie.
Conclusion
This no-bake peanut butter icebox cake has become my go-to dessert for every summer gathering, and especially for Labor Day. It is the kind of recipe that makes you look like a hero without actually doing much work. The layers stack up tall and beautiful, the chocolate ganache glistens on top, and every bite is creamy, rich, and satisfying.
What I love most about this cake is how it brings people together. I have watched conversations pause mid-sentence as someone takes their first bite. I have seen people close their eyes and just enjoy the moment. That is what cooking is really about, is not it? Not perfection, but connection.
I encourage you to make this your own. Add your favorite toppings. Experiment with different cookies. Swirl in some jam or sprinkle in some candy. The base recipe is forgiving and adaptable, so do not be afraid to play around.
If you make this no-bake peanut butter icebox cake, I would love to hear about it. Leave a comment below and tell me how it turned out. Did you add your own twist? Did your guests love it? Share your photos and tag me so I can see your beautiful creation. And if you are looking for more easy, no-bake desserts, check out this refreshing mango jalapeño agua fresca that takes exactly 5 minutes to make — perfect for washing down that slice of cake.
Happy Labor Day, and happy no-baking. Your oven can take the day off.
Frequently Asked Questions
Can I use natural peanut butter for this recipe?
You can, but the texture will be different. Natural peanut butter that separates can make the filling greasy and less stable. If you use natural peanut butter, stir it really well before measuring and expect the filling to be slightly softer. I recommend using a commercial creamy peanut butter like Jif or Skippy for the best results.
How long does this cake need to chill?
At least 6 hours, but overnight is best. The graham crackers need time to soften and absorb moisture from the filling. If you cut into the cake too early, the layers will slide apart and the crackers will still be crunchy. Patience pays off here.
Can I make this cake in advance for a party?
Absolutely. This cake actually tastes better when made a day ahead. The flavors meld together and the texture becomes perfectly uniform. You can assemble it up to 2 days before serving. Just keep it covered in the refrigerator.
Can I freeze this no-bake peanut butter icebox cake?
Yes, you can freeze it for up to 3 months. Wrap the entire dish tightly in plastic wrap, then a layer of aluminum foil. Thaw overnight in the refrigerator before serving. Do not thaw at room temperature or the texture can become watery.
What can I use instead of chocolate graham crackers?
You can use regular honey graham crackers, chocolate wafer cookies, or even vanilla wafers. Each will give a slightly different flavor and texture. Chocolate wafer cookies create a more intense chocolate flavor, while vanilla wafers make the cake lighter and sweeter. Gluten-free options work well too.
Pin This Recipe!
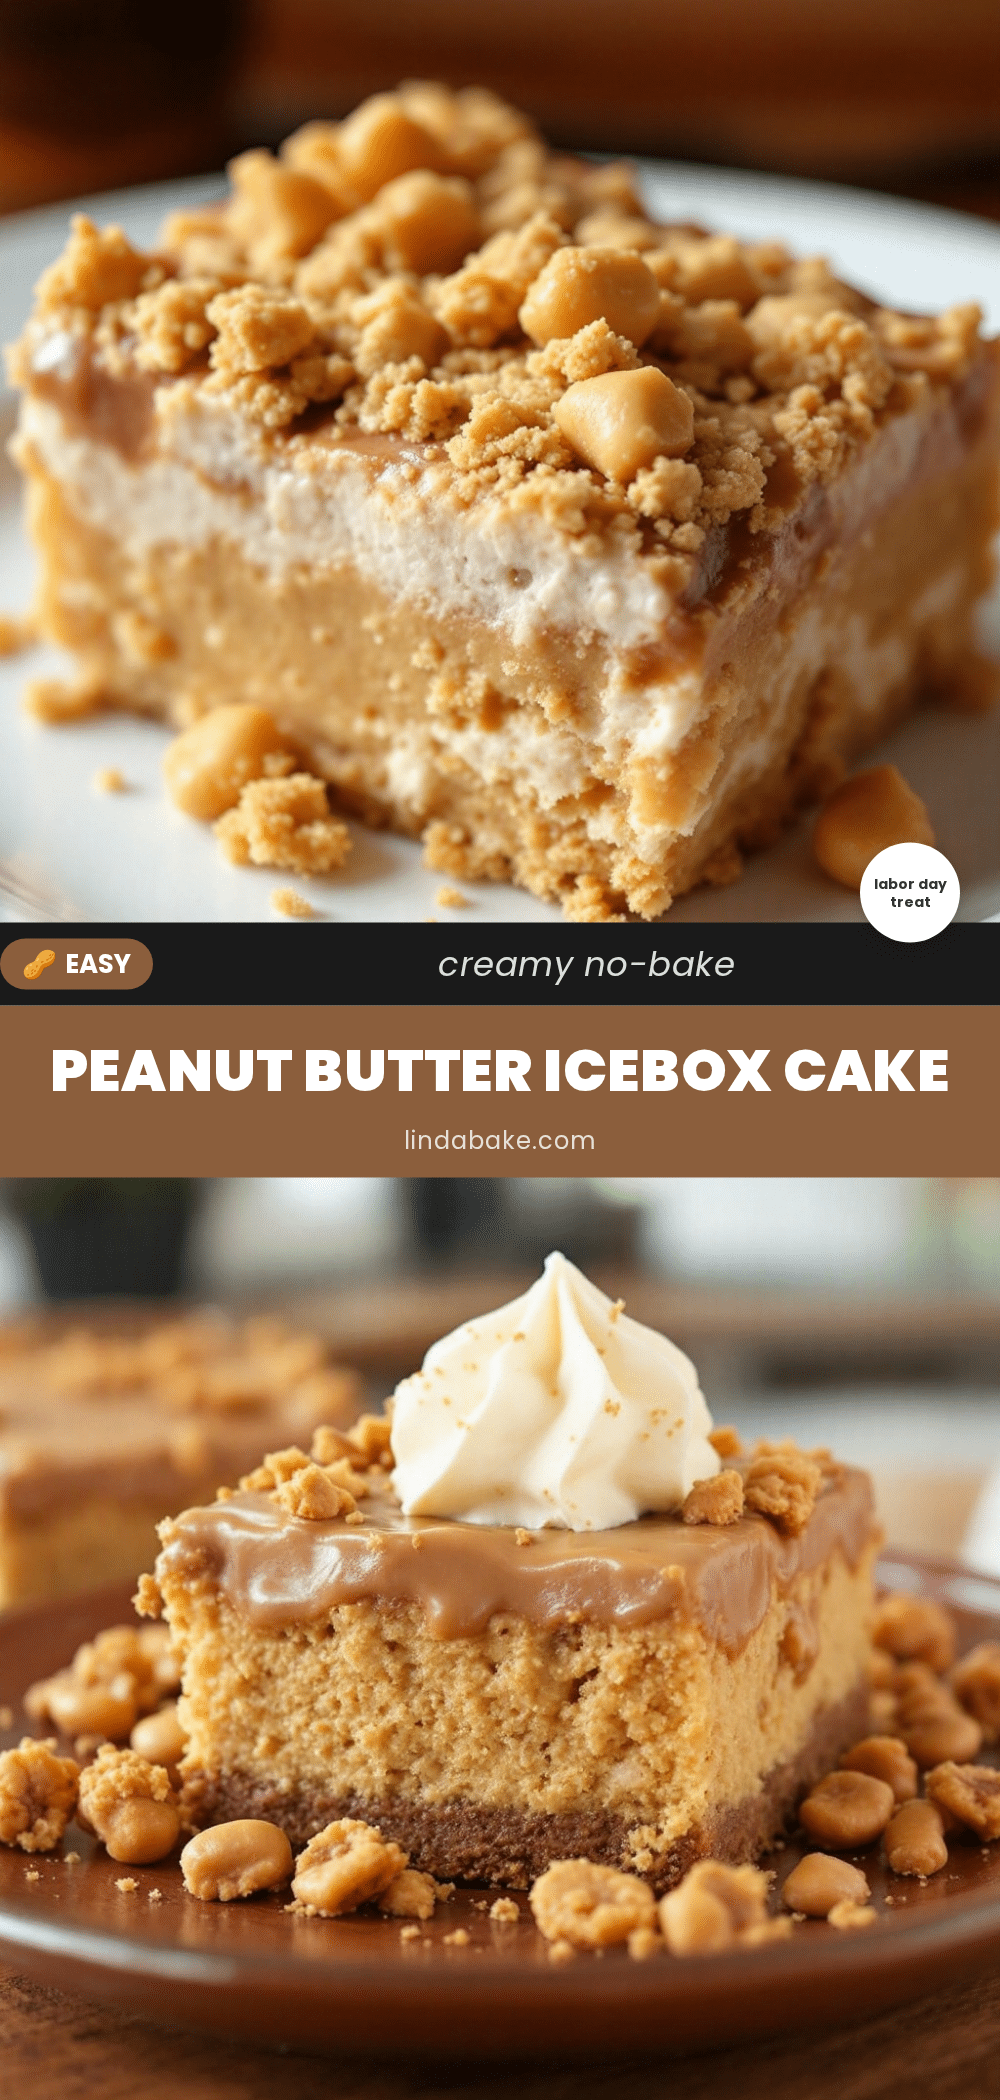
No-Bake Peanut Butter Icebox Cake: Easy Labor Day Dessert
This no-bake peanut butter icebox cake is a creamy, rich dessert that requires no oven time. Layers of chocolate graham crackers and a light peanut butter filling are topped with a glossy chocolate ganache, making it the perfect stress-free treat for summer gatherings.
- Prep Time: 20 minutes
- Cook Time: 0 minutes
- Total Time: 6 hours 20 minutes (includes chilling)
- Yield: 12 servings 1x
- Category: Dessert
- Cuisine: American
Ingredients
- 2 cups heavy whipping cream
- 16 ounces cream cheese, softened
- 1 cup creamy peanut butter
- 1 ½ cups powdered sugar
- 2 teaspoons vanilla extract
- 1 box (about 14 ounces) chocolate graham crackers (about 24 full sheets)
- 1 cup semi-sweet chocolate chips
- ½ cup heavy cream (for ganache)
- Crushed peanuts (optional, for garnish)
- Flaky sea salt (optional, for garnish)
- Chocolate shavings (optional, for garnish)
Instructions
- Whip the cream: Pour the 2 cups of cold heavy cream into a chilled mixing bowl. Beat on medium-high speed until soft peaks form, about 3 to 4 minutes. Set aside in the fridge.
- Make the peanut butter filling: In another large bowl, beat the softened cream cheese with an electric mixer until smooth and fluffy, about 2 minutes. Add the peanut butter and beat until combined. Add the powdered sugar and vanilla extract and beat until smooth. Scrape down the sides of the bowl.
- Fold in the whipped cream: Add about one-third of the whipped cream to the peanut butter mixture and fold gently. Add the remaining whipped cream and fold until no white streaks remain.
- Layer the cake: Spread a thin layer of the peanut butter filling on the bottom of a 9×13-inch dish. Arrange a single layer of chocolate graham crackers on top, breaking pieces as needed. Spread about one-third of the remaining filling evenly over the crackers. Repeat layers (crackers, filling, crackers, filling) until you have three layers of crackers and three layers of filling, ending with a layer of filling on top.
- Make the ganache: Place the chocolate chips in a heatproof bowl. Heat the ½ cup of heavy cream in a small saucepan over medium heat until it just starts to simmer. Pour the hot cream over the chocolate chips and let it sit for 2 minutes. Whisk gently until smooth and glossy. Let cool for about 5 minutes, then pour over the top layer of the cake and spread evenly.
- Chill the cake: Cover the dish with plastic wrap or foil and refrigerate for at least 6 hours, preferably overnight.
- Garnish and serve: Before serving, sprinkle crushed peanuts and flaky sea salt on top if desired. Cut into squares with a sharp knife, wiping the blade clean between cuts. Serve cold.
Notes
Chill the mixing bowl and beaters in the freezer for about 10 minutes before whipping the cream for better results. Let the cream cheese sit at room temperature for 30 minutes before starting. Do not over-whip the cream. Let the ganache cool for 5 minutes before pouring to avoid melting the filling. The cake tastes even better after 24 hours in the fridge. For easy transport, assemble in a disposable aluminum pan.
Nutrition
- Serving Size: 1 slice (1/12 of cak
- Calories: 480
- Sugar: 26
- Sodium: 320
- Fat: 34
- Saturated Fat: 17
- Carbohydrates: 38
- Fiber: 2
- Protein: 10
Keywords: no-bake dessert, peanut butter icebox cake, Labor Day dessert, easy dessert, chocolate peanut butter cake


