The first handful of crushed cookies hit the pudding, and my six-year-old gasped like I’d just performed actual magic. By the time I stuck a gummy worm into the “dirt,” he was already planning where to put the tombstone. That’s the thing about these Easy Spooky Graveyard Dirt Pudding Cups—they turn a simple dessert into a full-on Halloween event before anyone even takes a bite.
Honestly, I wasn’t trying to be impressive that afternoon. I was just trying to use up the last of the chocolate pudding mix and a sleeve of Oreos that had been sitting in the pantry since summer. But watching my kid carefully arrange each gummy worm like he was landscaping a tiny cemetery, I realized I’d accidentally created a new family tradition. (And I hadn’t even turned on the oven.)
These little cups are the kind of recipe that makes you look like a Halloween hero without any of the stress. No baking, no complicated steps, and no weird ingredients you have to hunt down at three different stores. Just chocolate pudding, crushed cookies, and a handful of creepy-crawly candy decorations that come together in about ten minutes flat. It’s the dessert equivalent of a perfect costume—looks elaborate, but is secretly simple.
I’ve brought these to school parties, Halloween potlucks, and even a grown-up Halloween dinner where the adults fought over the last one harder than the kids did. There’s something about eating chocolate pudding out of a cup that’s been turned into a graveyard scene that makes everyone feel like a kid again. And honestly? That’s exactly the kind of Halloween magic I want to share.
Why You’ll Love This Recipe
Let me tell you why these dirt pudding cups have become my go-to Halloween dessert year after year. They check every box a busy parent (or party host) could want.
- No-Bake & Quick : These come together in under 10 minutes of active time. No oven, no stovetop, no waiting for anything to cool.
- Simple Ingredients : You probably already have chocolate pudding mix, milk, and Oreos in your pantry. The only “special” items are gummy worms and maybe some candy tombstones—both easy to find at any grocery store during October.
- Perfect for Halloween Parties : Whether it’s a classroom celebration, a trunk-or-treat event, or a cozy family movie night, these cups fit right in. They’re portable, individual-sized, and mess-free.
- Crowd-Pleaser : I’ve yet to meet a kid (or adult) who can resist digging into a cup of “dirt” filled with gummy worms. It’s universally loved.
- Unbelievably Fun : The texture contrast between the smooth pudding and the crunchy cookie “dirt” is just perfect. And the visual payoff? Absolute showstopper.
What makes this recipe different from every other dirt dessert out there is the layering technique I figured out after a few trial-and-error batches. Instead of just dumping crushed cookies on top and calling it a day, I press a thin layer of cookie crumbs into the bottom of the cup first, then add the pudding, then top with more crumbs. This creates a distinct “dirt” layer on top that stays crunchy, while the bottom layer softens slightly into a cookie crust. It’s a small tweak, but it makes a huge difference in texture.
These cups are the kind of dessert that makes you close your eyes after the first bite—not because it’s fancy, but because it’s exactly what you wanted. Simple, chocolatey, and deeply satisfying. It’s comfort food dressed up for Halloween, and it never disappoints.
What Ingredients You Will Need
This recipe uses simple, everyday ingredients to create something that feels special. You don’t need to visit a specialty baking store or hunt down obscure items. Here’s what you’ll need:
For the Pudding Base
- 2 (3.9 oz) boxes instant chocolate pudding mix (I prefer Jell-O brand for consistent results, but store brands work fine too)
- 3 cups cold whole milk (Use 2% or skim if you prefer, but whole milk gives the creamiest texture. For dairy-free, use oat milk or coconut milk—just note the pudding may set slightly softer)
For the Dirt
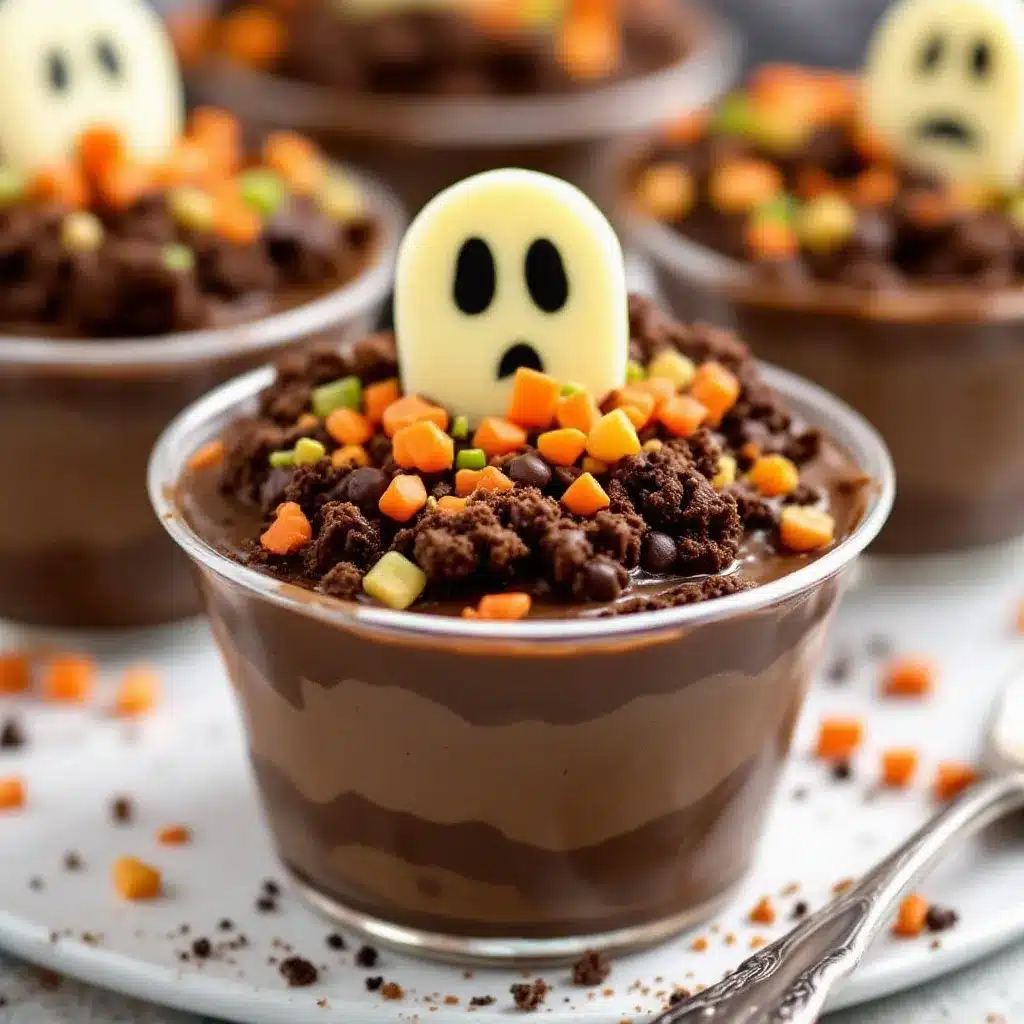
- 1 (14.3 oz) package chocolate sandwich cookies (Oreos are the classic choice. I recommend the regular ones, not Double Stuf, because you want more cookie than cream for the “dirt” texture)
- 2 tablespoons unsalted butter, melted (This is optional but helps the crumbs clump slightly, giving a more realistic dirt texture)
For the Graveyard Decorations
- 1 cup gummy worms (I use the classic bright-colored ones for contrast against the dark “dirt.” Feel free to mix in gummy spiders or bugs if you want extra creep factor)
- 6-8 candy tombstones or skeleton bones (You can buy premade candy tombstones at most grocery stores in the seasonal aisle. Or use Milano cookies standing upright with “RIP” written in black icing)
- Optional: Green-tinted shredded coconut for “grass” (Adds a fun pop of color and extra texture)
- Optional: Black decorating gel for writing on tombstones
Ingredient Tips from My Kitchen
I’ve made this recipe more times than I can count, and here’s what I’ve learned. For the pudding, let it set for at least 5 minutes after whisking before layering—if it’s too runny, the cookie crumbs will just sink into it. For the cookies, I pulse them in a food processor until they resemble coarse sand. A few bigger pieces are fine—they add texture. If you don’t have a food processor, put the cookies in a zip-top bag and crush them with a rolling pin. It’s a great stress reliever, honestly.
For the gummy worms, I like to cut a few in half so they look like they’re crawling out of the dirt. It’s a small detail, but kids absolutely notice and love it. And if you’re making these ahead of time, wait to add the gummy worms until just before serving—they can get a little sticky and lose their shape if they sit in the pudding too long.
Equipment Needed
You don’t need any fancy equipment for this recipe, which is part of its charm. Here’s what you’ll need:
- 6-8 small cups or glasses (I use 8-ounce clear plastic cups for parties—you can see the layers, and they’re easy to transport. For home, small mason jars or even juice glasses work beautifully)
- Medium mixing bowl (For whisking the pudding)
- Whisk (A balloon whisk works best to avoid lumps)
- Food processor or zip-top bag and rolling pin (For crushing the cookies)
- Small bowl (For mixing melted butter with cookie crumbs)
- Spoon or small spatula (For layering)
- Measuring cups and spoons
If you don’t have a food processor, don’t worry. I’ve crushed Oreos with a rolling pin while watching Hocus Pocus more times than I care to admit. It works perfectly fine, and honestly, it’s kind of therapeutic. Just make sure the bag is sealed tight so you don’t end up with cookie dust all over your counter (speaking from experience here).
For the cups, clear plastic ones are my favorite because they show off the layers. But I’ve also used small ramekins and even paper cups in a pinch. The presentation won’t be as dramatic with opaque cups, but the taste is exactly the same.
Preparation Method
Let’s get to the fun part. Here’s how to make these spooky graveyard dirt pudding cups step by step. I’ll include all the little details I’ve learned along the way.
Step 1: Make the Pudding
In a medium mixing bowl, whisk together the two boxes of instant chocolate pudding mix and 3 cups of cold milk. Whisk vigorously for about 2 minutes until the mixture thickens. You’ll feel it start to resist your whisk—that’s when you know it’s ready. Let it sit for 5 minutes to fully set. Don’t skip this resting time, or your layers will be a muddy mess.
Step 2: Crush the Cookies
While the pudding sets, crush the Oreos. If using a food processor, pulse until you have fine crumbs with a few slightly larger pieces for texture. If using a zip-top bag, place the cookies inside (remove the air, seal tight), and crush with a rolling pin until you reach the desired consistency. You want about 2 cups of crumbs total.
Transfer the crumbs to a small bowl. Pour the 2 tablespoons of melted butter over the crumbs and stir with a fork until evenly moistened. This step is optional, but I really recommend it—the butter helps the crumbs clump slightly, giving a more realistic “dirt” texture that doesn’t just dissolve into the pudding.
Step 3: Layer the Cups
Now comes the assembly. Take your cups and spoon about 2 tablespoons of the cookie crumbs into the bottom of each cup. Use the back of your spoon to press them down firmly into an even layer. This creates a base crust that will soften slightly as it sits against the pudding.
Next, divide the prepared pudding evenly among the cups, filling each about two-thirds full. You want enough room at the top for a generous layer of “dirt” and decorations. Smooth the top of the pudding with the back of your spoon.
Step 4: Add the Top Dirt Layer
Sprinkle the remaining cookie crumbs over the pudding, covering it completely. You want a thick, even layer—about 2-3 tablespoons per cup. Don’t press these down; leave them loose so they look like freshly turned soil. This is the “dirt” part of your graveyard.
Step 5: Decorate the Graveyard
Now for the best part. Gently press gummy worms into the top layer of crumbs so they look like they’re crawling out of the dirt. I like to place a few half-buried and a couple fully on top for variety. If using candy tombstones, press them into the crumbs at an angle, like they’re leaning in an old cemetery. You can write “RIP” or spooky messages on them with black decorating gel before placing them.
If you’re using green-tinted coconut for “grass,” sprinkle a small amount around the tombstones and worms. It adds a nice pop of color against the dark dirt.
Step 6: Chill and Serve
Refrigerate the cups for at least 30 minutes before serving. This allows the layers to set and the flavors to meld. The cookie crumbs will soften slightly against the pudding, creating that perfect dirt-like texture. Serve cold, straight from the fridge.
My Pro Tip: If you’re making these for a party, assemble everything except the gummy worms and tombstones a day ahead. Keep the cups covered in the fridge, then add the decorations right before serving. The gummy worms stay chewier this way, and the tombstones won’t get soggy.
Cooking Tips & Techniques
After making these cups for countless Halloween parties, school events, and family movie nights, I’ve collected a few tips that make the process even smoother.
Don’t Overmix the Pudding. I learned this the hard way. Whisk the pudding mix and milk together just until it thickens—about 2 minutes. Overmixing can make the pudding grainy or cause it to separate as it sets. You want it smooth and silky.
Crush Cookies in Batches. If you’re making a double batch, crush the cookies in two or three batches. Overcrowding the food processor leads to uneven crumbs, with some pieces too large and others reduced to dust. Working in smaller batches gives you more control.
Use a Spoon to Create “Dirt Mounds.” For a more realistic graveyard look, use the back of a spoon to create small mounds in the cookie crumbs before adding decorations. It mimics the uneven surface of disturbed soil and makes the gummy worms look even more like they’re emerging from the ground.
Keep Gummy Worms Cold. Warm gummy worms are sticky and hard to handle. Keep them in the fridge until you’re ready to decorate. Cold worms are firmer and easier to position without leaving sticky residue on your fingers.
My Biggest Failure. The first time I made these, I got impatient and didn’t let the pudding set before layering. The cookie crumbs immediately sank into the runny pudding, creating a muddy brown mess instead of distinct layers. It still tasted fine, but it looked nothing like a graveyard. Learn from my mistake: always let the pudding set for the full 5 minutes.
Variations & Adaptations
One of the best things about this recipe is how easy it is to customize. Here are some variations I’ve tried and loved.
Gluten-Free Version: Use gluten-free chocolate sandwich cookies (brands like Glutino or Kinnikinnick make great options). The rest of the ingredients are naturally gluten-free, so this swap works perfectly. I’ve made this for a gluten-sensitive friend, and she couldn’t tell the difference.
Vegan Adaptation: Use a plant-based chocolate pudding mix (Simply Delish is a good brand) and replace the milk with oat milk or full-fat coconut milk. Use vegan chocolate sandwich cookies and skip the melted butter or use vegan butter. The texture is slightly different—the pudding may be a bit softer—but the taste is still fantastic.
Peanut Butter Twist: Add a layer of peanut butter between the pudding and the top cookie crumbs. Just warm a few tablespoons of peanut butter in the microwave for 15 seconds and drizzle it over the pudding before adding the dirt layer. The combination of chocolate and peanut butter is always a winner.
Spooky Spider Version: Instead of gummy worms, use gummy spiders and place a few on top of the dirt. You can also add candy spider webs (sold in the seasonal aisle) for an extra creepy touch. My nephew declared these “way scarier than the worms” when I brought them to his Halloween party.
Mini Cup Version: Use shot glasses or small paper cups to create mini graveyard cups. These are perfect for parties where you want guests to grab and go without committing to a full-sized dessert. Just adjust the layering proportions accordingly.
Serving & Storage Suggestions
These dirt pudding cups are best served cold, straight from the fridge. The contrast between the cool, creamy pudding and the crunchy cookie “dirt” is what makes them so satisfying. I like to serve them on a tray lined with parchment paper that looks like a graveyard scene—maybe with a few plastic skeletons or fake cobwebs scattered around for atmosphere.
What to Serve With Them: These cups pair beautifully with a warm drink like hot apple cider or a pumpkin spice latte. For a full Halloween spread, I often serve them alongside these matcha green tea tiramisu parfaits for a fun contrast in flavors and colors. The green tea parfaits add a sophisticated touch to balance the playful dirt cups.
Storage Instructions: Store any leftover cups covered in the refrigerator for up to 3 days. The cookie crumbs will soften over time, but they’ll still taste delicious. If you want to keep the dirt crunchier, store the cups without the top cookie crumb layer and add fresh crumbs just before serving.
Freezing Tips: You can freeze these cups for up to 1 month. Prepare the cups without the gummy worms and tombstones, cover tightly with plastic wrap, and freeze. Thaw in the refrigerator overnight, then add the decorations before serving. The texture of the pudding may be slightly icier after freezing, but it’s still perfectly enjoyable.
Flavor Development: These cups actually taste better the next day. The flavors meld together, and the cookie crumbs soften just enough to create a cake-like texture. If you’re planning ahead, I recommend making them a day in advance for optimal flavor.
Nutritional Information & Benefits
Let’s be honest—these are a treat, not a health food. But here’s the nutritional breakdown so you can plan accordingly.
| Nutrient | Per Serving (1 cup) |
|---|---|
| Calories | 380-420 |
| Total Fat | 16g |
| Saturated Fat | 8g |
| Carbohydrates | 58g |
| Sugar | 42g |
| Protein | 6g |
| Calcium | 15% DV |
| Iron | 10% DV |
Health Highlights: The milk provides calcium and vitamin D, which are important for bone health. The cocoa in the chocolate pudding contains antioxidants called flavonoids, which have been linked to heart health benefits. And the gummy worms? Well, they’re pure fun—and sometimes that’s exactly what you need.
Dietary Considerations: This recipe can be made gluten-free and vegan with simple substitutions. It contains dairy and gluten in its standard form. If you’re serving a crowd with dietary restrictions, it’s easy to make a separate batch with the appropriate swaps.
My personal philosophy? These are Halloween treats. They’re meant to be enjoyed as part of the celebration. I don’t worry about the sugar content when my kids are having a fun, memorable experience decorating their own graveyard cups. Balance is key, and these are a once-a-year indulgence that brings so much joy.
Frequently Asked Questions
Can I use homemade chocolate pudding instead of instant?
Absolutely! Just make sure it’s fully cooled and thickened before layering. Homemade pudding will give you a richer, more custard-like texture. I’ve used a stovetop chocolate pudding recipe before, and it worked beautifully—just allow extra time for it to chill completely in the fridge before assembly.
How far in advance can I make these?
You can make the pudding and crush the cookies up to 2 days ahead and store them separately in the fridge and an airtight container, respectively. Assemble the cups no more than 24 hours before serving for the best texture. The gummy worms should be added within an hour of serving so they stay chewy.
Can I use different types of cookies for the dirt?
Yes! While Oreos are the classic choice, you can use chocolate wafer cookies, gluten-free chocolate cookies, or even homemade chocolate shortbread. I’ve also tried using crushed chocolate graham crackers in a pinch—they work, but the texture is slightly sandier than Oreo crumbs.
My pudding didn’t set properly. What went wrong?
This usually happens if the milk isn’t cold enough or if you didn’t whisk it long enough. Make sure your milk is straight from the fridge, and whisk for the full 2 minutes. If it still seems thin, let it sit for an extra 5 minutes—it will continue to thicken as it rests. If it’s still runny after that, you may need to add a bit more pudding mix.
Can I make these in a large dish instead of individual cups?
Absolutely! Use a 9×13 inch baking dish and layer the ingredients the same way. This is great for a party where people can scoop their own portions. Just be aware that the “graveyard” effect is less dramatic in a large dish—you’ll want to really pile on the decorations to make it visually striking.
Conclusion
These Easy Spooky Graveyard Dirt Pudding Cups have become my most-requested Halloween recipe for good reason. They’re ridiculously simple to make, use ingredients you probably already have in your pantry, and turn into something that feels genuinely special. Every time I bring them to a party, someone asks for the recipe. And every time, I smile and say, “It’s just pudding and cookies.”
But it’s more than that, isn’t it? It’s the look on a kid’s face when they see gummy worms crawling out of chocolate dirt. It’s the laughter that comes from decorating tombstones with silly epitaphs. It’s the way a simple dessert can turn an ordinary October evening into a Halloween memory.
I hope you make these your own. Change up the decorations, experiment with different candy, or let your kids go wild with the design. The best recipes are the ones that become part of your family’s traditions, and I have a feeling these graveyard cups are about to become one of yours.
If you try this recipe, I’d love to hear about it! Leave a comment below and tell me how your graveyard turned out. Did your kids come up with any creative decorations? Did you try a fun variation? Share your spooky creations—I can’t wait to see them!
Pin This Recipe!
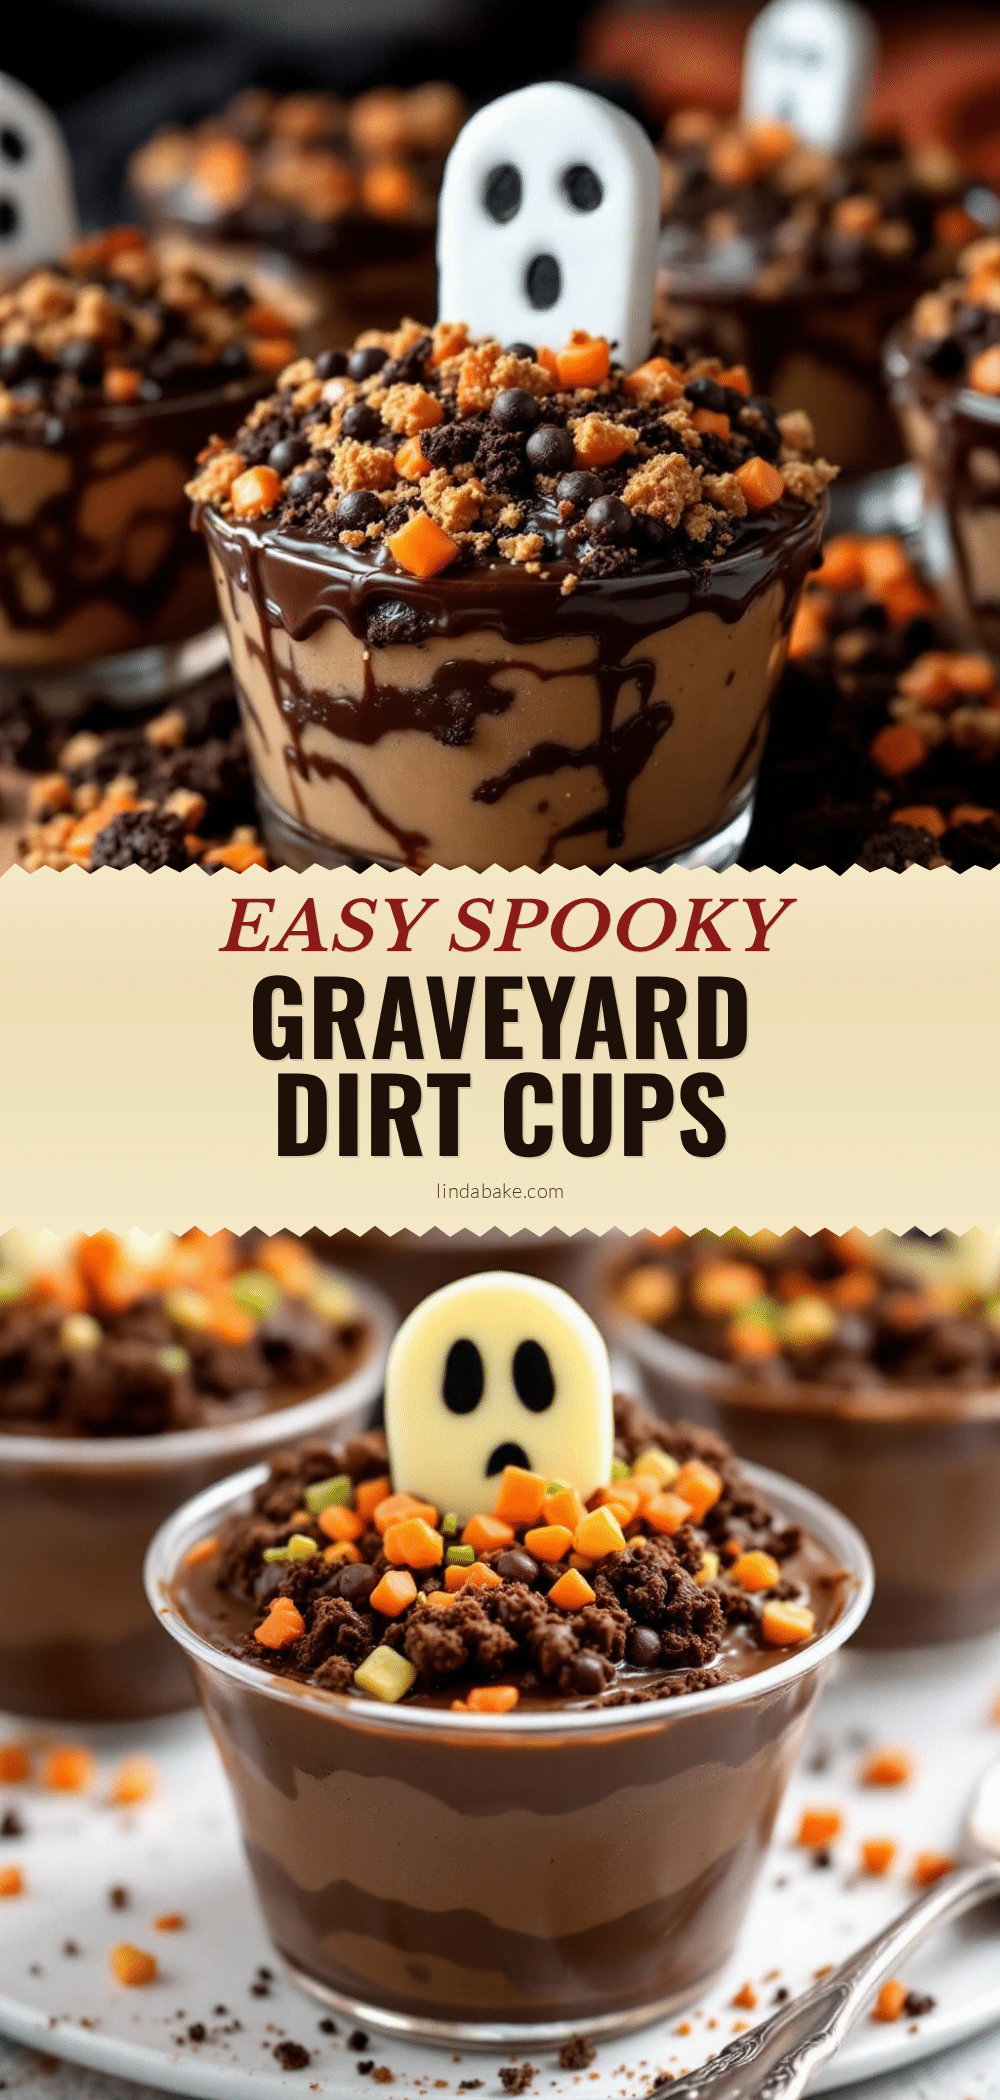
Easy Spooky Graveyard Dirt Pudding Cups: Best Halloween Dessert

These no-bake dirt pudding cups are a fun and easy Halloween dessert made with chocolate pudding, crushed Oreos, and gummy worms. They come together in minutes and are perfect for parties, school events, or a spooky family treat.
- Prep Time: 10 minutes
- Cook Time: 0 minutes
- Total Time: 40 minutes
- Yield: 6-8 servings 1x
- Category: Dessert
- Cuisine: American
Ingredients
- 2 (3.9 oz) boxes instant chocolate pudding mix
- 3 cups cold whole milk
- 1 (14.3 oz) package chocolate sandwich cookies (e.g., Oreos)
- 2 tablespoons unsalted butter, melted
- 1 cup gummy worms
- 6–8 candy tombstones or skeleton bones
- Optional: Green-tinted shredded coconut for ‘grass’
- Optional: Black decorating gel for writing on tombstones
Instructions
- In a medium mixing bowl, whisk together the two boxes of instant chocolate pudding mix and 3 cups of cold milk. Whisk vigorously for about 2 minutes until the mixture thickens. Let it sit for 5 minutes to fully set.
- While the pudding sets, crush the Oreos. If using a food processor, pulse until you have fine crumbs with a few slightly larger pieces. If using a zip-top bag, place the cookies inside, seal tight, and crush with a rolling pin. Transfer crumbs to a small bowl, pour melted butter over them, and stir with a fork until evenly moistened.
- Spoon about 2 tablespoons of the cookie crumbs into the bottom of each cup. Press them down firmly with the back of a spoon to create an even layer.
- Divide the prepared pudding evenly among the cups, filling each about two-thirds full. Smooth the top of the pudding with the back of a spoon.
- Sprinkle the remaining cookie crumbs over the pudding, covering it completely (about 2-3 tablespoons per cup). Do not press them down.
- Gently press gummy worms into the top layer of crumbs so they look like they’re crawling out of the dirt. Press candy tombstones into the crumbs at an angle. If using, sprinkle green-tinted coconut around the tombstones and worms.
- Refrigerate the cups for at least 30 minutes before serving. Serve cold.
Notes
For best texture, let the pudding set for 5 minutes before layering. If making ahead, assemble without gummy worms and tombstones, then add decorations just before serving. The cups taste even better the next day as flavors meld.
Nutrition
- Serving Size: 1 cup
- Calories: 400
- Sugar: 42
- Sodium: 380
- Fat: 16
- Saturated Fat: 8
- Carbohydrates: 58
- Fiber: 2
- Protein: 6
Keywords: Halloween dessert, dirt pudding cups, graveyard dessert, no-bake dessert, chocolate pudding, Oreo dirt, gummy worms, spooky dessert, easy Halloween recipe


