I figured a no-bake pumpkin dessert would taste like a compromise—something you make when you don’t have the energy for a real pie. It took about one bite of these Easy No-Bake Pumpkin Cheesecake Cups for that assumption to fall apart completely.
The first time I made them, I was testing a recipe for a fall potluck that I’d agreed to bring food for at the last minute. October had gotten away from me, the way it always does, and I needed something that looked like I’d planned it. These cups ended up being the thing everyone asked about—not the pie someone brought from the bakery, not the elaborate caramel cake. Just these little cups of pumpkin and cream cheese, layered in glass, no oven required.
Honestly, I think that’s what got me. They weren’t trying to be a showstopper. They just tasted exactly like what you want fall to feel like—spiced, creamy, and just sweet enough without being heavy. And they came together in the time it takes to scroll through three TikTok videos. That kind of efficiency? I can get behind that.
Why You’ll Love This Recipe
These Easy No-Bake Pumpkin Cheesecake Cups check every box you’d want in a dessert right now. Here’s why they’ve become my go-to for pretty much every fall occasion:
- Quick & Easy: Ten minutes of active prep. That’s it. No waiting for water to boil, no creaming butter and sugar, no wondering if your oven runs hot.
- Simple Ingredients: You probably have most of this in your pantry and fridge right now. The only thing I sometimes have to buy is the pumpkin puree.
- Perfect for Fall Gatherings: These are ideal for Friendsgiving, Halloween parties, or just a Tuesday when you need a little seasonal pick-me-up. They also pair beautifully with savory options like spicy Korean-Mexican street corn dip for a sweet-and-savory party spread.
- Crowd-Pleaser: I’ve served these to people who claim they “don’t like pumpkin desserts” and watched them go back for seconds. The cream cheese layer balances the squashiness, if that makes sense.
- Unbelievably Delicious: The texture is what gets you. Silky cream cheese, velvety pumpkin, and that little crunch from the crust—it’s a whole mouthfeel situation.
What makes these different from every other pumpkin dessert out there? It’s the ratio. I spent three batches getting the pumpkin-to-cream-cheese ratio exactly right. Too much pumpkin and it tastes like baby food. Too much cream cheese and you lose the fall flavor. These cups hit that sweet spot where both flavors shine.
This isn’t just a good no-bake dessert. It’s the kind that makes you close your eyes after the first bite and forget you’re eating out of a cup instead of a fancy pie plate.
What Ingredients You Will Need
This recipe leans on simple, pantry-friendly ingredients that come together to create something surprisingly elegant. No obscure spice blends or specialty items here—just good, honest ingredients doing their thing.
For the Crust Layer
- 1 ½ cups graham cracker crumbs (about 10-12 full sheets) — You can crush them yourself in a bag with a rolling pin, or buy the pre-made crumbs. Both work fine, though homemade has a slightly better texture.
- 5 tablespoons unsalted butter, melted — Salted butter works in a pinch, just skip the optional salt in the crust.
- 2 tablespoons granulated sugar — Just enough to give the crust a little sweetness. Brown sugar would also work for a deeper flavor.
- ¼ teaspoon ground cinnamon — Optional, but highly recommended. It ties the crust to the pumpkin layer beautifully.
For the Pumpkin Cheesecake Filling
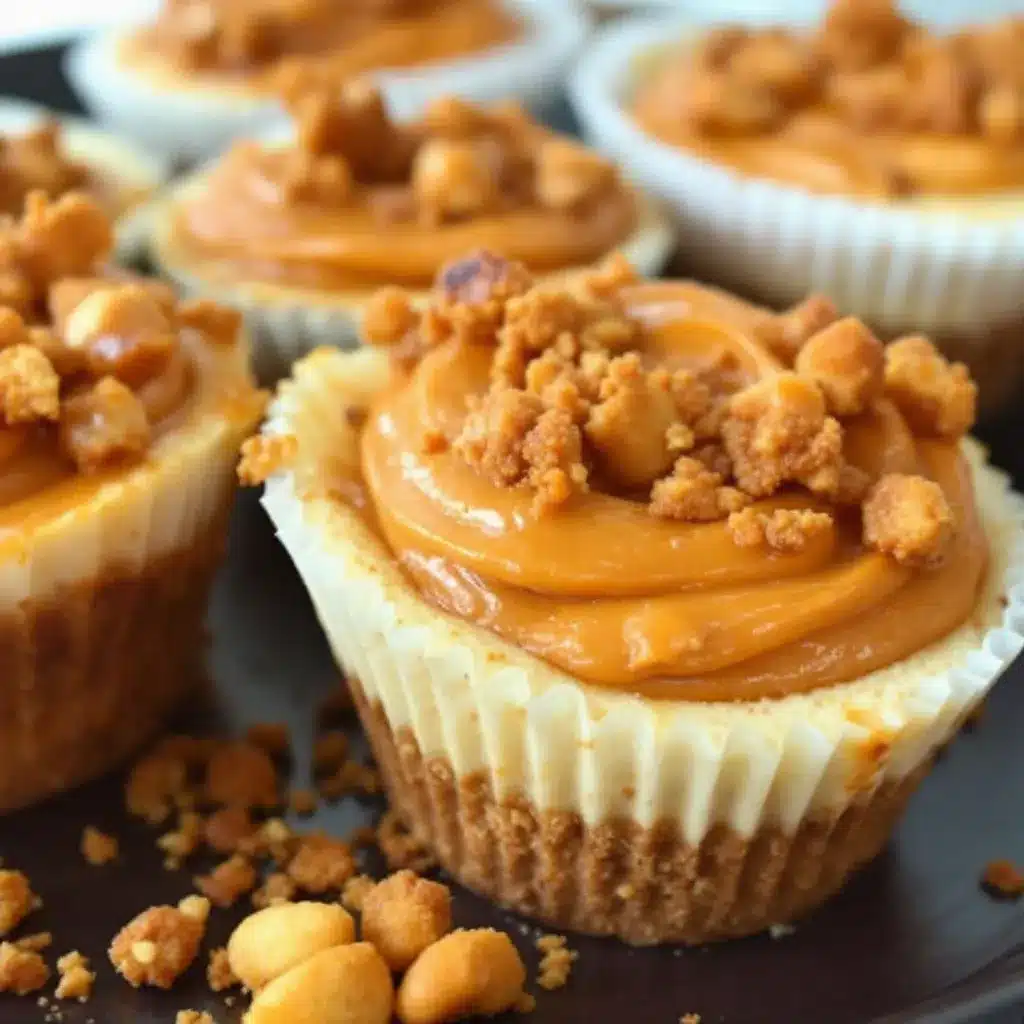
- 8 ounces cream cheese, softened — Full-fat is best here for texture. Low-fat will work but the filling won’t be as luscious. Let it sit on the counter for about 30 minutes before you start.
- ½ cup pumpkin puree — Not pumpkin pie filling. Make sure you grab the 100% pure pumpkin. Libby’s is my go-to for consistent texture and flavor.
- ½ cup powdered sugar — Dissolves more smoothly than granulated, which keeps the filling silky instead of gritty.
- ¼ cup packed light brown sugar — Adds moisture and that molasses-y depth that makes pumpkin desserts taste like fall. If you only have dark brown sugar, use it—it’ll just be a bit more intense.
- 1 teaspoon vanilla extract — Pure vanilla makes a difference here. Imitation works, but the flavor won’t be as warm.
- 1 ½ teaspoons pumpkin pie spice — Store-bought is fine, or make your own blend: ½ teaspoon cinnamon, ¼ teaspoon ginger, ¼ teaspoon nutmeg, ⅛ teaspoon cloves, and a tiny pinch of allspice.
- ½ cup heavy whipping cream — This gets whipped separately and folded in, which gives the filling its light, mousse-like texture. Cold cream whips best, so keep it refrigerated until you’re ready.
For the Topping (Optional but Recommended)
- ¾ cup cold heavy whipping cream — For the whipped cream topping. Or use store-bought if you’re in a hurry—I won’t tell.
- 2 tablespoons powdered sugar — Sweetens the whipped cream without making it grainy.
- ½ teaspoon vanilla extract — Adds flavor depth to the topping.
- Ground cinnamon or nutmeg for dusting — A little sprinkle on top makes these look bakery-worthy.
Equipment Needed
You don’t need a stand mixer or any fancy gadgets for these cups. Here’s what you’ll actually use:
- Mixing bowls — Three small-to-medium bowls. One for the crust, one for the cream cheese mixture, and one for whipping cream.
- Electric hand mixer or stand mixer — A hand mixer works perfectly. You can whip the cream by hand with a whisk, but your arm will definitely feel it. I’ve done it both ways, and the hand mixer wins every time.
- 4 to 6 small serving cups or jars — I use 6-ounce mason jars or small dessert glasses. Mini trifle dishes also work. The size is flexible—just adjust the layers accordingly.
- Measuring cups and spoons — Standard set. Nothing fancy.
- Spatula — For scraping every bit of filling into the cups. Waste not, want not.
- Small food processor or zip-top bag and rolling pin — For crushing the graham crackers. The bag-and-rolling-pin method works great and requires zero cleanup beyond tossing the bag.
If you don’t have a hand mixer, you can whisk the cream by hand—just make sure everything is very cold and be prepared for a little arm workout. It’s worth it for the texture.
Preparation Method
These Easy No-Bake Pumpkin Cheesecake Cups come together in layers, like building a tiny edible sculpture. Take your time with each step and you’ll be rewarded with perfect little desserts.
Step 1: Make the Crust
Crush the graham crackers into fine crumbs. If you’re using a food processor, pulse until you have a sand-like consistency. If you’re using the bag method, place the crackers in a zip-top bag, seal it, and go to town with a rolling pin. You want crumbs, not powder, but close to it.
Transfer the crumbs to a small bowl. Add the melted butter, sugar, and cinnamon if using. Stir with a fork until every crumb is coated and the mixture looks like wet sand. It should clump together when you press it between your fingers.
Spoon about 2 tablespoons of the crust mixture into the bottom of each cup. Press it down firmly using the back of a spoon or the bottom of a small glass. You want a compact, even layer. Set the cups aside while you make the filling.
Step 2: Make the Pumpkin Cheesecake Filling
In a medium bowl, beat the softened cream cheese with an electric mixer until smooth and fluffy—about 1 minute. Scrape down the sides of the bowl with a spatula.
Add the pumpkin puree, powdered sugar, brown sugar, vanilla extract, and pumpkin pie spice. Beat on medium speed until everything is combined and smooth. The mixture will look thick and a little glossy. Taste it here—you should get a balanced pumpkin-spice flavor with enough sweetness to feel like dessert.
In a separate bowl, pour the ½ cup of cold heavy whipping cream. Beat on medium-high speed until soft peaks form. You’ll know it’s ready when the cream holds its shape when you lift the beaters, but the peaks flop over slightly. Don’t over-whip or you’ll end up with butter.
Fold the whipped cream into the pumpkin mixture using a spatula. Use gentle, sweeping motions—fold from the bottom up, turning the bowl as you go. Stop when you don’t see any white streaks. The filling should be light, airy, and a beautiful pale orange color.
Step 3: Layer the Cups
Spoon or pipe the pumpkin cheesecake filling over the crust layer in each cup. Fill them about two-thirds full. You can use a piping bag for a cleaner look, but a spoon works just fine. Tap each cup gently on the counter to settle the filling and eliminate air pockets.
Place the cups in the refrigerator while you make the topping. They need at least 2 hours to set, but overnight is even better. The filling firms up beautifully and the flavors meld together.
Step 4: Make the Whipped Cream Topping
About 30 minutes before serving, make the topping. In a chilled bowl, beat the ¾ cup cold heavy whipping cream with powdered sugar and vanilla extract. Beat until medium-stiff peaks form—the cream should hold its shape firmly when you lift the beaters.
Spoon or pipe the whipped cream over the chilled cheesecake filling. Dust the tops with a light sprinkle of cinnamon or nutmeg. Serve immediately, or refrigerate for up to 2 hours before serving.
Cooking Tips & Techniques
I learned a few things the hard way while testing these cups. Here’s what I wish someone had told me:
Softening cream cheese properly matters. If your cream cheese is too cold, it won’t blend smoothly and you’ll end up with tiny lumps in your filling. Leave it on the counter for at least 30 minutes. If you’re in a rush, microwave it in 10-second bursts until it’s soft to the touch—but don’t overdo it or it’ll separate.
Don’t skip the whipped cream folding step. I tried making these with just cream cheese and pumpkin once, thinking the whipped cream was optional. It wasn’t. The filling was dense and heavy instead of light and mousse-like. The whipped cream is what gives these cups their airy, luxurious texture.
Press the crust firmly. I had one batch where the crust crumbled into the filling because I didn’t press it down hard enough. Use the bottom of a glass or a small measuring cup to really compact it. You want a solid foundation.
Chill time is non-negotiable. These need at least 2 hours in the fridge. I know it’s tempting to rush, but the filling needs that time to set properly. If you serve them too soon, they’ll be soupy and the layers will run together. Patience pays off here.
Make extra. Seriously. These disappear fast. If you’re bringing them to a gathering, double the recipe. You won’t regret it.
Variations & Adaptations
One of the best things about this recipe is how flexible it is. Here are some ways to make it your own:
Gluten-Free Version
Swap the graham cracker crumbs for gluten-free graham crackers or crushed gluten-free shortbread cookies. I’ve used both and they work beautifully. You can also use crushed almonds or pecans mixed with a little butter and sugar for a nut-based crust.
Dairy-Free Version
Use dairy-free cream cheese (I like Kite Hill or Violife) and coconut cream instead of heavy whipping cream. Chill the can of coconut cream overnight, then scoop out the solid part and whip it. The texture is slightly different but still delicious. Keep in mind the filling won’t be as firm.
Pumpkin-Free Option
If you’re not a pumpkin person (no judgment), swap the pumpkin puree for sweet potato puree or butternut squash puree. The flavor will be milder, so you might want to increase the pumpkin pie spice slightly. I’ve tried it with sweet potato and honestly, it’s almost better.
Flavor Twists
Add a tablespoon of bourbon or dark rum to the pumpkin filling for an adult version. Or layer in some caramel sauce between the crust and filling for extra decadence. I did a batch with salted caramel and it was gone in 20 minutes.
Different Crust Options
Try crushed gingersnap cookies, vanilla wafers, or shortbread cookies instead of graham crackers. Each one brings a different flavor profile. Gingersnaps are especially good because the ginger and molasses complement the pumpkin spice perfectly.
Serving & Storage Suggestions
These cups are best served cold, straight from the refrigerator. I like to let them sit at room temperature for about 5 minutes before serving—it takes the chill off just enough to let the flavors open up.
For presentation, top each cup with a small pinch of cinnamon or nutmeg, and maybe a whole graham cracker sticking out of the whipped cream for a cute “spoon” effect. If you’re feeling extra, add a drizzle of caramel sauce or a few candied pecans on top.
These pair beautifully with a hot cup of coffee or spiced apple cider. They’re also great alongside copycat pumpkin cream cheese muffins for a full fall dessert spread.
Storage: Cover each cup with plastic wrap or a lid and refrigerate for up to 3 days. The crust will soften slightly over time, but the flavor actually gets better after a day in the fridge. I actually prefer them on day two—the spices meld together and the texture becomes even creamier.
Freezer: You can freeze these cups without the whipped cream topping for up to 1 month. Wrap each cup tightly in plastic wrap and then foil. Thaw in the refrigerator overnight, then add the whipped cream before serving. The texture holds up surprisingly well.
Reheating: Don’t. These are meant to be served cold. If you want a warm pumpkin dessert, make pumpkin cream cheese muffins instead.
Nutritional Information & Benefits
Each serving (based on 6 cups) contains approximately 380 calories, 28g fat, 32g carbohydrates, 4g protein, and 22g sugar. These numbers are estimates and will vary based on your specific ingredients and portion sizes.
Pumpkin is the real star here nutritionally. It’s packed with vitamin A (over 200% of your daily needs per cup), fiber, and antioxidants like beta-carotene. It’s also low in calories and naturally sweet, which means you can use less added sugar than you might think.
The cream cheese and heavy cream add calcium and protein, but also saturated fat. If you’re watching your intake, the dairy-free version with coconut cream is a good alternative. Just keep in mind that coconut cream is also high in saturated fat, so it’s not a significant reduction.
These cups are vegetarian and can easily be made gluten-free or dairy-free. They contain dairy and gluten in their standard form, so adjust accordingly for allergies.
I don’t make these every week—they’re a treat, not a health food. But knowing there’s actual pumpkin in there makes me feel slightly better about going back for seconds.
Conclusion
These Easy No-Bake Pumpkin Cheesecake Cups are proof that you don’t need an oven, a lot of time, or a fancy ingredient list to make something genuinely special. They’re the kind of dessert that looks like you spent hours on it, when really you just spent ten minutes layering things into cups and letting the fridge do the work.
I love that I can make these on a whim, with ingredients I usually have on hand. I love that they travel well and look beautiful on a dessert table. But mostly, I love that first bite—that moment when the creamy pumpkin filling meets the buttery crust and everything just works.
Try these for your next fall gathering, or just for a quiet night when you need a little seasonal comfort. And if you make them your own—with a different crust, a flavor twist, or a new topping—come back and tell me about it in the comments. I’m always looking for new ideas.
Happy no-baking, friends.
Frequently Asked Questions
Can I make these ahead of time?
Absolutely. These cups are actually better when made a day ahead. Prepare them completely, including the whipped cream topping, and refrigerate for up to 24 hours. The flavors meld and the texture becomes even creamier.
Can I use pumpkin pie filling instead of pure pumpkin?
I don’t recommend it. Pumpkin pie filling already has sugar and spices added, which will throw off the sweetness and spice levels in this recipe. Stick with 100% pure pumpkin puree for the best results.
How long do these keep in the fridge?
These cups will keep for up to 3 days in the refrigerator. The crust will soften over time, but the flavor actually improves. Just keep them covered with plastic wrap or a lid to prevent them from absorbing other fridge odors.
Can I freeze these cups?
Yes, but freeze them without the whipped cream topping. Wrap each cup tightly in plastic wrap and foil, then freeze for up to 1 month. Thaw in the refrigerator overnight, then add fresh whipped cream before serving.
Can I use a different crust?
Definitely. Gingersnaps, vanilla wafers, shortbread cookies, or even crushed pretzels all work beautifully. Each one brings a different flavor profile. If you’re using a sweeter cookie, you might want to reduce the sugar in the crust slightly.
Pin This Recipe!
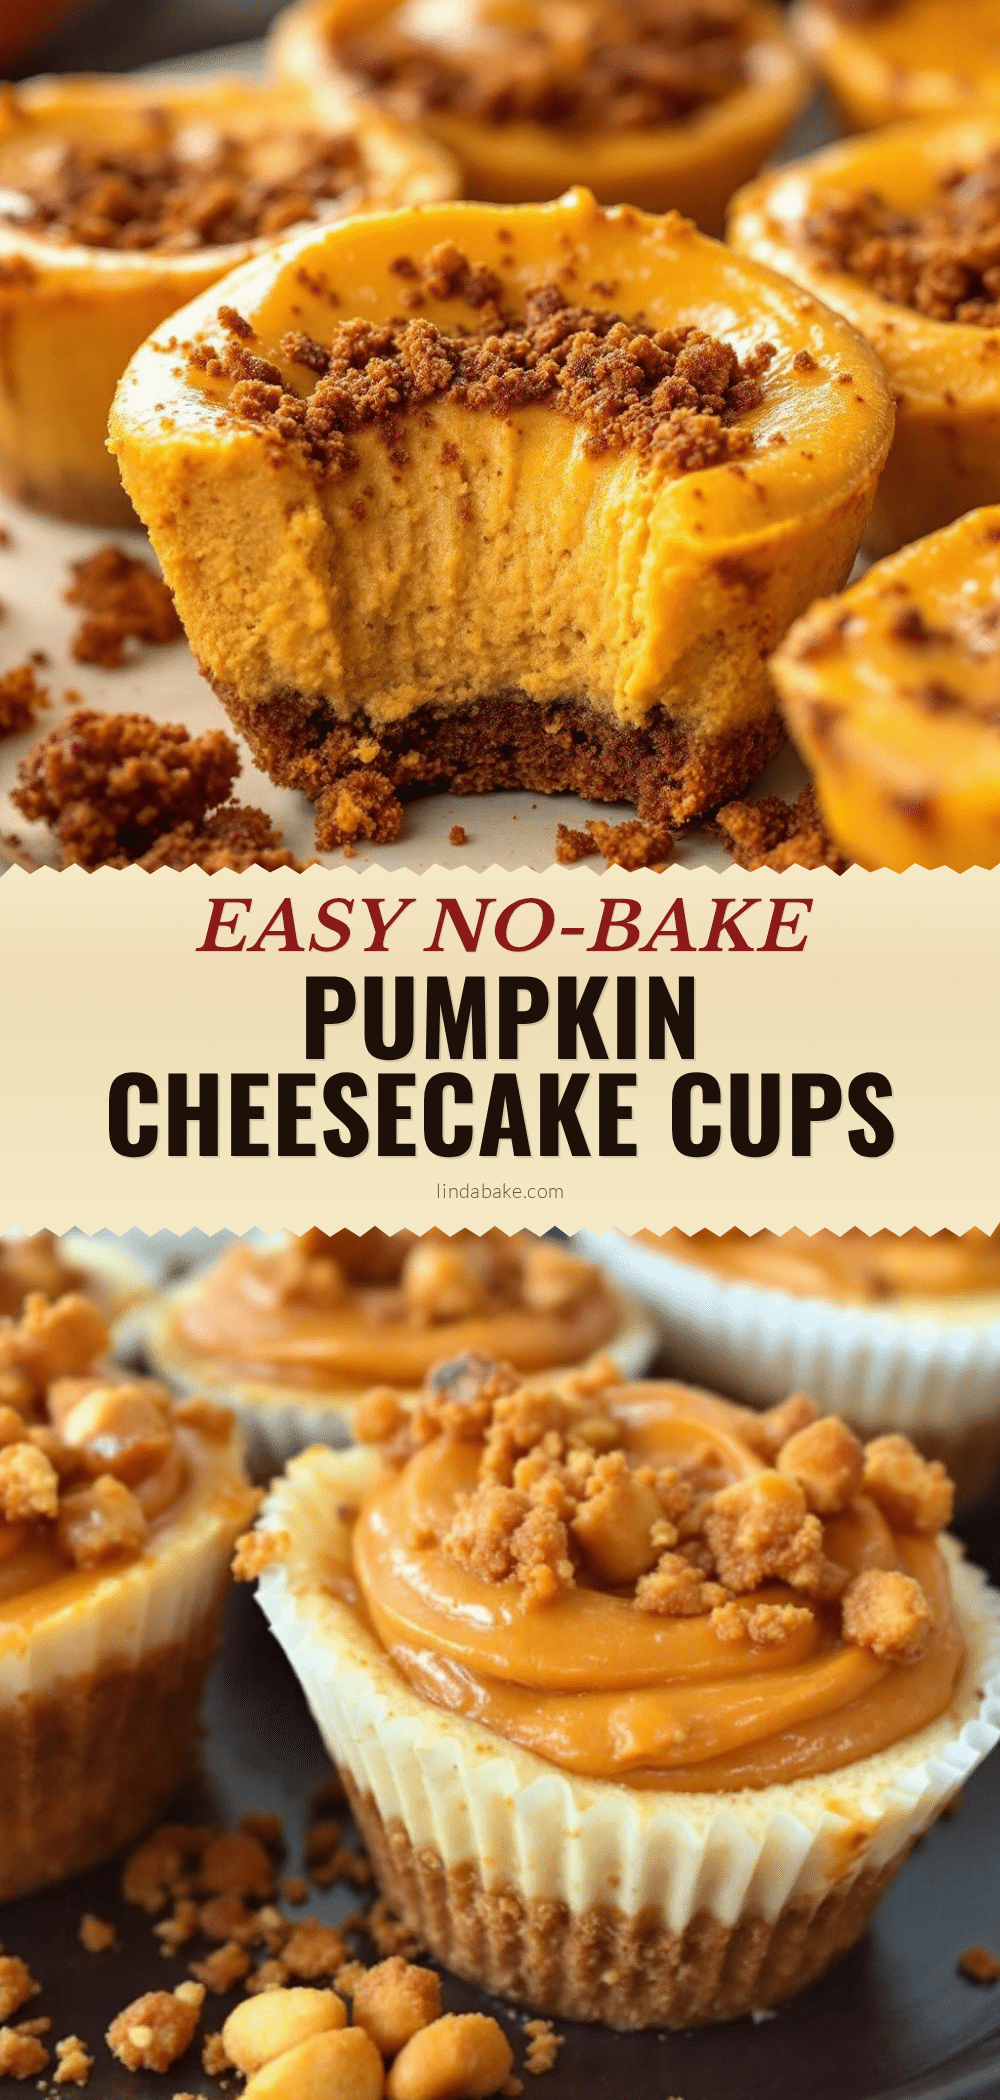
Easy No-Bake Pumpkin Cheesecake Cups: Best 10-Minute Dessert
These Easy No-Bake Pumpkin Cheesecake Cups are a quick and delicious fall dessert that comes together in just 10 minutes. With a buttery graham cracker crust, creamy pumpkin cheesecake filling, and fluffy whipped cream topping, they’re perfect for any gathering or a simple seasonal treat.
- Prep Time: 10 minutes
- Cook Time: 0 minutes
- Total Time: 2 hours 10 minutes (includes chilling time)
- Yield: 6 servings 1x
- Category: Dessert
- Cuisine: American
Ingredients
- 1 ½ cups graham cracker crumbs (about 10–12 full sheets)
- 5 tablespoons unsalted butter, melted
- 2 tablespoons granulated sugar
- ¼ teaspoon ground cinnamon (optional)
- 8 ounces cream cheese, softened
- ½ cup pumpkin puree (100% pure, not pumpkin pie filling)
- ½ cup powdered sugar
- ¼ cup packed light brown sugar
- 1 teaspoon vanilla extract
- 1 ½ teaspoons pumpkin pie spice
- ½ cup heavy whipping cream (cold)
- ¾ cup cold heavy whipping cream (for topping)
- 2 tablespoons powdered sugar (for topping)
- ½ teaspoon vanilla extract (for topping)
- Ground cinnamon or nutmeg for dusting
Instructions
- Make the crust: Crush graham crackers into fine crumbs. Transfer to a small bowl and add melted butter, sugar, and cinnamon (if using). Stir until mixture resembles wet sand. Spoon about 2 tablespoons into each serving cup and press firmly with the back of a spoon or small glass. Set aside.
- Make the pumpkin cheesecake filling: In a medium bowl, beat softened cream cheese with an electric mixer until smooth and fluffy (about 1 minute). Add pumpkin puree, powdered sugar, brown sugar, vanilla extract, and pumpkin pie spice. Beat on medium speed until combined and smooth.
- In a separate bowl, beat ½ cup cold heavy whipping cream on medium-high speed until soft peaks form. Fold the whipped cream into the pumpkin mixture using gentle, sweeping motions until no white streaks remain.
- Layer the cups: Spoon or pipe the pumpkin cheesecake filling over the crust layer in each cup, filling about two-thirds full. Tap cups gently on the counter to settle. Refrigerate for at least 2 hours or overnight to set.
- Make the whipped cream topping: About 30 minutes before serving, beat ¾ cup cold heavy whipping cream with 2 tablespoons powdered sugar and ½ teaspoon vanilla extract until medium-stiff peaks form. Spoon or pipe over chilled cheesecake filling. Dust with cinnamon or nutmeg. Serve immediately or refrigerate for up to 2 hours.
Notes
Softening cream cheese properly is crucial—leave it on the counter for 30 minutes or microwave in 10-second bursts. Don’t skip folding in the whipped cream; it gives the filling a light, mousse-like texture. Press the crust firmly to prevent crumbling. Chilling for at least 2 hours is non-negotiable for proper set. These cups are best served cold and can be made a day ahead. For gluten-free, use gluten-free graham crackers or crushed nuts. For dairy-free, use dairy-free cream cheese and coconut cream.
Nutrition
- Serving Size: 1 cup
- Calories: 380
- Sugar: 22
- Sodium: 220
- Fat: 28
- Saturated Fat: 16
- Carbohydrates: 32
- Fiber: 2
- Protein: 4
Keywords: no-bake pumpkin cheesecake, pumpkin dessert, easy fall dessert, no-bake dessert, pumpkin cheesecake cups, 10-minute dessert


