The peppermint bark display at the grocery store was already picked over. It was December 23rd, and I stood there, holding a bag of semi-sweet chocolate chips and a candy cane I found wedged under the seat of my car. My sister was coming over in an hour, and I had promised her something homemade for the holidays — not something that looked like it came off a clearance shelf.
I had zero time, zero patience for a double boiler, and honestly? I didn’t want to turn on the oven. The house was already warm from the tree lights and the space heater in the corner. So I grabbed the sweetened condensed milk I keep stashed for emergencies (don’t we all?), and I started experimenting right there on the counter.
That first batch of Easy No-Bake Peppermint Bark Fudge was a little lopsided. The chocolate layer was thicker on one side, and I crushed the candy cane too fine in some spots. But when my sister took a bite, she just closed her eyes and said, “This is it. This is the one.” And she was right. It was rich, creamy, and that cool peppermint crunch hit exactly the way you want it to. No fuss, no fancy techniques — just honest, good fudge that tastes like you spent hours on it.
That’s the thing about this recipe. It doesn’t need a polished origin story or a trip to a specialty store. It needs five minutes, a microwave, and a willingness to crush some candy canes with a rolling pin while watching your favorite holiday movie. It’s the kind of treat that becomes a tradition not because it’s complicated, but because it works every single time.
Why You’ll Love This Recipe
Let me tell you why this fudge has become my go-to for holiday gatherings, last-minute hostess gifts, and those evenings when you just need something sweet without a kitchen disaster. I’ve tested this through three holiday seasons now, and it never lets me down.
- Quick & Easy : From start to finish, you’re looking at about five minutes of active work. No candy thermometers, no boiling sugar to a specific temperature — just melt, stir, and chill. Perfect for those “I need a dessert in 20 minutes” panic moments.
- Simple Ingredients : You probably have most of these in your pantry right now. Chocolate chips, sweetened condensed milk, butter, vanilla, and peppermint extract. The only special item is candy canes, and those are everywhere during the holidays.
- Perfect for Gifting : This fudge holds its shape beautifully, slices into clean squares, and looks stunning on a plate or in a little gift box. I’ve brought it to cookie swaps, work parties, and family dinners — it always disappears first.
- Crowd-Pleaser : Kids love the crunch, adults love the nostalgic peppermint flavor, and nobody can believe it’s this easy. I’ve had friends text me for the recipe before they even finished their first piece.
- Unbelievably Delicious : The texture is what gets me every time. It’s creamy and dense, not grainy or crumbly like some fudge recipes. The peppermint is present but not overpowering, and the crushed candy cane on top adds that satisfying snap.
What makes this different from other peppermint bark recipes? Most require tempering chocolate or layering two different types of chocolate with a waiting period in between. This one combines everything into one smooth, rich fudge base that sets firm enough to slice but stays soft enough to melt on your tongue. It’s not just another version — it’s the version I reach for every single time.
This recipe is the kind that makes you close your eyes after the first bite. It’s comfort food reimagined — faster, simpler, but with the same soul-soothing satisfaction as those elaborate holiday desserts your grandmother used to make. Perfect for impressing guests without stress, or turning a simple Tuesday night into something a little more magical.
What Ingredients You Will Need
This recipe uses simple, wholesome ingredients to deliver bold flavor and satisfying texture without the fuss. Most of these are pantry staples, especially if you do any holiday baking. Here’s what you need and why each one matters.
- 2 cups semi-sweet chocolate chips — (I prefer Ghirardelli or Guittard for the smoothest melt; the quality of your chocolate really shows here)
- 1 can (14 ounces) sweetened condensed milk — (this is the secret to the creamy texture; don’t substitute evaporated milk or regular milk)
- 2 tablespoons unsalted butter — (adds richness and helps the fudge set with a silky mouthfeel)
- 1 teaspoon vanilla extract — (pure vanilla, not imitation, if you can swing it; it rounds out the peppermint beautifully)
- 1/2 teaspoon peppermint extract — (go easy here — peppermint extract is potent and a little goes a long way; start with 1/4 teaspoon if you’re nervous)
- 1/2 cup crushed candy canes or peppermint candies — (about 4-5 regular-sized candy canes; crush them yourself for the best texture — pre-crushed ones are often too fine)
- Pinch of salt — (trust me on this; it balances the sweetness and makes the chocolate taste more chocolatey)
Ingredient Selection Tips: Look for chocolate chips that are fresh — check the date on the bag. Old chocolate can seize or not melt smoothly. For the sweetened condensed milk, I’ve tested this with both name brand and store brand, and both work fine. Just make sure it’s sweetened condensed milk, not evaporated milk. They look similar but are completely different.
Substitution Guidance: If you need a dairy-free version, use dairy-free chocolate chips and a can of coconut sweetened condensed milk (yes, that exists and it works beautifully). For a gluten-free option, this recipe is naturally gluten-free as long as your candy canes are certified gluten-free — most are, but check the label if you’re serving someone with celiac disease. You can swap the peppermint extract for mint extract if that’s what you have, though the flavor will be slightly different — more like a thin mint than a candy cane.
Equipment Needed
You don’t need a fancy kitchen setup for this one. Here’s what I use every time I make this fudge.
- 8×8-inch baking pan — (glass or metal both work; line it with parchment paper so the fudge lifts out cleanly)
- Parchment paper — (don’t skip this; it makes cleanup and removal so much easier)
- Medium microwave-safe bowl — (glass is best; ceramic works too)
- Spatula or wooden spoon — (for stirring; silicone spatulas are great for scraping every last bit)
- Rolling pin or meat tenderizer — (for crushing candy canes; a sturdy mug works in a pinch)
- Ziploc bag — (put the candy canes inside before crushing to contain the mess)
- Measuring cups and spoons
- Sharp knife — (for clean slices once the fudge is set)
Personal Note: I’ve made this fudge in a 9×9-inch pan when my 8×8 was in the dishwasher. The fudge came out a little thinner, which actually made it perfect for smaller bite-sized pieces. If you only have a 9×9, just reduce the chilling time slightly and cut smaller squares. Also, if you don’t have a microwave, you can melt everything in a double boiler on the stovetop — just be patient and keep the heat low.
Preparation Method

This is where the magic happens. Follow these steps, and you’ll have perfect fudge every time.
- Prepare your pan. Line an 8×8-inch baking pan with parchment paper, leaving some overhang on two opposite sides. This creates “handles” that let you lift the fudge out later. Lightly spray the parchment with non-stick spray for extra insurance.
- Melt the chocolate mixture. In a medium microwave-safe bowl, combine 2 cups semi-sweet chocolate chips, 1 can (14 ounces) sweetened condensed milk, and 2 tablespoons unsalted butter. Microwave in 30-second intervals, stirring thoroughly between each interval. It usually takes about 90 seconds total, but microwaves vary. Stop when the mixture is mostly melted and smooth — don’t overheat or the chocolate will seize.
- Add the flavorings. Stir in 1 teaspoon vanilla extract, 1/2 teaspoon peppermint extract, and a pinch of salt. Stir until everything is fully incorporated. The mixture should look glossy and thick, like a very rich pudding.
- Pour and spread. Pour the fudge mixture into the prepared pan. Use your spatula to spread it evenly into all corners. Tap the pan gently on the counter a few times to release any air bubbles and level the surface.
- Add the topping. While the fudge is still warm, sprinkle the crushed candy canes evenly over the top. Gently press them into the surface with your spatula so they stick. Don’t wait too long — if the fudge starts to set, the candy canes won’t adhere as well.
- Chill until firm. Place the pan in the refrigerator for at least 2 hours, or until the fudge is completely firm to the touch. For best results, let it chill for 3-4 hours. Overnight is even better — the flavors meld and the texture becomes perfectly creamy.
- Slice and serve. Once firm, lift the fudge out of the pan using the parchment overhang. Place it on a cutting board. Use a sharp knife to cut into squares — I usually go for 1-inch pieces, which makes about 64 small squares. For cleaner cuts, wipe the knife clean between slices.
Troubleshooting Tip: If your fudge seems too soft after 2 hours, give it more time. Humidity can affect setting time. If it’s too hard, you might have overcooked the chocolate — next time, reduce your microwave time by 15 seconds. The fudge should be firm but still have a slight give when you press it.
Sensory Cue: When you lift the fudge out of the pan, you should feel a slight resistance as it releases from the parchment. The surface should be smooth and glossy, not sticky or tacky. When you slice it, the knife should glide through with a clean edge — no crumbling or cracking.
Cooking Tips & Techniques
After making this fudge more times than I can count, I’ve learned a few things the hard way. Let me save you some trouble.
The Microwave Technique: Low and slow is the name of the game. I know it’s tempting to blast it for a full minute, but chocolate burns easily. Those 30-second intervals with good stirring in between are non-negotiable. If you see any spots that look grainy or separated, you’ve gone too far — but don’t panic, just stir vigorously and it might come back together.
The Candy Cane Crush: Don’t pulverize the candy canes into dust. You want a mix of small pieces and slightly larger chunks for texture variety. I put the candy canes in a Ziploc bag, remove as much air as possible, and give them about 5-6 solid whacks with a rolling pin. Some pieces will be fine, some will be bigger — that’s perfect.
My Biggest Failure: The first time I made this, I used imitation vanilla and peppermint extract. The fudge had this weird, artificial aftertaste that lingered. I tried to cover it up with extra candy cane topping, but it was still noticeable. Now I always use pure vanilla extract and a good-quality peppermint extract. It makes a real difference. Don’t skimp here.
Timing Strategy: Make this the day before you need it. The fudge needs at least 2 hours to set, but overnight chilling gives you a better texture and makes slicing much easier. Plus, it’s one less thing to worry about on the day of your event. I often make two batches at once — one for the party and one to keep at home (or to hide in the back of the fridge for myself).
Consistency Check: If your fudge mixture looks oily or separated after melting, you might have overheated it. Next time, reduce your microwave time. If it’s already happened, try stirring in a tablespoon of cold butter — sometimes that helps bring it back together.
Variations & Adaptations
This recipe is incredibly forgiving and customizable. Here are some ways I’ve adapted it over the years.
Dark Chocolate Version: Swap the semi-sweet chips for dark chocolate chips (60-70% cacao). The bitterness of the dark chocolate balances the sweetness of the condensed milk beautifully. Reduce the peppermint extract to 1/4 teaspoon since dark chocolate has stronger flavor notes that can clash with too much mint.
White Chocolate Peppermint Fudge: Use white chocolate chips instead of semi-sweet. The fudge will be sweeter and have a creamier, more vanilla-forward flavor. Add a drop of red food coloring for a festive pink hue — my niece requests this version every year for her classroom holiday party.
Double Chocolate Peppermint: Add 2 tablespoons of unsweetened cocoa powder to the chocolate mixture before melting. This gives an intense chocolate flavor that stands up to the peppermint. You might need an extra tablespoon of butter to keep the texture smooth.
Nutty Crunch Version: Fold in 1/2 cup of toasted, chopped pecans or almonds along with the crushed candy canes. The nutty crunch adds another layer of texture and makes the fudge feel more substantial. I did this once when I ran out of candy canes and only had half the amount — it was a happy accident.
Allergen-Friendly Adaptations: For a nut-free version, skip any nut additions and double-check that your chocolate chips are processed in a nut-free facility. For a vegan version, use dairy-free chocolate chips and coconut sweetened condensed milk. The texture will be slightly different — a bit softer — but the flavor is still fantastic.
Serving & Storage Suggestions
This fudge is versatile when it comes to serving. Here’s how I handle it.
Serving Temperature: Serve the fudge chilled or at room temperature. I prefer it straight from the fridge — the texture is firmer and the peppermint flavor is more pronounced. If you leave it out for more than an hour, it will soften, so keep that in mind for parties.
Presentation Ideas: Arrange the fudge squares on a festive platter or in a decorative tin lined with parchment paper. For gift-giving, I layer the fudge in a clear cellophane bag tied with a red ribbon and a sprig of fresh rosemary. It looks professional and thoughtful without being fussy.
Complementary Pairings: This fudge pairs beautifully with a cup of hot cocoa, a peppermint mocha, or a strong black coffee. For a dessert board, I serve it alongside fresh strawberries, dark chocolate-covered almonds, and shortbread cookies. The combination of textures and flavors is irresistible.
Storage Instructions: Store the fudge in an airtight container in the refrigerator for up to 2 weeks. Layer the pieces between sheets of parchment paper to prevent sticking. You can also freeze the fudge for up to 3 months — just wrap it tightly in plastic wrap and then in foil. Thaw in the refrigerator overnight before serving.
Reheating Note: Don’t reheat this fudge. It’s meant to be served cold or at room temperature. If it’s been in the freezer, let it thaw slowly in the fridge to maintain the best texture.
Flavor Development: The fudge actually gets better after a day or two in the fridge. The flavors meld together, and the texture becomes even creamier. If you can resist eating it all right away, you’ll be rewarded with an even better treat.
Nutritional Information & Benefits
Let’s be real — this is a treat, not a health food. But here’s what you should know.
Estimated Nutritional Values (per 1-inch square, based on 64 pieces): Calories: 85, Total Fat: 4.5g, Saturated Fat: 2.5g, Cholesterol: 5mg, Sodium: 15mg, Total Carbohydrates: 11g, Dietary Fiber: 0.5g, Sugars: 9g, Protein: 1g.
Health Benefits of Key Ingredients: Dark chocolate contains antioxidants called flavonoids, which can support heart health. Peppermint has been shown to aid digestion and can help soothe an upset stomach. Of course, these benefits are minimal in a small serving of fudge, but it’s nice to know there’s something good in there besides sugar.
Dietary Considerations: This recipe is naturally gluten-free and can be made dairy-free or vegan with simple substitutions. It contains dairy in its standard form and may contain traces of nuts depending on your chocolate chip brand. Always check labels if you’re serving someone with allergies.
Personal Wellness Perspective: I believe in balance. This fudge is a special treat for the holidays, not an everyday snack. One or two small squares after dinner is plenty satisfying. I’ve found that making it myself means I control the quality of ingredients and portion sizes, which feels better than buying a giant box of processed candy.
Conclusion
This Easy No-Bake Peppermint Bark Fudge has become a staple in my holiday kitchen for good reason. It’s quick, it’s forgiving, and it delivers that perfect combination of rich chocolate and cool peppermint that makes the season feel special. Whether you’re making it for a cookie swap, a hostess gift, or just because you need a little sweetness in your life, this recipe won’t let you down.
I love that this fudge doesn’t require any special skills or equipment. It’s the kind of recipe that builds confidence in the kitchen — you make it once, it turns out great, and suddenly you’re volunteering to bring dessert to every gathering. That’s exactly what happened to me, and I’ve been making it for years now.
Don’t be afraid to customize it based on what you have or what you love. Try the white chocolate version, throw in some nuts, or double the peppermint if you’re a mint fanatic. The recipe is a starting point, not a rulebook.
If you give this fudge a try, I’d love to hear about it. Drop a comment below and let me know how it turned out — did you stick with the classic version or try one of the variations? Share your photos on social media and tag me so I can see your beautiful creations. Happy holidays, and happy fudge-making!
Frequently Asked Questions
Can I use milk chocolate instead of semi-sweet?
Absolutely. Milk chocolate will make the fudge sweeter and creamier. Just keep in mind that milk chocolate has more milk solids, so the texture might be slightly softer. Reduce the chilling time by about 30 minutes to compensate.
Why is my fudge grainy?
Grainy fudge usually means the chocolate was overheated or moisture got into the mixture. Make sure your bowl and utensils are completely dry before you start. If the fudge is already grainy, try reheating it gently with a tablespoon of butter and stirring until smooth — sometimes that saves it.
Can I make this fudge without a microwave?
Yes! Use a double boiler on the stovetop. Fill the bottom pot with an inch of water, bring it to a simmer, and place your bowl with the chocolate mixture on top. Stir constantly until melted. This method takes a few minutes longer but gives you more control over the temperature.
How do I crush candy canes without making a mess?
Put the candy canes in a sturdy Ziploc bag, remove as much air as possible, and seal it. Place the bag on a cutting board and use a rolling pin or the bottom of a heavy pan to crush them. The bag contains all the little pieces and the dust. Just make sure there are no holes in the bag first!
Can I double this recipe?
Yes, but use a 9×13-inch pan instead of an 8×8. The fudge will be the same thickness, and you’ll get about double the pieces. You might need to increase the chilling time by about an hour since there’s more volume to set.
Pin This Recipe!
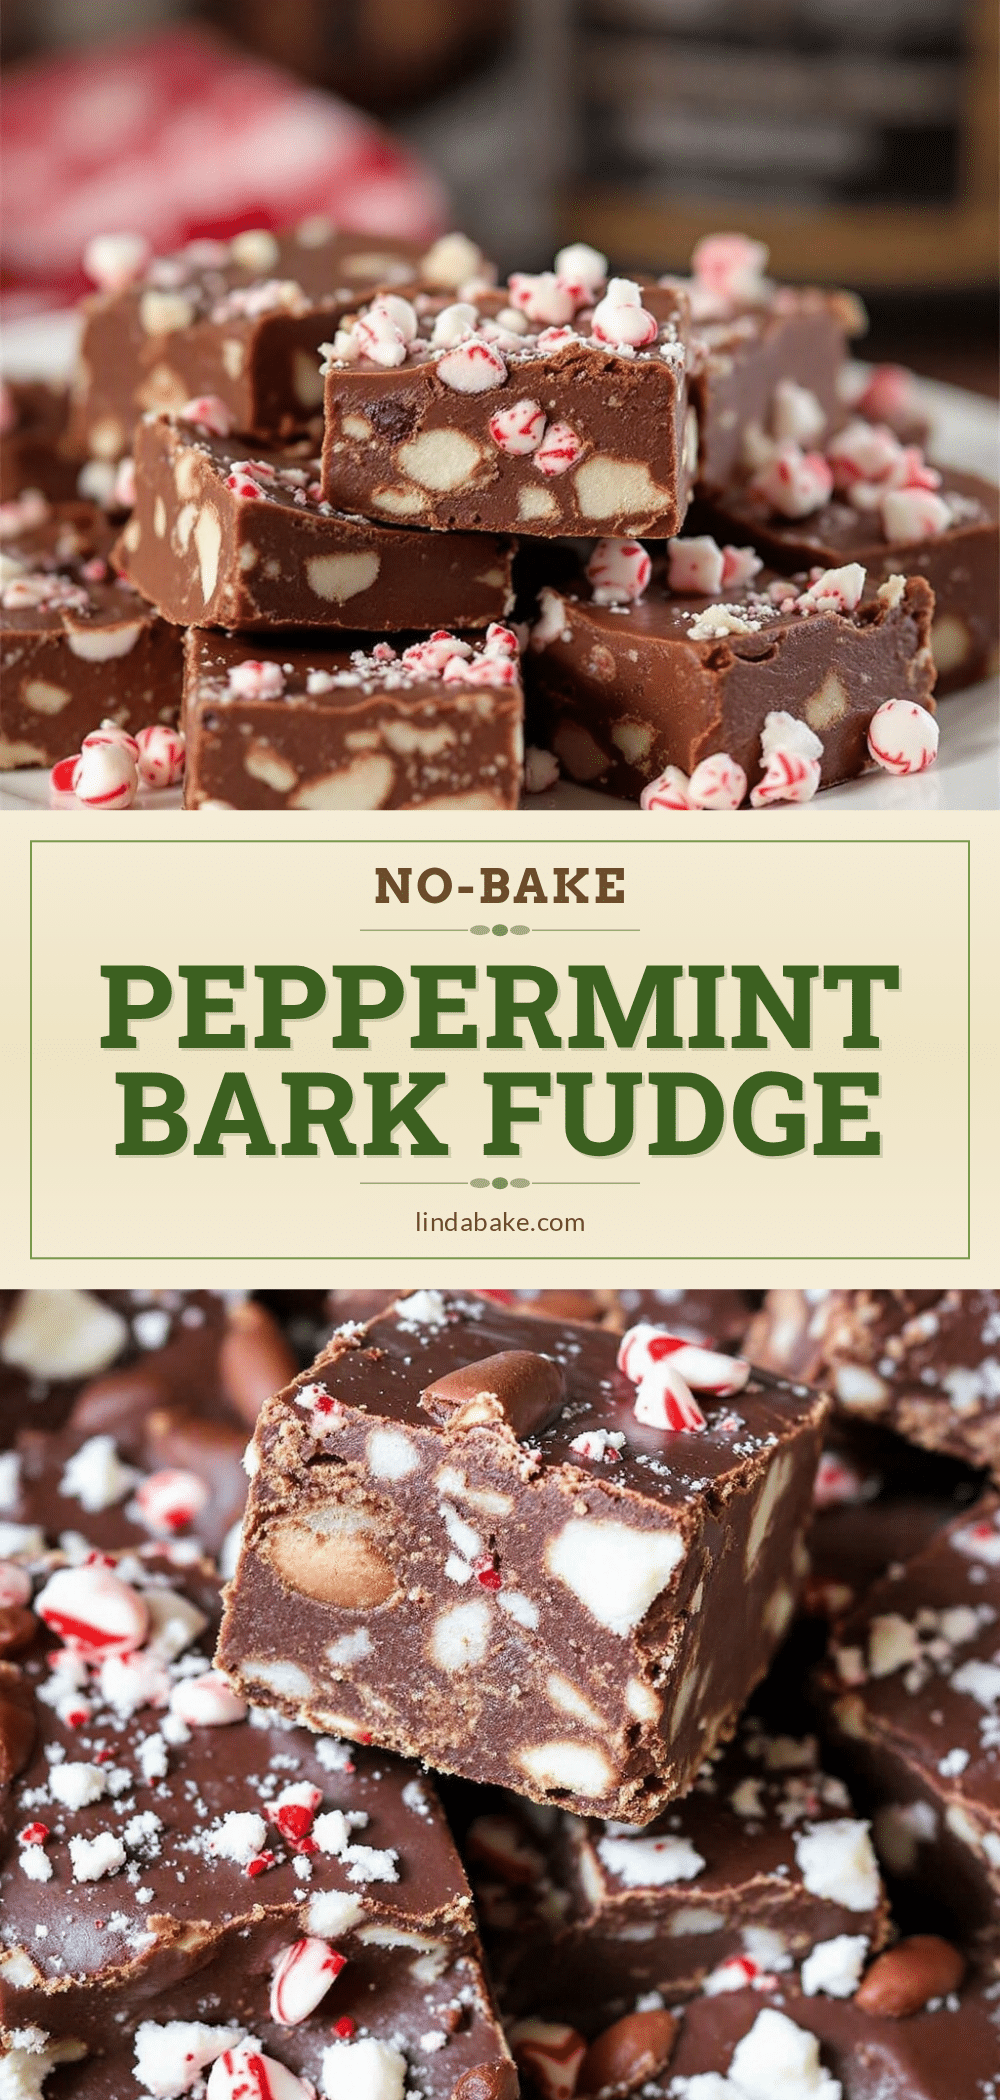
Easy No-Bake Peppermint Bark Fudge: Best 5-Minute Holiday Treat

This Easy No-Bake Peppermint Bark Fudge is a quick, 5-minute holiday treat that combines rich chocolate and cool peppermint crunch. Perfect for last-minute gifts, cookie swaps, or a simple sweet craving, it requires no oven and uses simple pantry ingredients.
- Prep Time: 5 minutes
- Cook Time: 2 hours (chilling time)
- Total Time: 2 hours 5 minutes
- Yield: 64 servings 1x
- Category: Dessert
- Cuisine: American
Ingredients
- 2 cups semi-sweet chocolate chips
- 1 can (14 ounces) sweetened condensed milk
- 2 tablespoons unsalted butter
- 1 teaspoon vanilla extract
- 1/2 teaspoon peppermint extract
- 1/2 cup crushed candy canes or peppermint candies (about 4–5 regular-sized candy canes)
- Pinch of salt
Instructions
- Line an 8×8-inch baking pan with parchment paper, leaving some overhang on two opposite sides. Lightly spray the parchment with non-stick spray.
- In a medium microwave-safe bowl, combine 2 cups semi-sweet chocolate chips, 1 can (14 ounces) sweetened condensed milk, and 2 tablespoons unsalted butter. Microwave in 30-second intervals, stirring thoroughly between each interval, until mostly melted and smooth (about 90 seconds total).
- Stir in 1 teaspoon vanilla extract, 1/2 teaspoon peppermint extract, and a pinch of salt until fully incorporated. The mixture should look glossy and thick.
- Pour the fudge mixture into the prepared pan and spread evenly into all corners. Tap the pan gently on the counter to release air bubbles and level the surface.
- While the fudge is still warm, sprinkle the crushed candy canes evenly over the top. Gently press them into the surface with a spatula so they stick.
- Place the pan in the refrigerator for at least 2 hours, or until completely firm (3-4 hours or overnight is best).
- Once firm, lift the fudge out of the pan using the parchment overhang. Place on a cutting board and cut into 1-inch squares (about 64 pieces) with a sharp knife, wiping the knife clean between slices.
Notes
For best results, chill overnight for optimal texture and flavor. If fudge seems too soft after 2 hours, give it more time. Humidity can affect setting time. For cleaner slices, wipe the knife clean between cuts. Store in an airtight container in the refrigerator for up to 2 weeks, or freeze for up to 3 months.
Nutrition
- Serving Size: 1 square (1-inch pie
- Calories: 85
- Sugar: 9
- Sodium: 15
- Fat: 4.5
- Saturated Fat: 2.5
- Carbohydrates: 11
- Fiber: 0.5
- Protein: 1
Keywords: peppermint bark fudge, no-bake fudge, holiday fudge, easy fudge, 5-minute fudge, chocolate peppermint fudge, Christmas fudge


