Introduction
The plate was empty before I could even grab a napkin. My daughter stared at the dusting of powdered sugar on her fingers, then looked up at me with wide, white eyes. “Mom, can we make the ghosts again?” she asked, third time in two weeks.
I honestly didn’t expect them to vanish so quickly. I had just popped the tray into the fridge while cleaning up the kitchen mess. You know how it goes—flour everywhere, spoons clattering, the usual chaos of a last-minute dessert request. But these little guys were different. They weren’t just sweet; they were playful.
It started because my kids wanted something that looked spooky but tasted familiar. They didn’t want spicy or weird flavors. They wanted comfort, but with a Halloween twist. So I grabbed the basics: graham crackers, marshmallow fluff, and a little bit of creativity. I didn’t have time to bake. The oven was busy making cookies for a friend’s kid.
That was the moment I realized how simple this could be. No heating up the kitchen in October heat. No waiting for layers to cool. Just assemble, chill, and serve. The reaction from my husband was the real test. He took one bite, paused, and said, “This is actually really good.” That’s the highest praise I get.
Now, every time October hits, these ghost cupcakes are the first thing I make. They’re not complicated. They’re not fancy. But they bring a quiet joy to the table. It’s funny how something so simple can make everyone smile.
Why You’ll Love This Recipe
There is a specific kind of magic in no-bake desserts during Halloween. It’s not just about the lack of oven heat; it’s about the ease. Let’s face it, when you’re trying to decorate a house, carve pumpkins, and manage a household, the last thing you want is to stand over a hot stove for an hour. These easy no-bake ghost cupcakes solve that problem beautifully.
Here is why this recipe has earned its spot in my regular rotation:
- Quick & Easy: You can have these assembled in under 20 minutes. That is perfect for busy weeknights or those sudden Halloween parties you forgot about until Tuesday.
- Simple Ingredients: You likely already have everything in your pantry. Graham crackers, marshmallow fluff, chocolate chips, and powdered sugar. No fancy grocery trips needed.
- Perfect for Kids: Great for school parties, trick-or-treat exchanges, or just a cozy family dinner. The cute factor is off the charts.
- Crowd-Pleaser: Always gets rave reviews from kids and adults alike. Even the picky eaters who usually refuse anything “white” or “creamy” will dig in.
- Unbelievably Delicious: The texture combo is next-level comfort food. The crunch of the cracker meets the soft, sweet marshmallow, all held together by a bit of chocolate.
What makes this recipe different from the rest? It’s the balance. Most no-bake treats are either too sweet or too crumbly. By using a specific ratio of crushed crackers to fluff, you get a cookie-like base that holds its shape. Plus, the marshmallow frosting isn’t just a topping; it’s the glue. It’s the kind that makes you close your eyes after the first bite. It’s comfort food reimagined—simpler, faster, but with the same soul-soothing satisfaction.
It’s also perfect for impressing guests without stress. You can prep them hours ahead. They look professional, like you spent hours piping delicate faces, but really, you just used a toothpick. It turns a simple meal into something memorable.
What Ingredients You Will Need
This recipe uses simple, wholesome ingredients to deliver bold flavor and satisfying texture without the fuss. Everything you need is likely already in your kitchen. The beauty of these ghost cupcakes lies in the simplicity of the components. You don’t need expensive chocolate or exotic spices. You need reliability.
Here is what you need to gather:
- Graham Crackers: About 15 full sheets. These form the sturdy base of your ghost. I recommend Honey Maid graham crackers for the best balance of sweetness and crunch. They hold up well when crushed.
- Unsalted Butter: 4 tablespoons, softened. This helps bind the crumbs together so they don’t fall apart when you’re shaping the ghosts.
- Granulated Sugar: 2 tablespoons. Just a touch to sweeten the cracker base. You don’t want it too sweet, as the frosting is already very sugary.
- Milk: 2-3 tablespoons. Use whole milk for richness. This helps the crumbs stick together like wet sand when you are molding them.
- Marshmallow Fluff: 1 full jar (about 7-8 ounces). This is the star of the show. Don’t skimp here. The texture of the fluff makes the frosting smooth and airy. If you can’t find fluff, homemade marshmallow cream works too.
- Vanilla Extract: 1 teaspoon. Adds depth to the marshmallow. It cuts through the sugar slightly.
- White Chocolate Chips: 1/2 cup. For melting and creating the “ghostly” glaze or accents. Use high-quality chips like Ghirardelli for a smoother melt. Avoid baking chips if you can, as they can be waxy.
- Chocolate Chips (Dark or Milk): 2 tablespoons, chopped or mini. For the eyes and mouth. Dark chocolate offers a nice contrast to the sweet white.
- Powdered Sugar: For dusting. This gives the ghosts that eerie, dusty, old-house look. It’s essential for the visual effect.
- Food Coloring (Optional): A drop of orange or red gel coloring if you want a subtle tint to the marshmallow, though pure white is classic.
If you need substitutions, you can use gluten-free graham crackers for a gluten-free option. Swap butter for coconut oil if you prefer dairy-free, though the texture might be slightly softer. For the marshmallow, you can use mini marshmallows melted with a little milk, but the fluff is definitely easier and creamier.
Equipment Needed
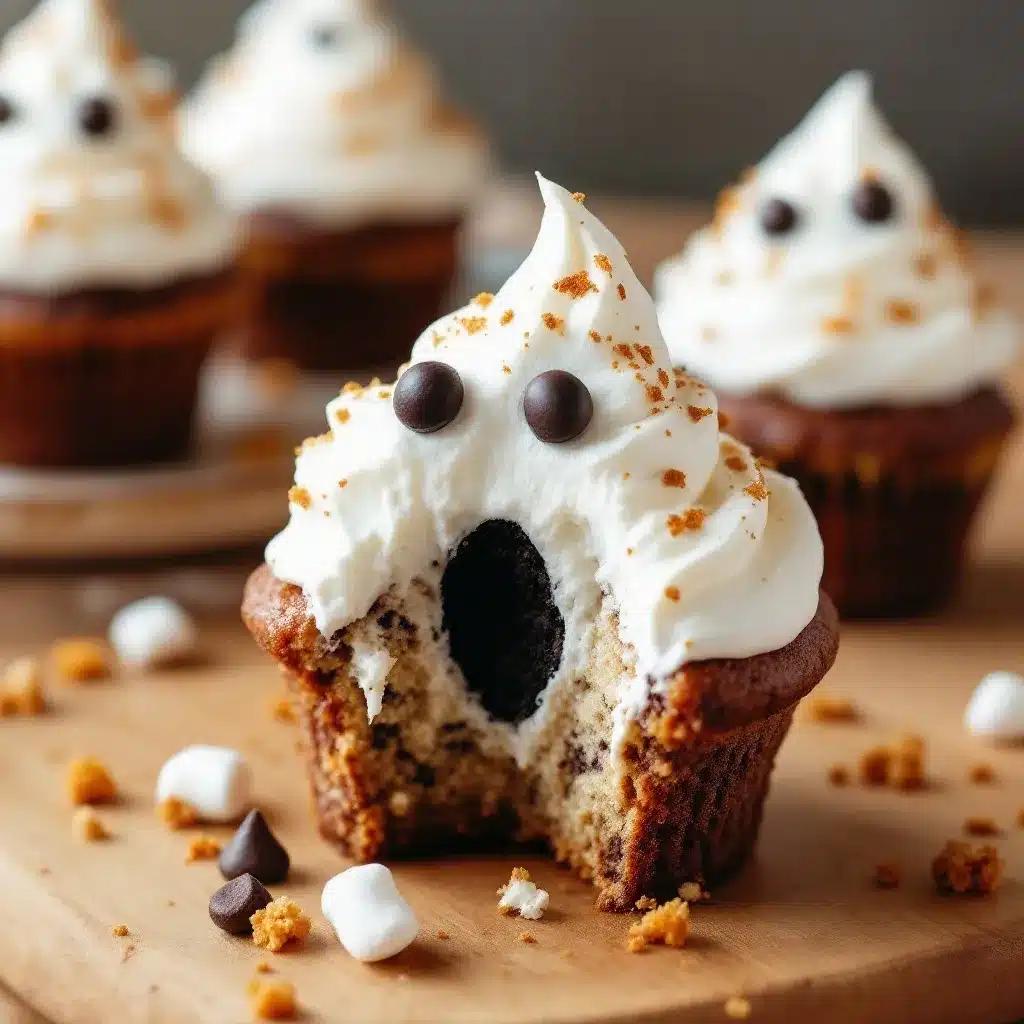
You don’t need a fancy kitchen to make these. Here is what you’ll need:
- Food Processor or Ziplock Bag: To crush the graham crackers. A food processor is faster, but a rolling pin and a heavy bag work just as well. It’s satisfying to crush them.
- Mixing Bowls: Two medium bowls. One for the cracker mixture, one for the frosting.
- Spatula: A flexible silicone spatula is best for folding the marshmallow fluff. It gets into the corners of the bowl.
- Piping Bag or Ziplock Bag: For applying the marshmallow frosting. If you don’t have a piping bag, just cut the corner off a heavy-duty ziplock bag. It works perfectly.
- Toothpicks: Essential for drawing the facial features. They are thin enough to create delicate eyes and mouths.
- Sieve or Sifter: For dusting the powdered sugar. A fine-mesh sieve gives the most even, spooky dusting.
- Microwave-Safe Bowl: For melting the white chocolate. If you don’t have a microwave, a double boiler on the stove works too.
I’ve tried using cookie cutters to shape the base, but it’s actually easier to just press the cracker mixture into the bottom of a mini muffin tin or just freehand it on a plate. Freehanding gives them more character. The toothpick is your best friend here. It doesn’t break the surface like a pen would.
Preparation Method
Making these ghost cupcakes is straightforward, but there are a few tricks to getting the shape right. Let’s break it down step-by-step.
- Crush the Crackers (5 minutes): Take your 15 graham cracker sheets and crush them into fine crumbs. If using a food processor, pulse until you have fine sand. If using a bag, use a rolling pin until there are no large chunks. You want a consistent texture. Transfer the crumbs to a mixing bowl.
- Make the Base (5 minutes): Add the softened butter, sugar, and milk to the crumbs. Mix with a spatula until the mixture looks like wet sand. It should hold together when you squeeze it in your hand. If it’s too dry, add a teaspoon more milk. If it’s too wet, add a few more crumbs. This mixture will form the bottom half of your ghost.
- Shape the Ghosts (10 minutes): This is the fun part. Take about 1-2 tablespoons of the cracker mixture. Press it into the bottom of a mini muffin cup or shape it into a small mound on a parchment-lined tray. You want a flat bottom so it sits upright. Then, take another small portion and shape it into a dome on top of the base. You are creating a teardrop or ghost shape. The bottom is the “skirt,” and the top is the “head.” Repeat until all mixture is used. Place them in the fridge to firm up for 10 minutes. This makes them easier to frost.
- Prepare the Frosting (2 minutes): In a separate bowl, scoop out the marshmallow fluff. Add the vanilla extract. Mix until smooth. If the fluff is too stiff, you can microwave it for 10 seconds to soften it. You want it to be pipeable but still thick enough to hold its shape.
- Frost the Ghosts (5 minutes): Transfer the marshmallow mixture to a piping bag. If you are using a ziplock bag, cut a small corner off. Pipe the marshmallow over the cracker base. Start from the top and let it drip down the sides slightly. You want it to look like a draped sheet. Don’t cover the bottom edge completely; leave a tiny bit of the cracker base visible for contrast. Place them back in the fridge for 5 minutes to set the frosting.
- Melt the Chocolate (2 minutes): Take your white chocolate chips and melt them in the microwave in 30-second intervals, stirring in between. You want it smooth and liquid. Be careful not to burn it. If it’s too thick, add a tiny drop of vegetable oil to thin it. Chop your dark chocolate chips into tiny pieces for the eyes and mouth.
- Add the Faces (5 minutes): Dip a toothpick into the melted white chocolate. Carefully draw two small dots for eyes and a small line or triangle for a mouth on the marshmallow. You can also use the dark chocolate chips. Press two tiny dark chocolate pieces for eyes and one for a mouth. The white chocolate helps them stick. Use the toothpick to adjust placement if needed. This is where your personality comes in. Some ghosts look happy, some look scared. Have fun with it.
- Dust and Serve (2 minutes): Once the chocolate has set (about 5 minutes), take your sieve and dust the ghosts generously with powdered sugar. This gives them that spooky, aged look. Gently shake off the excess. Place them on a serving platter. They are ready to eat!
Keep an eye on the marshmallow. If it gets too warm, it might melt into the crackers. Working in a cool kitchen helps. If your kitchen is hot, keep the ghosts in the fridge until the very last second.
Cooking Tips & Techniques
I learned a few things the hard way while perfecting these ghost cupcakes. First, don’t rush the chilling step. If you frost them while the cracker base is soft, they will collapse. The 10-minute chill in the fridge is non-negotiable. It firms up the butter in the base and makes the structure stable.
Second, the texture of the marshmallow fluff matters. If you use homemade marshmallow cream, it might be softer. You can add a little powdered sugar to stiffen it up. But honestly, the jarred fluff is the easiest and most consistent. It has that perfect airy quality.
Another common mistake is making the ghosts too tall. If they are too tall, they become top-heavy and might tip over. Keep them short and stout. They look cuter that way, and they are easier to handle. Think of them as little penguins, not tall ghosts.
When melting the chocolate, use low power. Microwave ovens vary wildly. If you heat it too high, the chocolate seizes and becomes grainy. Stir frequently. If it looks lumpy, keep stirring. The friction will melt it. If it’s still too thick, a drop of oil helps, but don’t add too much or it will become runny and slide off the ghost.
For the dusting, don’t be shy. The powdered sugar is what sells the ghost effect. Without it, they just look like white marshmallow treats. With it, they look like they’ve been haunting the attic for years. It’s a simple visual trick, but it works every time.
Finally, use a toothpick for the details. A pen or marker will bleed into the marshmallow and look messy. A toothpick gives you precise control. If you make a mistake, you can wipe it away with a damp paper towel before the chocolate sets.
Variations & Adaptations
One of the best things about this recipe is how easily it can be changed up. Here are a few variations I’ve tried:
- Orange Ghosts: Add a drop of orange gel food coloring to the marshmallow fluff. It gives a subtle sunset glow, perfect for autumn vibes. It looks beautiful dusted with a little brown sugar instead of white.
- Pumpkin Spice: Add a teaspoon of pumpkin pie spice to the cracker mixture. It adds a warm, cozy flavor that pairs well with the sweet marshmallow. This is great for fall gatherings.
- Chocolate Base: Mix cocoa powder into the cracker crumbs. This creates a chocolate ghost, which looks like a shadow or a bat. It’s a nice twist for kids who prefer chocolate.
- Gluten-Free: Use gluten-free graham crackers. Most brands work well, but check the texture. Some are more crumbly than others. You might need a bit more butter to bind them.
- Vegan: Use vegan graham crackers and vegan marshmallow fluff (there are several brands now). Use dairy-free chocolate chips. The result is almost identical to the original.
I once tried adding crushed cookies to the base, like Oreos, but it made the base too heavy. The graham cracker is the right balance of light and sturdy. Stick with the classic for best results.
Serving & Storage Suggestions
These ghost cupcakes are best served chilled. The cold temperature keeps the marshmallow firm and the chocolate crisp. You can serve them on a platter with a Halloween theme. Add some fake spiders or candy corn around the edges for extra flair.
They pair well with a glass of cold milk or a hot cup of coffee. The sweetness balances the bitterness of the coffee. I also like to serve them with a light tea, like chamomile, to cut the sweetness.
For storage, keep them in an airtight container in the refrigerator. They will last for up to 3 days. If you leave them out at room temperature for too long, the marshmallow will soften and the chocolate might melt. In hot weather, keep them in the fridge until serving.
You can also freeze them. Place them in a single layer on a tray, freeze until solid, then transfer to a freezer bag. They will last for up to a month. Thaw them in the fridge overnight before serving. The texture might be slightly softer after freezing, but they still taste great.
Over time, the powdered sugar dusting might absorb moisture and disappear. That’s normal. If you want them to stay dusty, add a fresh dusting right before serving. The flavors meld nicely over the first day, so they might taste even better on day two.
Nutritional Information & Benefits
While these are definitely a treat, they are relatively simple in ingredients. Each ghost cupcake contains approximately 150-200 calories, depending on the size. The main sources of calories are the graham crackers, butter, and marshmallow fluff.
The graham crackers provide carbohydrates for energy. The butter adds fat, which helps with satiety. The marshmallow fluff is mostly sugar, so these are best enjoyed in moderation. They are not a health food, but they are a fun, occasional indulgence.
If you are watching your sugar intake, you can reduce the amount of powdered sugar dusting or use a sugar-free marshmallow fluff. For a lower-fat option, you can use a butter substitute, but the flavor will change slightly.
These treats are gluten-containing and dairy-containing. If you have allergies, use the substitutions mentioned earlier. They are a great way to include kids in cooking, as they are safe and easy to handle. Plus, they bring joy, which is good for your mental health!
Conclusion
Easy No-Bake Ghost Cupcakes with Marshmallow Frosting are a Halloween staple for a reason. They are fun, easy, and delicious. They bring a smile to everyone’s face, from kids to adults. I love making them because they are stress-free and yet look impressive. They are a testament to the idea that simple ingredients can create magic.
Feel free to customize them. Make them spooky, make them cute, make them orange. The sky is the limit. I hope you enjoy making them as much as I do. They are a great way to spend an afternoon with family.
Don’t forget to share your creations! Post a photo online and tag me. I’d love to see your spooky ghosts. And if you try this recipe, leave a comment below. Let me know how they turned out. Happy Halloween!
FAQs
Can I make these ahead of time?
Yes, you can make them up to 3 days in advance. Store them in an airtight container in the refrigerator. Add the powdered sugar dusting right before serving to keep them looking fresh.
Can I use homemade marshmallow cream instead of fluff?
Yes, but homemade marshmallow cream is often softer. You may need to chill the ghosts longer after frosting to help the cream set. The jarred fluff is thicker and easier to work with for beginners.
How do I fix a ghost that won’t stand up?
If your ghost is top-heavy, it might tip over. Try making the base wider and the top smaller. Also, ensure the cracker mixture is firmly packed. Chilling them for 10 minutes before frosting helps them hold their shape.
Can I freeze these cupcakes?
Yes, you can freeze them for up to a month. Freeze them on a tray first, then transfer to a bag. Thaw in the fridge overnight. Note that the powdered sugar may absorb moisture, so you might need to re-dust them.
What if I don’t have a piping bag?
You can use a ziplock bag. Just scoop the marshmallow fluff into the bag, seal it, and cut a small corner off the end. This works perfectly for piping the frosting.
Pin This Recipe!
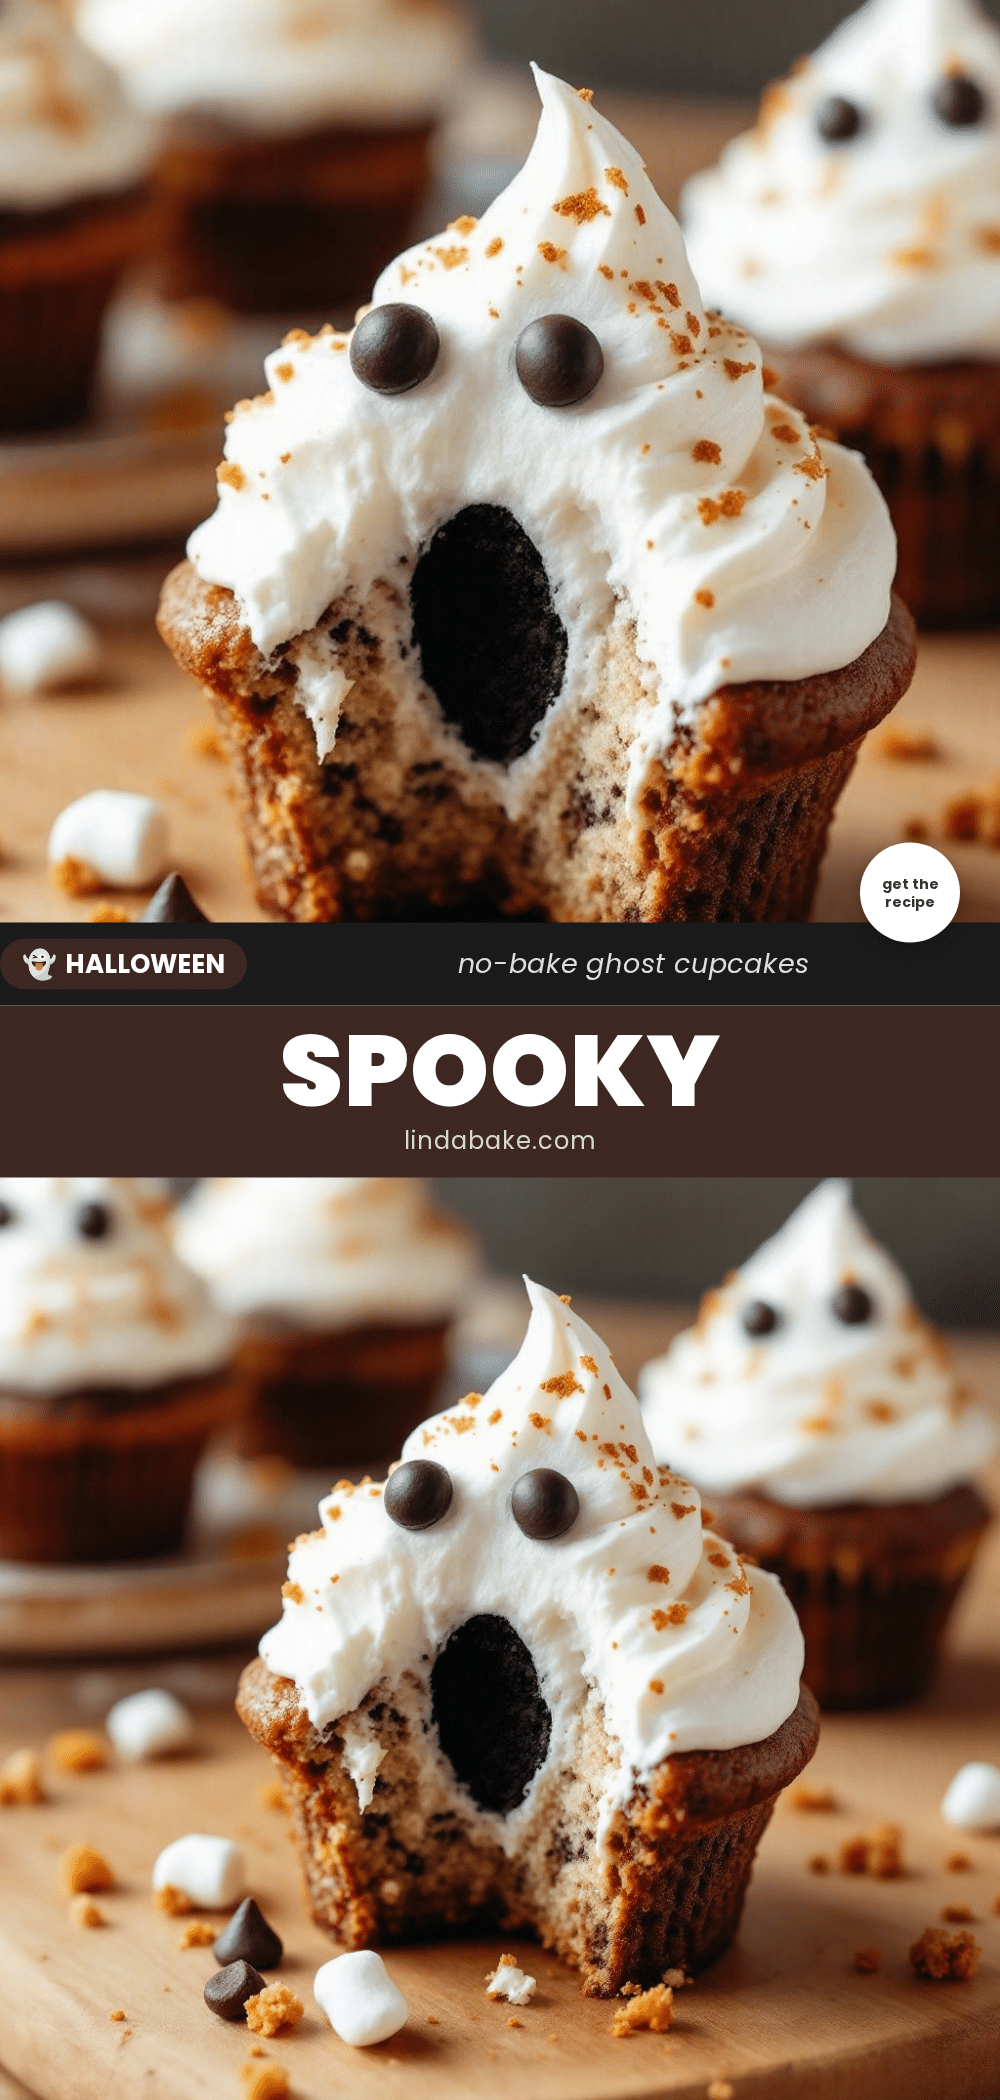
Easy No-Bake Ghost Cupcakes: Best Halloween Treat
These playful, no-bake ghost cupcakes are a stress-free Halloween dessert made with graham crackers, marshmallow fluff, and chocolate accents. They are quick to assemble, kid-friendly, and require no oven.
- Prep Time: 20 minutes
- Cook Time: 0 minutes
- Total Time: 20 minutes
- Yield: 15 servings 1x
- Category: Dessert
- Cuisine: American
Ingredients
- 15 full sheets Graham Crackers (Honey Maid recommended)
- 4 tablespoons Unsalted Butter, softened
- 2 tablespoons Granulated Sugar
- 2–3 tablespoons Whole Milk
- 1 jar (7-8 ounces) Marshmallow Fluff
- 1 teaspoon Vanilla Extract
- 1/2 cup White Chocolate Chips
- 2 tablespoons Dark or Milk Chocolate Chips, chopped or mini
- Powdered Sugar, for dusting
- Food Coloring (Optional): Orange or red gel
Instructions
- Crush 15 graham cracker sheets into fine crumbs using a food processor or rolling pin in a bag.
- In a mixing bowl, combine the crumbs, softened butter, granulated sugar, and milk. Mix until the texture resembles wet sand.
- Shape the cracker mixture into small mounds with flat bottoms and domed tops to form ghost shapes. Place on a parchment-lined tray or mini muffin tin.
- Chill the shaped bases in the refrigerator for 10 minutes to firm up.
- In a separate bowl, mix the marshmallow fluff and vanilla extract until smooth. If too stiff, microwave for 10 seconds to soften.
- Pipe the marshmallow mixture over the chilled cracker bases, letting it drip down the sides like a sheet. Leave the bottom edge slightly visible.
- Return to the refrigerator for 5 minutes to set the frosting.
- Melt white chocolate chips in the microwave in 30-second intervals, stirring until smooth. Thin with a drop of vegetable oil if necessary.
- Use a toothpick dipped in melted white chocolate to draw eyes and mouths on the ghosts, or press tiny dark chocolate chips into the marshmallow.
- Once the chocolate details have set, generously dust the ghosts with powdered sugar using a sieve for a spooky, aged look.
- Serve chilled.
Notes
Ensure the cracker base is chilled for 10 minutes before frosting to prevent collapsing. Keep the ghosts short and stout to avoid tipping. If your kitchen is warm, keep the treats in the fridge until serving. The powdered sugar dusting may absorb moisture over time; re-dust before serving if needed.
Nutrition
- Serving Size: 1 Ghost Cupcake
- Calories: 175
- Sugar: 18
- Sodium: 100
- Fat: 8
- Saturated Fat: 5
- Carbohydrates: 25
- Fiber: 1
- Protein: 2
Keywords: Halloween, No-Bake, Ghost Cupcakes, Marshmallow, Graham Cracker, Kids Recipe, Easy Dessert, Fall Treat


