My nephew walked through the back door holding a bag of pretzel rods and a tube of refrigerated breadstick dough. “Aunt Linda, we need to make something spooky for the school party tomorrow.” That was it. No warning. No plan. Just a kid with an idea and a pantry that needed to cooperate.
I stared at those two ingredients for a solid minute. Pretzel rods look like skinny witch fingers already, don’t they? And breadstick dough wraps around anything. My brain started connecting dots that honestly should have been obvious. Wrap the dough around the pretzel, leave a little gap at the top for the “fingernail,” bake them up, and add some almond slivers for creepy claws.
That first batch came out of the oven looking ridiculous in the best way. My nephew grabbed one before it even cooled and said “these are disgusting looking” with the biggest grin on his face. Which is exactly the reaction you want from a Halloween snack, right? We dipped the tips in a little melted butter and sprinkled on some coarse salt. The whole thing took maybe twenty minutes from start to finish.
This Easy Mummy Hand Pretzel Halloween Snack Mix was born from a last-minute panic and a kid who refused to show up empty-handed. It’s the kind of recipe that makes you look like you planned something elaborate when really you just got lucky with what was in your fridge. And honestly? That’s my favorite kind of cooking.
Why You’ll Love This Recipe
Let me tell you why this snack mix has become my go-to for Halloween parties, classroom celebrations, and even those random October movie nights when you want something fun without spending hours in the kitchen.
- Unbelievably Quick : You can go from pantry to plate in under 25 minutes. That includes prep and baking time. For real.
- Minimal Ingredients : Pretzel rods, breadstick dough, almond slivers, and melted butter. That’s it. You probably have most of this stuff already.
- Perfect for Halloween Parties : These little mummy fingers look genuinely creepy but taste absolutely delicious. Kids go nuts for them, and adults sneak them when nobody’s looking.
- Zero Fuss : No complicated techniques or fancy equipment. If you can wrap a piece of dough around a pretzel, you can make these.
- Customizable : You can switch up the “fingernails” using sliced almonds, pumpkin seeds, or even candy corn for a sweeter version.
What makes this recipe different from other Halloween snacks is the texture combination. You get that satisfying crunch from the pretzel, the soft breadiness from the baked dough, and the slight nuttiness from the almond “nails.” It’s not just visually fun—it actually tastes good. I’ve tried so many Halloween recipes that look amazing but taste like cardboard. This one delivers on both fronts.
I’ve tested this with different dough types and pretzel sizes, and I can confidently say the refrigerated breadstick dough works best. It’s sturdy enough to hold its shape during baking but soft enough to create that mummy wrap look. Plus, it’s widely available and super affordable.
This recipe is the kind that makes you feel like a kitchen hero with minimal effort. Perfect for busy parents, last-minute party planners, or anyone who wants to bring something memorable to the Halloween spread without stressing out.
What Ingredients You Will Need
This recipe uses simple, everyday ingredients that come together to create something genuinely fun and tasty. Here’s what you’ll need to grab from your pantry and fridge.
- Pretzel rods (1 package, about 12 ounces) – These form the “bones” of your mummy fingers. Look for rods that are straight and uniform in thickness. I prefer the brand Snyder’s of Hanover because they’re consistently sturdy and don’t break easily during wrapping. If you can only find thin pretzel sticks, double them up or use two per finger for a chunkier look.
- Refrigerated breadstick dough (1 can, 11 ounces) – This is your mummy wrapping. Pillsbury makes the best version for this recipe because the dough separates easily into individual strips and bakes up golden and flaky. Don’t use crescent roll dough—it’s too delicate and won’t hold the mummy wrap effect properly.
- Sliced almonds (about ¼ cup) – These become the creepy fingernails at the tips of your mummy fingers. Look for whole sliced almonds, not slivered or chopped. The wider slices look more like actual nails. Toast them lightly beforehand if you want extra crunch and nutty flavor.
- Unsalted butter (2 tablespoons, melted) – Brushing this over the dough before baking gives your mummies that golden, appetizing finish. You can use salted butter if that’s what you have, just skip any additional salt on top.
- Coarse sea salt (optional, for sprinkling) – A light dusting adds texture and balances the buttery flavor. Skip this if you’re using salted butter or if you prefer a milder taste.
- Mustard or ketchup (for dipping, optional) – Serve these with little bowls of dipping sauces for extra fun. The salty pretzel and buttery dough pair beautifully with classic condiments.
Here’s a quick substitution guide if you need to adapt the recipe:
- Gluten-free option : Use gluten-free pretzel rods and a gluten-free pizza dough or breadstick dough. The texture will be slightly different, but the visual effect still works.
- Nut-free version : Skip the almonds and use small pieces of dried apricot or a sliver of bell pepper for the fingernails. You can also leave them off entirely—the mummies still look great without nails.
- Sweet twist : Brush the baked mummies with melted white chocolate and add candy corn fingernails for a dessert version. My kids actually prefer this sweeter take.
- Vegan adaptation : Use vegan butter and a dairy-free breadstick dough. Most refrigerated doughs contain butter, so check labels carefully.
One thing I’ve learned from making these multiple times—don’t overthink the ingredients. The beauty of this recipe is its simplicity. You don’t need specialty items or obscure pantry staples. Everything is available at your regular grocery store, probably in the same aisle.
Equipment Needed
You won’t need much for this recipe, which is part of why I love it so much. Here’s what you’ll want to have on hand.
- Baking sheet (standard 13×18 inch) – Line it with parchment paper or a silicone baking mat for easy cleanup. The dough can stick to ungreased pans, so don’t skip this step.
- Pastry brush – For brushing melted butter over the dough. A silicone brush works best because it doesn’t shed bristles. If you don’t have one, use a folded paper towel to dab the butter on.
- Sharp knife or pizza cutter – You’ll need to slice the breadstick dough into thinner strips. A pizza cutter makes quick work of this, but a regular knife works fine too.
- Small bowl – For melting your butter in the microwave. Any microwave-safe bowl will do.
- Cutting board – A flat surface for assembling your mummy fingers before transferring them to the baking sheet.
- Cooling rack – Letting the mummies cool on a rack prevents soggy bottoms. If you don’t have one, transfer them to a plate after a few minutes on the baking sheet.
I’ve made these with nothing more than a cookie sheet and a butter knife when I was at my sister’s house and didn’t have my usual tools. They turned out perfectly fine. The equipment list is more about convenience than necessity. If you have a baking sheet and something to cut dough with, you’re good to go.
Preparation Method
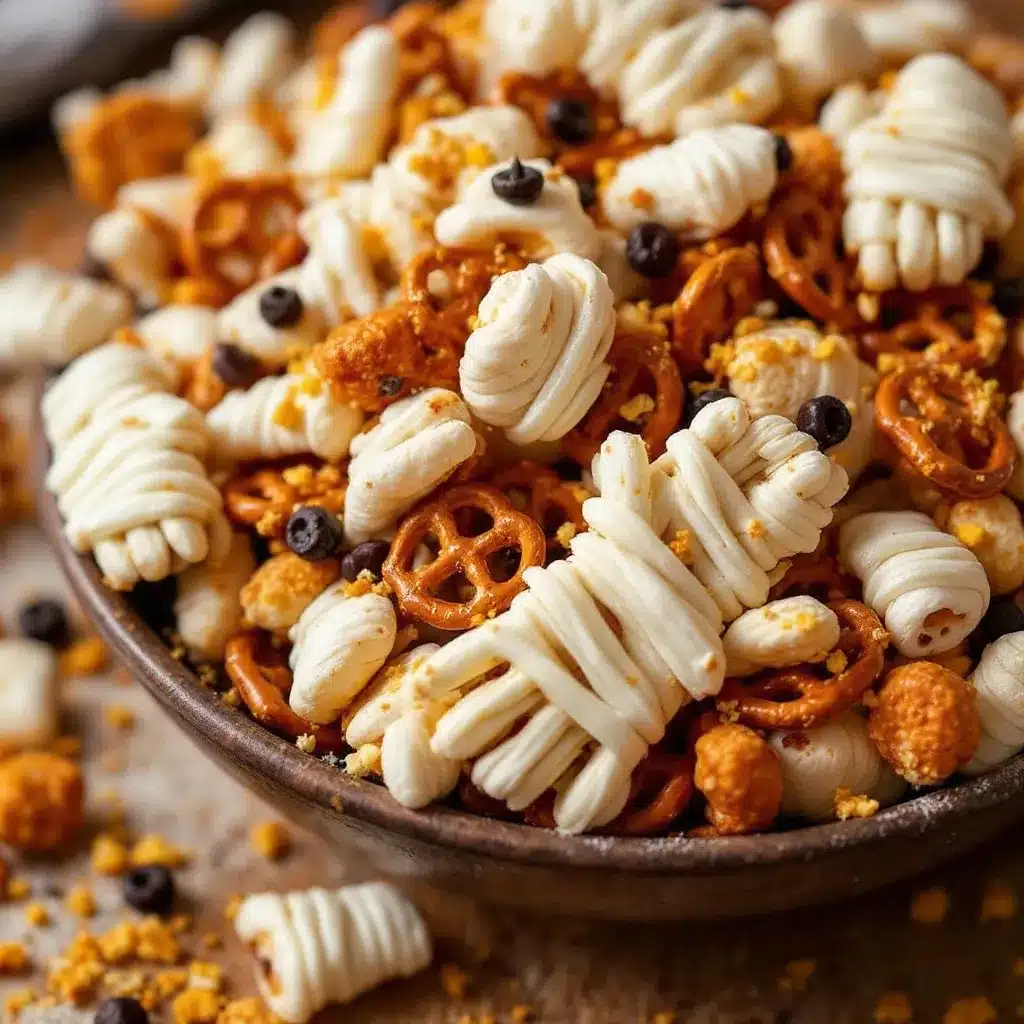
Let me walk you through this step by step. Trust me, it’s easier than it looks, and you’ll have a batch of spooky mummy fingers ready in no time.
Step 1: Preheat and Prep
Preheat your oven to 375°F (190°C). Line your baking sheet with parchment paper or a silicone mat. This step matters because the dough can stick, and nobody wants to peel mummy fingers off a hot pan.
Step 2: Prepare the Dough
Open the can of refrigerated breadstick dough. Separate the dough into individual strips as directed on the package. You’ll typically get 8 strips. Using a pizza cutter or sharp knife, slice each strip lengthwise into 2 or 3 thinner strips. The exact width doesn’t matter much—aim for about ½ inch wide. Thinner strips create more realistic mummy wraps. Thicker strips look chunkier but still work.
Step 3: Wrap the Pretzels
Take one pretzel rod and start wrapping a dough strip around it, starting about ½ inch from the top. Leave that top portion exposed—that’s where the fingernail goes. Overlap the dough slightly as you wrap, leaving small gaps so the pretzel shows through. This creates the mummy bandage effect. Press the end of the dough gently against the wrapped portion to seal it. Repeat with remaining pretzels and dough strips.
Step 4: Add the Fingernails
Place a sliced almond on the exposed tip of each pretzel rod. Press it gently so it sticks. The almond should look like a creepy fingernail growing out of the pretzel. If the almond doesn’t stay put, dab a tiny bit of water or egg wash underneath it before pressing.
Step 5: Brush with Butter
Melt your 2 tablespoons of unsalted butter in a small microwave-safe bowl. Brush the melted butter over the dough-wrapped portions of each pretzel. Don’t brush the almond fingernails—they’ll burn. Sprinkle a pinch of coarse sea salt over the buttered dough if you’re using it.
Step 6: Bake
Place the assembled mummy fingers on your prepared baking sheet, leaving about an inch of space between each one. Bake for 12 to 15 minutes, or until the dough is golden brown and cooked through. The pretzels will get slightly darker during baking, which adds to the creepy effect.
Step 7: Cool and Serve
Let the mummy fingers cool on the baking sheet for 2 minutes, then transfer them to a cooling rack. They’ll firm up as they cool. Serve warm or at room temperature with your favorite dipping sauces.
Pro Tip from My Kitchen : If the dough starts unraveling while you’re wrapping, your hands might be too warm. Chill the dough strips in the fridge for 5 minutes before wrapping. This makes them easier to handle and helps them hold their shape better during baking.
Visual Cue : The dough should look puffy and golden when done. The pretzel underneath will be slightly darker and visible through the gaps. The almond fingernails should be lightly toasted but not burnt. If they’re browning too quickly, tent the baking sheet with foil for the last few minutes of baking.
Cooking Tips & Techniques
After making these mummy fingers more times than I can count, I’ve picked up a few tricks that make the process smoother and the results better. Let me share what I’ve learned.
Don’t Overwrap
The biggest mistake I made the first time was wrapping the dough too tightly around the pretzel. The dough expanded during baking and squeezed the pretzel, making it hard to bite through. Leave a little breathing room between the dough and the pretzel. The gaps are what create that mummy look anyway.
Room Temperature Dough is Your Friend
Cold dough straight from the fridge is stiff and prone to cracking when you try to wrap it. Let the dough sit at room temperature for about 10 minutes before you start working with it. It becomes pliable and easy to shape without tearing.
Watch the Almonds
Almonds toast quickly in the oven. If your oven runs hot, check the mummies at the 10-minute mark. If the almonds are already golden, pull the pan out and cover just the almond tips with small pieces of foil, then return to the oven for the remaining time.
Batch Size Matters
One can of dough makes about 16 to 24 mummy fingers, depending on how thin you cut the strips. If you’re making these for a party, double or triple the recipe. They disappear fast. I learned this the hard way when I brought a single batch to a Halloween potluck and they were gone in 10 minutes.
Make Ahead Option
You can assemble the mummy fingers up to 4 hours ahead of time and keep them covered in the refrigerator. Bake them just before serving for the best texture. The unbaked dough can get sticky if left out too long, so refrigerate if you’re prepping ahead.
What I Learned from Failure
I once tried using pretzel sticks instead of rods because that’s all I had. They were too thin and the dough overwhelmed them completely. The result looked more like breadsticks with pretzel centers than mummy fingers. Stick with the rods for the best visual effect.
Variations & Adaptations
One of the best things about this recipe is how easy it is to tweak. Here are some variations I’ve tried and loved.
Sweet Mummy Fingers
Skip the butter and salt. After baking, drizzle the mummies with melted white chocolate or candy melts. Use candy corn or orange jelly beans for the fingernails instead of almonds. This version is a hit at Halloween dessert tables and kids absolutely devour it.
Spicy Mummy Fingers
Brush the dough with a mixture of melted butter and hot sauce before baking. Add a sprinkle of chili powder or cayenne pepper along with the salt. The spicy kick pairs surprisingly well with the salty pretzel. Serve with ranch dressing for dipping to cool things down.
Cheesy Mummy Fingers
Sprinkle shredded parmesan or cheddar cheese over the buttered dough before baking. The cheese melts and creates a crispy, savory crust. Use pumpkin seeds for the fingernails to keep the theme going. This version works great for Halloween parties with adults.
Gluten-Free Version
Use gluten-free pretzel rods and a gluten-free pizza dough or breadstick dough. The texture will be slightly denser, but the visual effect is still spot on. I’ve tested this with my gluten-sensitive friends and they were thrilled to have a Halloween snack they could actually eat.
Air Fryer Method
If you don’t want to heat up your oven, these work beautifully in an air fryer. Cook at 350°F (175°C) for 8 to 10 minutes, flipping halfway through. The dough gets extra crispy and the cooking time is shorter. Just make sure your air fryer basket is large enough to hold the mummies without overcrowding.
Personal Variation I Love
My favorite twist is adding everything bagel seasoning to the buttered dough before baking. The sesame seeds, poppy seeds, and garlic flakes create a savory crust that’s absolutely addictive. I serve these with a cream cheese dip mixed with dried chives. It’s become my signature Halloween appetizer.
Serving & Storage Suggestions
These mummy fingers are best served warm, but they hold up well at room temperature for several hours, making them perfect for parties.
Serving Temperature : Serve them warm from the oven for the best texture contrast between the crispy dough and crunchy pretzel. If you’re making them ahead, reheat in a 300°F (150°C) oven for 5 minutes to restore the crispness.
Presentation Ideas : Arrange the mummy fingers on a platter with a small bowl of mustard or ketchup in the center for dipping. You can also stand them upright in a tall glass or jar for a creepy “hand” effect. For a Halloween party, place them on a black platter with fake spider webs around the edges.
Complementary Dishes : These pair beautifully with other Halloween snacks like cheddar ranch popcorn snack mix for a savory spread. If you’re serving a full Halloween menu, they go great alongside pulled pork nachos for a hearty option that balances the lighter snack.
Storage Instructions : Store leftover mummy fingers in an airtight container at room temperature for up to 2 days. The dough will soften over time, so they’re best eaten the same day. If you need to store them longer, keep them in the refrigerator for up to 4 days and reheat before serving.
Freezer Tips : You can freeze the unbaked assembled mummy fingers on a baking sheet until solid, then transfer them to a freezer bag. Bake directly from frozen, adding 3 to 5 minutes to the baking time. This is perfect for last-minute party prep.
How Flavors Develop : These are honestly best fresh from the oven. The dough stays crispy and the pretzel maintains its crunch. After a day, the dough absorbs moisture from the pretzel and becomes softer. Still tasty, but not as texturally exciting.
Nutritional Information & Benefits
Let’s be real—these are a treat, not a health food. But knowing what’s in them helps with portion control and planning your Halloween menu.
Estimated Nutritional Values (per mummy finger) :
| Nutrient | Amount |
|---|---|
| Calories | 85 |
| Total Fat | 3.5g |
| Saturated Fat | 1.5g |
| Carbohydrates | 12g |
| Protein | 2g |
| Sodium | 210mg |
| Fiber | 0.5g |
Health Benefits of Key Ingredients : Pretzels provide quick energy from carbohydrates, making these a good option for active kids at Halloween parties. Almonds add healthy fats, vitamin E, and a small amount of protein. The butter provides vitamin A and adds flavor without needing excessive amounts.
Dietary Considerations : This recipe contains wheat, dairy, and tree nuts (almonds). For a nut-free version, skip the almonds or use seeds instead. For a dairy-free option, use vegan butter. The recipe is naturally egg-free and can be made vegetarian easily.
Potential Allergens : Wheat gluten, milk, tree nuts. Always check your pretzel labels if serving to someone with celiac disease, as some pretzels may contain gluten or be processed in facilities that handle wheat.
My Wellness Perspective : Halloween is about having fun with food, not stressing over nutrition. I make these once a year for our neighborhood party and nobody worries about calories. Balance comes from enjoying treats in moderation and filling the rest of your day with wholesome foods. These mummy fingers are worth every bite.
Conclusion
This Easy Mummy Hand Pretzel Halloween Snack Mix has become a tradition in my house, and I hope it becomes one in yours too. It’s the kind of recipe that proves you don’t need complicated techniques or fancy ingredients to create something memorable. A bag of pretzels, some breadstick dough, and a handful of almonds—that’s all it takes to make Halloween magic.
I love how adaptable this recipe is. You can make it sweet, savory, spicy, or cheesy depending on your mood. You can serve it at a kid’s party, a Halloween potluck, or just for fun on a Friday night in October. The possibilities are endless, and that’s what makes it so special.
If you try these mummy fingers, I’d love to hear how they turned out. Drop a comment below and tell me about your Halloween party, your kids’ reactions, or any creative twists you added. Did you use candy corn instead of almonds? Did you serve them with something unexpected? Share your stories—they’re my favorite part of running this blog.
And if you’re looking for more spooky snack ideas, check out our full recipe collection for more Halloween inspiration. From pumpkin cream cheese muffins to buffalo chicken dip, there’s something for every Halloween craving.
Happy Halloween, friends. Now go make some mummy fingers and watch them disappear.
Frequently Asked Questions
Can I make these ahead of time for a party?
Yes! You can assemble the mummy fingers up to 4 hours ahead and keep them covered in the fridge. Bake them just before serving for the best texture. You can also bake them a day ahead and reheat in a 300°F oven for 5 minutes.
What if I can’t find pretzel rods?
Use thick pretzel sticks or even breadsticks as a substitute. Just keep in mind that thinner pretzels will be overwhelmed by the dough. If using thin sticks, double them up or wrap the dough more loosely to maintain the mummy look.
How do I prevent the almond fingernails from falling off?
Press the almond firmly onto the pretzel tip before baking. If it still doesn’t stick, dab a tiny bit of water or egg wash underneath the almond. The baking process will help it adhere as the dough expands.
Can I use homemade dough instead of refrigerated breadstick dough?
Absolutely! Any basic bread dough or pizza dough will work. Roll it out thin and cut into strips. Homemade dough might need a slightly longer baking time, so keep an eye on the color and adjust accordingly.
How long do these stay fresh?
They’re best eaten the same day, ideally within a few hours of baking. Stored in an airtight container at room temperature, they’ll last up to 2 days, but the dough will soften. Reheating in the oven helps restore some crispness.
Pin This Recipe!
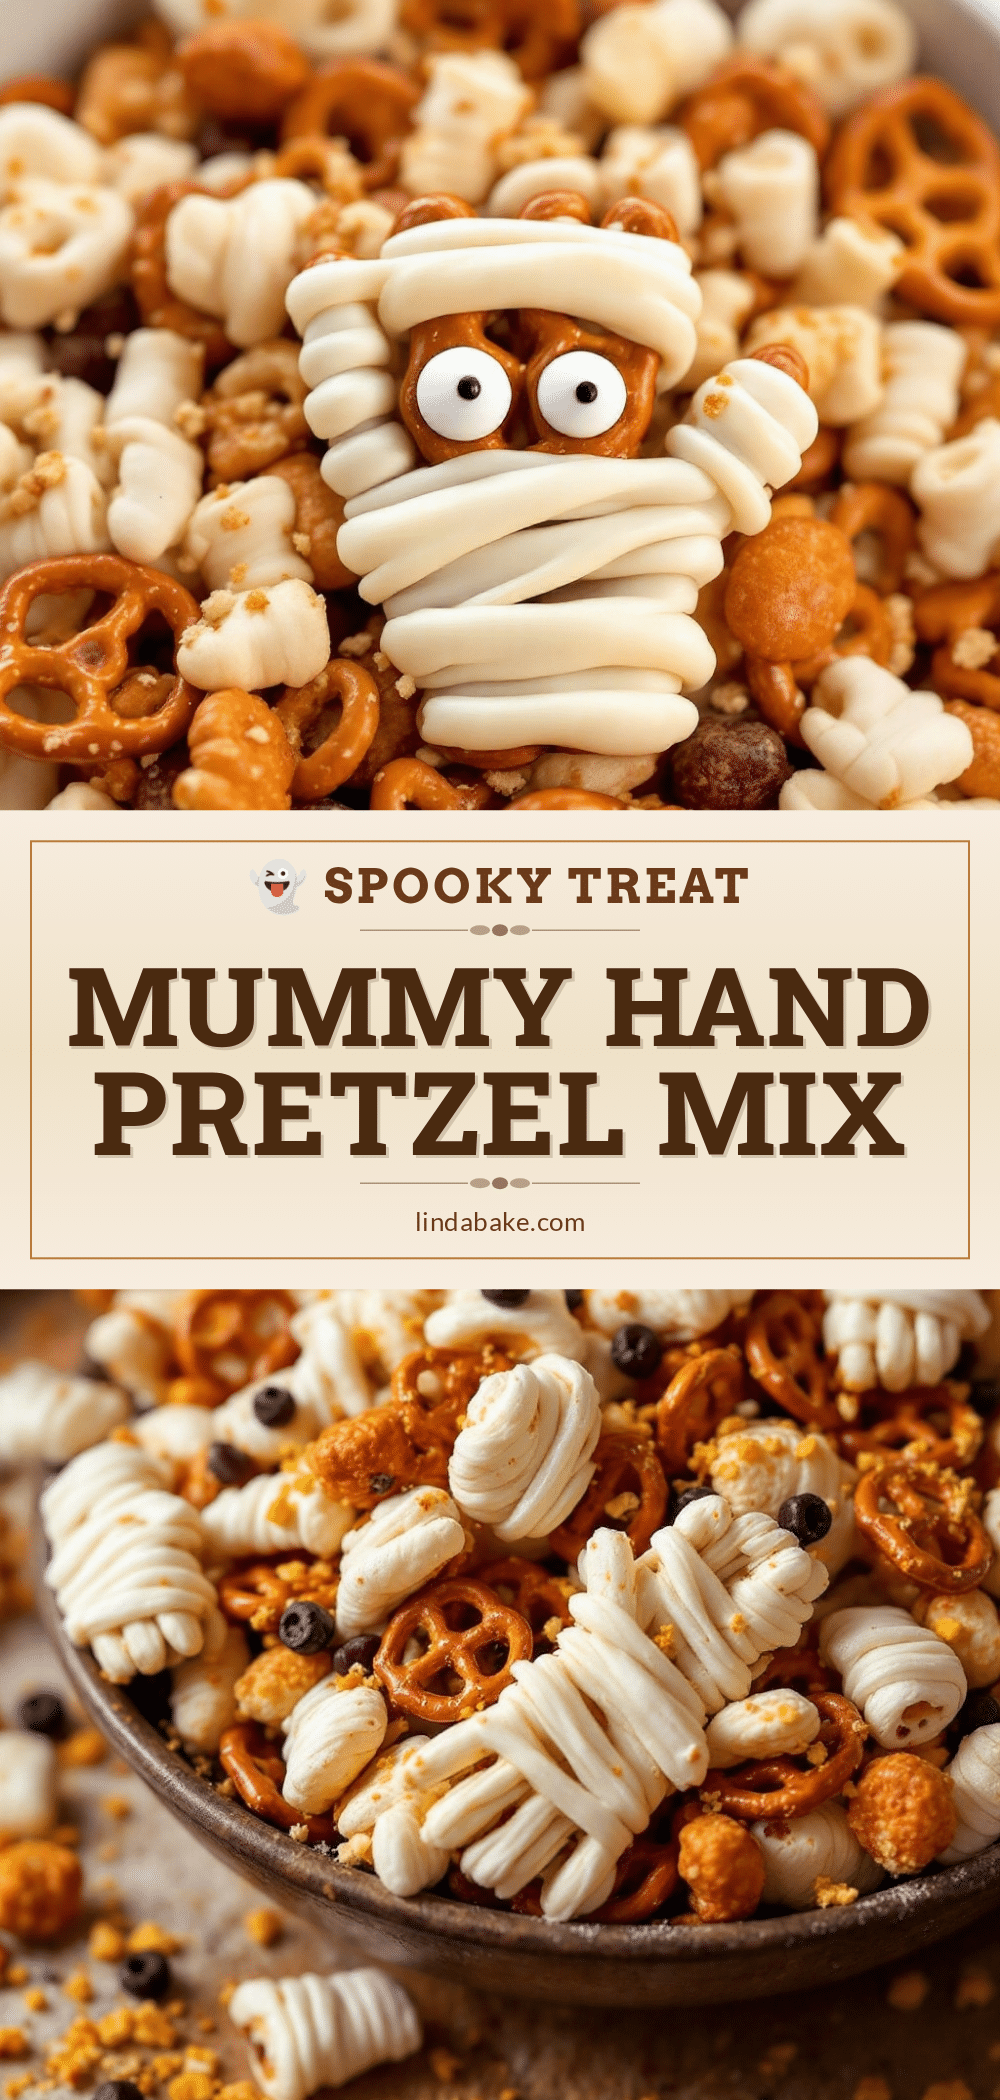
Easy Mummy Hand Pretzel Halloween Snack Mix
These spooky mummy fingers are made with pretzel rods wrapped in breadstick dough, topped with almond fingernails, and baked to golden perfection. A quick and fun Halloween snack that kids and adults love.
- Prep Time: 10 minutes
- Cook Time: 15 minutes
- Total Time: 25 minutes
- Yield: 16 to 24 mummy fingers 1x
- Category: Snack
- Cuisine: American
Ingredients
- 1 package (12 ounces) pretzel rods
- 1 can (11 ounces) refrigerated breadstick dough
- 1/4 cup sliced almonds
- 2 tablespoons unsalted butter, melted
- Coarse sea salt (optional, for sprinkling)
- Mustard or ketchup (for dipping, optional)
Instructions
- Preheat oven to 375°F (190°C). Line a baking sheet with parchment paper or a silicone mat.
- Open the can of refrigerated breadstick dough and separate into individual strips. Using a pizza cutter or sharp knife, slice each strip lengthwise into 2 or 3 thinner strips, about 1/2 inch wide.
- Take one pretzel rod and start wrapping a dough strip around it, starting about 1/2 inch from the top. Leave the top portion exposed for the fingernail. Overlap the dough slightly, leaving small gaps so the pretzel shows through. Press the end of the dough gently to seal. Repeat with remaining pretzels and dough strips.
- Place a sliced almond on the exposed tip of each pretzel rod, pressing gently to stick. If needed, dab a tiny bit of water or egg wash underneath the almond.
- Melt the butter in a small microwave-safe bowl. Brush the melted butter over the dough-wrapped portions of each pretzel, avoiding the almond fingernails. Sprinkle with coarse sea salt if desired.
- Place the assembled mummy fingers on the prepared baking sheet, leaving about 1 inch of space between each. Bake for 12 to 15 minutes, or until the dough is golden brown and cooked through.
- Let the mummy fingers cool on the baking sheet for 2 minutes, then transfer to a cooling rack. Serve warm or at room temperature with dipping sauces.
Notes
For best results, let the dough sit at room temperature for 10 minutes before wrapping. If the dough starts unraveling, chill the strips in the fridge for 5 minutes. Watch the almonds closely as they toast quickly; if browning too fast, tent with foil. These are best eaten the same day but can be stored in an airtight container at room temperature for up to 2 days.
Nutrition
- Serving Size: 1 mummy finger
- Calories: 85
- Sugar: 1
- Sodium: 210
- Fat: 3.5
- Saturated Fat: 1.5
- Carbohydrates: 12
- Fiber: 0.5
- Protein: 2
Keywords: Halloween snack, mummy pretzels, pretzel rods, breadstick dough, easy Halloween recipe, spooky snack, party appetizer


