Halloween treats have a funny way of looking way more complicated than they actually are. For years, I just accepted that festive desserts meant spending hours in the kitchen, wrestling with fondant or trying to pipe melted chocolate into shapes that never held. It was frustrating, honestly, because I wanted something my kids could help with, not something that required a pastry degree. I kept looking for that one Halloween recipe that actually looked the part without demanding a whole afternoon of my life. And then, on a random Tuesday in October, I made these Easy Jack-O-Lantern Rice Krispie Treats out of pure desperation, and it clicked.
The whole thing started because I had a batch of regular Rice Krispie treats cooling on the counter and a bag of candy corn staring at me from the pantry. I had about fifteen minutes before the school pickup line, and I just grabbed a pumpkin-shaped cookie cutter and started pressing. No planning, no Pinterest-perfect vision—just a mom trying to make something fun without losing her mind. The kids came home, saw these little orange pumpkins grinning up at them, and absolutely lost it. They thought I had spent hours. I let them believe it.
That moment stuck with me. Here was a recipe that looked like it belonged on a magazine cover but took less time than unloading the dishwasher. No fancy tools, no special ingredients, and no stress. Just a simple, buttery marshmallow base cut into shapes and decorated with a smile. It felt like finding a cheat code for Halloween. If you have ever wanted to bring something adorable to a school party or a trunk-or-treat without breaking a sweat, this is your recipe.
Why You’ll Love This Recipe
These Easy Jack-O-Lantern Rice Krispie Treats are the kind of recipe that makes you look like a Halloween hero with almost zero effort. I have tested this method about a dozen times now, tweaking the marshmallow-to-butter ratio and figuring out the best way to get clean cuts without the treats crumbling. Here is why this version works every single time.
- Ready in 5 Minutes: From start to finish, you are looking at about five minutes of active work. The hardest part is waiting for the marshmallows to melt, and that takes maybe two minutes. Perfect for those last-minute classroom treat requests.
- Simple Ingredients You Already Have: Butter, marshmallows, Rice Krispies cereal, and a few drops of orange food coloring. That is it. No trips to a specialty baking store required. You probably have everything in your kitchen right now.
- Perfect for Halloween Parties: Whether you need something for a school bake sale, a trunk-or-treat event, or just a fun afternoon snack with the kids, these little pumpkins fit right in. They are portable, mess-free, and kid-approved every single time.
- Crowd-Pleaser for All Ages: I have brought these to adult Halloween parties and watched grown-ups grab two before I could even set the plate down. There is something nostalgic about Rice Krispie treats that makes everyone smile, and the jack-o-lantern shape just adds to the fun.
- Unbelievably Easy to Decorate: You do not need piping bags or special tips. Just a little melted chocolate in a ziplock bag with the corner snipped off. My five-year-old can do it, and honestly, his jack-o-lantern faces are way more creative than mine.
What makes this recipe different from the dozens of other pumpkin-shaped treats out there is the texture. I use a slightly higher butter ratio than most recipes, which keeps the treats soft and chewy instead of hard and crunchy. They stay fresh for days, which is a game-changer when you are making them ahead for a party. And the orange coloring is just enough to make them look festive without being neon or artificial-looking.
This is the kind of recipe that makes you close your eyes after the first bite. It is comfort food reimagined for Halloween—faster, cuter, and with the same soul-soothing satisfaction of that classic marshmallow treat you grew up eating. Perfect for impressing other parents at the school party without stressing yourself out.
What Ingredients You Will Need
This recipe uses simple, pantry-friendly ingredients to deliver that classic Rice Krispie treat texture with a festive Halloween twist. Every ingredient has a specific job, and I have tested a few variations to make sure this version gives you the best results.
- 3 tablespoons unsalted butter (I use Land O Lakes—it has a consistent fat content that melts smoothly without separating. Salted butter works in a pinch, just reduce any added salt.)
- 1 package (10 oz) mini marshmallows (Regular size works too, but mini marshmallows melt faster and more evenly. Jet-Puffed is my go-to brand because they have a good melt consistency.)
- 6 cups Rice Krispies cereal (The original brand gives the best crunch, but any puffed rice cereal works. Avoid generic store brands that can be stale or overly puffy.)
- Orange gel food coloring (Gel coloring is key here—liquid drops can make the marshmallow mixture too wet and ruin the texture. I use Wilton orange gel. Start with a tiny dab and add more until you get the shade you want.)
- 1/2 cup semi-sweet chocolate chips (For the jack-o-lantern faces. Milk chocolate or dark chocolate both work. I prefer Ghirardelli for its smooth melt.)
- 1 teaspoon coconut oil or vegetable shortening (Optional, but it helps thin the melted chocolate for easier piping. Not necessary if you are careful with your microwave timing.)
- Green candy melts or green frosting (For the pumpkin stems. You can also use green Twizzlers cut into small pieces, or just skip the stem entirely.)
- Non-stick cooking spray (For greasing your spatula and hands. This is non-negotiable unless you want marshmallow glued to everything you own.)
Ingredient Selection Tips: Fresh marshmallows are important. If your bag of marshmallows has been sitting in the pantry for months, they will be hard and dry, and they won’t melt into that silky-smooth texture you want. Squeeze the bag at the store—if they feel soft and springy, they are fresh. For the cereal, check the expiration date. Stale cereal makes for sad, chewy treats instead of light and crispy ones.
Substitution Guidance: If you need a gluten-free option, Rice Krispies are naturally gluten-free, but double-check the label because some generic versions contain malt flavoring. Use vegan butter and vegan marshmallows (Dandies brand works great) for a dairy-free version. For a lower-sugar option, you can use a sugar-free marshmallow brand, but be aware that the texture will be slightly different—they don’t puff up as much.
Equipment Needed
You do not need a fully stocked bakery to make these Easy Jack-O-Lantern Rice Krispie Treats. Here is what you will need.
- Large pot or Dutch oven: You need something big enough to stir the marshmallows and cereal together without spilling. A 5-quart pot is ideal.
- Rubber spatula: Silicone is best because it won’t scratch your pot and it handles the sticky marshmallow mixture well. Make sure to spray it with non-stick spray before using.
- 9×13-inch baking pan: This gives you the perfect thickness for cutting pumpkin shapes. Line it with parchment paper for easy removal.
- Parchment paper: Absolutely necessary. Wax paper will melt and stick. Parchment saves your sanity.
- Pumpkin-shaped cookie cutter: About 3 inches wide works best. You can find these at any craft store or online. If you don’t have one, you can cut freehand squares and decorate them as pumpkins, but the shape really makes it special.
- Small piping bag or ziplock bag: For the melted chocolate. A ziplock bag with a tiny corner snipped off works perfectly and costs nothing.
- Microwave-safe bowl: For melting the chocolate. Glass or ceramic works best.
- Sharp knife: For trimming edges if needed.
I have made these treats with a cheap dollar-store cookie cutter and a random pot I found at a thrift store. They turned out just fine. Do not let missing equipment stop you—get creative. A knife and a steady hand can create pumpkin shapes, too. Just trace a small bowl or use a cardboard template.
Preparation Method
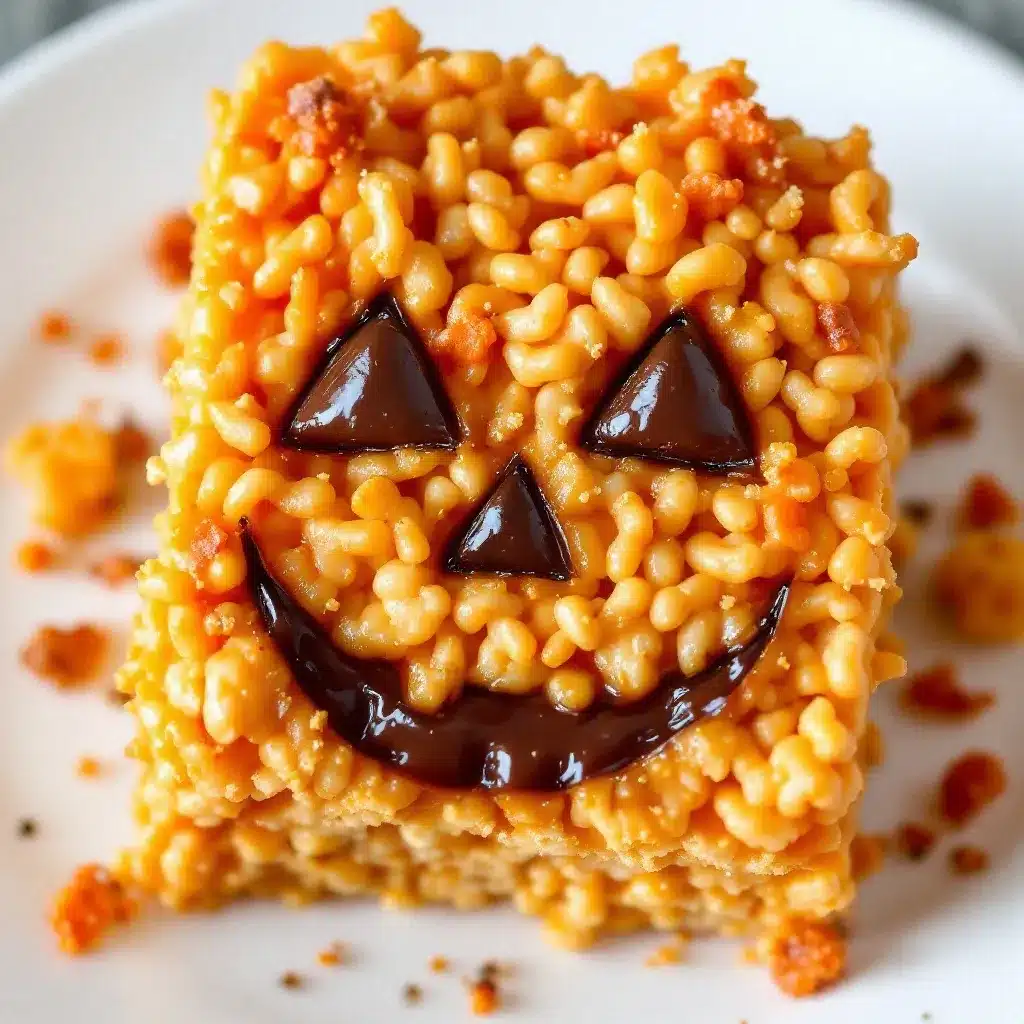
Follow these steps carefully, and you will have perfect Easy Jack-O-Lantern Rice Krispie Treats every single time.
- Prepare your pan. Line a 9×13-inch baking pan with parchment paper, leaving a little overhang on two sides. This makes lifting the whole block of treats out later so much easier. Lightly spray the parchment with non-stick cooking spray.
- Melt the butter. In a large pot over medium-low heat, melt the 3 tablespoons of unsalted butter. Stir occasionally so it doesn’t brown. You want it just melted, not sizzling. (If the butter gets too hot, it can make the marshmallows seize up.)
- Add the marshmallows. Pour in the entire 10-ounce bag of mini marshmallows. Stir constantly with your greased spatula until the marshmallows are completely melted and smooth. This takes about 2-3 minutes. Do not walk away—marshmallows can burn quickly if left unattended.
- Add the orange color. Remove the pot from the heat. Add a small dab of orange gel food coloring—start with about 1/8 teaspoon. Stir until the color is evenly distributed. You can always add more, but you cannot take it away. Aim for a warm pumpkin orange, not neon. (I once added too much and ended up with treats that looked like traffic cones. Learn from my mistake.)
- Mix in the cereal. Pour the 6 cups of Rice Krispies cereal into the pot. Fold gently with your greased spatula until all the cereal is coated in the orange marshmallow mixture. Be careful not to crush the cereal—you want those crispy puffs intact.
- Press into the pan. Transfer the mixture to your prepared pan. Use a piece of parchment paper or a greased spatula to press it down evenly. Do not press too hard—you want the treats to hold together but still have some airiness. A gentle, even pressure is all you need.
- Let them set. Allow the treats to cool at room temperature for about 30 minutes. Do not put them in the fridge—this can make them hard and brittle. Room temperature is perfect.
- Cut the shapes. Once cooled, lift the block of treats out of the pan using the parchment overhang. Place it on a cutting board. Press your pumpkin-shaped cookie cutter firmly into the treats. Wiggle it gently to loosen, then lift. You should get about 8-10 pumpkins from one batch, depending on the size of your cutter.
- Melt the chocolate. Place the 1/2 cup of semi-sweet chocolate chips in a microwave-safe bowl. Microwave in 20-second intervals, stirring between each, until smooth. If using coconut oil, stir it in now for a thinner consistency.
- Pipe the faces. Transfer the melted chocolate to a small piping bag or a ziplock bag with a tiny corner snipped off. Draw jack-o-lantern faces on each pumpkin. Simple triangle eyes and a jagged smile work best. Let the chocolate set for about 10 minutes.
- Add the stems. If using green candy melts, melt them the same way and pipe a small stem on top of each pumpkin. You can also press a small piece of green Twizzler into the top while the chocolate is still wet.
Sensory Cues: When the marshmallows are fully melted, the mixture should look glossy and smooth, like thick honey. When you fold in the cereal, you should hear a soft crackling sound—that is the cereal staying fresh and crispy. The finished treats should feel firm but give slightly when you press them, like a soft pillow.
Cooking Tips & Techniques
I have made more batches of Rice Krispie treats than I care to count, and I have definitely learned some lessons the hard way. Here is what I wish someone had told me.
Low and slow is the rule. When melting the butter and marshmallows, keep the heat on medium-low. High heat can cause the sugar in the marshmallows to scorch, which gives the treats a bitter, burnt taste. I ruined an entire batch for a school party once because I got impatient and cranked up the heat. The kids ate them anyway, but I knew.
Grease everything. Spray your spatula, your hands, your pan, and even the inside of your pot before you start. Marshmallow mixture sticks to everything like glue. I keep a can of non-stick spray right next to the stove when I am making these.
Work fast but gently. Once the marshmallows are melted and the cereal is added, you have about 3-4 minutes before the mixture starts to set. Press it into the pan quickly, but don’t smash it down like you are packing a suitcase. Gentle, even pressure gives you treats that are light and chewy instead of dense and hard.
Use a sharp cookie cutter. A dull cutter will crush the edges of your treats instead of cutting cleanly. If your cutter is getting stuck, dip it in a little warm water and dry it off between cuts. This helps it slide through the sticky marshmallow without pulling.
Let the chocolate set properly. If you try to stack or move the treats before the chocolate faces are fully set, you will end up with smudged smiles and sad pumpkins. Give the chocolate at least 15-20 minutes to harden at room temperature. If you are in a hurry, pop them in the fridge for 5 minutes, but no longer.
Variations & Adaptations
One of the best things about this recipe is how easy it is to change up. Here are some variations I have tried and loved.
Chocolate Pumpkin Base: For a richer flavor, melt 1/2 cup of cocoa powder into the butter before adding the marshmallows. You will end up with chocolate-flavored pumpkin treats that taste like a brownie and a Rice Krispie treat had a baby. My husband says these are his favorite version.
Ghost and Bat Shapes: Do not limit yourself to pumpkins. Use ghost-shaped or bat-shaped cookie cutters for a whole Halloween spread. Ghosts can have simple black dot eyes, and bats look great with a little edible glitter dusted on top. I have made a whole Halloween platter with three different shapes, and it looks incredible.
Peanut Butter Twist: Stir in 1/4 cup of creamy peanut butter along with the marshmallows. It adds a salty, nutty depth that pairs beautifully with the sweet marshmallow. Just make sure to use natural peanut butter that is well-stirred, or the oil can separate and make the treats greasy.
Spiced Pumpkin Version: Add 1 teaspoon of pumpkin pie spice and 1/2 teaspoon of cinnamon to the marshmallow mixture before adding the cereal. It gives the treats a warm, autumnal flavor that makes your kitchen smell like a fall candle. This version is perfect for Thanksgiving leftovers or November parties.
Allergen-Friendly Adaptation: For a nut-free version, skip any nut-based add-ins and double-check that your chocolate chips are processed in a nut-free facility. For a vegan version, use vegan butter and vegan marshmallows—Dandies brand melts beautifully and tastes just like the real thing.
Serving & Storage Suggestions
These Easy Jack-O-Lantern Rice Krispie Treats are best served at room temperature. The texture is perfect—soft, chewy, and slightly crisp around the edges. If you serve them straight from the fridge, they will be hard and less enjoyable.
Presentation Idea: Arrange the pumpkins on a large platter lined with orange or black napkins. You can add a few candy corn scattered around for color, or place them on individual treat bags tied with green ribbon for party favors. I once made a “pumpkin patch” display by placing each treat on a small square of green tissue paper, and it was a huge hit at my daughter’s class party.
Storage Instructions: Store the treats in an airtight container at room temperature for up to 5 days. Place a sheet of parchment paper between layers to prevent sticking. Do not refrigerate them—the cold air dries them out and makes them hard. If you need to keep them longer, you can freeze them for up to 3 months. Wrap each pumpkin individually in plastic wrap, then place them in a freezer-safe bag. Thaw at room temperature for about 30 minutes before serving.
Flavor Development: These treats actually taste better the next day. The marshmallow and cereal have time to meld together, creating a more cohesive texture. The chocolate faces will also set completely, making them easier to handle. I often make these a day ahead of time for parties, and they are always perfect.
Nutritional Information & Benefits
Here is the estimated nutritional breakdown for one Easy Jack-O-Lantern Rice Krispie Treat (based on 10 servings).
| Nutrient | Amount per Serving |
|---|---|
| Calories | 210 |
| Total Fat | 8g |
| Saturated Fat | 4.5g |
| Cholesterol | 10mg |
| Sodium | 180mg |
| Total Carbohydrates | 35g |
| Dietary Fiber | 0g |
| Sugars | 18g |
| Protein | 2g |
Health Considerations: These treats are a fun, occasional indulgence, not an everyday snack. The Rice Krispies cereal provides iron and B vitamins, and the butter adds a small amount of vitamin A. If you are looking for a slightly healthier version, you can reduce the butter to 2 tablespoons and use a sugar-free marshmallow alternative. The treats will be a bit less rich but still tasty.
Dietary Notes: This recipe is naturally gluten-free if you use certified gluten-free Rice Krispies. It contains dairy from the butter and chocolate. For a dairy-free version, use vegan butter and dairy-free chocolate chips. The treats are nut-free as written, making them safe for school parties with allergy restrictions.
My Personal Perspective: I do not make these treats thinking about nutrition. I make them because they bring joy to my kids and their friends. Halloween is about fun, and sometimes a little sugar is part of that. Balance is everything, and these treats fit perfectly into a happy, balanced life.
Conclusion
These Easy Jack-O-Lantern Rice Krispie Treats are proof that Halloween magic does not require hours in the kitchen or complicated techniques. With just five minutes of active work and a handful of simple ingredients, you can create something that looks like it came from a bakery. The kids will love helping cut out the shapes and draw the faces, and you will love how easy the cleanup is.
I have made these for school parties, trunk-or-treat events, and lazy Sunday afternoons in October. Every single time, they disappear within minutes. There is something about that combination of crispy marshmallow, creamy chocolate, and playful pumpkin shape that just works. And honestly, knowing that I can whip up a batch in the time it takes to find a Halloween costume makes this recipe a permanent part of my fall rotation.
I would love to see your versions of these treats. Tag me in your photos or leave a comment below with your favorite jack-o-lantern face design. Did you add a twist? Try a different shape? Share your creations—I read every comment and I love seeing how you make this recipe your own. Happy Halloween, and happy snacking!
Frequently Asked Questions
Can I use a different cereal instead of Rice Krispies?
Absolutely. Cocoa Krispies will give you chocolate-flavored pumpkins, and Fruity Pebbles will make them colorful and fun. Just keep in mind that different cereals have different textures, so the final treat might be slightly crunchier or softer than the original.
How do I prevent the marshmallow mixture from getting too hard?
Do not overcook the marshmallows. As soon as they are melted and smooth, remove the pot from the heat. Overcooking causes the sugar to crystallize, which makes the treats hard. Also, press the mixture gently into the pan—pressing too hard compresses the cereal and makes it dense.
Can I make these treats ahead of time?
Yes, and they actually taste better the next day. Store them in an airtight container at room temperature for up to 5 days. If you need to make them weeks in advance, freeze them for up to 3 months. Just wrap each pumpkin individually in plastic wrap before freezing.
What if I don’t have a pumpkin-shaped cookie cutter?
No problem. You can cut the treats into squares and use a knife to round the top edges slightly to resemble a pumpkin shape. Or just cut them into rectangles and draw jack-o-lantern faces on them—they will still taste amazing and look festive.
Can I use liquid food coloring instead of gel?
I do not recommend it. Liquid food coloring adds extra moisture to the marshmallow mixture, which can make the treats sticky and prevent them from setting properly. Gel food coloring gives you vibrant color without changing the texture. You can find it at any craft store or in the baking aisle of most grocery stores.
Pin This Recipe!
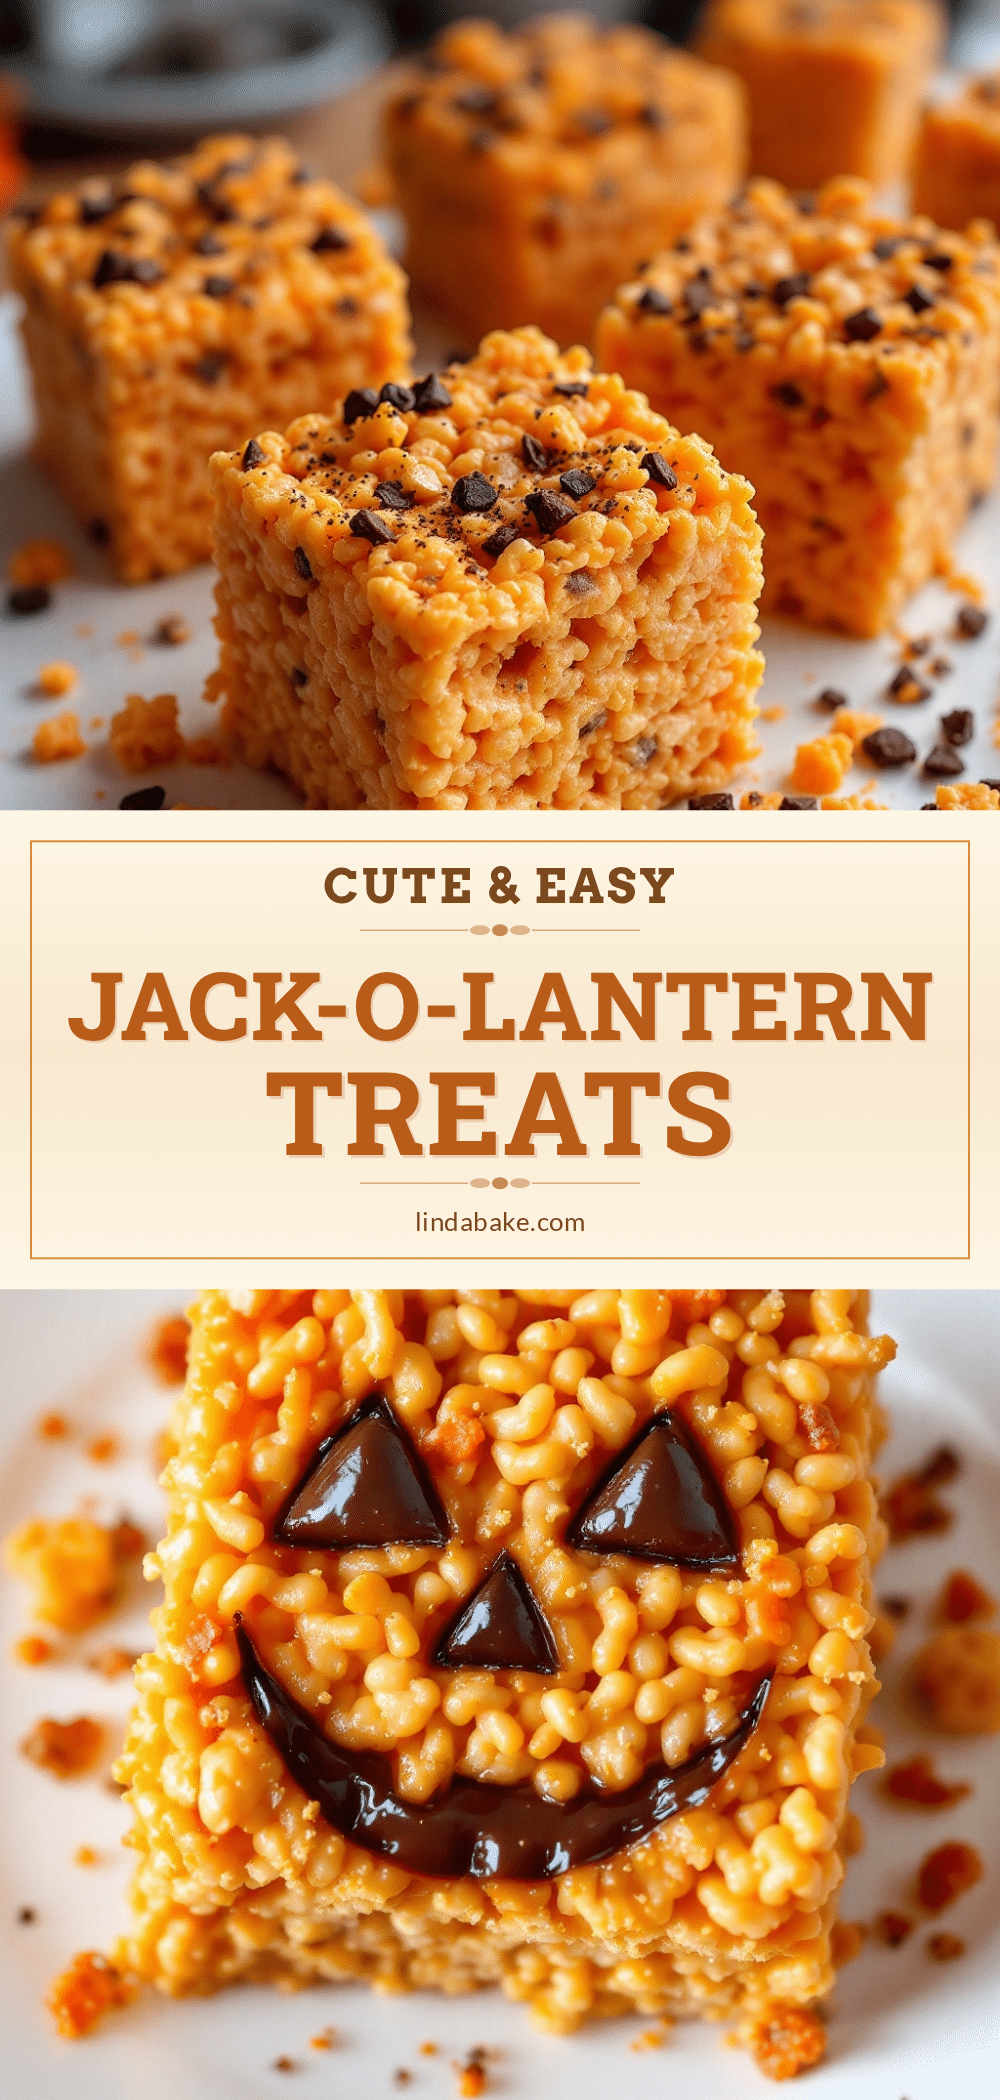
Easy Jack-O-Lantern Rice Krispie Treats: Best 5-Minute Halloween Recipe
These Easy Jack-O-Lantern Rice Krispie Treats are a quick and fun Halloween dessert that looks like it came from a bakery but takes only 5 minutes of active work. Made with simple ingredients and decorated with a chocolate face, they are perfect for school parties, trunk-or-treat events, or a festive afternoon snack.
- Prep Time: 5 minutes
- Cook Time: 5 minutes
- Total Time: 40 minutes (including cooling and setting)
- Yield: 8-10 servings 1x
- Category: Dessert
- Cuisine: American
Ingredients
- 3 tablespoons unsalted butter
- 1 package (10 oz) mini marshmallows
- 6 cups Rice Krispies cereal
- Orange gel food coloring
- 1/2 cup semi-sweet chocolate chips
- 1 teaspoon coconut oil or vegetable shortening (optional)
- Green candy melts or green frosting (for stems)
- Non-stick cooking spray
Instructions
- Line a 9×13-inch baking pan with parchment paper, leaving overhang on two sides. Lightly spray with non-stick cooking spray.
- In a large pot over medium-low heat, melt the 3 tablespoons of unsalted butter. Stir occasionally until just melted.
- Add the entire 10-ounce bag of mini marshmallows. Stir constantly with a greased spatula until completely melted and smooth, about 2-3 minutes.
- Remove the pot from the heat. Add a small dab of orange gel food coloring (about 1/8 teaspoon) and stir until evenly distributed. Add more if needed for a warm pumpkin orange.
- Pour in the 6 cups of Rice Krispies cereal. Fold gently with the greased spatula until all cereal is coated. Be careful not to crush the cereal.
- Transfer the mixture to the prepared pan. Use a piece of parchment paper or a greased spatula to press it down evenly with gentle pressure.
- Let the treats cool at room temperature for about 30 minutes. Do not refrigerate.
- Once cooled, lift the block of treats out of the pan using the parchment overhang. Place on a cutting board. Press a pumpkin-shaped cookie cutter firmly into the treats to cut out shapes. You should get about 8-10 pumpkins.
- Place the 1/2 cup of semi-sweet chocolate chips in a microwave-safe bowl. Microwave in 20-second intervals, stirring between each, until smooth. If using, stir in 1 teaspoon of coconut oil or vegetable shortening.
- Transfer the melted chocolate to a small piping bag or a ziplock bag with a tiny corner snipped off. Draw jack-o-lantern faces on each pumpkin. Let the chocolate set for about 10 minutes.
- If using green candy melts, melt them the same way and pipe a small stem on top of each pumpkin. Alternatively, press a small piece of green Twizzler into the top while the chocolate is still wet.
Notes
Use fresh marshmallows for best texture. Do not overcook the marshmallows to prevent hard treats. Press the mixture gently into the pan to keep treats light and chewy. Let chocolate set fully before stacking or moving. These treats taste even better the next day.
Nutrition
- Serving Size: 1 jack-o-lantern tre
- Calories: 210
- Sugar: 18
- Sodium: 180
- Fat: 8
- Saturated Fat: 4.5
- Carbohydrates: 35
- Protein: 2
Keywords: Halloween treats, Rice Krispie treats, jack-o-lantern, easy dessert, no-bake, kid-friendly, 5-minute recipe


