Ripping open the second bag of frozen peppers and realizing I only had four bell peppers left when I needed six—that’s the exact moment these Easy Halloween Mummy Stuffed Peppers were born. It was two days before Halloween, the kids were already buzzing on candy anticipation, and I had promised a “spooky dinner” that wasn’t just hot dogs cut to look like fingers. Honestly, I was this close to ordering pizza.
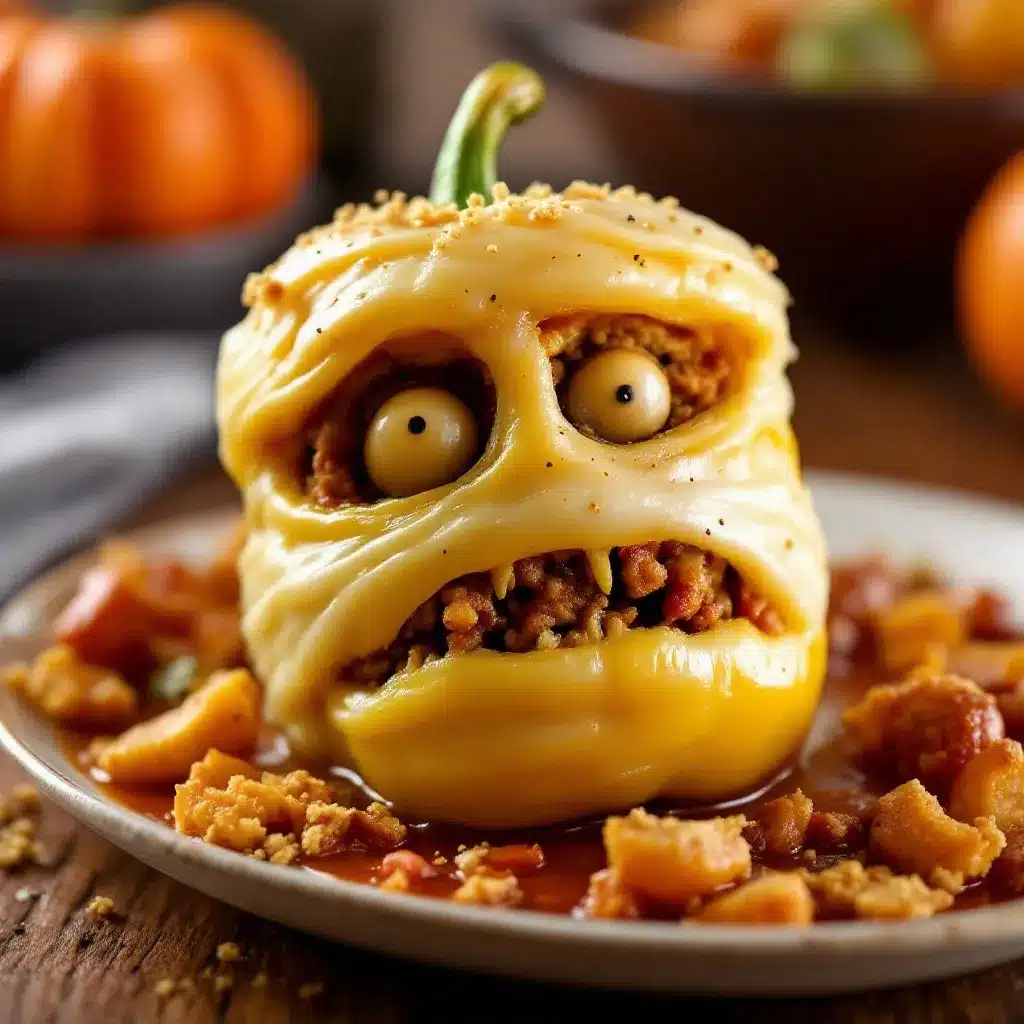
But then I spotted the mozzarella cheese strings in the fridge, and something clicked. What if I didn’t just stuff the peppers but wrapped them like little mummies? The black olives could be eyes. The ground beef and rice filling was already a weeknight staple in our house. Within twenty minutes, I had four slightly ridiculous, completely adorable little mummy faces staring back at me from the baking dish. My six-year-old actually gasped when she saw them.
That’s the thing about these Easy Halloween Mummy Stuffed Peppers—they turned a stressed-out weeknight into a memory. The kids helped press the olive eyes in place, my husband pretended to be scared of them, and everyone ate every single bite without complaint. No fancy ingredients, no hours in the kitchen, just a silly, warm, comforting dinner that somehow made the holiday feel special without the stress. It’s the kind of recipe that saves you when you need it most.
Why You’ll Love This Recipe
Let me be real with you—I’ve tested this recipe through three Halloweens now, tweaking the filling-to-pepper ratio and perfecting the cheese wrapping technique. Here’s why it works so beautifully for busy families:
- Quick & Easy: From fridge to table in under 40 minutes. Seriously, you can make these on a school night without breaking a sweat.
- Simple Ingredients: Ground beef, rice, bell peppers, cheese, and olives. You probably have most of this in your kitchen right now.
- Perfect for Halloween: These aren’t just cute—they’re genuinely fun to eat. The kids get involved wrapping the “bandages” and placing the eyes.
- Crowd-Pleaser: I’ve served these at two Halloween parties now, and adults always sneak seconds. The filling is classic comfort food with a spooky twist.
- Unbelievably Delicious: The combination of seasoned beef, tender rice, sweet roasted pepper, and gooey melted cheese is just next-level satisfying.
What makes these different from every other stuffed pepper recipe out there? It’s the presentation, honestly. The mozzarella strings melt into perfect little bandages, and the black olive eyes stay put during baking. Plus, the filling has a subtle smoky kick from cumin and smoked paprika that makes it taste like you spent way more time than you actually did.
This is the kind of dinner that makes you feel like a holiday hero without actually being one. It’s stress-free, kid-approved, and guaranteed to get you more “wow” reactions than any pumpkin-shaped cookie ever could.
What Ingredients You Will Need
This recipe uses simple, wholesome ingredients that come together to create something genuinely special. Most of these are pantry staples, which is exactly what you want when Halloween chaos hits.
For the Filling:
- 1 lb ground beef (80/20 works best for flavor, but lean is fine too—just add a splash of olive oil)
- 1 cup cooked white rice (leftover rice is perfect here; day-old rice actually holds up better)
- 1 small onion, finely diced (about ½ cup—yellow or white onion both work)
- 2 cloves garlic, minced (or 1 teaspoon garlic powder in a pinch)
- 1 teaspoon smoked paprika (this gives the filling that subtle smoky depth)
- 1 teaspoon cumin (adds warmth and earthiness)
- ½ teaspoon chili powder (for a tiny kick—adjust based on your family’s heat tolerance)
- ½ teaspoon salt (plus more to taste)
- ¼ teaspoon black pepper
- 1 can (8 oz) tomato sauce (keeps the filling moist and adds richness)
- ½ cup shredded cheddar cheese (optional but highly recommended for extra gooeyness inside)
For the Peppers & Mummy Decoration:
- 4 medium bell peppers (any color works, but orange and red look most “Halloween-y”; yellow and green work too)
- 8-10 mozzarella cheese sticks (the string cheese kind—these are your “bandages”)
- 12-16 black olives, whole (for the mummy eyes—pitted ones are easier to work with)
- Optional: 2 tablespoons olive oil (for brushing the peppers before baking)
Ingredient Tips: I prefer using ground beef from a local butcher when I can—it’s usually fresher and has better fat content for flavor. For the rice, any long-grain white rice works, but I’ve also used brown rice and quinoa successfully. If you’re dairy-free, use dairy-free mozzarella shreds instead of cheese sticks—just lay them in strips over the peppers. For a vegetarian version, swap the ground beef with cooked lentils or plant-based crumbles and adjust seasoning slightly.
Equipment Needed
You don’t need anything fancy for these mummies—just basic kitchen tools you probably already own:
- Large skillet or frying pan (for cooking the filling—a 12-inch skillet works perfectly)
- Cutting board and sharp knife (for prepping peppers and onions)
- Medium mixing bowl (for combining the filling ingredients)
- 9×13-inch baking dish (glass or ceramic works great; a metal pan is fine too)
- Small spoon (for stuffing the peppers)
- Kitchen shears or scissors (for cutting the cheese sticks into strips—way easier than a knife)
- Aluminum foil (for covering the dish during the first part of baking)
If you don’t have a 9×13 dish, you can use a large cast-iron skillet or even a rimmed baking sheet. Just make sure the peppers sit snugly so they don’t tip over during baking. I’ve also used a round casserole dish in a pinch—it works fine, just arrange the peppers in a circle.
Budget-friendly tip: Skip the fancy baking dish and use whatever oven-safe pan you have. The peppers don’t care about aesthetics—they just want to get cooked.
Preparation Method
Alright, let’s get these little mummies assembled. I promise the process is straightforward, but I’ll walk you through every step with the little tricks I’ve learned from making this recipe at least a dozen times.
- Preheat your oven to 375°F (190°C). This gives it time to come to temperature while you prep everything else.
- Cook the filling base. Heat a large skillet over medium-high heat. Add the ground beef and cook, breaking it apart with a wooden spoon, until browned—about 5-6 minutes. Drain off any excess fat (leave about a tablespoon for flavor). Add the diced onion and cook for 2-3 minutes until softened, then add the minced garlic and cook for 30 seconds until fragrant. The smell at this point is incredible—smoky, savory, and deeply comforting.
- Season the filling. Stir in the smoked paprika, cumin, chili powder, salt, and black pepper. Cook for 1 minute to toast the spices—this wakes up their flavors. Then pour in the tomato sauce and let it simmer for 2-3 minutes until slightly thickened.
- Add the rice and cheese. Remove the skillet from heat. Stir in the cooked rice until everything is well combined. If you’re using the optional cheddar cheese, fold it in now—it’ll melt into the warm filling and make it extra creamy. Taste the filling and adjust salt or spices as needed. It should be savory, slightly smoky, and just a little bit rich.
- Prep the peppers. While the filling cools slightly, cut the tops off each bell pepper (about ½ inch from the top). Remove the seeds and white membranes from inside. If the peppers don’t sit flat, trim a tiny slice off the bottom—just enough so they stand upright without wobbling. Don’t cut too much or the filling will leak out.
- Stuff the peppers. Spoon the filling into each pepper, packing it gently but firmly. Fill them all the way to the top—the filling will settle slightly during baking. Place the stuffed peppers in your baking dish. If they’re wobbly, nestle them close together or use crumpled foil to keep them upright.
- Create the mummy bandages. Here’s the fun part. Take each mozzarella cheese stick and use kitchen shears to cut it lengthwise into 3-4 long strips. You want them to be about ¼ inch wide—thin enough to look like bandages but thick enough to hold their shape. Starting at the bottom of each pepper, wrap the cheese strips around the pepper in a crisscross pattern, leaving a small gap near the top for the “eyes.” Don’t wrap too tightly—the cheese will melt and settle during baking.
- Add the eyes. Press two black olives into the exposed pepper near the top of each mummy. Place them close together for a cute expression, or slightly apart for a more “scary” look. My kids prefer the close-together, slightly goofy expression—it makes them laugh.
- Bake covered first. Cover the baking dish with aluminum foil and bake for 20 minutes. This steams the peppers so they soften properly without burning the cheese.
- Uncover and finish. Remove the foil and bake for another 10-15 minutes, until the peppers are tender and the cheese is golden and bubbly. The cheese will puff up slightly and brown in spots—that’s exactly what you want. If the cheese isn’t browned enough, switch the oven to broil for 1-2 minutes, but watch it carefully so it doesn’t burn.
- Rest before serving. Let the mummy peppers sit in the dish for 5 minutes before serving. This lets the filling set slightly and makes them easier to handle. The peppers will be tender but still hold their shape—perfect for little hands to pick up.
Sensory cue: When the peppers are done, you’ll smell the sweet roasted pepper mingling with the smoky beef and the nutty melted cheese. The mozzarella will be stretchy and slightly browned, and the peppers should yield easily when poked with a fork but not collapse into mush.
Cooking Tips & Techniques
After making these mummy peppers more times than I can count, I’ve collected a few hard-won lessons that will save you from my early mistakes:
Don’t overcook the peppers. I once baked these for 40 minutes uncovered because I got distracted, and the peppers turned into sad, wrinkled blobs. The sweet spot is 20 minutes covered plus 10-15 minutes uncovered. The peppers should be tender but still have structure—they’re supposed to look like mummies, not zombies.
Use room-temperature cheese sticks. Cold cheese sticks straight from the fridge are brittle and crack when you try to wrap them. Let them sit on the counter for 10 minutes before cutting—they’ll be much more pliable and cooperative.
Cut the cheese strips in advance. If you’re making these with little helpers (which I highly recommend), pre-cut all the cheese strips before you start assembling. The kids can focus on wrapping and placing eyes without waiting for you to cut more strips. Trust me on this—I learned the hard way during a particularly chaotic Halloween prep session.
Don’t skip the foil cover. I know it’s tempting to just throw them in the oven uncovered and hope for the best, but the covered baking step is crucial. It steams the peppers so they cook through evenly, and it prevents the cheese from burning before the peppers are tender. Your patience will be rewarded with perfectly cooked mummies.
Make extra filling. This recipe makes exactly enough for 4 peppers with no leftovers. If you’re feeding a crowd or want leftovers, double the filling and grab a few extra peppers. The filling also freezes beautifully—I sometimes make a double batch and freeze half for a quick weeknight dinner later.
Multitasking tip: While the ground beef is browning, you can prep the peppers and cut the cheese strips. By the time the filling is done, everything else is ready to go. This cuts your active prep time to about 15 minutes.
Variations & Adaptations
One of the best things about this recipe is how flexible it is. Here are some variations I’ve tried and loved:
Vegetarian Mummy Peppers: Swap the ground beef with 1½ cups of cooked lentils or your favorite plant-based crumbles. Add an extra ¼ cup of tomato sauce to keep the filling moist, and stir in some chopped mushrooms for extra umami. My vegetarian friend actually prefers this version—she says it’s “heartier” than the beef version.
Spicy Southwest Mummies: Add ½ cup of corn kernels and ½ cup of black beans to the filling. Use pepper jack cheese instead of cheddar, and add a diced jalapeño with the onions. The corn adds sweetness, the beans add texture, and the pepper jack gives it a nice kick. This version is my husband’s favorite—he calls them “fiery mummies.”
Italian-Style Mummies: Replace the cumin and smoked paprika with 1 teaspoon of dried oregano and ½ teaspoon of dried basil. Use Italian sausage instead of ground beef (remove the casings first), and add ¼ cup of grated Parmesan cheese to the filling. Top with fresh basil before serving. This version tastes like a deconstructed lasagna in pepper form.
Low-Carb/ Keto Mummies: Skip the rice entirely and replace it with 1 cup of riced cauliflower (frozen or fresh). Cook the cauliflower rice in the skillet with the beef until most of the moisture evaporates. The texture is slightly different but still delicious, and the cheese bandages more than make up for the missing carbs.
Air Fryer Method: If you’re short on time, you can make these in the air fryer. Preheat to 350°F (175°C). Place the stuffed peppers in the air fryer basket (work in batches if needed). Cook covered with foil for 12 minutes, then remove the foil and cook for another 5-7 minutes until the cheese is golden. This method cuts the cooking time almost in half.
Serving & Storage Suggestions
These mummy peppers are best served warm, right out of the oven, when the cheese is still stretchy and the peppers are tender. But they’re also surprisingly good at room temperature—I’ve packed them in lunchboxes the next day with great success.
Serving ideas: Arrange the mummy peppers on a platter with a small bowl of extra tomato sauce or salsa for dipping. For a full Halloween dinner, serve them alongside spicy Korean-Mexican street corn dip for a fun, colorful spread that kids and adults will love. You can also add a simple green salad or some roasted sweet potato wedges to round out the meal.
Storage: Leftover mummy peppers keep well in an airtight container in the refrigerator for up to 4 days. The cheese might lose some of its stretchiness, but the flavor holds up beautifully. In fact, the flavors meld together even more overnight—I sometimes think they taste better the next day.
Freezing: These peppers freeze surprisingly well. Let them cool completely, then wrap each pepper individually in plastic wrap and place them in a freezer-safe bag. They’ll keep for up to 3 months. To reheat, thaw in the refrigerator overnight, then bake at 350°F (175°C) for 15-20 minutes until heated through.
Reheating: The best way to reheat individual peppers is in the microwave for 1-2 minutes, or in a 350°F oven for 10 minutes if you’re reheating multiple peppers. The cheese won’t be as perfectly golden as the first time, but it’ll still be deliciously gooey.
Flavor development note: The filling actually gets better after a day or two in the fridge—the spices have time to meld and deepen. So if you’re meal-prepping for Halloween night, you can absolutely make the filling a day ahead and stuff the peppers right before baking.
Nutritional Information & Benefits
While these mummy peppers are definitely a treat, they’re surprisingly balanced for a Halloween dinner. Here’s the estimated nutritional breakdown per stuffed pepper (based on using 80/20 ground beef, white rice, and mozzarella cheese sticks):
- Calories: ~420-450 per pepper
- Protein: 28g
- Carbohydrates: 32g
- Fat: 20g
- Fiber: 4g
- Sugar: 8g (mostly from the peppers and tomato sauce)
Health benefits: Bell peppers are packed with vitamin C—a single pepper provides more than 100% of your daily needs. They’re also rich in vitamin A, which is great for eye health (fitting for our mummy theme, right?). The ground beef provides iron and B vitamins, while the rice offers steady energy. The mozzarella adds calcium for bone health.
Dietary considerations: This recipe is naturally gluten-free (just make sure your tomato sauce and spices are certified gluten-free if needed). It’s also nut-free and egg-free. For a dairy-free version, use dairy-free mozzarella shreds instead of cheese sticks. For a lower-carb option, swap the rice for cauliflower rice as mentioned in the variations section.
Allergen note: Contains dairy (cheese). If you’re serving a crowd with dairy allergies, clearly label which peppers are dairy-free if you’re making both versions.
Personally, I love that this recipe lets me serve something festive and fun without resorting to pure sugar and processed snacks. It’s a real meal that happens to look like a Halloween decoration—and that feels like a win in my book.
Conclusion
These Easy Halloween Mummy Stuffed Peppers are proof that festive food doesn’t have to be complicated or stressful. They come together with simple ingredients, take less than an hour from start to finish, and deliver that perfect combination of cute and delicious that makes Halloween dinner feel special.
What I love most about this recipe is how it brings people together. The kids get involved in the wrapping and decorating, the adults appreciate the familiar comfort-food flavors, and everyone ends up laughing at the goofy little mummy faces staring back at them from the plate. It’s the kind of meal that creates memories without requiring hours in the kitchen or a trip to a specialty store.
I’d love to see your mummy creations! Tag me when you make them, and let me know in the comments what variations you tried. Did your kids come up with their own eye placements? Did you try the spicy Southwest version? Drop a comment below—I read every single one and I’m always looking for new ideas to test in my kitchen.
And if you’re looking for more easy weeknight dinners with a fun twist, don’t miss this Thai coconut curry pulled pork—it’s another one of those recipes that makes a busy night feel like a special occasion. Happy Halloween, and happy cooking!
Frequently Asked Questions
Can I make these mummy peppers ahead of time?
Absolutely! You can assemble the stuffed peppers completely (including the cheese bandages and olive eyes) up to 24 hours in advance. Cover them tightly with plastic wrap and refrigerate. When you’re ready to bake, add about 5-10 minutes to the covered baking time since they’ll be starting from cold.
What if I can’t find mozzarella cheese sticks?
No problem at all! You can use sliced mozzarella cheese cut into thin strips, or even shredded mozzarella pressed into strips with your fingers. Provolone slices also work well—they melt beautifully and have a mild flavor that complements the filling.
Can I use different colored bell peppers?
Yes, and I actually encourage it! Orange and red peppers look the most “Halloween-y” and are sweeter, which balances the savory filling. Green peppers are slightly more bitter but still work great. Yellow peppers are mild and add a cheerful pop of color. Mix and match for a festive look!
How do I prevent the peppers from tipping over during baking?
This is a common issue! First, trim a tiny slice off the bottom of each pepper so they sit flat. If they’re still wobbly, nestle them close together in the baking dish so they support each other. You can also crumple small pieces of aluminum foil and place them between the peppers to keep them upright.
Can I make these in a slow cooker?
Yes, but with adjustments. Prepare the filling and stuff the peppers as directed. Place them in the slow cooker, add about ¼ cup of water or broth to the bottom, and cook on low for 4-5 hours or high for 2-3 hours. Add the cheese bandages and olives during the last 30 minutes of cooking so they don’t melt away completely. The peppers will be very tender—almost falling apart—which some people actually prefer!
Pin This Recipe!
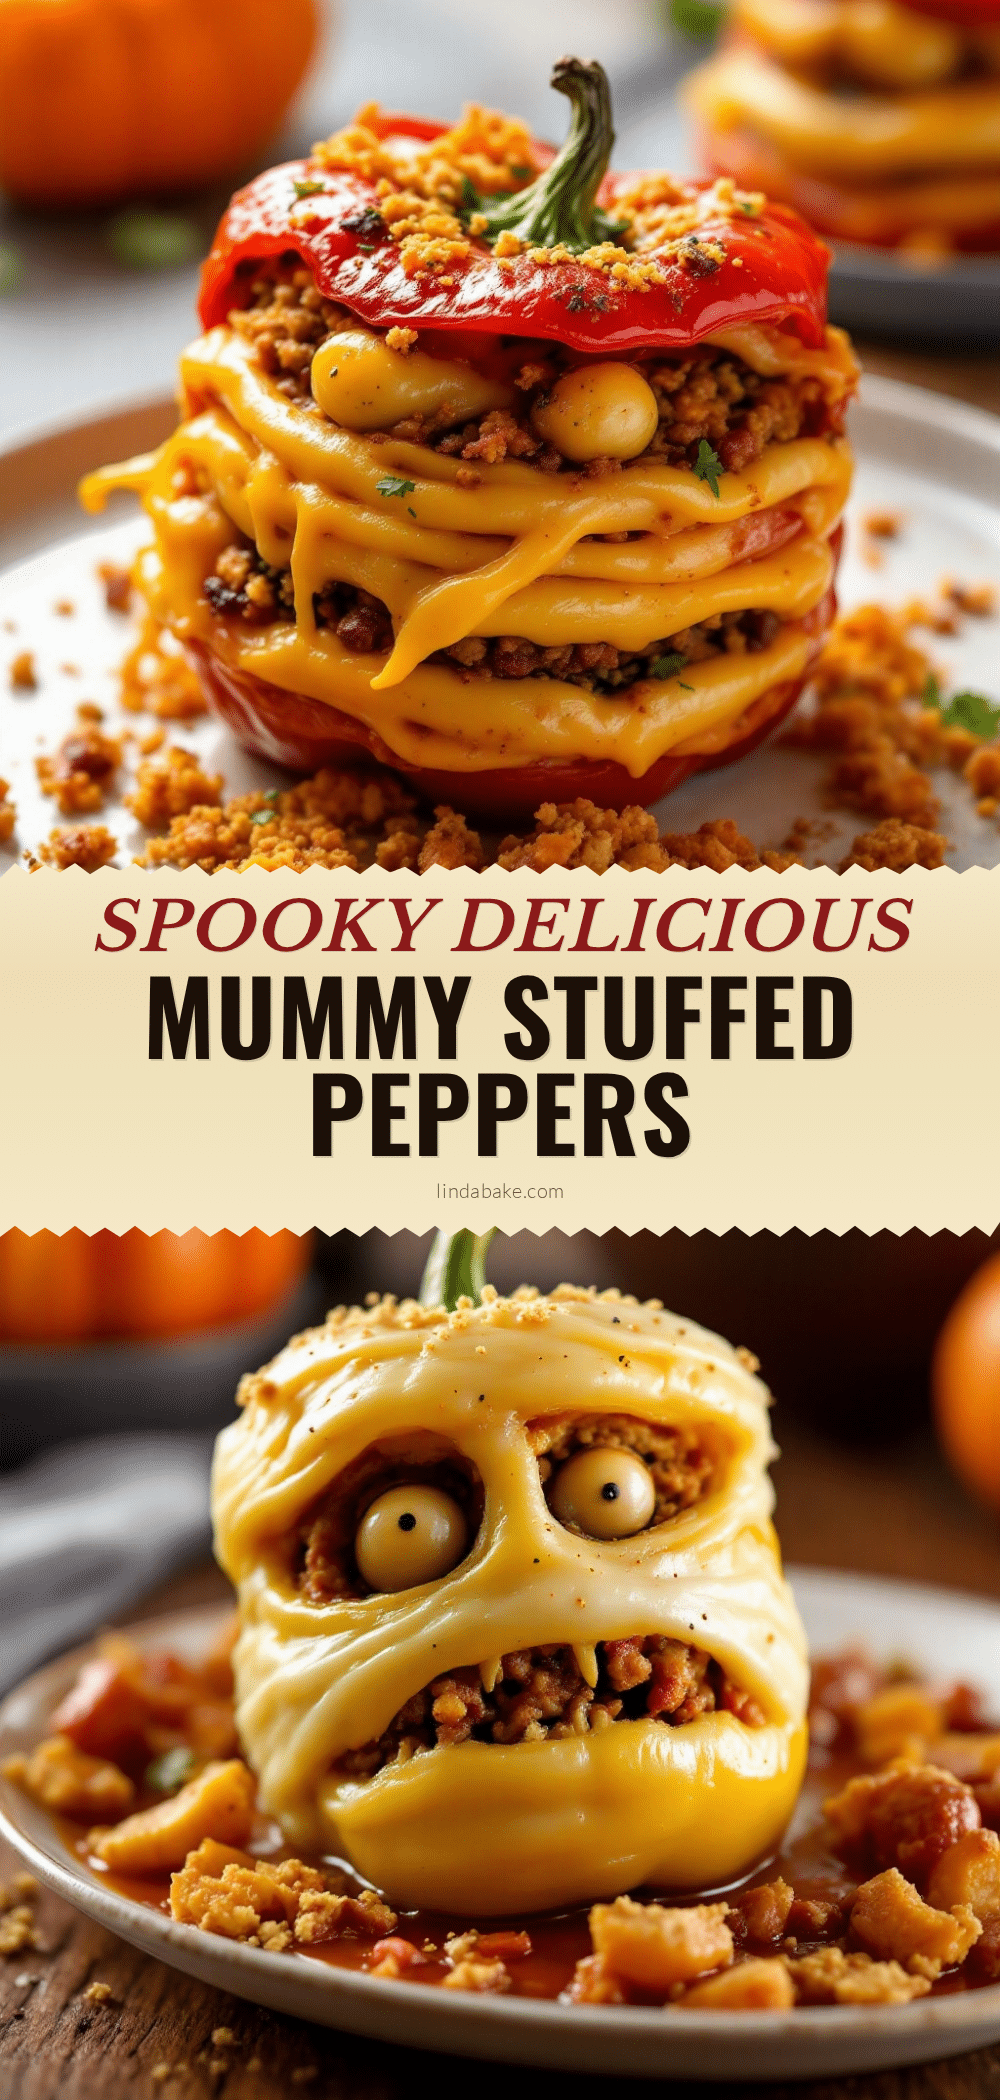
Easy Halloween Mummy Stuffed Peppers: Best Spooky Dinner Idea
These Easy Halloween Mummy Stuffed Peppers turn a stressed-out weeknight into a memory with adorable mummy faces made from bell peppers, mozzarella cheese bandages, and black olive eyes. A quick, kid-approved dinner that’s perfect for Halloween without the fuss.
- Prep Time: 15 minutes
- Cook Time: 30 minutes
- Total Time: 45 minutes
- Yield: 4 servings 1x
- Category: Main Course
- Cuisine: American
Ingredients
- 1 lb ground beef (80/20 works best)
- 1 cup cooked white rice
- 1 small onion, finely diced (about ½ cup)
- 2 cloves garlic, minced
- 1 teaspoon smoked paprika
- 1 teaspoon cumin
- ½ teaspoon chili powder
- ½ teaspoon salt
- ¼ teaspoon black pepper
- 1 can (8 oz) tomato sauce
- ½ cup shredded cheddar cheese (optional)
- 4 medium bell peppers (any color)
- 8–10 mozzarella cheese sticks
- 12–16 black olives, whole (pitted)
- 2 tablespoons olive oil (optional, for brushing peppers)
Instructions
- Preheat your oven to 375°F (190°C).
- Cook the filling base: Heat a large skillet over medium-high heat. Add the ground beef and cook, breaking it apart, until browned (about 5-6 minutes). Drain excess fat, leaving about 1 tablespoon. Add diced onion and cook 2-3 minutes until softened, then add minced garlic and cook 30 seconds until fragrant.
- Season the filling: Stir in smoked paprika, cumin, chili powder, salt, and black pepper. Cook for 1 minute to toast spices. Pour in tomato sauce and let simmer 2-3 minutes until slightly thickened.
- Add the rice and cheese: Remove skillet from heat. Stir in cooked rice until well combined. If using cheddar cheese, fold it in now. Taste and adjust seasoning as needed.
- Prep the peppers: Cut tops off each bell pepper (about ½ inch from top). Remove seeds and membranes. Trim a tiny slice off the bottom if needed so peppers stand upright.
- Stuff the peppers: Spoon filling into each pepper, packing gently but firmly. Fill to the top. Place stuffed peppers in a 9×13-inch baking dish.
- Create the mummy bandages: Cut each mozzarella cheese stick lengthwise into 3-4 long strips (about ¼ inch wide). Starting at the bottom of each pepper, wrap cheese strips in a crisscross pattern, leaving a small gap near the top for eyes.
- Add the eyes: Press two black olives into the exposed pepper near the top of each mummy.
- Bake covered: Cover baking dish with aluminum foil and bake for 20 minutes.
- Uncover and finish: Remove foil and bake for another 10-15 minutes until peppers are tender and cheese is golden and bubbly. Optionally broil 1-2 minutes for extra browning.
- Rest before serving: Let mummy peppers sit in dish for 5 minutes before serving.
Notes
Don’t overcook the peppers; the sweet spot is 20 minutes covered plus 10-15 minutes uncovered. Use room-temperature cheese sticks for easier wrapping. Pre-cut cheese strips in advance if cooking with kids. Don’t skip the foil cover—it steams the peppers. Make extra filling if feeding a crowd; filling freezes well. For a vegetarian version, swap ground beef with cooked lentils or plant-based crumbles. For a low-carb option, replace rice with riced cauliflower.
Nutrition
- Serving Size: 1 stuffed pepper
- Calories: 420450
- Sugar: 8
- Sodium: 800
- Fat: 20
- Saturated Fat: 8
- Carbohydrates: 32
- Fiber: 4
- Protein: 28
Keywords: Halloween stuffed peppers, mummy peppers, spooky dinner, kid-friendly Halloween, easy weeknight dinner, stuffed bell peppers, ground beef recipe


