I burned the first batch of these mummy hot dogs so badly the smoke alarm went off and my kids still ask me about it every Halloween. Not exactly the festive snack moment I was going for. But here’s the thing — that disaster taught me exactly what not to do, and these Easy Halloween Mummy Hot Dog Bites have been a staple at every single October gathering since. They’re the kind of recipe that looks like you spent way more time than you actually did.
My oldest son, who is seven and has strong opinions about most things I cook, declared them “the best thing you’ve ever made” after that first successful batch. That’s a win in my book. These little guys are simple, fun, and honestly, they disappear faster than anything else on the snack table. The best part? You probably already have everything you need in your kitchen right now.
Why You’ll Love This Recipe
Let me tell you why these mummy bites have earned a permanent spot in my Halloween rotation. I’ve tested this recipe more times than I care to admit, and it just works.
- Quick & Easy: From start to finish, you’re looking at about 20 minutes. Perfect for those last-minute party invites or when the kids suddenly need a classroom treat.
- Simple Ingredients: No fancy grocery store trips. Hot dogs, crescent roll dough, and a bit of mustard or ketchup for the eyes. That’s it.
- Perfect for Halloween: These are the life of the party. Kids love them, adults sneak them, and they fit right in with any spooky spread.
- Crowd-Pleaser: I’ve brought these to school parties, neighborhood get-togethers, and family dinners. They get rave reviews every single time.
- Unbelievably Delicious: The combination of flaky, buttery dough wrapped around a juicy hot dog is just comfort food at its finest. Add those little mustard eyes and it’s next-level fun.
This isn’t just another hot dog recipe. The trick is in how you wrap the dough — not too tight, not too loose — so the mummies puff up perfectly and look adorably wrapped. It’s a small detail that makes a huge difference. And honestly, there’s something about watching a kid’s face light up when they see these little guys on the table. That’s the real magic.
What Ingredients You Will Need
This recipe uses simple, everyday ingredients to create something that feels special without any fuss. Here’s what you’ll need:
- Hot dogs — 8 standard-sized hot dogs (I prefer beef hot dogs for better flavor, but any kind works)
- Crescent roll dough — 1 can (8 oz) refrigerated crescent roll dough (Pillsbury is my go-to)
- Mustard or ketchup — for the mummy eyes (yellow mustard gives that classic spooky look)
- Optional: cheese slices — for adding a little extra flavor inside the wrap
For the dough, I’ve tried a few different brands and Pillsbury consistently gives the flakiest, most even results. If you’re feeling adventurous, you can make your own dough from scratch, but honestly, the refrigerated stuff works perfectly here and saves so much time.
When it comes to hot dogs, go with what your family likes. I’ve used turkey dogs, chicken dogs, and even vegetarian options — they all work. Just make sure they’re standard size, not the jumbo ones, because those are harder to wrap nicely.
For the eyes, yellow mustard is traditional and gives that classic mummy look. But if your kids prefer ketchup or you want to mix it up, go for it. I’ve even used small dots of sriracha for a spicy adult version.
One thing I learned the hard way — make sure your crescent roll dough is cold when you start working with it. If it gets too warm, it becomes sticky and hard to cut into those perfect little strips. Keep it in the fridge until you’re ready to roll.
Equipment Needed
You don’t need much for this recipe, which is part of its beauty. Here’s what you’ll need:
- Baking sheet — standard half-sheet pan works perfectly
- Parchment paper — for easy cleanup and preventing sticking (you can also use a silicone baking mat)
- Knife or pizza cutter — for cutting the dough into strips (I prefer a pizza cutter for even strips)
- Small knife or toothpick — for applying the mustard eyes
- Oven mitts — because hot pans are no joke
If you don’t have parchment paper, you can lightly grease the baking sheet with cooking spray. I’ve done it both ways, and parchment paper just makes cleanup so much easier. A pizza cutter is my secret weapon for getting even strips of dough — a knife works, but the cutter gives you cleaner lines.
Preparation Method

Let’s get these little mummies wrapped up and in the oven. Follow these steps and you’ll have a batch of adorable, delicious bites in no time.
- Preheat your oven to 375°F (190°C). Line a baking sheet with parchment paper and set it aside. This gives you time to prep while the oven heats up.
- Unroll the crescent roll dough onto a clean cutting board. You’ll have 8 triangles. Pinch the perforated seams together to create 4 rectangles. Then, using a pizza cutter or knife, cut each rectangle lengthwise into 3 thin strips. You should end up with 12 strips total.
- Take one hot dog and wrap a strip of dough around it, starting at one end and working your way to the other. Leave a small gap near the top for the mummy’s face. Don’t wrap too tightly — the dough will expand as it bakes, and you want those cute little gaps that make it look like a mummy.
- Place each wrapped hot dog on the prepared baking sheet, leaving about an inch of space between each one. They’ll puff up a bit as they bake.
- Bake for 12-15 minutes, or until the dough is golden brown and the hot dogs are heated through. The dough should be flaky and slightly puffed. Keep an eye on them — ovens vary, and you don’t want them to burn like my first batch did.
- Remove from the oven and let them cool for 2-3 minutes on the baking sheet. This helps the dough set so it doesn’t fall apart when you add the eyes.
- Add the eyes. Using a toothpick or small knife, dab a tiny amount of mustard or ketchup onto the exposed hot dog section to create the mummy’s eyes. You can do two dots for a classic look, or get creative with expressions.
A quick tip — if the dough strips feel too long, just trim them a bit. You don’t have to use the entire strip. I usually have a little leftover dough, which I just bake on the side as little dough bites (my kids love those).
One thing I noticed after my first few attempts — the dough will puff up and create natural gaps, which is exactly what you want. If you wrap too tightly, the mummies look more like sausages in a blanket, which is fine but not as fun. Leave those little spaces.
Cooking Tips & Techniques
After making these more times than I can count, here are the things I wish someone had told me from the start.
Don’t overwork the dough. Crescent roll dough is delicate, and if you handle it too much, it becomes tough. Just unroll it, cut it, and wrap. No kneading, no stretching.
Cold dough is your friend. If your dough starts getting sticky while you’re cutting it, pop it back in the fridge for 5 minutes. Warm dough is harder to work with and won’t give you those clean strips.
Space them out. I made the mistake of crowding the baking sheet once, and the mummies ended up merging into one big dough blob. They still tasted fine, but they didn’t look like mummies anymore. Give them room to breathe.
Watch the oven. My first batch burned because I got distracted. Set a timer for 10 minutes and check them. Every oven runs a little differently, and you want that perfect golden brown, not dark brown.
Let them rest. Those 2-3 minutes of cooling time are crucial. If you try to add the eyes right away, the mustard will just slide off the hot surface. Patience pays off here.
One more thing — if you’re making these for a party, you can prep them ahead of time. Wrap the hot dogs in the dough, place them on the baking sheet, and refrigerate for up to 4 hours before baking. Just add a couple of extra minutes to the baking time since they’ll be cold going in.
Variations & Adaptations
The beauty of this recipe is how easy it is to customize. Here are some variations I’ve tried and loved.
Cheesy Mummy Bites: Before wrapping the dough, cut a slit lengthwise in each hot dog and stuff it with a small strip of cheese. Cheddar, mozzarella, or pepper jack all work great. The cheese melts inside and adds a gooey surprise.
Spicy Mummies: For the adults, swap the regular hot dogs for spicy ones or add a thin slice of jalapeño under the dough. The heat pairs perfectly with the flaky crust.
Vegetarian Version: Use vegetarian hot dogs or even cheese sticks wrapped in the dough. They bake up just as nicely and taste delicious.
Breakfast Mummies: This is a fun twist — wrap the dough around breakfast sausages instead of hot dogs. Serve them with a side of maple syrup for dipping. My kids went crazy for these on Halloween morning.
Gluten-Free Option: You can use gluten-free crescent roll dough if you can find it. The texture is a little different, but the flavor is still great. Just follow the package instructions for baking times.
I’ve also tried adding a sprinkle of everything bagel seasoning on top before baking. It adds a nice savory crunch that works surprisingly well with the hot dog. Not traditional, but delicious.
Serving & Storage Suggestions
These mummy bites are best served warm, right out of the oven. The dough is flaky, the hot dog is juicy, and the mustard eyes are still fresh. I like to arrange them on a platter with a bowl of ketchup or mustard for dipping.
If you’re serving them at a party, they hold up well at room temperature for about an hour. After that, the dough starts to soften. For a buffet, just pop them back in a warm oven for a few minutes before serving.
For storage, let any leftovers cool completely, then place them in an airtight container in the refrigerator. They’ll keep for up to 3 days. To reheat, pop them in a 350°F oven for 5-7 minutes, or until warmed through. You can also microwave them, but the dough won’t be as crispy.
I don’t recommend freezing these — the dough gets soggy when thawed. But honestly, they disappear so fast that leftovers are rarely an issue.
One thing I love about this recipe is how the flavors develop. The dough gets a little more buttery and the hot dog flavor melds with the mustard. If you have any left the next day, they’re still delicious cold, straight from the fridge. My husband calls them “second-day mummies” and eats them for a quick snack.
Nutritional Information & Benefits
Let’s be real — these mummy bites are a fun treat, not a health food. But they’re not terrible for you either. Here’s a rough estimate per serving (one mummy bite):
- Calories: 180-200
- Protein: 7-8 grams
- Fat: 12-14 grams
- Carbohydrates: 12-15 grams
- Sodium: 500-600 mg
If you’re looking to make them a bit lighter, use turkey or chicken hot dogs and low-fat crescent roll dough. You’ll save some calories and fat without sacrificing flavor.
Hot dogs are a good source of protein, and the dough provides some carbohydrates for energy. They’re not exactly a superfood, but for a Halloween treat, they’re a lot better than candy. Plus, the mustard adds a tiny bit of turmeric, which has anti-inflammatory properties. Every little bit counts, right?
If you’re watching your sodium intake, look for low-sodium hot dogs and use unsalted butter if you’re brushing the dough. But honestly, for a once-a-year treat, I say go for it and enjoy.
Conclusion
These Easy Halloween Mummy Hot Dog Bites are proof that simple ingredients can create something truly special. They’re fun, they’re delicious, and they’re guaranteed to be the hit of any Halloween party. Whether you’re making them for your kids, your coworkers, or just for yourself (no judgment here), they’re worth every minute.
I love this recipe because it brings people together. There’s something about seeing a plate of these little guys that makes everyone smile. And isn’t that what cooking is all about? Creating moments that stick with you.
So go ahead and give them a try. Customize them with your favorite hot dogs, add some cheese, or keep them classic. And when you do, I’d love to hear how they turned out. Drop a comment below, share a photo, or tell me your favorite variation. Happy Halloween, and happy snacking!
Frequently Asked Questions
Can I make these mummy hot dog bites ahead of time?
Yes! You can wrap the hot dogs in the dough, place them on a baking sheet, and refrigerate for up to 4 hours before baking. Just add 2-3 extra minutes to the baking time since they’ll be cold.
Can I use puff pastry instead of crescent roll dough?
Absolutely. Puff pastry will give you a flakier, more buttery result. Just cut it into thin strips and wrap the same way. You might need to bake them a minute or two longer.
How do I keep the dough from getting soggy?
Make sure your hot dogs are dry before wrapping them. Pat them with a paper towel to remove any excess moisture. Also, don’t overcrowd the baking sheet — good air circulation helps the dough crisp up.
Can I make these in an air fryer?
Yes! Preheat your air fryer to 375°F (190°C). Place the wrapped hot dogs in a single layer in the basket and cook for 8-10 minutes, or until golden brown. Check them halfway through to make sure they’re cooking evenly.
What can I use instead of mustard for the eyes?
Ketchup works great and gives a slightly different look. You can also use sriracha, barbecue sauce, or even tiny dots of cream cheese for a milder flavor. Get creative with it!
Pin This Recipe!
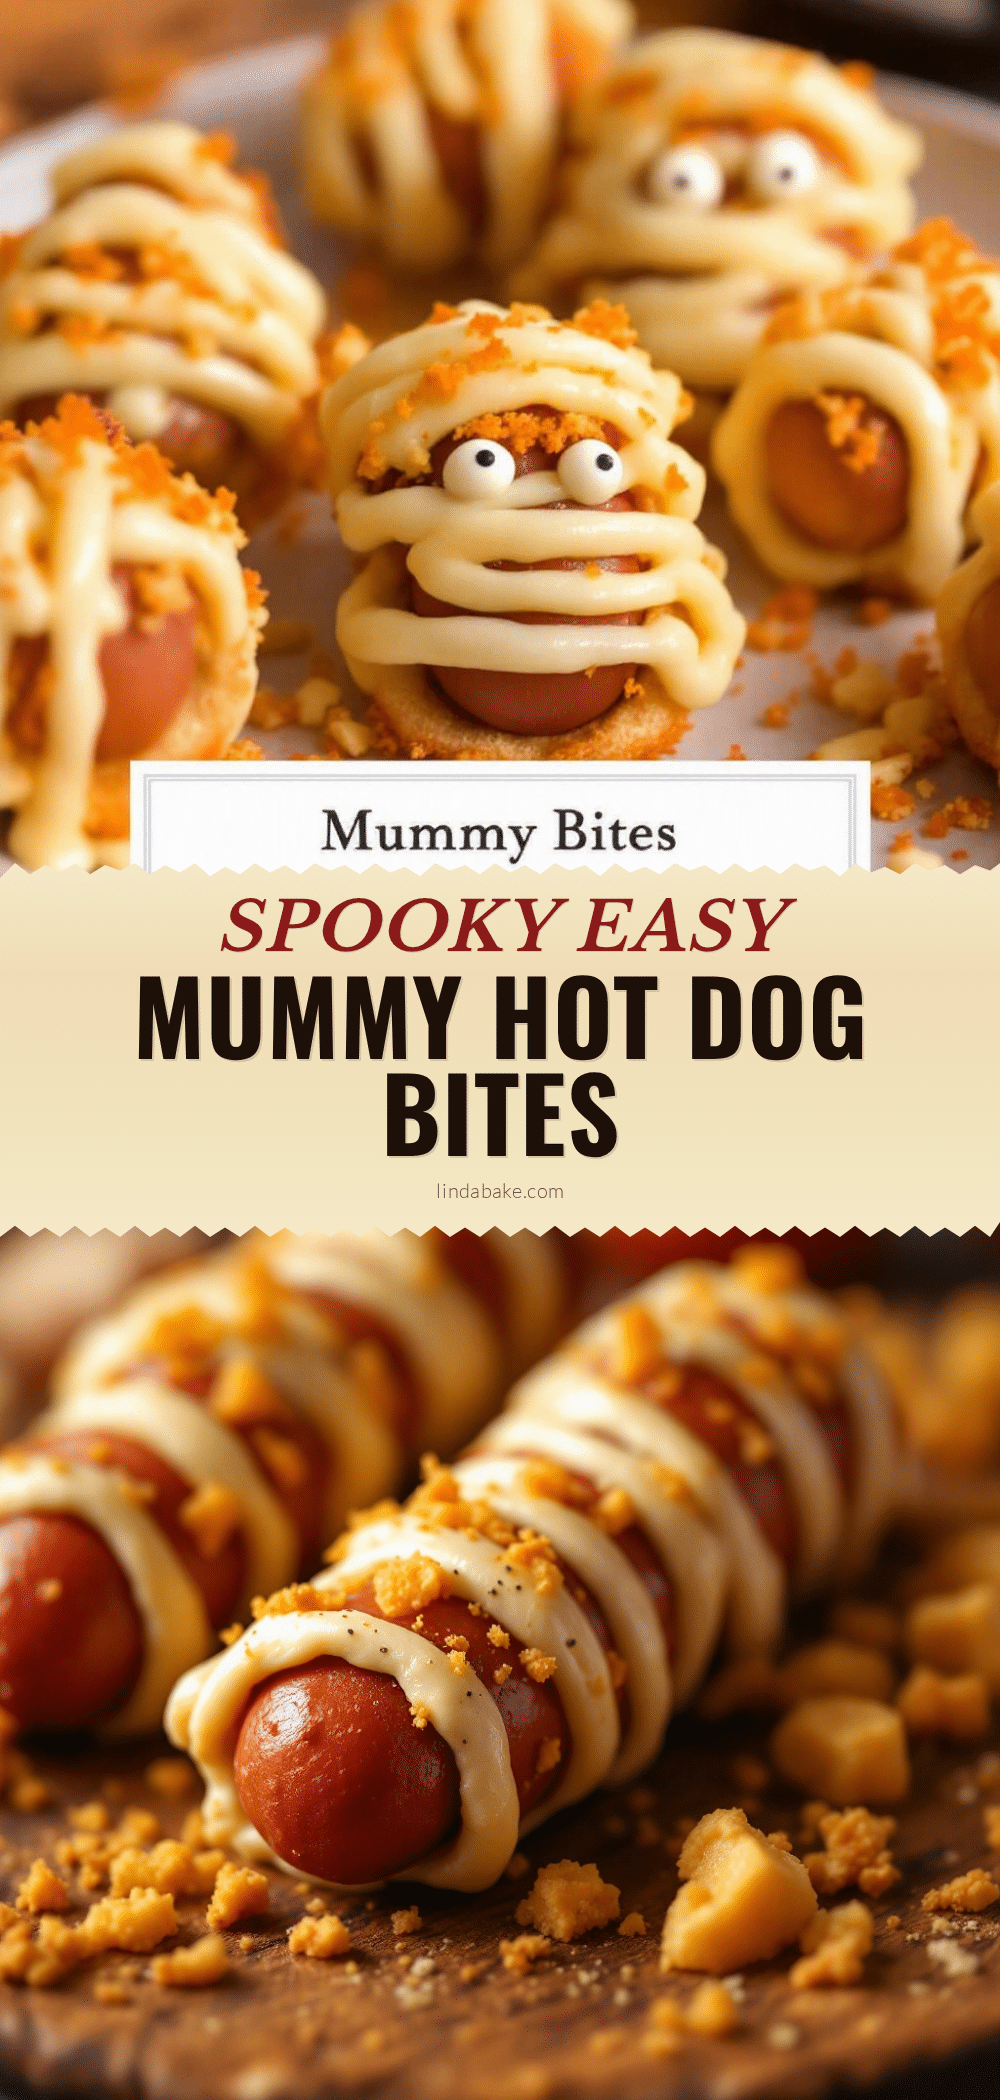
Easy Halloween Mummy Hot Dog Bites: Best Fun Snack
These Easy Halloween Mummy Hot Dog Bites are a fun, quick, and delicious snack perfect for Halloween parties. Made with simple ingredients like hot dogs and crescent roll dough, they are a guaranteed crowd-pleaser that kids and adults love.
- Prep Time: 10 minutes
- Cook Time: 12-15 minutes
- Total Time: 22-25 minutes
- Yield: 8 servings (1 mummy bite per serving) 1x
- Category: Appetizer
- Cuisine: American
Ingredients
- 8 standard-sized hot dogs (beef hot dogs preferred)
- 1 can (8 oz) refrigerated crescent roll dough (e.g., Pillsbury)
- Mustard or ketchup (for mummy eyes; yellow mustard recommended)
- Optional: cheese slices (for extra flavor inside the wrap)
Instructions
- Preheat your oven to 375°F (190°C). Line a baking sheet with parchment paper and set aside.
- Unroll the crescent roll dough onto a clean cutting board. You’ll have 8 triangles. Pinch the perforated seams together to create 4 rectangles. Then, using a pizza cutter or knife, cut each rectangle lengthwise into 3 thin strips. You should end up with 12 strips total.
- Take one hot dog and wrap a strip of dough around it, starting at one end and working your way to the other. Leave a small gap near the top for the mummy’s face. Don’t wrap too tightly — the dough will expand as it bakes.
- Place each wrapped hot dog on the prepared baking sheet, leaving about an inch of space between each one.
- Bake for 12-15 minutes, or until the dough is golden brown and the hot dogs are heated through.
- Remove from the oven and let them cool for 2-3 minutes on the baking sheet.
- Add the eyes. Using a toothpick or small knife, dab a tiny amount of mustard or ketchup onto the exposed hot dog section to create the mummy’s eyes.
Notes
Keep crescent roll dough cold for easier handling. Don’t overwork the dough. Space out the mummy bites on the baking sheet to prevent merging. Let them rest for 2-3 minutes before adding eyes. Can be prepped ahead and refrigerated for up to 4 hours before baking. For air fryer: cook at 375°F for 8-10 minutes.
Nutrition
- Serving Size: 1 mummy bite
- Calories: 180200
- Sodium: 500600
- Fat: 1214
- Carbohydrates: 1215
- Protein: 78
Keywords: Halloween, mummy hot dogs, hot dog bites, easy snack, party food, kid-friendly, crescent roll, fun snack


