My nephew Leo looked up at me, his face completely serious, and asked, “Auntie, can we eat the dirt?” I paused, spatula in hand, already knee-deep in chocolate pudding. I had been testing a batch for an upcoming school party, and he had wandered into the kitchen, drawn by the smell of crushed chocolate. “Not just any dirt,” I told him, scooping a spoonful of the creamy, dark mixture. “It’s magic dirt.” He took a bite, and the way his eyes went wide—that’s the moment this recipe truly stuck. It wasn’t just a dessert anymore. It was a tiny, edible moment of pure childhood wonder. That’s the honest truth about these Easy Halloween Dirt Cups with Crushed Oreos and Gummy Worms. They’re not complicated, but they carry a kind of simple magic that makes you feel like a kid again.
These little cups are the kind of thing you throw together when you want a big reaction without a big effort. Honestly, the first time I made them, I was rushing between a work call and a school bake sale. I needed something that looked impressive but didn’t require me to turn on the oven. I grabbed a box of instant pudding, a pack of Oreos, and a bag of gummy worms. Ten minutes later, I had a tray of these little cups, and they were the first thing to disappear from the table. It was a quiet realization that sometimes the best recipes aren’t the ones you slave over. They’re the ones that let you be the fun aunt—or the cool parent—without the stress. And that’s a feeling worth sharing.
Why You’ll Love This Recipe
Let’s face it, Halloween can be chaotic. Between the costume planning, the candy sorting, and the general sugar-fueled excitement, the last thing you need is a complicated dessert. This recipe is my secret weapon for exactly that reason. It’s the dessert equivalent of a magic trick—it looks like you spent hours, but you really just spent ten minutes and a little bit of love.
- Quick & Easy: This comes together in under 10 minutes. No baking, no boiling, no complicated steps. It’s perfect for last-minute Halloween parties or when the kids are already buzzing and you need a win.
- Simple Ingredients: You probably have most of this in your pantry already. A box of pudding, some milk, a pack of Oreos, and a handful of gummy worms. No fancy grocery trips needed.
- Perfect for Halloween Parties: These are the undisputed champions of the school party table. They’re individual, mess-free (mostly), and kids absolutely lose their minds over them. They’re also fantastic for a spooky movie night or a pre-trick-or-treat snack.
- Crowd-Pleaser: I’ve never met a kid (or an adult, honestly) who can resist digging into a cup of “dirt.” It’s playful, it’s delicious, and it brings out the kid in everyone.
- Unbelievably Delicious: The creamy, rich chocolate pudding paired with the crunchy, crumbly Oreo “dirt” and the chewy, fruity gummy worms is a texture and flavor combo that’s just pure comfort food. It’s next-level, I tell you.
What makes this version different from the rest? It’s all in the texture. I’ve learned that the key isn’t just crushing the Oreos—it’s layering them properly so you get that satisfying crunch in every single bite. And the pudding? I blend it for a few seconds to make it extra smooth and creamy. It’s a tiny trick, but it makes a huge difference. This isn’t just another version of a classic. It’s the best version, tested and approved by a very picky five-year-old.
What Ingredients You Will Need
This recipe uses simple, wholesome-ish ingredients to deliver a dessert that feels both indulgent and nostalgic. You’ll be surprised how a few pantry staples can come together to create something so fun.
- 1 (3.9 oz) box of instant chocolate pudding mix: I prefer Jell-O brand for its reliable texture, but any brand works. Make sure it’s the “instant” kind, not the cook-and-serve, unless you want to wait much longer.
- 2 cups cold milk: Whole milk gives the richest, creamiest pudding. But 2% or even oat milk works perfectly fine. (I’ve used oat milk for dairy-sensitive friends, and it’s still delicious.)
- 1 (14.3 oz) package of Oreo cookies: You’ll use the whole package. Don’t even think about using off-brand cookies here. The real Oreos have that perfect chocolate-to-cream ratio that makes the “dirt” so good. Regular or Double Stuf both work—just be aware Double Stuf makes the “dirt” a little sweeter.
- 1 (4.5 oz) bag of gummy worms: This is where you can get creative. I love using the sour gummy worms for a little tangy kick, but classic fruit-flavored ones are perfect too. For a truly spooky look, grab the Halloween-themed packs with the green and purple worms.
- Optional for garnish: A few extra gummy worms, some crushed graham crackers for extra “dirt” texture, or a spooky plastic spider on top. These are just for fun, but they really make the presentation pop.
Equipment Needed
You don’t need a professional kitchen to pull this off. In fact, the simpler, the better.
- Mixing bowl: Any medium-sized bowl will do. A glass bowl is nice for seeing the pudding come together.
- Whisk or electric mixer: A whisk works perfectly fine, but if you have a hand mixer, it’ll make the pudding come together in about a minute. I prefer the whisk for a little arm workout, but hey, no judgment.
- Measuring cups: For the milk. A liquid measuring cup is best.
- Ziploc bag or food processor: For crushing the Oreos. A Ziploc bag and a rolling pin is the classic, kid-friendly method. A food processor makes it almost too easy, and you get a finer, more even crumb.
- Rolling pin (or a heavy pan): If you’re going the Ziploc bag route.
- Small cups or clear plastic cups: This is where the magic happens. Clear cups are essential so you can see the layers of “dirt.” I use 5-ounce solo cups for the perfect single-serving size. You can also use small mason jars or even little terracotta pots for a more authentic “dirt” look.
- Spoon or small spatula: For layering.
Preparation Method
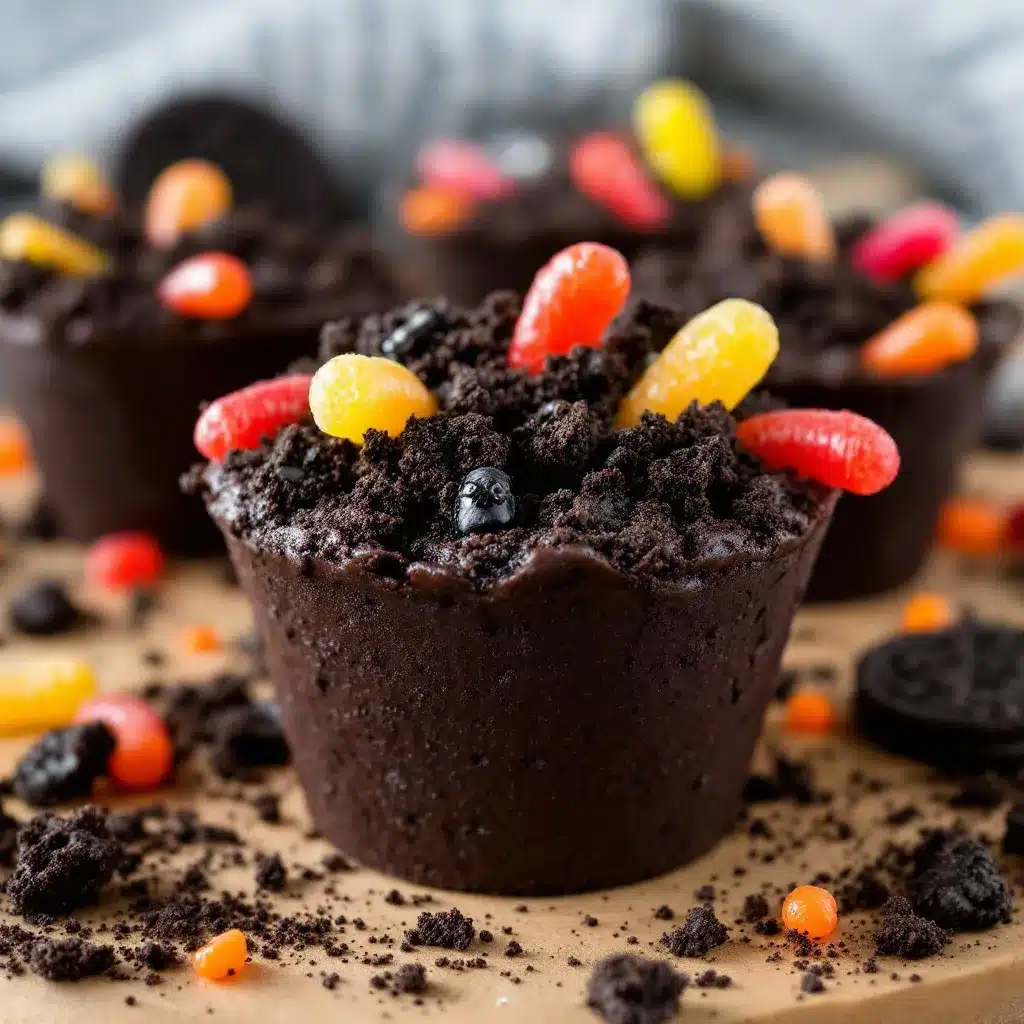
This is the easy part. Follow these steps, and you’ll have a batch of spooky treats in no time.
- Make the pudding: In your mixing bowl, pour the cold milk. Add the entire box of instant chocolate pudding mix. Whisk vigorously for about 2 minutes, or use your electric mixer on low speed. The mixture will start to thicken. Stop when it’s smooth and creamy. Let it sit for 5 minutes to set completely. You’ll know it’s ready when you can drag a spoon through it and it leaves a clean trail.
- Crush the Oreos: While the pudding is setting, get to work on your “dirt.” Place the entire package of Oreos (yes, cream filling and all) into a large Ziploc bag. Seal it tightly, pushing out as much air as possible. Now, let out your inner monster. Use a rolling pin or the bottom of a heavy pan to crush the cookies into fine crumbs. You want a mix of fine dust and slightly larger pebbles—that’s what gives it that realistic “dirt” texture. If you’re using a food processor, pulse the cookies in batches until you reach the desired consistency. Be careful not to over-process, or you’ll get Oreo butter.
- Layer the cups: Grab your clear cups. Start with a generous spoonful of the crushed Oreos at the bottom of each cup. This forms the base of your “dirt.” I use about 2 tablespoons per cup.
- Add the pudding: Spoon the chocolate pudding on top of the Oreo layer. Fill the cup about two-thirds of the way full. Use the back of your spoon to smooth the top of the pudding slightly. This gives you a nice, even surface for the next layer.
- Top with “dirt”: Sprinkle another generous layer of crushed Oreos over the pudding. This is the topsoil. You want it to completely cover the pudding so it looks like a real cup of dirt. I use about 1.5 to 2 tablespoons for the top layer.
- Add the worms: Now for the fun part. Gently press a few gummy worms into the top layer of Oreo crumbs. I like to push them in at different angles—some poking straight up, some half-hidden, like they’re trying to escape. It creates the best visual effect. For a little extra fun, you can even let a few “worms” dangle over the edge of the cup.
- Chill (optional but recommended): For the best texture, pop the cups in the fridge for at least 30 minutes before serving. This allows the pudding to firm up even more and the Oreo crumbs to soften slightly, mimicking real dirt. They’re perfectly fine to eat right away, but chilling them takes them to the next level.
Cooking Tips & Techniques
I’ve made these cups more times than I can count, and I’ve learned a few things the hard way. Let me save you the trouble.
The biggest mistake? Not crushing the Oreos finely enough. Big chunks of cookie are hard to eat with a spoon and don’t look like dirt at all. You want a fine, sandy texture with just a few small pebbles. I once used a meat tenderizer and ended up with huge shards of cookie. It was a disaster. The Ziploc bag and rolling pin method is honestly the most forgiving.
Another tip: Make the pudding first and let it set while you crush the cookies. This way, everything is ready to layer at the same time. It’s a small timing trick, but it makes the whole process feel effortless.
For a super smooth pudding: After you whisk it, give it a quick 10-second blend with an immersion blender (or just transfer it to a regular blender). This eliminates any tiny lumps and gives you a velvety, restaurant-quality texture. It’s a little extra step, but it’s worth it if you’re serving these to impress.
Multitasking is your friend: While the pudding is setting, get the kids involved in crushing the Oreos. It’s a great way to burn off some of that pre-Halloween energy, and they’ll be so proud of their “dirt.”
One last thing: Don’t overfill the cups. Leave a little room at the top so the gummy worms can peek out. It looks much more appetizing and makes the cups easier to handle.
Variations & Adaptations
This base recipe is a perfect canvas for all kinds of fun twists. Here are a few of my favorite ways to change it up.
- Peanut Butter Cup Dirt: Before layering the pudding, drop a mini peanut butter cup into the center of each cup. The combination of chocolate pudding, Oreo crumbs, and peanut butter is absolutely irresistible. It’s like a Reese’s in dirt form.
- Pumpkin Patch Dirt: Swap the chocolate pudding for a pumpkin spice pudding mix (if you can find it) or make your own by adding a teaspoon of pumpkin pie spice to a vanilla pudding mix. Top with crushed ginger snaps instead of Oreos, and use candy pumpkins instead of worms. It’s a fall-themed twist that’s perfect for a Halloween party.
- Mint Chocolate Chip Dirt: Use a chocolate pudding mix and add 1/2 teaspoon of peppermint extract to the milk before whisking. Top with crushed Oreos and a few mini chocolate chips. It’s like a Thin Mint in a cup.
- For a dairy-free version: Use your favorite dairy-free milk (oat or almond work best) and a dairy-free pudding mix. Most instant pudding mixes are naturally dairy-free, but double-check the label. The texture will be slightly less rich, but it’s still delicious.
- For a gluten-free version: Use gluten-free chocolate cookies (like Glutino or Kinnikinnick) and a gluten-free pudding mix. The taste is nearly identical, and no one will know the difference.
I once tried a “spider web” version where I drizzled melted white chocolate over the top layer of dirt in a web pattern. It looked incredible, but it added about 15 minutes of work. It’s a fun variation for a special occasion, but for everyday Halloween fun, I stick to the classic worms.
Serving & Storage Suggestions
These cups are best served cold. The contrast between the cold, creamy pudding and the crunchy Oreo crumb is what makes them so addictive. I usually pull them straight from the fridge just before the party starts.
For presentation: Serve them on a platter with a few extra gummy worms scattered around the base for a “worm farm” effect. You can also label them with a little sign that says “Worm Farm” or “Dirt Cups.” It adds a fun, spooky touch. If you’re using tiny terracotta pots, you can even stick a small plastic flower in the top for a “garden” vibe.
What to serve with them: These are a dessert all on their own, but they pair wonderfully with a warm drink like hot apple cider or a spooky Mango Jalapeño Agua Fresca for a non-alcoholic option. For a full Halloween spread, they go perfectly alongside a batch of Cheddar Ranch Popcorn Snack Mix for that sweet-and-salty combo.
Storage: These cups store beautifully in the refrigerator for up to 3 days. Just cover them with plastic wrap or a lid. The Oreo crumbs will soften over time, which actually makes them taste even more like real dirt. I actually prefer them on day two!
Can you freeze them? I don’t recommend it. The pudding will become watery and grainy when thawed, and the texture just isn’t the same. Stick to the fridge.
Reheating: You don’t. These are a cold dessert. If you want a warm version, you’d need to make a completely different recipe.
Nutritional Information & Benefits
Let’s be real—this is a treat, not a health food. But that doesn’t mean it can’t fit into a balanced lifestyle. A single serving (one cup) contains approximately:
- Calories: 320-380 (depending on the type of milk and cookies used)
- Fat: 12-15g
- Carbohydrates: 50-60g
- Sugar: 35-42g
- Protein: 4-6g
Health highlights: Believe it or not, there are a few small wins here. The milk provides calcium and vitamin D, which are good for bone health. The Oreos (in moderation) can provide a small amount of iron from the enriched flour. And the gummy worms? Well, they’re mostly sugar, but they do make you smile, and that counts for something, right?
Dietary considerations: As mentioned, this recipe can easily be made dairy-free or gluten-free with simple substitutions. It is not suitable for a low-carb or keto diet due to the high sugar content from the cookies and pudding.
Potential allergens: This recipe contains dairy (milk), wheat/gluten (Oreos), and soy (often found in chocolate and cookies). Always check labels if you’re serving someone with allergies.
My personal take? I don’t make these every day. But for a special occasion like Halloween, they’re a fun, nostalgic treat that brings people together. The joy on a kid’s face when they dig into a cup of “dirt” is worth every calorie.
Conclusion
These Easy Halloween Dirt Cups with Crushed Oreos and Gummy Worms are more than just a dessert. They’re a memory in the making. They’re the kind of thing you throw together on a busy Tuesday night and suddenly the whole kitchen is filled with laughter and chocolatey smiles. They’re proof that you don’t need fancy equipment or hours in the kitchen to create something truly special.
I love this recipe because it’s forgiving. You can’t really mess it up. The kids can help, the adults can enjoy, and everyone leaves happy. It’s the perfect Halloween treat for all ages.
Now I want to hear from you. Have you made dirt cups before? What’s your favorite gummy worm flavor? Drop a comment below and let me know your twist on this classic. And if you try this recipe, please share a photo—I’d love to see your spooky creations!
Frequently Asked Questions
Can I make these dirt cups ahead of time?
Yes! They actually taste better the next day. You can assemble them up to 24 hours in advance and store them covered in the refrigerator. Just wait to add the gummy worms until right before serving to keep them from getting too soft.
Can I use homemade chocolate pudding instead of instant?
Absolutely. Homemade pudding will be richer and creamier, but it will also take longer to set. Just make sure it’s completely cool before layering, or the Oreo crumbs will get mushy.
What if I don’t have clear cups?
You can use any small cups or bowls, but you won’t see the layers. If you’re serving them at a party, clear cups really make the “dirt” effect pop. You can find them at any dollar store.
Can I use a different type of cookie?
Of course! Golden Oreos, chocolate wafers, or even crushed graham crackers work great. Just keep in mind that the flavor will change. Golden Oreos make for a “sandy” dirt, which is also very cute.
How do I keep the gummy worms from sinking into the pudding?
Make sure you have a thick enough layer of Oreo crumbs on top. I use about 1.5 to 2 tablespoons. You can also let the pudding set in the fridge for 30 minutes before adding the top layer of dirt and worms. This gives the pudding a firmer surface.
Pin This Recipe!
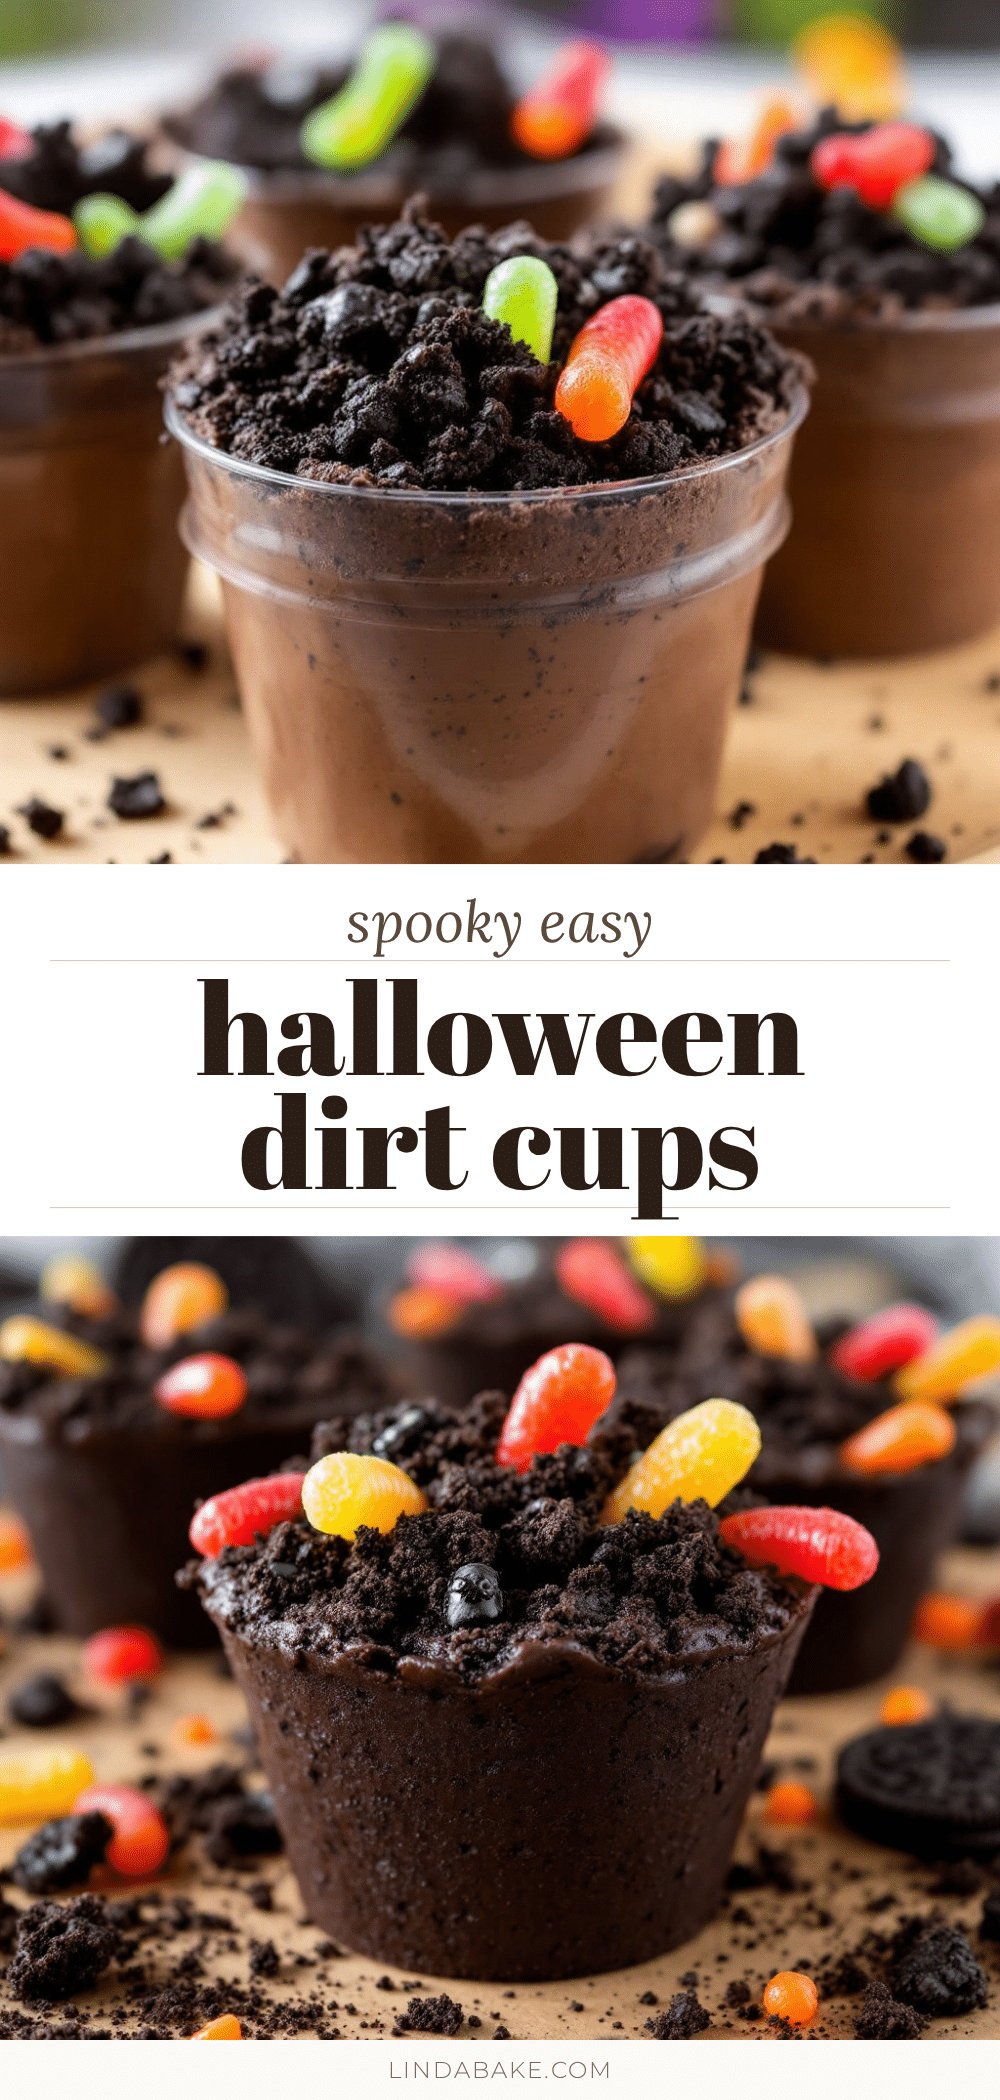
Easy Halloween Dirt Cups with Crushed Oreos and Gummy Worms

These Easy Halloween Dirt Cups with Crushed Oreos and Gummy Worms are a quick, no-bake dessert that comes together in just 10 minutes. Creamy chocolate pudding layered with crunchy Oreo ‘dirt’ and topped with gummy worms creates a fun, spooky treat that kids and adults love.
- Prep Time: 10 minutes
- Cook Time: 0 minutes
- Total Time: 10 minutes (plus optional 30 minutes chilling)
- Yield: 6 servings 1x
- Category: Dessert
- Cuisine: American
Ingredients
- 1 (3.9 oz) box instant chocolate pudding mix
- 2 cups cold milk
- 1 (14.3 oz) package Oreo cookies
- 1 (4.5 oz) bag gummy worms
- Optional: extra gummy worms, crushed graham crackers, or plastic spiders for garnish
Instructions
- Make the pudding: In a mixing bowl, pour the cold milk. Add the entire box of instant chocolate pudding mix. Whisk vigorously for about 2 minutes, or use an electric mixer on low speed. The mixture will start to thicken. Stop when it’s smooth and creamy. Let it sit for 5 minutes to set completely.
- Crush the Oreos: While the pudding is setting, place the entire package of Oreos into a large Ziploc bag. Seal tightly, pushing out as much air as possible. Use a rolling pin or the bottom of a heavy pan to crush the cookies into fine crumbs with a mix of fine dust and slightly larger pebbles. Alternatively, pulse in a food processor in batches until desired consistency.
- Layer the cups: Grab clear cups. Start with a generous spoonful (about 2 tablespoons) of crushed Oreos at the bottom of each cup.
- Add the pudding: Spoon the chocolate pudding on top of the Oreo layer, filling the cup about two-thirds full. Use the back of a spoon to smooth the top slightly.
- Top with ‘dirt’: Sprinkle another generous layer (about 1.5 to 2 tablespoons) of crushed Oreos over the pudding to completely cover it.
- Add the worms: Gently press a few gummy worms into the top layer of Oreo crumbs at different angles—some poking straight up, some half-hidden. Optionally, let a few ‘worms’ dangle over the edge.
- Chill (optional but recommended): Refrigerate the cups for at least 30 minutes before serving to allow the pudding to firm up and the Oreo crumbs to soften slightly.
Notes
For best texture, chill for at least 30 minutes. The Oreo crumbs will soften over time, making them taste more like real dirt. These cups can be stored in the refrigerator for up to 3 days. Do not freeze. For a super smooth pudding, blend with an immersion blender for 10 seconds after whisking. Let kids help crush the Oreos for fun.
Nutrition
- Serving Size: 1 cup
- Calories: 350
- Sugar: 38
- Sodium: 380
- Fat: 13.5
- Saturated Fat: 5
- Carbohydrates: 55
- Fiber: 2
- Protein: 5
Keywords: Halloween dirt cups, Oreo dirt cups, gummy worm dessert, no-bake Halloween dessert, easy Halloween treat, chocolate pudding cups, kids Halloween recipe


