My sister laughed when I told her I was putting pinwheels in the freezer. “They’ll get soggy,” she said, shaking her head like I’d suggested packing soup in a paper bag. And honestly? I thought she might be right. I’d had my fair share of sad, limp tortillas that tasted more like refrigerator than lunch. But I needed a solution. Mornings were chaos—backpacks lost, shoes missing, and me standing at the counter trying to roll something edible before the bus arrived. So I did what any stubborn person does. I tested it anyway.
I made a batch, wrapped them tight, and tossed them in the freezer with zero expectations. A week later, I pulled one out, let it thaw in the fridge overnight, and took a bite. It wasn’t just okay. It was actually good. The turkey was still tender, the cheese held its shape, and the tortilla hadn’t turned into a mushy mess. That’s when I knew I had something worth sharing. These Easy Freezer-Friendly Turkey and Cheese Lunchbox Pinwheels aren’t just a hack—they’re a genuine time-saver that actually tastes like real food.
No fancy techniques. No expensive ingredients. Just a simple, reliable recipe that makes weekday lunches feel less like a chore and more like a small victory. And if my skeptical sister can come around, I promise you will too.
Why You’ll Love This Recipe
Let me tell you why these pinwheels have become my go-to for school lunches, workday meals, and even road trip snacks. They check every box I need without making me feel like I’m cutting corners.
- Quick & Easy: You can assemble the whole batch in under 15 minutes. Seriously. Spread, layer, roll, slice. That’s it.
- Simple Ingredients: You probably already have tortillas, cream cheese, turkey, and cheese in your kitchen right now. No special trips to the store.
- Perfect for Meal Prep: Make them on Sunday, freeze them, and grab one each morning. No thinking required.
- Crowd-Pleaser: Kids actually eat these without complaint. Adults do too. I’ve seen it happen at more than one lunch table.
- Unbelievably Delicious: The cream cheese keeps everything moist and flavorful, even after freezing. It’s comfort food in a portable, no-mess package.
What makes this recipe different from all those other pinwheel recipes out there? It’s the technique. I tested freezing times, tortilla brands, and cream cheese spreads until I found the combination that works every single time. No sogginess. No dry edges. Just perfectly rolled pinwheels that taste fresh even a month later. This isn’t just another version—it’s the version I trust with my own family’s lunches.
What Ingredients You Will Need
This recipe uses simple, pantry-friendly ingredients to deliver a lunch that’s both satisfying and stress-free. Here’s what you’ll need to grab.
- Large flour tortillas (10-inch size works best for rolling; burrito-sized are great too)
- 8 oz cream cheese, softened to room temperature (full-fat gives the best texture for freezing)
- 1/4 cup mayonnaise (adds creaminess and prevents the cream cheese from getting too firm when frozen)
- 1/2 teaspoon garlic powder
- 1/4 teaspoon onion powder
- 1/4 teaspoon black pepper
- 8-10 slices deli turkey (I prefer oven-roasted or honey turkey for balanced flavor)
- 8-10 slices provolone or cheddar cheese (provolone melts beautifully; cheddar adds a sharper kick)
- Optional: 1/4 cup finely shredded lettuce (add it fresh after thawing, not before freezing)
A few notes from my own trials. I’ve tried low-fat cream cheese, and honestly, it gets a little watery after freezing. Stick with full-fat for the best results. For the tortillas, avoid the thin “wraps” or low-carb versions—they crack when you roll them after freezing. Go with standard flour tortillas. If you want a whole wheat option, that works fine too, just make sure they’re pliable and fresh.
You can also swap the turkey for ham or roast beef if you have leftovers from another meal. And if you’re feeling adventurous, try adding a thin layer of cranberry sauce or honey mustard before rolling. Just keep it thin so the pinwheels hold together.
Equipment Needed
You don’t need much for this recipe, which is part of the beauty. Here’s what I use every time.
- Large cutting board (a clean, flat surface for rolling)
- Sharp knife (a serrated knife works best for clean slices without squishing the roll)
- Plastic wrap or parchment paper (for wrapping the rolls tightly before freezing)
- Freezer-safe zip-top bags (quart-sized works perfectly for storing individual rolls)
- Small mixing bowl (for combining the cream cheese spread)
- Rubber spatula (for spreading the cream cheese evenly)
If you don’t have plastic wrap, you can use reusable beeswax wraps or even aluminum foil. Just make sure the wrap is tight against the roll to prevent freezer burn. I’ve also used a bench scraper to slice the pinwheels when my knife was dull—it works surprisingly well and gives cleaner cuts.
Preparation Method

Let’s walk through this step by step. I promise it’s easier than you think.
- Make the cream cheese spread. In a small bowl, combine the softened cream cheese, mayonnaise, garlic powder, onion powder, and black pepper. Mix until smooth and fully combined. Taste it—you want it slightly more seasoned than you think, because the flavor will mellow out after freezing.
- Prepare your work surface. Lay one tortilla flat on your cutting board. If it feels stiff, microwave it for 10 seconds to make it more pliable. This makes rolling so much easier and prevents cracks.
- Spread the cream cheese mixture. Using your rubber spatula, spread about 2 tablespoons of the mixture evenly across the entire tortilla, leaving a 1-inch border around the edges. Don’t skimp here—the cream cheese is what keeps everything together and prevents sogginess.
- Layer the turkey. Place 2-3 slices of turkey flat over the cream cheese, overlapping slightly. Make sure the turkey covers the entire surface area for even flavor in every bite.
- Add the cheese. Lay 2-3 slices of provolone or cheddar over the turkey. If your cheese slices are large, you can tear them in half and arrange them to cover the turkey completely.
- Roll it tight. Starting from the edge closest to you, begin rolling the tortilla away from you, keeping even pressure. Roll as tightly as you can without tearing the tortilla. When you reach the end, press down gently to seal the seam.
- Wrap and chill. Place the rolled tortilla seam-side down on a piece of plastic wrap. Roll it up tightly, twisting the ends like a candy wrapper. This keeps the roll compact and prevents it from unrolling in the freezer. Repeat with remaining tortillas.
- Freeze the rolls. Place the wrapped rolls in a single layer in your freezer for 1-2 hours, or until firm. This step is crucial—it makes slicing so much easier and cleaner.
- Slice into pinwheels. Once the rolls are firm, unwrap each one and place it on your cutting board. Using a sharp knife, slice into 1-inch thick rounds. A gentle sawing motion works better than pressing down, which can squish the roll.
- Package for storage. Place the sliced pinwheels in a single layer inside a freezer-safe bag. Squeeze out as much air as possible before sealing. Label with the date and contents. They’ll keep for up to 3 months.
A quick tip from experience: if your pinwheels start to unroll while slicing, pop them back in the freezer for 15 minutes. That extra chill makes all the difference. And don’t worry if the first few slices look a little messy—the end pieces are always the baker’s tax anyway.
Cooking Tips & Techniques
After making these pinwheels more times than I can count, I’ve picked up a few tricks that make the process smoother and the results better.
Don’t overfill. It’s tempting to pile on the turkey and cheese, but too much filling makes the pinwheels bulge and fall apart. Stick to the amounts listed above. You want a balanced ratio of filling to tortilla.
Temperature matters. Cold cream cheese is impossible to spread evenly. Let it sit on the counter for 30 minutes before you start. If you’re in a hurry, microwave it in 10-second bursts until soft but not melted.
Use a damp paper towel. If your tortillas feel dry or crack when you roll them, place a damp paper towel over them and microwave for 15 seconds. The steam softens them right up. I learned this after ruining an entire batch of tortillas that cracked like old pavement.
Slice with confidence. Hesitation leads to squished pinwheels. Use a sharp knife and cut with a single, smooth motion. If you’re making a big batch, chill the rolls for at least 2 hours before slicing—it’s worth the wait.
Label everything. I cannot stress this enough. Frozen pinwheels all look the same after a week. Write the date and filling on the bag with a permanent marker. Future you will be grateful.
Variations & Adaptations
One of my favorite things about this recipe is how easy it is to change up. Here are some variations I’ve tried and loved.
- Ham and Swiss: Swap the turkey for deli ham and use Swiss cheese instead of provolone. Add a thin smear of Dijon mustard for extra zing. This version reminds me of a classic croissant sandwich, minus the flaky mess.
- Veggie Lover’s: Skip the meat entirely and layer roasted red peppers, cucumber strips, and cream cheese with fresh dill. It’s a great option for meatless Mondays or when you need something lighter.
- Spicy Southwest: Add a tablespoon of chopped pickled jalapeños to the cream cheese mixture, use pepper jack cheese, and swap turkey for sliced chicken breast. The heat cuts through the creaminess beautifully.
- Gluten-Free Option: Use gluten-free tortillas (look for ones labeled “soft and pliable”) and check that your deli meats and cheese are gluten-free. The technique stays the same, just handle the tortillas gently as they can be more fragile.
- Dairy-Free Adaptation: Use dairy-free cream cheese and vegan cheese slices. I’ve tested this with a few brands, and the key is to let the dairy-free cream cheese come to room temperature before mixing. It spreads better that way.
My personal favorite variation? The ham and Swiss version with a smear of honey mustard. It’s simple but feels a little fancy, and my kids actually request it over the original. That’s a win in my book.
Serving & Storage Suggestions
These pinwheels are designed to be eaten cold or at room temperature, which makes them perfect for lunchboxes. Here’s how to serve and store them for the best results.
Serving: Pull the desired number of pinwheels from the freezer the night before and let them thaw in the refrigerator. By morning, they’re ready to pack. If you forget, you can thaw them at room temperature for about 30 minutes. They’re best eaten within 24 hours of thawing. For a fun presentation, arrange them in a bento box with fresh fruit, veggie sticks, and a small dip like ranch or hummus.
Storage: Keep frozen pinwheels in a sealed freezer bag for up to 3 months. Once thawed, store them in the refrigerator for up to 3 days. I don’t recommend refreezing after thawing—the texture changes and they can get a little mushy.
Reheating: These are meant to be served cold, but if you prefer them slightly warm, microwave them for 10-15 seconds. Just be careful not to overdo it, or the tortilla can become chewy. For a hot lunch option, try our Easy Mini Turkey Meatball Lunchbox Cups with Marinara instead—they reheat beautifully.
One thing I’ve noticed: the flavors actually meld together better after a day in the fridge. So if you can, make these a day ahead even if you’re not freezing them. The cream cheese spreads its magic overnight, and every bite tastes more cohesive.
Nutritional Information & Benefits
Here’s a rough estimate for one serving (about 4 pinwheels, depending on size).
Per serving: Calories 320, Fat 18g, Saturated Fat 9g, Cholesterol 55mg, Sodium 680mg, Carbohydrates 22g, Fiber 1g, Sugar 3g, Protein 16g.
These pinwheels offer a balanced mix of protein from the turkey and cheese, healthy fats from the cream cheese, and energy from the tortilla. The protein helps keep kids (and adults) full through the afternoon, while the fat content provides sustained energy without a sugar crash.
For a lighter option, use reduced-fat cream cheese and low-sodium turkey. You can also swap the flour tortilla for a whole wheat version to add a little extra fiber. If you’re watching sodium, look for deli meats labeled “low sodium” or “no salt added”—they’re widely available and taste just as good.
From a personal perspective, I love that this recipe gives me control over what goes into my family’s lunches. No mystery ingredients, no preservatives, just real food that I assembled with my own hands. That peace of mind is worth more than any convenience food.
Conclusion
These Easy Freezer-Friendly Turkey and Cheese Lunchbox Pinwheels have genuinely changed how I handle weekday lunches. No more morning panic, no more soggy sandwiches, no more spending money on overpriced pre-made options. Just a simple, reliable recipe that delivers every single time.
I hope you give them a try and make them your own. Add your favorite fillings, adjust the seasonings, or let your kids help with the rolling—it’s a fun kitchen activity that teaches them about meal prep. And when you find yourself pulling a perfectly rolled pinwheel from the freezer on a busy Tuesday morning, you’ll understand why I love this recipe so much.
Have you tried these pinwheels? What variations did you come up with? Drop a comment below and let me know—I’m always looking for new ideas to test in my own kitchen. And if you’re looking for another lunchbox-friendly option, don’t miss our Easy Turkey and Cheese Sushi Roll-Ups for a fun twist on the same concept. Happy rolling!
Frequently Asked Questions
Can I use corn tortillas instead of flour?
Corn tortillas are smaller and more brittle, so they don’t roll as well for pinwheels. They tend to crack and break, especially after freezing. Stick with flour tortillas for the best results. If you need a gluten-free option, look for large gluten-free flour tortillas labeled as soft and pliable.
How long do these pinwheels last in the freezer?
Properly stored in a sealed freezer bag, these pinwheels will stay fresh for up to 3 months. After that, the texture can start to degrade, and the tortilla may become dry. I recommend labeling your bags with the date so you know when to use them.
Can I add vegetables like spinach or bell peppers?
Absolutely! Just keep in mind that watery vegetables like tomatoes or cucumber can make the pinwheels soggy after freezing. If you want to add veggies, stick with drier options like shredded carrots, bell pepper strips, or baby spinach. Or add fresh veggies after thawing, right before serving.
Do I have to freeze them before slicing?
It’s not strictly necessary, but it makes a huge difference. Freezing the rolls for 1-2 hours firms up the cream cheese and makes slicing clean and easy. If you try to slice them right after rolling, you’ll end up with squished, messy pinwheels. Trust me on this one.
Can I use flavored cream cheese?
Yes! Chive and onion cream cheese works wonderfully with turkey, and garden vegetable cream cheese adds a nice savory note. Just be aware that flavored cream cheeses often have a softer texture, so you might want to skip the mayonnaise in the spread to keep things from getting too loose.
Pin This Recipe!
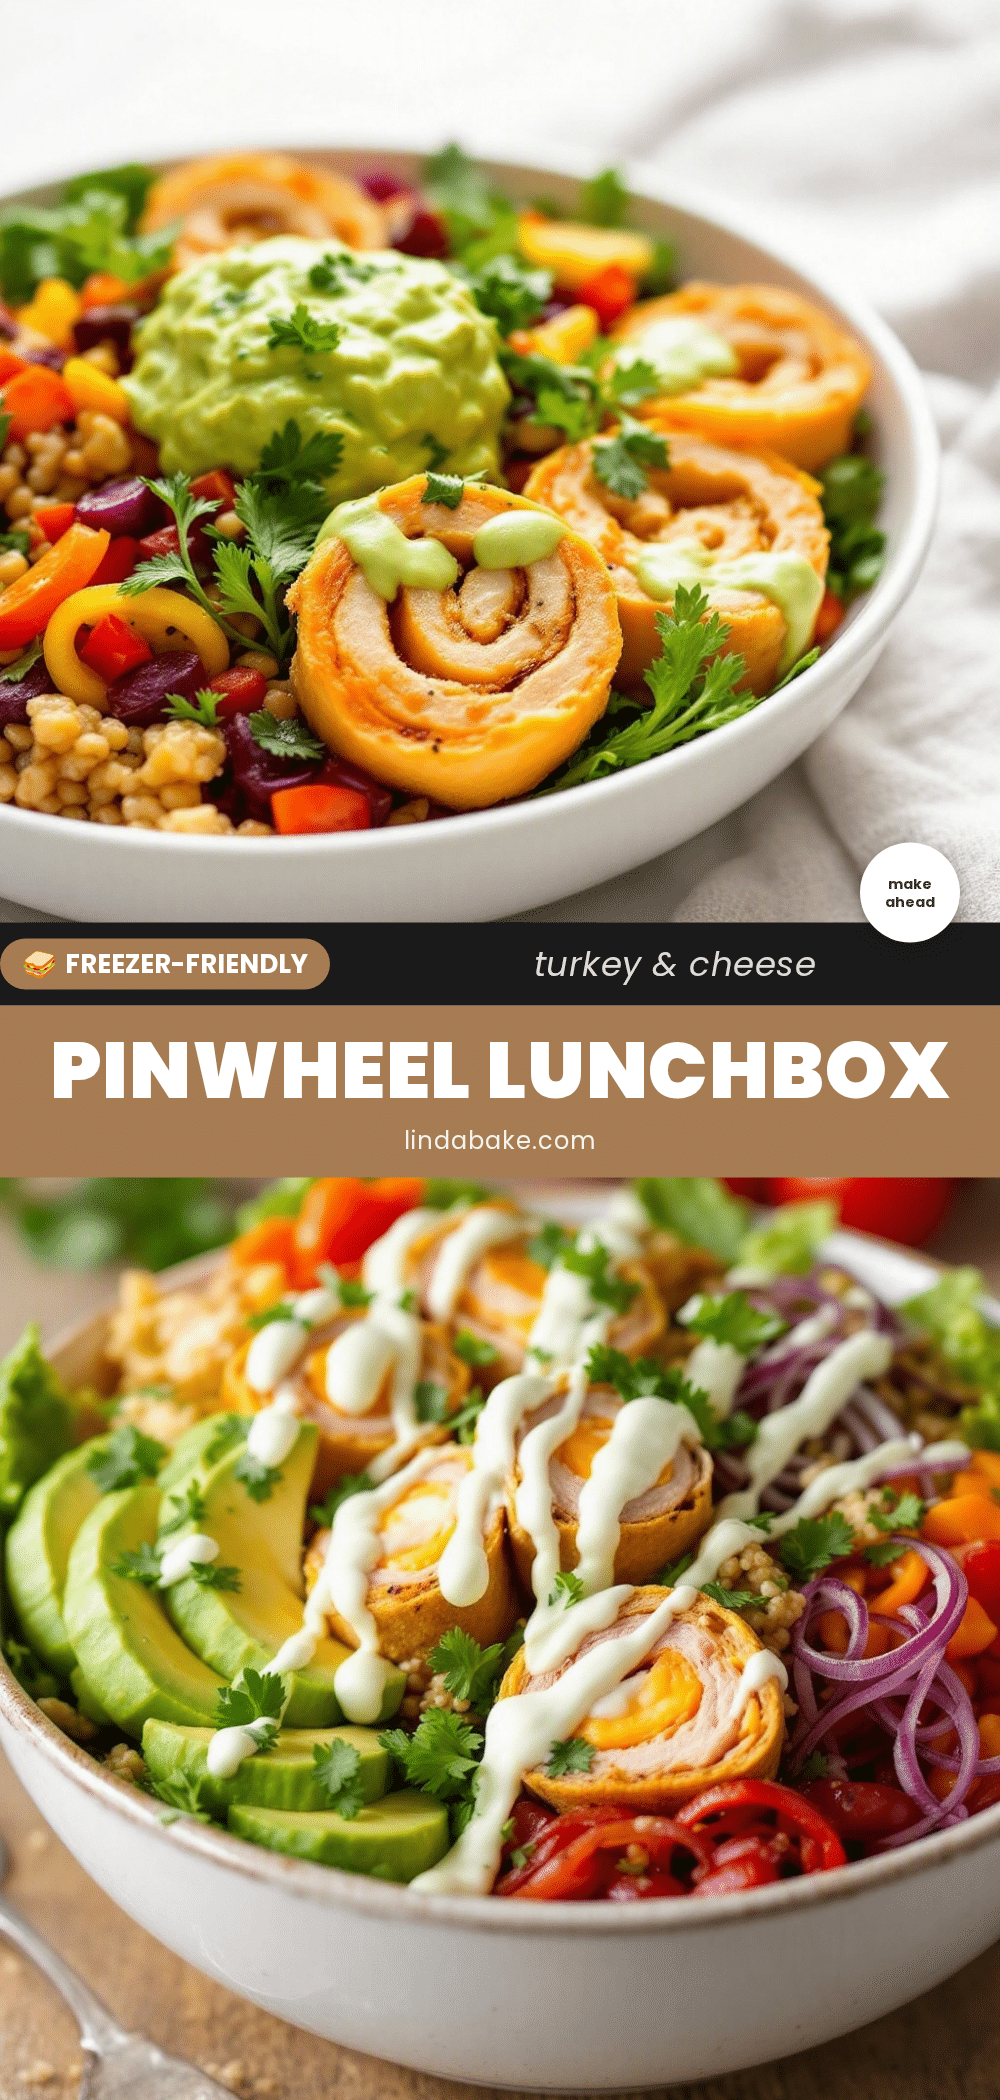
Easy Freezer-Friendly Turkey and Cheese Pinwheels

These Easy Freezer-Friendly Turkey and Cheese Lunchbox Pinwheels are a genuine time-saver that actually tastes like real food. Made with simple ingredients and a tested technique, they stay fresh and delicious even after freezing, making weekday lunches a breeze.
- Prep Time: 15 minutes
- Cook Time: 0 minutes
- Total Time: 15 minutes (plus 1-2 hours freezing time)
- Yield: 4 servings 1x
- Category: Lunch
- Cuisine: American
Ingredients
- 4 large flour tortillas (10-inch size works best for rolling; burrito-sized are great too)
- 8 oz cream cheese, softened to room temperature (full-fat gives the best texture for freezing)
- 1/4 cup mayonnaise (adds creaminess and prevents the cream cheese from getting too firm when frozen)
- 1/2 teaspoon garlic powder
- 1/4 teaspoon onion powder
- 1/4 teaspoon black pepper
- 8–10 slices deli turkey (I prefer oven-roasted or honey turkey for balanced flavor)
- 8–10 slices provolone or cheddar cheese (provolone melts beautifully; cheddar adds a sharper kick)
- Optional: 1/4 cup finely shredded lettuce (add it fresh after thawing, not before freezing)
Instructions
- Make the cream cheese spread. In a small bowl, combine the softened cream cheese, mayonnaise, garlic powder, onion powder, and black pepper. Mix until smooth and fully combined. Taste it—you want it slightly more seasoned than you think, because the flavor will mellow out after freezing.
- Prepare your work surface. Lay one tortilla flat on your cutting board. If it feels stiff, microwave it for 10 seconds to make it more pliable. This makes rolling so much easier and prevents cracks.
- Spread the cream cheese mixture. Using your rubber spatula, spread about 2 tablespoons of the mixture evenly across the entire tortilla, leaving a 1-inch border around the edges. Don’t skimp here—the cream cheese is what keeps everything together and prevents sogginess.
- Layer the turkey. Place 2-3 slices of turkey flat over the cream cheese, overlapping slightly. Make sure the turkey covers the entire surface area for even flavor in every bite.
- Add the cheese. Lay 2-3 slices of provolone or cheddar over the turkey. If your cheese slices are large, you can tear them in half and arrange them to cover the turkey completely.
- Roll it tight. Starting from the edge closest to you, begin rolling the tortilla away from you, keeping even pressure. Roll as tightly as you can without tearing the tortilla. When you reach the end, press down gently to seal the seam.
- Wrap and chill. Place the rolled tortilla seam-side down on a piece of plastic wrap. Roll it up tightly, twisting the ends like a candy wrapper. This keeps the roll compact and prevents it from unrolling in the freezer. Repeat with remaining tortillas.
- Freeze the rolls. Place the wrapped rolls in a single layer in your freezer for 1-2 hours, or until firm. This step is crucial—it makes slicing so much easier and cleaner.
- Slice into pinwheels. Once the rolls are firm, unwrap each one and place it on your cutting board. Using a sharp knife, slice into 1-inch thick rounds. A gentle sawing motion works better than pressing down, which can squish the roll.
- Package for storage. Place the sliced pinwheels in a single layer inside a freezer-safe bag. Squeeze out as much air as possible before sealing. Label with the date and contents. They’ll keep for up to 3 months.
Notes
Use full-fat cream cheese for best results; avoid thin ‘wraps’ or low-carb tortillas as they crack after freezing. For best slicing, freeze rolls for 1-2 hours before cutting. Add fresh lettuce after thawing, not before freezing. Pinwheels can be stored in the freezer for up to 3 months. Thaw overnight in the refrigerator before serving.
Nutrition
- Serving Size: 4 pinwheels
- Calories: 320
- Sugar: 3
- Sodium: 680
- Fat: 18
- Saturated Fat: 9
- Carbohydrates: 22
- Fiber: 1
- Protein: 16
Keywords: turkey and cheese pinwheels, freezer-friendly lunch, meal prep, lunchbox ideas, easy pinwheels, turkey pinwheels, cheese pinwheels, make-ahead lunch


