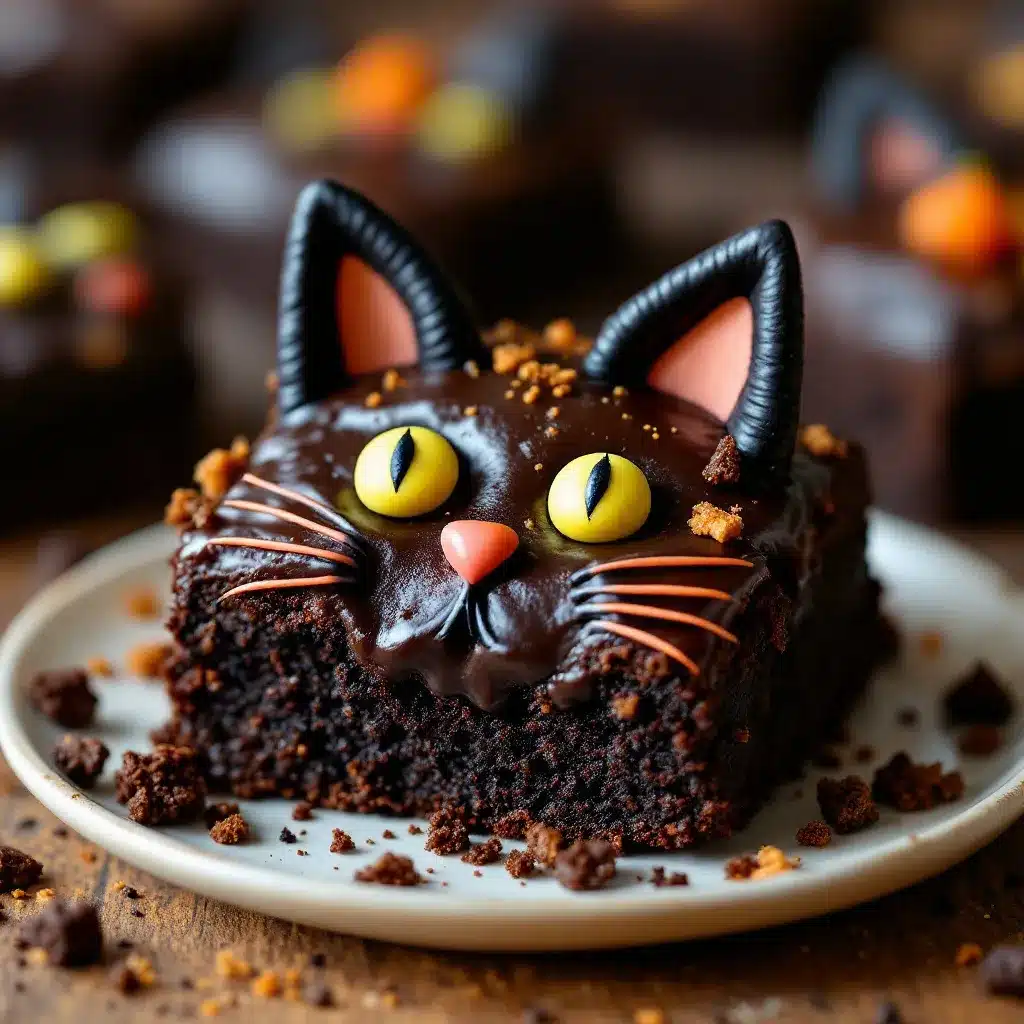
The little black ears sticking out of the fudgy brownie—that’s the whole reason I make these. Everything else is just the vehicle for those perfect, slightly crooked fondant triangles poking up like a tiny cat who’s just spotted something interesting. I’m not kidding when I say I spent an entire afternoon testing different ear shapes. Too pointy and they looked like a cartoon devil. Too rounded and they were just blobs. There’s a specific geometry to a black cat’s ear that I became weirdly obsessed with, and these brownies are the result of that very particular fixation.
It started when my niece asked if we could make something “spooky but cute” for her Halloween class party. Not scary, she emphasized. Cute. The kind of cute that makes people say “aww” before they take a bite. So I pulled out my go-to brownie recipe—the one I’ve been tweaking for years, the one that always turns out with that crackly top and fudgy center—and started thinking about what makes something adorable versus just another Halloween treat. The answer, honestly, was in the details. A little face, some whiskers, and those ears.
These black cat Halloween brownies aren’t complicated. They’re the kind of thing that looks like you spent hours on them when really, you just let the brownie do the heavy lifting. The fondant ears are forgiving, the faces are forgiving, and the whole thing comes together in a way that feels more like playing than baking. That’s the part that stuck with me—how making these felt like sitting on the kitchen floor with my niece, cutting out tiny fondant shapes, laughing at the ones that looked more like mice than cats. It was messy and imperfect and exactly right.
So if you need a Halloween treat that’s more charming than chilling, these are it. They’re the brownies that make people smile before they even taste them.
Why You’ll Love This Recipe
Let me tell you why these brownies have become my go-to for Halloween, and honestly, for any occasion that calls for a little whimsy.
- Fudgy, Not Cakey: These are real brownies—dense, rich, with that signature crackly top. No dry, crumbly texture here. The kind that makes you close your eyes after the first bite.
- Surprisingly Simple: The fondant ears and faces look intricate, but they’re just cut-out shapes. You don’t need fancy tools or sculpting skills. I promise if I can do it, you can do it.
- Perfect for Halloween Parties: Whether it’s a classroom treat, a Halloween potluck, or just a fun weekend activity with the kids, these brownies fit right in. They’re conversation starters without being over-the-top.
- Customizable to Your Mood: Make them spooky with fangs and angry eyebrows, or keep them sweet with big eyes and little smiles. The face is totally up to you.
- Kid-Approved and Adult-Friendly: My niece’s friends devoured them, and the parents kept sneaking extras. There’s something about a brownie with a face that appeals to everyone.
What makes these different from other Halloween brownies? It’s the combination of that perfectly fudgy base with the playful, almost sculptural fondant details. You get the satisfaction of a homemade brownie with the charm of a decorated cookie, all in one bite. And honestly? It’s the kind of recipe that makes you feel like a kitchen wizard without actually having to be one.
What Ingredients You Will Need
This recipe uses simple, mostly pantry-staple ingredients to create that irresistible fudgy texture and the cute cat details. Here’s what you’ll need to gather.
For the Brownies
- 1 cup (2 sticks) unsalted butter, melted and cooled slightly (I prefer Kerrygold for the richness, but any good unsalted butter works)
- 2 cups granulated sugar (this creates that crackly top)
- 4 large eggs, room temperature (cold eggs can seize the batter)
- 1 tablespoon vanilla extract (real vanilla, not imitation—it makes a difference)
- 1 cup unsweetened cocoa powder (I use Ghirardelli for deep chocolate flavor)
- 1 cup all-purpose flour (spooned and leveled, not scooped)
- 1/2 teaspoon salt (to balance the sweetness)
- 1/2 teaspoon baking powder (for just a little lift)
- 1 cup semi-sweet chocolate chips (optional, but I love the extra pockets of melted chocolate)
For the Fondant Decorations
- 1 package (7-8 oz) black fondant (store-bought is fine—I use Wilton or Satin Ice)
- 1 package (7-8 oz) white fondant (for the eyes)
- A small amount of pink or red fondant (for the noses—you’ll use barely any)
- Powdered sugar, for dusting your work surface (cornstarch works too)
- Black food coloring gel (for the pupils and whiskers—Americolor is my go-to)
- A fine-tipped paintbrush or food-safe marker (for drawing the faces)
A note on fondant: I know some people aren’t fans of the taste, but for these brownies, it’s more about the look. You can absolutely use modeling chocolate instead if you prefer the flavor. Or, if you’re really ambitious, make your own marshmallow fondant—it’s softer and tastes better. But honestly, the store-bought stuff works perfectly for little ears and faces. Nobody’s eating a huge chunk of it; it’s just the cute details.
Equipment Needed
You don’t need a professional bakery setup for these, but a few tools make the process much smoother.
- 9×13-inch baking pan (metal pans give better browning than glass)
- Parchment paper (for easy brownie removal—don’t skip this)
- Large mixing bowls (one for wet, one for dry ingredients)
- Whisk and rubber spatula
- Small rolling pin (for the fondant—a regular rolling pin works too)
- Small circle cutter or bottle cap (for the eyes—about 1/2 inch in diameter)
- Small triangle cutter or a sharp knife (for the ears—I actually use a tiny cookie cutter I found at a baking supply store, but a paring knife works just fine)
- Toothpicks (for applying details and adjusting ear placement)
- Fine-tipped paintbrush or food-safe marker
- Wire rack (for cooling the brownies completely before decorating)
Budget-friendly tip: If you don’t have small fondant cutters, raid your kitchen for alternatives. A clean bottle cap makes perfect circles for eyes. A plastic knife can be shaped into a triangle cutter. I’ve used a chopstick to create whisker indentations in a pinch. Get creative!
Preparation Method
Step 1: Make the Brownies
- Preheat your oven to 350°F (175°C). Line your 9×13 pan with parchment paper, leaving some overhang on the long sides—this creates handles for lifting the brownies out later.
- In a large bowl, whisk together the melted butter and sugar until well combined. It should look like wet sand. Don’t overmix at this stage.
- Add the eggs one at a time, whisking after each addition. Then add the vanilla and whisk until the mixture is smooth and glossy.
- In a separate bowl, sift together the cocoa powder, flour, salt, and baking powder. This step is important—cocoa powder loves to clump, and sifting ensures it incorporates evenly.
- Gradually add the dry ingredients to the wet mixture, folding gently with a rubber spatula. Mix just until you don’t see any more flour streaks. Overmixing will make the brownies tough instead of fudgy.
- Fold in the chocolate chips if using. Pour the batter into the prepared pan and spread it evenly. The batter will be thick—that’s normal.
- Bake for 25-30 minutes. The edges should be set and starting to pull away from the pan, but the center should still look slightly underdone. A toothpick inserted in the center should come out with a few moist crumbs, not clean batter. For fudgy brownies, it’s better to underbake slightly than overbake.
- Let the brownies cool completely in the pan on a wire rack. This is crucial—if you try to decorate warm brownies, the fondant will melt and slide right off. I usually make the brownies a day ahead and decorate the next day.
Step 2: Prepare the Fondant Decorations
- Dust your work surface lightly with powdered sugar. Knead the black fondant until it’s soft and pliable—about 30 seconds. If it’s too stiff, microwave it for 5 seconds (no more, or it’ll get sticky).
- Roll out the black fondant to about 1/8-inch thickness. Using your triangle cutter or a sharp knife, cut out ear shapes. You need 2 ears per brownie. For a standard 9×13 pan cut into 12 brownies, that’s 24 ears. Cut a few extra in case some break.
- Gently shape each ear by pinching the bottom edge slightly and curving the top tip. Set them aside on a piece of parchment paper. They’ll firm up as they sit.
- Roll out the white fondant and cut out small circles for the eyes. You need 2 per brownie. I use a 1/2-inch circle cutter, but a clean bottle cap works perfectly.
- Roll out a tiny bit of pink fondant and cut out small oval or triangle shapes for the noses. They should be about 1/4 inch wide. Don’t stress about perfection—cat noses are naturally irregular.
Step 3: Assemble the Cats
- Once the brownies are completely cool, lift them out of the pan using the parchment paper. Place them on a cutting board. Using a sharp knife, cut them into rectangles. I go for 12 even pieces, but you can make them larger or smaller depending on your preference.
- For each brownie, gently press two black fondant ears into the top edge. They should stick slightly to the brownie surface. If they don’t, dab a tiny bit of water on the bottom of the ear before pressing it on.
- Place two white fondant circles below the ears for the eyes. Press them gently so they adhere.
- Using the black food coloring gel and a fine-tipped paintbrush (or a food-safe marker), draw a small dot in the center of each white circle for the pupil. This is where the cat’s expression comes to life—big pupils look cute and surprised, smaller pupils look more mischievous.
- Place the pink fondant nose centered below the eyes. Again, press gently to adhere.
- Using the black food coloring, draw a small mouth below the nose. I do a tiny “w” shape for a sweet smile, or a little triangle for an open mouth. Then draw three whiskers on each side, curving outward from the nose.
- Let the decorated brownies sit for about 15 minutes so the fondant sets. Then serve or store.
Cooking Tips & Techniques
After making these black cat Halloween brownies about six times in one week (yes, my neighbors were very happy), I learned a few things the hard way.
Don’t overbake. I cannot stress this enough. The first batch I made was in the oven for 32 minutes, and while they were still good, they were more cakey than fudgy. The second batch, pulled at 27 minutes, was perfect—dense, moist, with that slightly gooey center that makes brownies irresistible. Trust the toothpick test with moist crumbs, not clean batter.
Let the brownies cool completely. I know, I know, you want to decorate them immediately. But warm brownies will melt the fondant into a sad, sticky mess. I once tried to speed things up by putting the brownies in the freezer for 20 minutes, and the condensation made the fondant slide right off. Patience is your friend here.
Work with small batches of fondant. Fondant dries out quickly when exposed to air. Keep the portions you’re not using wrapped in plastic wrap. Only roll out what you need at the moment. If your fondant starts cracking when you shape it, it’s too dry—knead in a tiny bit of vegetable shortening to soften it.
Use a light touch with the food coloring. It’s easier to add more than to fix a mistake. I use the fine-tipped paintbrush dipped very lightly in the gel, and I dab off excess on a paper towel before drawing. For the pupils, a single small dot is all you need.
Variations & Adaptations
One of the best things about these brownies is how easy they are to adapt. Here are a few ways I’ve played around with the recipe.
Gluten-Free Version: Substitute the all-purpose flour with a 1:1 gluten-free baking flour blend. I’ve used King Arthur’s Measure for Measure with great results. The texture is slightly more delicate, but the flavor is still fantastic.
Dairy-Free Version: Use a high-quality vegan butter (I like Earth Balance) and dairy-free chocolate chips. The brownies will be a touch less rich, but still delicious. The fondant is typically dairy-free, but check the package—some brands use milk powder.
Spooky Cat Variation: Instead of sweet faces, make them spooky. Use black fondant for the eyes with white pupils (reverse the colors). Draw sharp fangs on the mouth. Make the ears more pointed. My nephew requested “scary cats” for his Halloween party, and these were a hit.
Pumpkin Spice Brownies: Add 1 teaspoon of pumpkin pie spice to the dry ingredients and substitute 1/4 cup of the melted butter with 1/4 cup of pumpkin puree. The brownies will be slightly more cake-like, but the fall flavor is incredible. This version pairs beautifully with our pumpkin cream cheese muffins for a full Halloween brunch spread.
Peppermint Halloween Brownies: Add 1/2 teaspoon of peppermint extract to the batter along with the vanilla. Top the finished brownies with crushed candy canes (or peppermint candies crushed in a bag with a rolling pin). The mint-chocolate combo is surprisingly perfect for Halloween.
Serving & Storage Suggestions
These brownies are best served at room temperature, which allows the fondant to stay firm while the brownie remains fudgy. If you’ve refrigerated them, let them sit out for about 20 minutes before serving.
For presentation, I like to arrange them on a black or orange platter—the contrast makes the cat faces pop. A few strategically placed candy corn or mini pumpkins around the edges add to the Halloween vibe without overwhelming the main attraction.
Storage: Place the decorated brownies in a single layer in an airtight container. Separate layers with parchment paper if stacking. They’ll keep at room temperature for up to 3 days. Do not refrigerate—the cold will make the brownies dry and the fondant can get sticky from condensation.
Freezing: You can freeze the undecorated brownies for up to 3 months. Wrap them tightly in plastic wrap, then foil. Thaw at room temperature and decorate after thawing. I’ve done this for Halloween parties when I wanted to prep ahead, and it works beautifully.
Reheating: If you want that just-baked warmth, microwave a single brownie for 10-15 seconds. The fondant will soften slightly but should hold its shape. For a crowd, warm the undecorated brownies in a 300°F oven for 5 minutes, then add the fondant faces after they’ve cooled slightly.
Nutritional Information & Benefits
Let’s be honest—these are a treat, not a health food. But here’s the estimated breakdown for one brownie (based on 12 servings from a 9×13 pan):
- Calories: Approximately 380-420
- Fat: 20g (mostly from butter and chocolate)
- Carbohydrates: 50g
- Protein: 5g
- Fiber: 3g
- Sugar: 35g
Potential Allergens: This recipe contains dairy (butter), eggs, gluten (flour), and may contain soy (in chocolate chips and fondant). For allergen-friendly versions, see the variations section above.
Health Perspective: I’m a firm believer that food should bring joy, and these brownies do exactly that. The cocoa powder is rich in antioxidants, and dark chocolate has some health benefits in moderation. Plus, the act of decorating and sharing these with loved ones is good for the soul. Balance is everything—enjoy these as a special occasion treat, not an everyday snack.
Conclusion
These black cat Halloween brownies are more than just a dessert—they’re a little moment of joy. The kind of thing that makes a Halloween party feel special, that makes kids (and adults) light up when they see them. They’re proof that you don’t need elaborate skills or expensive tools to create something genuinely adorable and delicious.
I love that this recipe lets you be playful. Maybe your cat has one ear slightly higher than the other. Maybe the whiskers are a little crooked. Maybe the eyes are different sizes. That’s the charm—each brownie has its own personality. It’s the opposite of mass-produced perfection, and that’s exactly what makes it special.
I’d love to see your versions! Tag me when you make them, tell me what faces your cats ended up with, and let me know if you tried any fun variations. And if you’re looking for more Halloween treats, don’t miss our cheddar ranch popcorn snack mix for a savory option. Happy baking, and may your brownies be fudgy and your cats be cute!
Frequently Asked Questions
Can I use a boxed brownie mix instead of making from scratch?
Absolutely! If you’re short on time or just prefer the convenience, go ahead and use your favorite boxed mix. Just follow the package instructions for fudgy brownies (usually using less oil or adding an extra egg yolk). The fondant decorations will work on any brownie base.
How far in advance can I make these brownies?
You can bake the brownies up to 2 days ahead and store them undecorated at room temperature. Decorate them the day you plan to serve them—the fondant stays fresher and the faces look their best. If you need to prep even further ahead, freeze the undecorated brownies for up to 3 months.
My fondant keeps cracking when I try to shape the ears. What am I doing wrong?
This usually means the fondant is too dry. Knead in a tiny amount of vegetable shortening (about 1/4 teaspoon at a time) until it becomes pliable again. Also, make sure you’re not working with fondant that’s been exposed to air too long—keep unused portions wrapped in plastic wrap.
Can I use frosting instead of fondant for the faces?
Yes, but it will look different. Use black frosting for the ears and face details, and white frosting for the eyes. You’ll need to pipe the shapes rather than cutting them out, which requires a steady hand. The fondant gives a cleaner, more polished look, but frosting works in a pinch.
How do I transport these brownies without messing up the faces?
Place them in a single layer in a container with a tight-fitting lid. If you need to stack them, separate layers with wax paper or parchment paper, and make sure the fondant has fully set (at least 30 minutes at room temperature) before stacking. For long trips, consider decorating the brownies after you arrive at your destination.
Pin This Recipe!
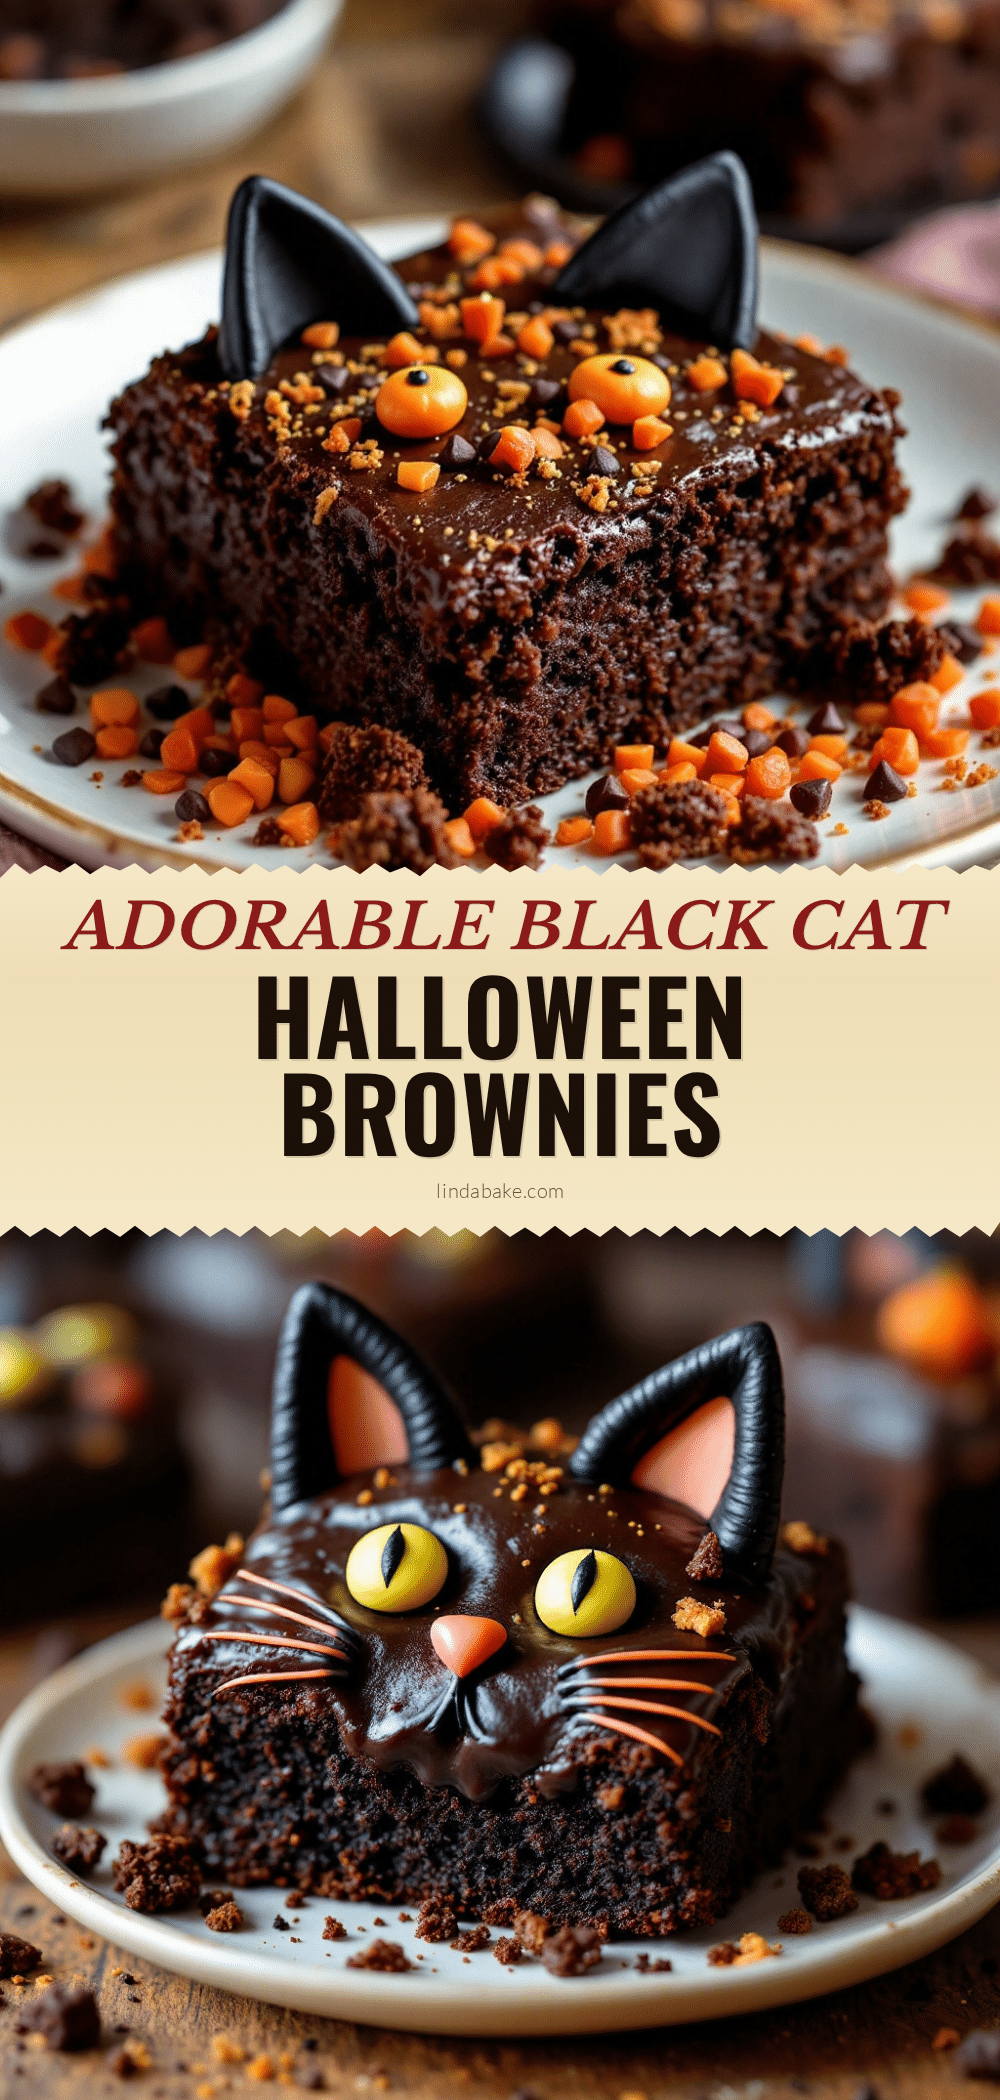
Easy Black Cat Halloween Brownies with Fondant Ears
Fudgy brownies topped with adorable black cat fondant ears and faces. A spooky-cute Halloween treat that’s surprisingly simple to make and perfect for parties.
- Prep Time: 30 minutes
- Cook Time: 30 minutes
- Total Time: 1 hour
- Yield: 12 servings 1x
- Category: Dessert
- Cuisine: American
Ingredients
- 1 cup (2 sticks) unsalted butter, melted and cooled slightly
- 2 cups granulated sugar
- 4 large eggs, room temperature
- 1 tablespoon vanilla extract
- 1 cup unsweetened cocoa powder
- 1 cup all-purpose flour, spooned and leveled
- 1/2 teaspoon salt
- 1/2 teaspoon baking powder
- 1 cup semi-sweet chocolate chips (optional)
- 1 package (7-8 oz) black fondant
- 1 package (7-8 oz) white fondant
- Small amount of pink or red fondant
- Powdered sugar, for dusting
- Black food coloring gel
- Fine-tipped paintbrush or food-safe marker
Instructions
- Preheat oven to 350°F (175°C). Line a 9×13-inch baking pan with parchment paper, leaving overhang on the long sides.
- In a large bowl, whisk together melted butter and sugar until well combined.
- Add eggs one at a time, whisking after each addition. Add vanilla and whisk until smooth and glossy.
- In a separate bowl, sift together cocoa powder, flour, salt, and baking powder.
- Gradually add dry ingredients to wet mixture, folding gently with a rubber spatula until just combined. Do not overmix.
- Fold in chocolate chips if using. Pour batter into prepared pan and spread evenly.
- Bake for 25-30 minutes until edges are set and center looks slightly underdone. A toothpick inserted in center should come out with moist crumbs.
- Let brownies cool completely in the pan on a wire rack.
- Dust work surface with powdered sugar. Knead black fondant until soft and pliable. Roll out to 1/8-inch thickness.
- Cut out 24 ear shapes using a triangle cutter or sharp knife. Gently shape each ear by pinching the bottom and curving the top tip. Set aside.
- Roll out white fondant and cut out 24 small circles for eyes using a 1/2-inch cutter or bottle cap.
- Roll out pink fondant and cut out 12 small oval or triangle shapes for noses.
- Lift cooled brownies from pan using parchment paper. Cut into 12 rectangles.
- For each brownie, press two black fondant ears into the top edge. If needed, dab a tiny bit of water on the bottom of each ear to help it stick.
- Place two white fondant circles below the ears for eyes. Press gently to adhere.
- Using black food coloring gel and a fine-tipped paintbrush, draw a small dot in the center of each white circle for the pupil.
- Place pink fondant nose centered below the eyes. Press gently to adhere.
- Using black food coloring, draw a small mouth below the nose (a tiny ‘w’ shape) and three whiskers on each side curving outward from the nose.
- Let decorated brownies sit for 15 minutes to allow fondant to set before serving.
Notes
Don’t overbake the brownies for a fudgy texture. Let brownies cool completely before decorating to prevent fondant from melting. Work with small batches of fondant to prevent drying out. If fondant cracks, knead in a tiny bit of vegetable shortening. Use a light touch with food coloring gel. Brownies can be baked up to 2 days ahead and stored undecorated at room temperature. Decorate the day of serving for best results.
Nutrition
- Serving Size: 1 brownie
- Calories: 400
- Sugar: 35
- Sodium: 180
- Fat: 20
- Saturated Fat: 12
- Carbohydrates: 50
- Fiber: 3
- Protein: 5
Keywords: Halloween brownies, black cat brownies, fondant decorations, fudgy brownies, spooky treats, cute Halloween desserts, kid-friendly Halloween


