Third time this week, and I finally stopped trying to chop the garlic cloves into neat little pieces. The first batch was fine—good, even. But those tiny, uniform bits kept burning in the pan while the chicken was still catching up. Second batch, I tried grating the garlic on a microplane, and honestly, it turned into a sticky paste that dissolved into the sauce before it could do its job. By Wednesday night, I was standing over the skillet with a chef’s knife in one hand and a clove in the other, and I just… smashed it. Roughly. Let some chunks be bigger than others. And that, right there, was the version where everything clicked. The honey caramelized around those uneven garlic pieces, and the ones that got a little dark on the edges added this almost-burnt-sweet depth that made the whole kitchen smell like a restaurant kitchen on a Friday night. I ate three thighs standing at the counter before I even remembered I’d planned to serve them with rice.
This recipe started as a weeknight panic meal—something to throw together when the chicken thighs were defrosted and the kids were hangry. But somewhere between the first sticky batch and the third, it became the thing I actually looked forward to making. Not because it’s fancy, but because it’s the kind of cooking that reminds you why you learned to cook in the first place. You don’t need a marinade. You don’t need to babysit it. You just need a hot pan, some patience with the first sear, and the willingness to let the sauce do its thing. That’s it. And somehow, that’s enough to make chicken thighs taste like you spent all afternoon on them.
Why You’ll Love This Recipe
Let me tell you why this one sticks. I’ve tested it about seven times now, and every single batch taught me something small—like how the honey-to-soy ratio shifts when you use dark soy versus light, or how letting the chicken rest for exactly two minutes after cooking keeps the juices from running out onto the plate. This isn’t just another sticky chicken recipe. It’s the one where the sauce actually clings to the meat instead of pooling at the bottom of the pan.
- Quick & Easy: From fridge to table in 30 minutes flat. No marinating, no complicated steps, no special equipment.
- Simple Ingredients: You probably have everything in your kitchen right now—chicken thighs, honey, soy sauce, garlic, and a few pantry staples.
- Perfect for Weeknights: This is the recipe you turn to when you forgot to plan dinner and everyone’s hungry. It works every time.
- Crowd-Pleaser: My kids fight over the last piece, and my husband asked me to put it in the regular rotation after the first try.
- Unbelievably Delicious: The sauce reduces into this glossy, sticky coating that’s equal parts sweet, savory, and garlicky. It’s the kind of dinner that makes you close your eyes after the first bite.
What makes this recipe different from all the other honey garlic chicken versions out there? It’s the technique. Most recipes tell you to dump everything in the pan at once, which gives you a watery sauce that never thickens properly. Instead, I sear the chicken first to build that golden-brown crust, then remove it, build the sauce in the same pan, and return the chicken to finish cooking. The result is a glaze that actually coats each piece instead of sliding off. And because we’re using boneless, skinless thighs, you get tender, juicy meat in half the time of bone-in cuts.
This isn’t just good chicken. It’s the kind of meal that makes a Tuesday night feel like a treat. No stress, no fuss, just really good food that comes together faster than takeout delivery.
What Ingredients You Will Need
This recipe uses simple, everyday ingredients to create something that tastes way more complex than it should. Most of these are pantry staples, so you probably don’t need to make a special trip to the store.
- Boneless, skinless chicken thighs (about 1.5 lbs or 680g) — I prefer thighs over breasts here because they stay juicy and forgiving. If you can find air-chilled thighs, they sear better. Pat them dry with paper towels before cooking for the best crust.
- Honey (⅓ cup or 110ml) — Use a runny, mild honey like clover or orange blossom. Avoid raw or crystallized honey, which won’t dissolve evenly into the sauce. If your honey is thick, microwave it for 10 seconds to loosen it up.
- Soy sauce (¼ cup or 60ml) — I use low-sodium soy sauce so I can control the salt level. Tamari or coconut aminos work great for gluten-free options. Dark soy sauce will give a deeper color and richer flavor, but regular works just fine.
- Garlic (6-8 cloves, roughly chopped) — Don’t mince it too finely. You want some chunks that will caramelize and some that stay soft. Fresh garlic is non-negotiable here—the jarred stuff won’t give you the same depth.
- Rice vinegar (2 tablespoons or 30ml) — Adds brightness to balance the sweetness. Apple cider vinegar works in a pinch, but rice vinegar is milder and less acidic.
- Sesame oil (1 tablespoon or 15ml) — This adds that toasty, nutty flavor that makes the sauce taste complete. Don’t skip it. Toasted sesame oil, not the light kind.
- Cornstarch (1 tablespoon) — Mixed with 2 tablespoons of water to make a slurry. This thickens the sauce at the end so it clings to the chicken instead of running off.
- Avocado oil or vegetable oil (2 tablespoons) — For searing the chicken. Avocado oil has a high smoke point and neutral flavor, which is perfect here.
- Optional garnishes: Sliced green onions, toasted sesame seeds, and a pinch of red pepper flakes for heat.
I recommend using a good-quality soy sauce like Kikkoman or San-J. The difference between a cheap soy sauce and a decent one is noticeable in a simple sauce like this. For honey, I’ve tried everything from local farmer’s market honey to the bear-shaped bottle, and honestly, the bear-shaped bottle works perfectly here—no need to get fancy.
Equipment Needed
You don’t need much for this recipe, which is part of the appeal. Here’s what you’ll need:
- Large skillet or frying pan (12-inch or 30cm) — A heavy-bottomed pan works best for even heat distribution. Cast iron or stainless steel gives the best sear. Nonstick works too, but you won’t get as much browning.
- Sharp chef’s knife — For chopping garlic and trimming any excess fat from the chicken thighs. A dull knife makes prep frustrating and dangerous.
- Cutting board — Wood or plastic, whatever you prefer. Just make sure it’s stable and large enough to work on.
- Tongs — For flipping the chicken and moving it around the pan. Metal tongs with silicone tips are my favorite because they don’t scratch the pan and give you good grip.
- Small bowl — For mixing the cornstarch slurry. A ramekin or small prep bowl works perfectly.
- Measuring cups and spoons — For accurate measurements. I’ve eyeballed this recipe before and regretted it—the balance of sweet and salty is important.
- Paper towels — For patting the chicken dry. This step is crucial for getting a good sear, so don’t skip it.
If you don’t have a heavy-bottomed skillet, a regular nonstick pan will work—just be patient with the sear and don’t move the chicken too early. I’ve made this in a cheap nonstick pan before, and while the crust wasn’t as impressive, the sauce still came out great.
Preparation Method
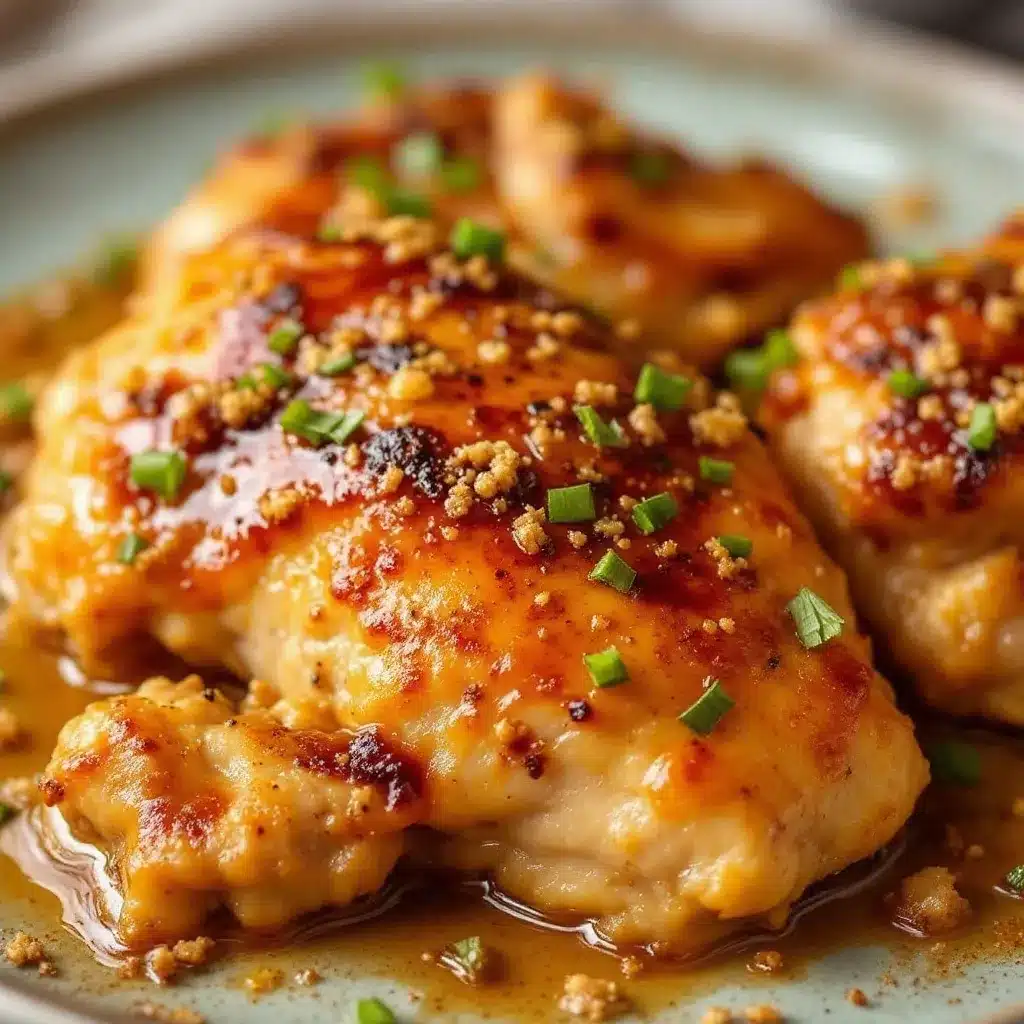
Let’s get cooking. This whole process takes about 30 minutes from start to finish, and most of that is hands-off cooking time.
- Prep the chicken. Pat the chicken thighs dry with paper towels. This is the most important step for getting a good sear. Season both sides generously with salt and pepper. Don’t be shy—the seasoning helps build flavor in the crust. Trim any excess fat or skin if needed, but leave a little for flavor.
- Make the sauce mixture. In a small bowl, whisk together the honey, soy sauce, rice vinegar, and sesame oil. Set it aside. In another small bowl, mix the cornstarch with 2 tablespoons of cold water until smooth. This is your slurry for thickening later.
- Heat the pan. Place your skillet over medium-high heat and add the avocado oil. Let it heat up until the oil shimmers and moves easily around the pan—about 2 minutes. You should see tiny wisps of smoke starting to rise. That’s your cue that the pan is ready.
- Sear the chicken. Carefully place the chicken thighs in the hot pan, skin-side down if they have skin, or just presentation-side down. Don’t overcrowd the pan—work in batches if needed. Let them cook undisturbed for 4-5 minutes. The chicken should release easily from the pan when it’s ready to flip. If it sticks, it’s not done searing yet. Flip and cook for another 3-4 minutes on the second side. The chicken should be golden brown and crispy on the outside.
- Remove the chicken. Transfer the seared chicken to a plate and set it aside. Don’t wipe out the pan—those browned bits on the bottom are flavor bombs that will infuse the sauce.
- Cook the garlic. Reduce the heat to medium-low. Add the roughly chopped garlic to the pan and stir constantly for about 30 seconds. You want it fragrant and just starting to soften, not brown. Burnt garlic turns bitter, so keep it moving.
- Build the sauce. Pour the honey-soy mixture into the pan, scraping up all those browned bits with a wooden spoon or spatula. Let it come to a simmer and cook for about 1 minute, stirring occasionally. The sauce will start to thicken slightly and smell incredible.
- Return the chicken. Place the chicken thighs back into the pan, nestling them into the sauce. Spoon some of the sauce over the tops of the chicken. Reduce the heat to low, cover the pan, and let it cook for 8-10 minutes, or until the chicken is cooked through and reaches an internal temperature of 165°F (74°C).
- Thicken the sauce. Remove the chicken from the pan again (yes, again) and set it aside. Give the cornstarch slurry a quick stir to recombine, then pour it into the simmering sauce. Whisk constantly for about 30-60 seconds until the sauce thickens to a glossy, syrupy consistency. It should coat the back of a spoon.
- Finish and serve. Return the chicken to the pan and turn to coat each piece in the thickened sauce. Let everything warm through for about 1 minute. Transfer to a serving platter, spoon any remaining sauce over the top, and garnish with sliced green onions and sesame seeds if you’re using them.
Here’s a tip I learned the hard way: don’t rush the sear. The first time I made this, I flipped the chicken after two minutes because I was impatient, and it stuck to the pan and tore apart. Let the crust develop naturally. You’ll know it’s ready when the chicken lifts easily off the pan without resistance.
Cooking Tips & Techniques
I’ve made this recipe enough times to know where things can go wrong. Here’s what I’ve learned:
Patience with the sear is everything. I ruined my first batch by moving the chicken around too much. You want to place it in the pan and leave it alone. The sizzle tells you it’s working. If you hear a gentle hiss, you’re in the sweet spot. If you hear nothing, your pan isn’t hot enough. If it’s spitting aggressively, it’s too hot—turn it down slightly.
Watch the garlic carefully. Garlic goes from fragrant to burnt in about 15 seconds. I’ve had to start over twice because I walked away from the pan while the garlic was cooking. Stay at the stove during this step. The difference between golden garlic and bitter garlic is a matter of seconds.
Don’t skip the cornstarch slurry. Some recipes skip this step and just let the sauce reduce naturally, but that takes longer and can make the sauce too salty as the soy sauce concentrates. The slurry gives you that glossy, restaurant-quality texture in under a minute. Just make sure you whisk it well before adding it—cornstarch settles fast.
Let the chicken rest between steps. I know it seems fussy to remove the chicken twice, but it makes a difference. The first rest lets the juices redistribute after searing. The second rest keeps the chicken from overcooking while you thicken the sauce. Trust me on this one.
Use a meat thermometer if you have one. Chicken thighs are forgiving, but they can still dry out if overcooked. 165°F (74°C) is the magic number. If you don’t have a thermometer, cut into the thickest thigh—the juices should run clear and the meat should be opaque all the way through.
Double the sauce if you like extra. I always make a double batch of the honey-soy mixture because my family loves spooning extra sauce over rice. Just be careful with the cornstarch slurry—you’ll need to increase it to 2 tablespoons cornstarch with 4 tablespoons water for a double batch.
Variations & Adaptations
This recipe is flexible, and I’ve tried several variations over the past few weeks. Here are some of my favorites:
Spicy Honey Garlic Chicken: Add 1-2 teaspoons of sriracha or gochujang to the sauce mixture before cooking. The heat balances beautifully with the sweet honey. I made this version last week and it was gone in minutes. If you like Korean flavors, you might also enjoy this spicy Korean-Mexican street corn dip—it has a similar sweet-spicy vibe that works great as a side.
Gluten-Free Version: Swap the soy sauce for tamari or coconut aminos. Everything else in the recipe is naturally gluten-free. Just double-check your cornstarch label—most brands are gluten-free, but some are processed in facilities that handle wheat.
Baked Version: Sear the chicken as directed, then transfer everything to a baking dish and bake at 400°F (200°C) for 15-20 minutes instead of finishing on the stovetop. This is great when you’re cooking for a crowd and don’t want to stand at the stove. The sauce will reduce slightly in the oven and get even stickier.
Chicken Breast Option: If you prefer white meat, use boneless, skinless chicken breasts. Pound them to even thickness first so they cook evenly, and reduce the covered cooking time to 6-8 minutes. Breasts dry out faster than thighs, so watch them carefully.
Extra Veggie Addition: Add broccoli florets, sliced bell peppers, or snap peas to the pan after removing the chicken the second time. Let them cook in the sauce for 2-3 minutes before adding the slurry. This turns the dish into a complete one-pan meal. I’ve done this with broccoli and it’s become my go-to weeknight dinner.
Air Fryer Adaptation: Sear the chicken in the air fryer at 400°F (200°C) for 8 minutes, flipping halfway. Meanwhile, make the sauce on the stovetop. Toss the cooked chicken in the sauce and return to the air fryer for 2 more minutes. The sauce gets wonderfully sticky and caramelized.
Serving & Storage Suggestions
This honey garlic chicken is incredibly versatile when it comes to serving. Here’s how I like to enjoy it:
Serving temperature: Serve the chicken hot, straight from the pan. The sauce is at its glossiest and most flavorful when it’s fresh. Let it rest for just 2 minutes after coating so the sauce sets slightly, then dig in.
What to serve with it: Steamed jasmine rice or coconut rice is my favorite base—it soaks up all that extra sauce. For a lighter option, try cauliflower rice or a simple green salad. Roasted broccoli or green beans pair beautifully. If you’re in the mood for something different, this chicken also works great alongside this Thai coconut curry pulled pork for a fun fusion dinner night.
Presentation tips: Arrange the chicken on a platter and spoon the remaining sauce over the top. Sprinkle with sliced green onions, toasted sesame seeds, and a pinch of red pepper flakes for color and texture. A few fresh cilantro leaves add a nice pop of green.
Storing leftovers: Store any leftover chicken in an airtight container in the refrigerator for up to 4 days. The flavors actually deepen overnight as the sauce continues to penetrate the meat. I’ve found the chicken tastes even better the next day, if you can believe it.
Reheating instructions: The best way to reheat is in a skillet over medium-low heat with a splash of water or chicken broth to loosen the sauce. Cover and warm for 3-4 minutes, flipping halfway. You can also microwave individual portions for 1-2 minutes, but the sauce won’t be as glossy. Avoid reheating at high temperatures, which can make the chicken tough and the sauce separate.
Freezing: This recipe freezes well for up to 3 months. Let the chicken cool completely, then place it in a freezer-safe container with the sauce. Thaw overnight in the refrigerator and reheat as directed above. The sauce might separate slightly after freezing, but a quick whisk while reheating brings it back together.
How flavors develop over time: Fresh out of the pan, this chicken is all about that sticky, glossy sauce with bright garlic notes. After a day in the fridge, the honey and soy meld together more deeply, and the garlic mellows into something sweeter and more rounded. I honestly love the leftovers just as much as the fresh batch.
Nutritional Information & Benefits
Here’s a rough estimate of the nutritional content per serving (based on 4 servings, with chicken and sauce only):
- Calories: Approximately 380-420 per serving
- Protein: 32-35g
- Fat: 18-22g
- Carbohydrates: 22-25g
- Sugar: 18-20g (from honey)
- Sodium: 700-800mg (varies by soy sauce brand)
Health benefits of key ingredients: Chicken thighs are a great source of lean protein, iron, and B vitamins, which support energy metabolism. Garlic contains allicin, a compound linked to immune support and heart health. Honey provides antioxidants and natural sweetness without refined sugar. Sesame oil adds healthy fats and a dose of vitamin E.
Dietary considerations: This recipe is naturally dairy-free and can be made gluten-free with tamari or coconut aminos. It’s not low-carb due to the honey, but you can reduce the honey to 2 tablespoons for a lower-sugar version—just add a splash of chicken broth to maintain the sauce volume. If you’re watching sodium, use low-sodium soy sauce and reduce the added salt during seasoning.
Potential allergens: This recipe contains soy (from soy sauce) and sesame (from sesame oil). For soy-free options, use coconut aminos. For sesame-free, substitute the sesame oil with avocado oil and skip the sesame seed garnish.
Personal wellness perspective: I love that this recipe feels indulgent but is made with whole, recognizable ingredients. There’s no refined sugar, no weird preservatives, and nothing processed. It’s the kind of meal that satisfies a craving for something sweet and savory without leaving you feeling heavy or guilty.
Conclusion
This easy 30-minute honey garlic chicken thighs recipe has become a staple in my kitchen for a reason. It’s fast enough for a busy weeknight, impressive enough for company, and simple enough that you don’t need to think too hard about it. The sauce is the star—sticky, glossy, and packed with flavor that clings to every bite of tender, juicy chicken.
I love that this recipe lets you play around. Add more garlic if you’re a garlic lover. Throw in some red pepper flakes for heat. Serve it over rice, noodles, or a pile of roasted vegetables. It works every time, and it always makes everyone at the table happy.
If you make this recipe, I’d love to hear about it. Leave a comment below and let me know how it turned out—did you try any variations? What did you serve it with? Your feedback helps other readers and gives me ideas for future recipes. And if you’re looking for more quick dinner ideas, check out these harissa lamb meatballs with couscous for another 30-minute meal that’s packed with flavor.
Happy cooking, friends. This one’s a keeper.
Frequently Asked Questions
Can I use chicken breasts instead of thighs?
Yes, absolutely. Boneless, skinless chicken breasts work well, but they cook faster and can dry out more easily. Pound them to even thickness, reduce the covered cooking time to 6-8 minutes, and use a meat thermometer to check for 165°F (74°C).
How do I prevent the garlic from burning?
Keep the heat at medium-low when cooking the garlic, and stir constantly. Garlic burns quickly, especially in a hot pan with residual oil. If you see it turning brown within seconds, your pan is too hot—take it off the heat for a moment and let it cool slightly before continuing.
Can I make this recipe ahead of time?
Yes, and it actually tastes great as leftovers. Cook the chicken completely, let it cool, and store it in an airtight container in the refrigerator for up to 4 days. Reheat gently in a skillet with a splash of water to loosen the sauce. The flavors deepen overnight.
What can I use instead of honey for a sugar-free version?
You can substitute honey with sugar-free maple syrup, monk fruit sweetener mixed with a little water, or a sugar-free honey substitute. Keep in mind that the texture and caramelization will be slightly different, but the flavor will still be delicious.
Is this recipe gluten-free?
It can be! Regular soy sauce contains wheat, so swap it for tamari or coconut aminos to make the recipe gluten-free. Double-check your cornstarch label as well—most brands are gluten-free, but some are processed in facilities that handle wheat.
Pin This Recipe!
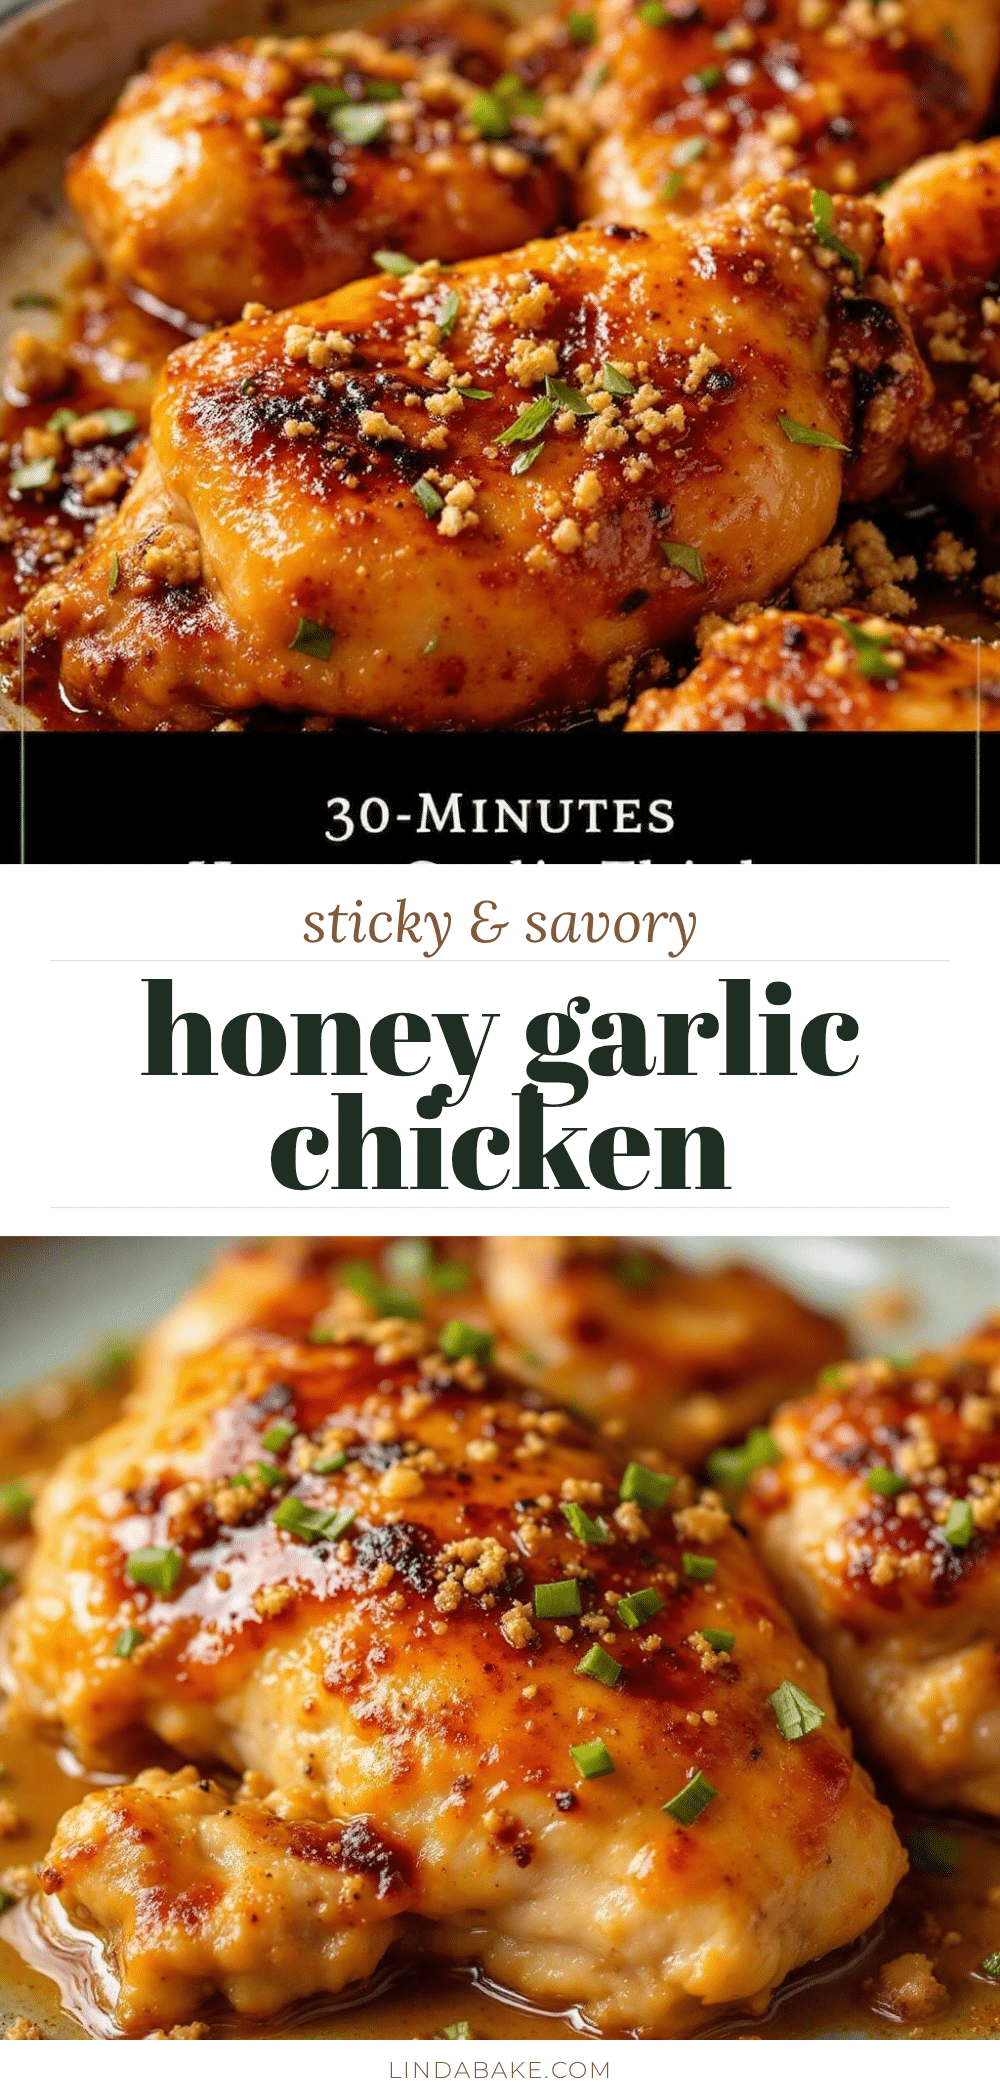
Easy 30-Minute Honey Garlic Chicken Thighs Recipe

This easy 30-minute honey garlic chicken thighs recipe features tender, juicy chicken in a sticky, glossy sauce that’s equal parts sweet, savory, and garlicky. Perfect for busy weeknights, it comes together faster than takeout and uses simple pantry ingredients.
- Prep Time: 10 minutes
- Cook Time: 20 minutes
- Total Time: 30 minutes
- Yield: 4 servings 1x
- Category: Main Course
- Cuisine: Asian
Ingredients
- 1.5 lbs (680g) boneless, skinless chicken thighs
- 1/3 cup (110ml) honey
- 1/4 cup (60ml) low-sodium soy sauce
- 6–8 cloves garlic, roughly chopped
- 2 tablespoons (30ml) rice vinegar
- 1 tablespoon (15ml) toasted sesame oil
- 1 tablespoon cornstarch
- 2 tablespoons water (for slurry)
- 2 tablespoons avocado oil or vegetable oil
- Salt and pepper to taste
- Optional: sliced green onions, toasted sesame seeds, red pepper flakes for garnish
Instructions
- Pat the chicken thighs dry with paper towels. Season both sides generously with salt and pepper. Trim any excess fat if needed.
- In a small bowl, whisk together honey, soy sauce, rice vinegar, and sesame oil. Set aside. In another small bowl, mix cornstarch with 2 tablespoons cold water until smooth.
- Heat a large skillet over medium-high heat and add avocado oil. Heat until oil shimmers, about 2 minutes.
- Place chicken thighs in the hot pan, presentation-side down. Cook undisturbed for 4-5 minutes until golden brown. Flip and cook for another 3-4 minutes.
- Transfer seared chicken to a plate. Do not wipe out the pan.
- Reduce heat to medium-low. Add chopped garlic to the pan and stir constantly for about 30 seconds until fragrant.
- Pour honey-soy mixture into the pan, scraping up browned bits. Let simmer for 1 minute, stirring occasionally.
- Return chicken to the pan, spooning sauce over the tops. Reduce heat to low, cover, and cook for 8-10 minutes until chicken reaches 165°F (74°C).
- Remove chicken from pan. Stir cornstarch slurry, then pour into simmering sauce. Whisk constantly for 30-60 seconds until sauce thickens to a glossy, syrupy consistency.
- Return chicken to pan, turning to coat in sauce. Warm through for 1 minute. Transfer to a platter, spoon remaining sauce over top, and garnish as desired.
Notes
Pat chicken dry for best sear. Don’t rush the sear; let crust develop naturally. Watch garlic carefully to avoid burning. Don’t skip cornstarch slurry for glossy sauce. Let chicken rest between steps. Use a meat thermometer for accuracy. Double sauce if desired.
Nutrition
- Serving Size: 1 serving (about 1-2
- Calories: 400
- Sugar: 19
- Sodium: 750
- Fat: 20
- Saturated Fat: 5
- Carbohydrates: 24
- Protein: 34
Keywords: honey garlic chicken, chicken thighs, 30-minute meal, weeknight dinner, easy chicken recipe, sticky chicken, garlic chicken


