For a while, I just accepted that holiday sugar cookies weren’t going to taste like the crisp, snappy kind my grandmother used to make. You know the type? The ones that hold their shape perfectly on a crowded cookie tray without sagging or spreading into sad, flat circles. I had spent years fighting with dough that was too soft, icing that would run off the edges, and cookies that crumbled into dust the moment you tried to stack them. Honestly, it was exhausting. I kept trying different recipes, some called for chilling the dough for days, others demanded a roller that cost more than my first car. Let’s face it, I didn’t have the patience for that kind of fuss during the holidays. I just wanted cookies that looked festive, tasted sweet but not cloying, and actually stayed crisp until the last one was eaten. Then I found the method that finally clicked. It wasn’t about fancy ingredients or expensive tools. It was about getting the ratio just right. Now, when I pull a tray of these crispy iced turkey and leaf sugar cookies out of the oven, I feel this quiet satisfaction. The kitchen smells like vanilla and warm butter, and the counter is covered in little edible art pieces that actually stay put. It’s not a triumph, just a really good, reliable way to make holiday treats that don’t disappoint.
Why You’ll Love This Recipe
There is a specific kind of joy in baking cookies that behave. These crispy iced turkey and leaf sugar cookies are the result of a lot of trial and error in my own kitchen. I’ve tested dozens of sugar cookie recipes, and most of them end up being cakey or chewy. That’s fine if that’s what you want, but for detailed decorations like turkeys and leaves, you need structure. This recipe delivers exactly that. The dough is firm enough to hold intricate cuts but tender enough to melt in your mouth. Here is why this version stands out from the rest:
- Perfect Structural Integrity: Unlike softer sugar cookies, these hold their shape beautifully. You can cut out delicate leaf veins or turkey feathers, and they won’t merge together in the oven. This makes them ideal for detailed holiday themes.
- Quick Prep Time: You can have these ready to bake in under 30 minutes. No overnight chilling required, which is a huge relief when you are hosting last-minute guests or trying to get the kids involved in holiday prep.
- Beginner-Friendly Icing: The royal icing used here is forgiving. If you mess up a detail, you can scrape it off and try again because it dries hard. This gives you the freedom to experiment without fear of ruining the whole batch.
- Authentic Flavor: Many crisp sugar cookies taste like plain flour and sugar. This recipe uses a blend of butter and shortening to create a rich, buttery flavor that pairs perfectly with the vanilla and almond extracts. It tastes like a real bakery cookie, not a box mix.
- Crowd-Pleasing Versatility: While the turkey and leaf shapes are perfect for Thanksgiving and autumn, the base recipe works for any holiday. You can switch to stars for Christmas or hearts for Valentine’s Day with zero changes to the dough.
What makes this recipe different is the balance of fats. Using both butter for flavor and shortening for stability ensures that the cookies spread minimally. I learned this the hard way after a batch of pure-butter cookies spread into large, flat discs that were impossible to decorate. This specific ratio keeps them compact and crisp. It’s the kind of detail that matters when you are trying to make a turkey look like a turkey and not a potato. Plus, the royal icing sets to a hard finish, meaning you can stack them in tins for gifts without them sticking together. It’s comfort food that looks professional but is surprisingly easy to make.
Ingredient Needed
Making crisp sugar cookies requires a few key ingredients that work together to create the right texture. You don’t need anything exotic or hard to find. Most of these items are pantry staples. The secret to the crispness lies in the fat blend and the sugar type. Here is what you will need to get started:
- All-Purpose Flour (2 ½ cups / 315g): This is the backbone of the cookie. Don’t use self-rising flour as the leavening agents will throw off the balance. Spoon the flour into your measuring cup and level it off. Packing it down will result in dry, hard cookies. If you want to be precise, weighing your flour is always the best option.
- Unsalted Butter (1 cup / 226g, softened): Butter provides the rich flavor. Make sure it is softened to room temperature but not melted. If it’s too soft, the dough will be greasy. If it’s too hard, it won’t cream properly with the sugar. I prefer high-quality European-style butter for its richer flavor, but standard grocery store brands work fine too.
- Vegetable Shortening (½ cup / 113g): This is the secret weapon for crispness. Shortening has a higher melting point than butter, which helps the cookies hold their shape. It also prevents excessive spreading. I use Crisco because it’s reliable and has a neutral flavor. You can substitute more butter if you want, but the cookies will spread more and be less crisp.
- Granulated White Sugar (1 cup / 200g): White sugar creates a crisp texture. Brown sugar would add moisture and chewiness, which is the opposite of what we want here. Make sure your sugar is fresh and not clumpy. If it is, give it a quick pulse in the food processor.
- Egg Yolks (2 large): Using only yolks adds richness and tenderness without the extra water content of the whites. This helps keep the cookies crisp. Room temperature yolks incorporate better into the dough.
- Vanilla Extract (2 teaspoons): Use pure vanilla extract, not imitation. The flavor will be noticeable in the final cookie. I like to use a good quality Madagascar vanilla bean paste for a speckled look, but regular extract works great too.
- Almond Extract (½ teaspoon): This adds a subtle nutty depth that complements the vanilla. It’s optional but highly recommended. It gives the cookies that classic bakery aroma.
- Baking Powder (1 teaspoon): Just a little bit helps the cookies lift slightly without spreading. Too much will make them cakey.
- Salt (½ teaspoon): Salt is crucial for balancing the sweetness. Don’t skip it. It enhances the flavor of the butter and vanilla.
- Royal Icing Ingredients: For the icing, you will need powdered sugar (4 cups / 480g), meringue powder (3 tablespoons), warm water (6 tablespoons), and gel food coloring. Meringue powder is safer than raw egg whites and helps the icing dry hard. You can find it in the baking aisle next to the sprinkles.
One tip for sourcing ingredients: if you live in a humid climate, you might need to reduce the liquid in the icing slightly. Humidity affects how royal icing sets. Also, always check the expiration date on your baking powder. Old baking powder won’t give you the lift you need, and the cookies will be dense.
Equipment Needed
You don’t need a lot of fancy gear to make these cookies, but having the right tools makes the process much smoother. Here is what you will need:
- Mixer: A stand mixer with a paddle attachment is ideal for creaming the butter and shortening. A hand mixer works too, but it takes more elbow grease. Avoid using a wooden spoon; it’s just too tiring for this amount of dough.
- Silicone Baking Mats: These are better than parchment paper because they provide a non-stick surface that helps the cookies bake evenly. They also make cleanup a breeze. I have used the same mat for years, and it still looks new.
- Cookie Cutters: You will need turkey and leaf-shaped cutters. Look for ones with sharp edges for clean cuts. If you can’t find specific shapes, you can use a small turkey cookie cutter and a leaf cutter. Make sure they are clean and dry.
- Piping Bags and Tips: For the royal icing, you will need piping bags and small round tips (like #1 or #2) for detailing. Disposable bags are convenient and save on washing. If you are doing large areas of color, a larger tip (#3 or #4) works well.
- Offset Spatula: This helps you spread the icing smoothly over the cookies without scratching the surface. A small offset spatula gives you more control than a large one.
- Airtight Containers: For storing the cookies and icing. Airtight containers keep the cookies crisp and prevent the icing from absorbing moisture from the air.
If you don’t have silicone mats, parchment paper is a fine alternative. Just make sure it is flat and smooth. For the icing, you can use zip-top bags with the corner snipped off if you don’t have piping bags, but it’s harder to control the flow. Keep your equipment clean and dry, especially when working with royal icing, as even a drop of water can ruin the consistency.
Preparation Method

Making these cookies is straightforward if you follow the steps carefully. The key is to get the dough consistency right and then let it chill before cutting. Here is how to do it:
- Cream the Fats and Sugar: In a stand mixer fitted with the paddle attachment, beat the softened butter, shortening, and granulated sugar on medium-high speed for about 3-4 minutes. You want the mixture to be light, fluffy, and pale in color. This step incorporates air, which helps with the texture. Scrape down the sides of the bowl with a spatula to ensure everything is mixed evenly. This should take about 3 minutes.
- Add Wet Ingredients: Reduce the mixer speed to low. Add the egg yolks one at a time, mixing just until incorporated after each addition. Be careful not to overmix. Then, add the vanilla extract and almond extract. Mix for another 30 seconds. The mixture should look smooth and creamy. If it looks curdled, it might be too cold. Let it sit at room temperature for a few minutes and try again.
- Combine Dry Ingredients: In a separate bowl, whisk together the all-purpose flour, baking powder, and salt. This ensures the leavening agent is evenly distributed. Add the dry ingredients to the mixer in two batches, mixing on low speed. Stop the mixer as soon as the flour disappears. Overmixing at this stage can develop gluten, which leads to tough cookies. The dough will be stiff and slightly crumbly at first, but it should come together into a ball.
- Chill the Dough: Divide the dough into two equal discs. Wrap each disc tightly in plastic wrap. Refrigerate for at least 1 hour, or up to 2 days. Chilling is crucial for crisp cookies because it firms up the fat, which prevents spreading in the oven. If you skip this step, your turkeys and leaves will likely merge into one big blob. I usually chill the dough overnight for best results.
- Preheat and Prepare: Preheat your oven to 350°F (175°C). Line two baking sheets with silicone baking mats or parchment paper. Take one disc of dough out of the fridge. If it is too hard to roll, let it sit for 5 minutes. Roll the dough out on a lightly floured surface to about ¼-inch thickness. Use a rolling pin to ensure even thickness. This helps the cookies bake uniformly.
- Cut and Bake: Dip your cookie cutters in flour to prevent sticking. Press the cutter firmly into the dough and lift straight up. Transfer the cookies to the prepared baking sheets, leaving about 1 inch of space between them. Gather the scraps and re-roll to cut more cookies. Bake for 10-12 minutes. The cookies should be set and lightly golden around the edges. They will look soft in the center, but they will firm up as they cool. Do not overbake, or they will become too hard. Let them cool on the baking sheet for 5 minutes before transferring to a wire rack to cool completely.
- Make the Royal Icing: While the cookies cool, make the icing. In a clean, grease-free bowl, beat the meringue powder and warm water on high speed for 3 minutes until stiff peaks form. Gradually add the powdered sugar, one cup at a time, beating on low speed. Once all the sugar is added, beat on high for 5 more minutes until the icing is glossy and smooth. The consistency should be like thick honey. If it is too thick, add water a teaspoon at a time. If it is too thin, add more powdered sugar.
- Ice the Cookies: Divide the icing into separate bowls for different colors. Add gel food coloring to each bowl and mix well. Thin some of the icing with a little water for flooding (filling in the large areas). Use a piping bag to outline the cookie shape with thicker icing. Let the outline set for a minute, then flood the inside with the thinner icing. Use a toothpick to pop any air bubbles and spread the icing to the edges. For details like turkey feathers or leaf veins, use thicker icing and a small tip. Let the icing dry completely, which can take 4-8 hours depending on humidity.
One important note: if your icing starts to skin over while you are working, cover the bowl with a damp paper towel. This keeps the icing from drying out. Also, work in small batches of icing to maintain consistency.
Cooking Tips & Techniques
There are a few tricks I’ve learned over the years to ensure these cookies turn out perfectly every time. The first is temperature control. Your butter and shortening should be at the perfect room temperature. If you poke them, they should leave an indent but not feel greasy. Too cold, and the dough won’t mix well. Too warm, and the cookies will spread. I usually leave the butter out for about an hour before I start.
Another common mistake is overmixing the dough after adding the flour. As soon as you see no more streaks of flour, stop. Overmixing develops gluten, which makes the cookies tough and chewy instead of crisp and tender. You want a delicate crumb. Also, when you roll out the dough, use as little flour as possible. Too much flour on the surface can make the cookies dry and tough. If the dough sticks, chill it for 10 minutes and try again.
When baking, rotate the trays halfway through. Ovens often have hot spots, and rotating ensures even baking. Keep an eye on the edges. They should be lightly golden, not brown. If they are dark, they will be too hard. The cookies continue to cook on the hot baking sheet after you take them out of the oven, so underbaking slightly is better than overbaking.
For the royal icing, consistency is key. For outlining, the icing should hold its shape and not run. For flooding, it should flow smoothly but still hold a ribbon when dropped from the spatula. If the icing is too thick, it will crack as it dries. If it’s too thin, it will run off the edges. Practice makes perfect here. Don’t be afraid to adjust the consistency with small amounts of water or powdered sugar.
Finally, patience is your best friend. Let the cookies cool completely before icing. Warm cookies will melt the icing. Let the icing dry completely before stacking or packaging. Rushing this step will result in smudged designs and sticky cookies. I usually ice the cookies in the morning and let them dry all day, so they are ready by evening. It’s worth the wait.
Variations & Adaptations
While the turkey and leaf shapes are perfect for Thanksgiving, this dough is versatile. You can change the shapes and flavors to suit any occasion. Here are a few ideas:
- Gluten-Free Option: You can substitute the all-purpose flour with a 1:1 gluten-free flour blend. Look for a blend that includes xanthan gum, or add ½ teaspoon of xanthan gum to the dry ingredients. The texture might be slightly more crumbly, but it will still be crisp.
- Flavor Variations: Add 1 teaspoon of lemon zest or orange zest to the dough for a citrusy twist. This pairs well with the vanilla and almond extracts. You can also add ½ teaspoon of cinnamon or nutmeg for a spiced version, which is great for fall themes.
- Dairy-Free: Use dairy-free butter and shortening. There are many excellent plant-based butter alternatives that work well in baking. For the icing, use a meringue powder substitute or aquafaba (chickpea water) to make a vegan royal icing. It won’t dry as hard, so handle with care.
- Other Shapes: Use star cutters for Christmas, heart cutters for Valentine’s Day, or pumpkin cutters for autumn. The dough holds any shape well, so you can get creative. I often make a mix of shapes for holiday gift boxes.
- Chocolate Dipped: For a different look, dip the bottom half of the cookies in melted chocolate after they have cooled. This adds a rich contrast to the sweet icing. Drizzle with white chocolate for a decorative touch.
I once made these with orange zest and dipped them in dark chocolate for a Christmas gift, and they were a huge hit. The bitterness of the chocolate balanced the sweetness of the cookies perfectly. It’s a nice change from the traditional white icing. Feel free to experiment with different flavor combinations to find your favorite.
Serving & Storage Suggestions
These cookies are best served at room temperature. They are crisp and not too sweet, making them a perfect treat with coffee or tea. They are also great for holiday gift boxes. Layer them between parchment paper in an airtight container to prevent them from sticking together. You can add a ribbon or a tag for a nice presentation.
For storage, keep the cookies in an airtight container at room temperature for up to 2 weeks. If your kitchen is humid, add a piece of bread to the container to absorb excess moisture. This helps keep the cookies crisp. Do not refrigerate the cookies, as the moisture from the fridge can make them soft.
For the icing, make sure it is completely dry before storing. If the icing is still tacky, it will stick to the container or other cookies. You can store the icing in an airtight container for up to a week. Re-whip it before using if it has thickened. For longer storage, you can freeze the cookies without icing. Wrap them tightly in plastic wrap and foil. They will keep for up to 3 months. Thaw at room temperature before icing.
When serving, consider pairing these cookies with a warm beverage. Hot cocoa, mulled wine, or spiced cider complement the flavors beautifully. They are also a great addition to a holiday dessert table. Just make sure to display them in a way that protects the icing from touching other cookies. A tiered stand with parchment paper separators works well.
Nutritional Information & Benefits
These cookies are a treat, so enjoy them in moderation. Each cookie contains approximately 150 calories, with 8g of fat, 18g of carbohydrates, and 2g of protein. The exact values will vary depending on the size of the cookie and the amount of icing used. The recipe uses a blend of butter and shortening, which provides a rich flavor but also adds to the fat content. If you are looking to reduce the fat, you can substitute some of the shortening with more butter, but the cookies will spread more.
The cookies are not inherently healthy, but they are made with simple ingredients. You can control the quality of the ingredients by using high-quality butter and pure vanilla extract. For a healthier twist, you can use whole wheat flour, but this will change the texture and flavor. The cookies are not suitable for those with egg allergies due to the egg yolks and meringue powder. They are also not gluten-free unless you use a gluten-free flour blend.
I try to balance these treats with more nutritious meals during the holidays. They are a small indulgence that brings joy and nostalgia. The key is to savor them slowly. A few cookies with a cup of tea is a perfect afternoon break. It’s a moment to pause and enjoy the season.
Conclusion
Making crispy iced turkey and leaf sugar cookies is a rewarding experience that brings a sense of holiday cheer to your kitchen. The recipe is straightforward, but the results are professional and delicious. I love how the cookies hold their shape and how the icing looks when it dries. It’s a project that you can enjoy with family and friends, especially kids who love decorating. I encourage you to try this recipe and customize it to your liking. Add your own colors, shapes, and flavors. Make it your own. And if you do, I’d love to hear how it turned out. Leave a comment below with your photos and tips. Share this recipe with your friends and family who love baking. Happy baking, and enjoy the cookies!
FAQs
Why are my sugar cookies spreading in the oven?
This usually happens if the dough is too warm or if there is too much sugar relative to the flour. Make sure your butter is softened but not melted. Chill the dough thoroughly before cutting. Also, check your baking powder; if it is old, it might not provide enough lift.
Can I freeze the cookie dough?
Yes, you can freeze the dough for up to 3 months. Wrap it tightly in plastic wrap and then in foil. Thaw in the refrigerator overnight before rolling and cutting. This is a great way to prepare ahead of time.
How do I fix royal icing that is too thick?
Add warm water, one teaspoon at a time, and mix well. Test the consistency by lifting the spatula; the icing should flow off in a ribbon that disappears into the bowl within 10 seconds. Be careful not to add too much water, as this will make the icing too thin.
Can I use egg whites instead of egg yolks?
You can, but the cookies will be less rich and slightly more prone to spreading. Egg yolks add fat and richness, which contributes to the crisp texture. If you use whites, the cookies might be a bit harder.
How long does royal icing take to dry?
It typically takes 4-8 hours to dry completely, depending on the thickness of the icing and the humidity in your kitchen. In low humidity, it dries faster. You can speed up the process by placing the cookies in a well-ventilated area, but avoid direct sunlight.
Pin This Recipe!
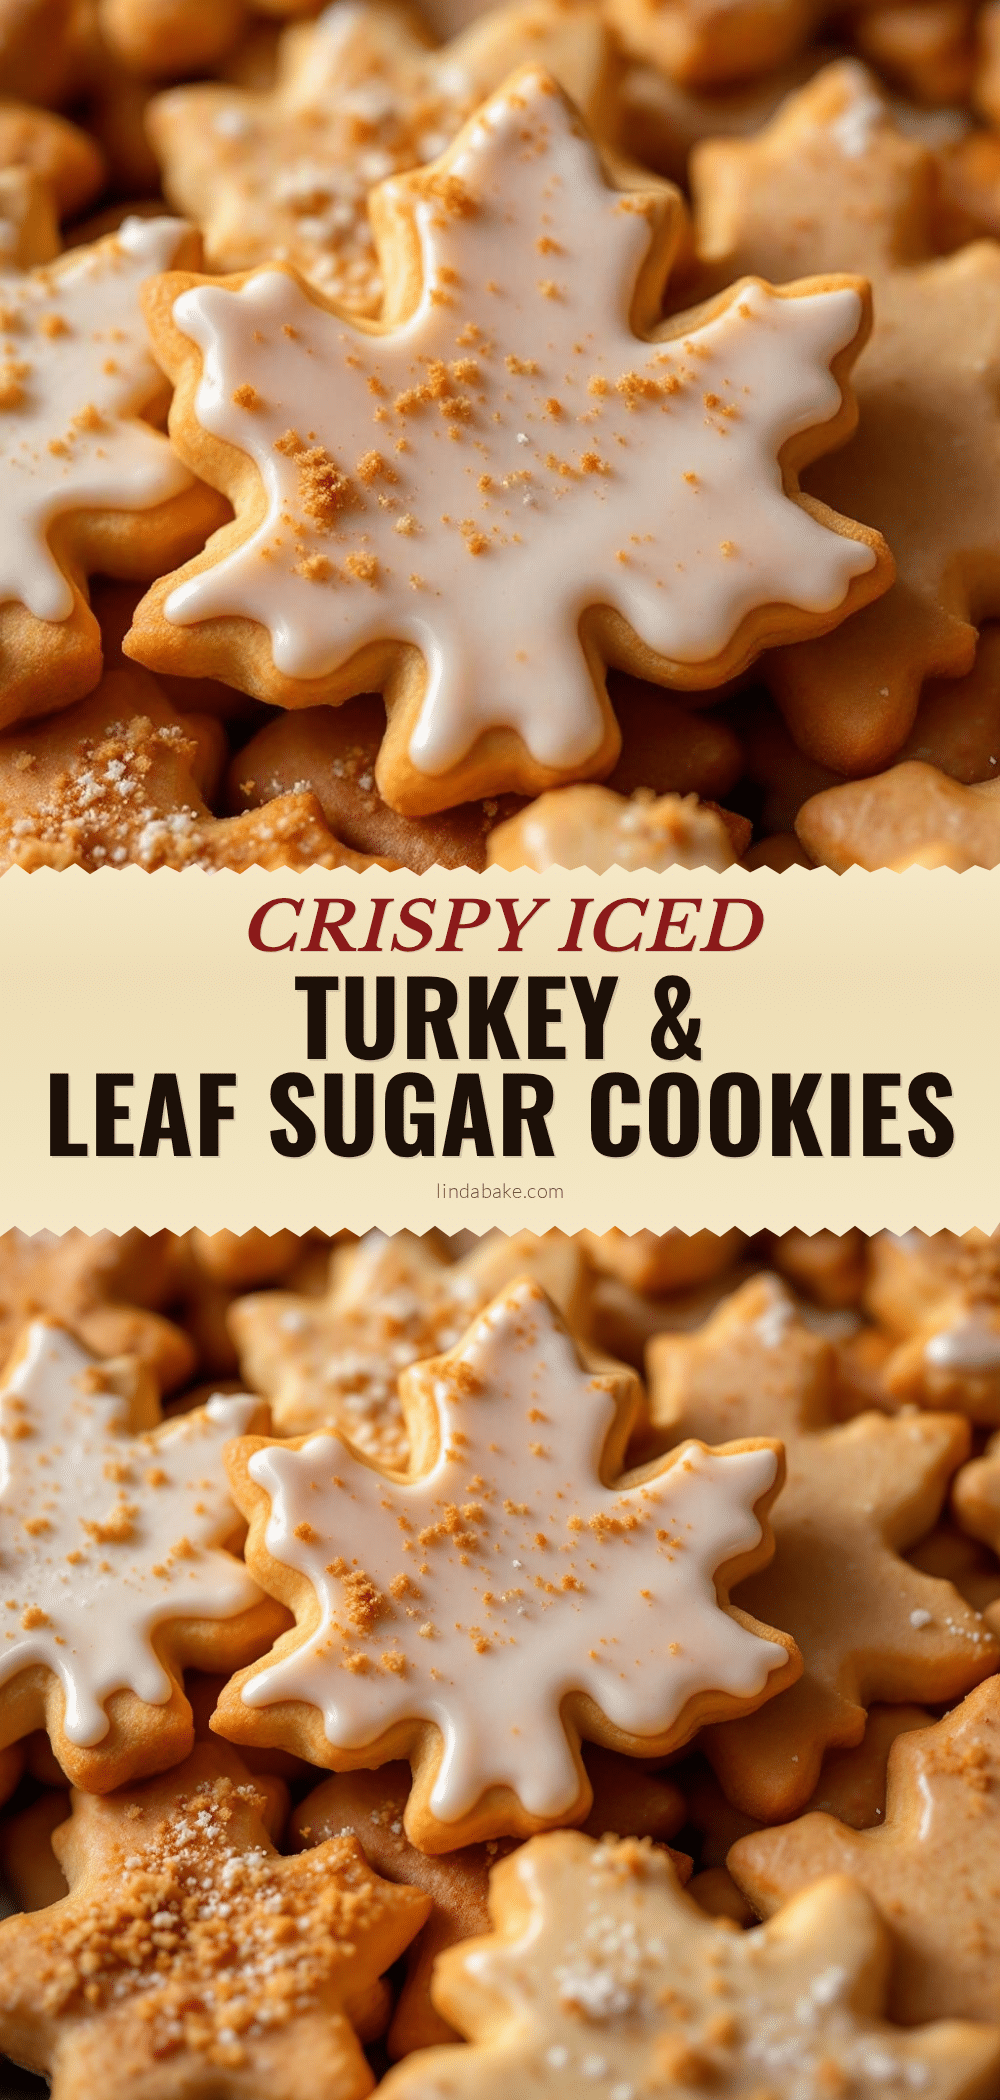
Crispy Iced Turkey & Leaf Sugar Cookies

These crispy iced turkey and leaf sugar cookies hold their shape perfectly for detailed holiday decorations. Made with a blend of butter and shortening, they offer a crisp, snappy texture and rich flavor without spreading.
- Prep Time: 30 minutes
- Cook Time: 12 minutes
- Total Time: 45 minutes
- Yield: Approximately 24-30 cookies 1x
- Category: Dessert
- Cuisine: American
Ingredients
- 2 ½ cups (315g) All-Purpose Flour
- 1 cup (226g) Unsalted Butter, softened
- ½ cup (113g) Vegetable Shortening
- 1 cup (200g) Granulated White Sugar
- 2 large Egg Yolks
- 2 teaspoons Vanilla Extract
- ½ teaspoon Almond Extract
- 1 teaspoon Baking Powder
- ½ teaspoon Salt
- 4 cups (480g) Powdered Sugar (for icing)
- 3 tablespoons Meringue Powder (for icing)
- 6 tablespoons Warm Water (for icing)
- Gel Food Coloring (for icing)
Instructions
- In a stand mixer fitted with a paddle attachment, beat the softened butter, shortening, and granulated sugar on medium-high speed for 3-4 minutes until light, fluffy, and pale. Scrape down the sides of the bowl.
- Reduce mixer speed to low. Add egg yolks one at a time, mixing just until incorporated. Add vanilla and almond extracts, mixing for another 30 seconds.
- In a separate bowl, whisk together flour, baking powder, and salt. Add dry ingredients to the mixer in two batches on low speed, stopping as soon as the flour disappears.
- Divide dough into two discs, wrap tightly in plastic wrap, and refrigerate for at least 1 hour (or up to 2 days).
- Preheat oven to 350°F (175°C). Line baking sheets with silicone mats or parchment paper.
- Roll dough on a lightly floured surface to ¼-inch thickness. Cut into shapes using turkey and leaf cookie cutters. Place on baking sheets 1 inch apart.
- Bake for 10-12 minutes until edges are lightly golden. Cool on the baking sheet for 5 minutes, then transfer to a wire rack to cool completely.
- While cookies cool, beat meringue powder and warm water on high speed for 3 minutes until stiff peaks form. Gradually add powdered sugar, beating on low then high for 5 minutes until glossy.
- Divide icing into bowls and add gel food coloring. Use thicker icing to outline cookies and thinner icing to flood the centers. Let dry completely (4-8 hours).
Notes
Ensure butter is softened but not melted. Do not overmix the dough after adding flour to prevent toughness. Chill dough thoroughly to prevent spreading. Royal icing consistency should be like thick honey for flooding. Work in small batches of icing to prevent skinning.
Nutrition
- Serving Size: 1 cookie
- Calories: 150
- Sugar: 14
- Sodium: 90
- Fat: 8
- Saturated Fat: 3
- Carbohydrates: 18
- Protein: 2
Keywords: sugar cookies, holiday baking, turkey cookies, leaf cookies, royal icing, crispy cookies, Thanksgiving treats, Christmas cookies, easy cookie recipe


