The pot had been sitting on the stove for about twenty minutes after I turned the heat off. I was leaning against the counter, scrolling through my phone, when my neighbor texted: “Is that chili I smell? Because I’m about to come over.” She wasn’t joking. Five minutes later she was at my door with a bag of tortilla chips and a hopeful look on her face. That’s when I knew this recipe was different.
I hadn’t planned on making chili that day. Honestly, it was one of those afternoons where I opened the fridge and just started pulling things out—ground beef I needed to use, a can of beans that had been sitting in the pantry for months, some tomatoes I bought on a whim. I figured I’d throw something together, maybe eat it over rice, and call it dinner. But the smell that filled my kitchen was something else entirely—deep, warm, slightly smoky, with that slow-simmer richness that makes you want to hover by the stove with a spoon.
By the time my neighbor left (with a container full of chili, obviously), I had already made a mental note: this one’s going in the regular rotation. It’s not fancy chili. It’s not competition chili. It’s the kind of chili you make on a Tuesday when you need something that feels like a hug in a bowl. And honestly, that’s exactly what it turned out to be.
This classic beef and bean chili has become my go-to for those nights when I want something hearty without spending hours in the kitchen. It comes together in one pot, uses ingredients I usually have on hand, and somehow tastes even better the next day. If you’ve been looking for a chili recipe that delivers on flavor without demanding too much effort, I think you’ll really like this one.
Why You’ll Love This Recipe
I’ve tested this classic beef and bean chili more times than I care to admit. There were batches that were too watery, batches that were too spicy, and one memorable attempt where I accidentally used cinnamon instead of cumin (don’t ask). But this version? This is the one that stuck.
- Quick & Easy: From start to finish, this chili is ready in about 45 minutes. Most of that time is hands-off simmering, so you can prep toppings, make some cornbread, or just relax while dinner practically cooks itself.
- Simple Ingredients: No fancy spice blends or hard-to-find ingredients here. Everything is available at your regular grocery store, and you probably already have most of the spices in your cabinet.
- Perfect for Meal Prep: This chili freezes beautifully and tastes even better after a day in the fridge. Make a big batch on Sunday and you’ve got lunches or dinners ready for the week.
- Crowd-Pleaser: I’ve served this at game day gatherings, family dinners, and casual weeknight meals. It gets rave reviews every single time, and people always ask for the recipe.
- Unbelievably Satisfying: There’s something about the combination of tender beef, creamy beans, and that rich, spiced broth that just hits differently. It’s comfort food at its finest.
What makes this chili different from the dozens of other recipes out there? It’s the technique of browning the beef really well—getting those deep, caramelized bits on the bottom of the pot before adding the aromatics. That little step makes a huge difference in the final flavor. Plus, I add a secret ingredient that gives the chili a subtle depth without being obvious. (Spoiler: it’s a splash of Worcestershire sauce and a tiny bit of cocoa powder. Trust me on this.)
This isn’t just good chili. It’s the kind that makes you close your eyes after the first bite, the kind that makes you want to curl up on the couch with a bowl and forget about everything else. It’s simple, it’s honest, and it’s exactly what dinner should be.
What Ingredients You Will Need
This recipe uses straightforward ingredients to build layers of flavor without any fuss. Here’s what you’ll need to make this classic beef and bean chili:
For the Chili Base
- 2 tablespoons olive oil – for browning the beef and sautéing the vegetables
- 2 pounds ground beef (80/20 blend works best) – the fat adds flavor and keeps the meat tender
- 1 large yellow onion, diced – about 2 cups
- 1 green bell pepper, diced – adds sweetness and texture
- 4 cloves garlic, minced – because garlic makes everything better
- 2 jalapeño peppers, seeded and minced – for gentle heat (leave the seeds in if you want more kick)
For the Spice Blend
- 3 tablespoons chili powder – I prefer Gebhardt brand for its balanced flavor
- 1 tablespoon ground cumin – adds that warm, earthy note
- 1 teaspoon smoked paprika – for a subtle smoky depth
- 1 teaspoon dried oregano – preferably Mexican oregano if you can find it
- 1/2 teaspoon cayenne pepper – adjust to your heat preference
- 1 teaspoon salt – plus more to taste
- 1/2 teaspoon black pepper
For the Liquid and Beans
- 1 can (14.5 ounces) diced tomatoes – fire-roasted if you can find them
- 1 can (15 ounces) tomato sauce – creates the rich base
- 2 cups beef broth – low-sodium so you can control the salt level
- 1 can (15 ounces) kidney beans, drained and rinsed
- 1 can (15 ounces) black beans, drained and rinsed
- 1 tablespoon Worcestershire sauce – my secret umami booster
- 1 teaspoon cocoa powder – don’t skip this, it deepens the flavor without making it taste like chocolate
For Serving (Optional but Recommended)
- Shredded cheddar cheese
- Sour cream or Greek yogurt
- Fresh cilantro, chopped
- Green onions, sliced
- Cornbread or tortilla chips
- Lime wedges
Ingredient Tips: For the best texture, use 80/20 ground beef. The fat renders during cooking and adds richness to the broth. If you want to use a leaner blend, add an extra tablespoon of olive oil to compensate. I recommend Bush’s beans for kidney beans and black beans—they hold their shape well during simmering. If you’re sensitive to heat, start with half the cayenne and adjust after tasting.
Equipment Needed
One of the best things about this classic beef and bean chili is that it doesn’t require any special equipment. Here’s what you’ll need:
- Large Dutch oven or heavy-bottomed pot (5-6 quart capacity) – this is ideal for even heat distribution and browning. Le Creuset is my dream pot, but Lodge makes excellent affordable enameled cast iron options.
- Sharp chef’s knife – for dicing onions, peppers, and mincing garlic
- Cutting board – preferably large enough to handle all your prep work
- Wooden spoon or spatula – for stirring and breaking up the ground beef
- Measuring spoons – for the spice blend
- Can opener – unless you’re using pull-tab cans
- Colander – for rinsing the beans
- Ladle – for serving
Budget-Friendly Tip: If you don’t own a Dutch oven, any heavy-bottomed pot will work. A stainless steel stockpot or even a large nonstick skillet with high sides can do the job. The key is having a pot that can hold at least 5 quarts and distributes heat evenly to prevent burning.
Preparation Method
Let me walk you through how to make this classic beef and bean chili step by step. Take your time with the browning—it’s the most important part.
- Prep your ingredients first. Dice the onion and bell pepper, mince the garlic and jalapeños, and measure out your spices. Having everything ready before you start cooking makes the process much smoother. Trust me, you don’t want to be chopping onions while your beef is burning.
- Heat the olive oil in your Dutch oven over medium-high heat until it shimmers. Add the ground beef and let it cook without moving it for about 4-5 minutes. You want a deep brown crust to form on the bottom. Break the beef into large chunks with your spoon, then let it cook for another 3-4 minutes. The goal here is deep browning, not just cooking through.
- Remove the beef with a slotted spoon and set it aside in a bowl. Leave about 2 tablespoons of rendered fat in the pot (if there’s more, pour some off). This fat will carry the flavor of the aromatics.
- Add the diced onion and bell pepper to the pot. Cook over medium heat, stirring occasionally, until the onions are translucent and starting to brown at the edges—about 5-6 minutes. Scrape up any browned bits from the bottom of the pot as the vegetables release their moisture.
- Add the garlic and jalapeños and cook for 1 minute until fragrant. Stir constantly so the garlic doesn’t burn. Your kitchen should smell amazing at this point.
- Sprinkle the spice blend (chili powder, cumin, smoked paprika, oregano, cayenne, salt, and pepper) over the vegetables. Stir and cook for 1 minute to toast the spices. This step blooms the flavors and makes them more aromatic.
- Return the browned beef to the pot. Add the diced tomatoes (with their juices), tomato sauce, beef broth, Worcestershire sauce, and cocoa powder. Stir everything together, scraping the bottom of the pot one last time to incorporate all those flavorful bits.
- Bring the chili to a boil, then reduce the heat to low. Cover the pot with the lid slightly ajar and let it simmer for 25 minutes. Stir occasionally to prevent sticking.
- Add the drained and rinsed beans to the pot. Stir gently to combine, then let the chili simmer uncovered for another 10-15 minutes. This allows the chili to thicken slightly and the flavors to meld together.
- Taste and adjust seasoning. This is where you make the chili your own. Need more salt? Add it. Want more heat? Stir in extra cayenne or a dash of hot sauce. The chili should be thick, rich, and deeply flavorful.
- Remove from heat and let the chili rest for 5-10 minutes before serving. This resting time allows the flavors to settle and the chili to thicken a bit more.
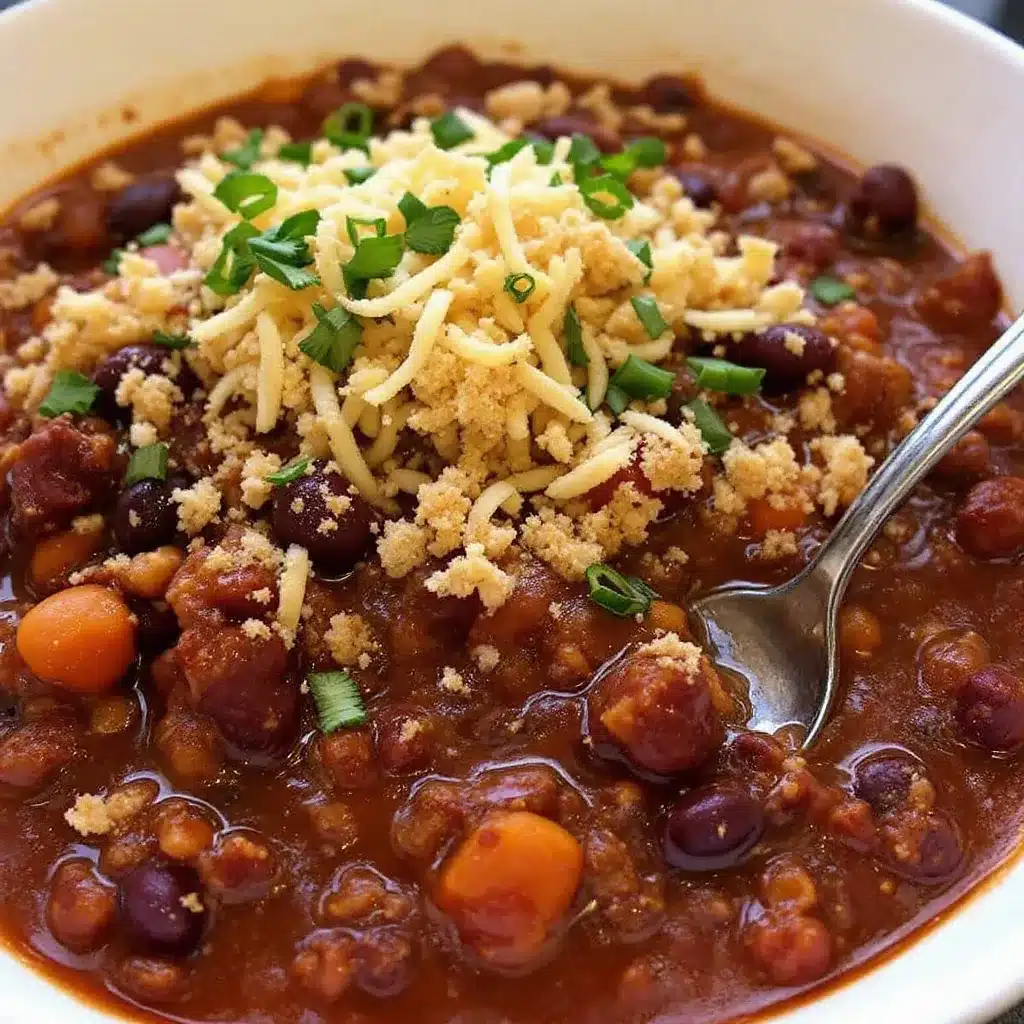
Sensory Cues: When the chili is ready, it should have a deep reddish-brown color. The broth should be thick enough to coat the back of a spoon but still slightly liquid. You should see small bubbles breaking the surface during simmering, not a vigorous boil. The aroma should be rich, smoky, and slightly sweet from the caramelized vegetables.
Cooking Tips & Techniques
After making this classic beef and bean chili more times than I can count, I’ve learned a few things the hard way. Here are my best tips for chili success:
Don’t rush the browning. This is probably the most common mistake people make. If you crowd the pot or stir the beef too often, it will steam instead of brown. Give it space and patience. Those browned bits on the bottom of the pot are pure flavor gold.
Toast your spices. Adding the spice blend to the hot vegetables and cooking it for a minute before adding liquid makes a huge difference. It wakes up the essential oils in the spices and gives the chili a much deeper, more complex flavor.
Add beans at the end. Beans that simmer for too long can turn mushy and fall apart. Adding them in the last 10-15 minutes of cooking keeps them intact and gives them just enough time to absorb the flavors of the chili.
Let it rest. Chili always tastes better after it’s had time to sit. If you can, make this chili a day ahead and reheat it. The flavors meld together overnight and become even more harmonious. I’ve had leftovers three days later that tasted better than the first serving.
My biggest failure: I once tried to speed up the process by using a higher heat for simmering. The chili burned on the bottom, and the whole batch had a bitter, scorched taste. Low and slow is the way to go. If you see dark specks floating in your chili, you’ve probably burned the bottom. Start over—it’s not worth salvaging.
Variations & Adaptations
This recipe is flexible, so feel free to make it your own. Here are some variations I’ve tried and loved:
Spicy Chipotle Chili
Add 2-3 chipotle peppers in adobo sauce (minced) along with the garlic. This adds a smoky, complex heat that’s different from fresh jalapeños. I made this version for a game day party and it disappeared in minutes.
Turkey and White Bean Chili
Swap the ground beef for ground turkey and use cannellini beans instead of kidney and black beans. Reduce the chili powder to 2 tablespoons and add an extra teaspoon of cumin. This lighter version is perfect for those nights when you want something hearty but not too heavy.
Vegetarian Lentil Chili
Omit the beef and double the beans (use a mix of kidney, black, and pinto beans). Add 1 cup of brown lentils along with the broth—they’ll cook down and create a meaty texture. This version is surprisingly satisfying and packed with protein.
Dietary Adaptations: For a gluten-free version, make sure your Worcestershire sauce is gluten-free (Lea & Perrins is safe). For a lower-carb option, reduce the beans to 1 can total and add an extra cup of diced zucchini or bell peppers. For dairy-free serving, skip the cheese and sour cream and top with avocado slices instead.
Serving & Storage Suggestions
This classic beef and bean chili is incredibly versatile when it comes to serving. Here’s how I like to enjoy it:
Serving Temperature: Serve the chili hot, straight from the pot. Ladle it into deep bowls and let everyone customize their toppings. I always set out shredded cheddar, sour cream, fresh cilantro, sliced green onions, and lime wedges. A side of warm cornbread or crunchy tortilla chips completes the meal.
Presentation Tip: For a prettier presentation, drizzle a little sour cream over the top in a spiral pattern and sprinkle with fresh cilantro. A few slices of jalapeño on top add a pop of green and a hint of heat.
Storage Instructions: Let the chili cool completely before storing. Transfer it to an airtight container and refrigerate for up to 5 days. The flavors actually improve over time, so don’t hesitate to make it ahead.
Freezing: This chili freezes beautifully. Portion it into freezer-safe containers or zip-top bags (lay them flat for easy stacking). It will keep for up to 3 months. Thaw overnight in the refrigerator before reheating.
Reheating: Reheat the chili gently on the stovetop over medium-low heat, stirring occasionally. Add a splash of beef broth or water if it’s too thick. You can also microwave individual portions in 30-second bursts, stirring between each. The chili might separate slightly after freezing, but a good stir will bring it back together.
Flavor Development: Here’s something interesting—this chili actually tastes better on day two or three. The spices meld together, the flavors deepen, and everything becomes more cohesive. If you have the patience, make it a day ahead and let it rest in the fridge overnight.
Nutritional Information & Benefits
This classic beef and bean chili is not just delicious—it’s also surprisingly nutritious. Here’s a rough breakdown per serving (based on 6 servings):
| Nutrient | Amount per Serving |
|---|---|
| Calories | 420 |
| Protein | 32g |
| Carbohydrates | 28g |
| Fiber | 9g |
| Fat | 20g |
| Saturated Fat | 7g |
| Sodium | 680mg |
Health Benefits: The combination of lean beef and beans provides a complete protein source with all essential amino acids. Beans are rich in soluble fiber, which helps lower cholesterol and stabilize blood sugar. The tomatoes are packed with lycopene, a powerful antioxidant that’s better absorbed when cooked. The spices—especially cumin and chili powder—have anti-inflammatory properties and aid digestion.
Dietary Considerations: This recipe is naturally gluten-free (check your Worcestershire sauce) and can be made dairy-free by skipping the cheese and sour cream toppings. For a lower-sodium version, use no-salt-added canned tomatoes and low-sodium broth, and adjust the added salt accordingly. If you’re watching your red meat intake, the turkey variation is an excellent alternative.
Conclusion
This classic beef and bean chili has earned a permanent spot in my recipe rotation, and I think it will in yours too. It’s the kind of recipe that delivers every single time—rich, hearty, deeply flavorful, and surprisingly simple to make. Whether you’re feeding a crowd on game day, meal-prepping for the week, or just craving a bowl of comfort on a chilly evening, this chili delivers.
What I love most about this recipe is how forgiving it is. You can adjust the heat, swap the beans, add extra vegetables, or let it simmer longer—it always turns out delicious. It’s the kind of dish that doesn’t demand perfection, just a little patience and love.
I’d love to hear how your chili turns out. Did you add any twists? Did you serve it with something unexpected? Drop a comment below and let me know—I read every single one and I’m always looking for new ideas to try. If you’re looking for another hearty one-pot meal, you might enjoy this Thai coconut curry pulled pork for a completely different flavor profile. And if you’re in the mood for something with a bit of heat, this spicy Korean-Mexican street corn dip is always a hit at gatherings.
Happy cooking, and don’t forget the cornbread!
Frequently Asked Questions
Can I make this chili in a slow cooker?
Absolutely. Brown the beef and sauté the vegetables on the stovetop first, then transfer everything except the beans to a slow cooker. Cook on low for 6-8 hours or high for 3-4 hours. Add the beans in the last 30 minutes of cooking. The slow cooker version is perfect for busy days when you want dinner ready when you walk in the door.
How can I thicken my chili if it’s too watery?
If your chili is thinner than you’d like, there are a few easy fixes. Let it simmer uncovered for an additional 10-15 minutes to evaporate excess liquid. You can also mash some of the beans against the side of the pot with a spoon—the starch will naturally thicken the broth. Another option is to mix 1 tablespoon of cornstarch with 2 tablespoons of cold water and stir it into the simmering chili.
Can I use dried beans instead of canned?
Yes, but you’ll need to cook them separately first. Soak 1 cup each of dried kidney beans and black beans overnight, then drain and rinse them. Cook them in fresh water until tender (about 1-2 hours depending on the beans) before adding them to the chili. Using dried beans gives you more control over texture and sodium levels, but it does add extra time to the process.
What’s the best way to reheat frozen chili?
The best method is to thaw the chili overnight in the refrigerator, then reheat it gently on the stovetop over medium-low heat. If you’re in a hurry, you can reheat it directly from frozen in a pot over low heat, adding a splash of broth or water to prevent scorching. Microwave reheating works too—just use 50% power and stir every 30 seconds for even heating.
Can I add other vegetables to this chili?
Definitely. This recipe is very adaptable. Diced zucchini, corn kernels, chopped carrots, or even sweet potatoes work beautifully. Add firmer vegetables like carrots and sweet potatoes along with the broth so they have time to soften. Quick-cooking vegetables like zucchini and corn should be added in the last 10 minutes of simmering to prevent them from turning mushy.
Pin This Recipe!

Classic Beef and Bean Chili: Easy One-Pot Dinner

This classic beef and bean chili is hearty, deeply flavorful, and surprisingly simple to make. It comes together in one pot with simple ingredients, making it the perfect weeknight dinner that tastes even better the next day.
- Prep Time: 15 minutes
- Cook Time: 45 minutes
- Total Time: 1 hour
- Yield: 6 servings 1x
- Category: Main Course
- Cuisine: American
Ingredients
- 2 tablespoons olive oil
- 2 pounds ground beef (80/20 blend)
- 1 large yellow onion, diced (about 2 cups)
- 1 green bell pepper, diced
- 4 cloves garlic, minced
- 2 jalapeño peppers, seeded and minced
- 3 tablespoons chili powder
- 1 tablespoon ground cumin
- 1 teaspoon smoked paprika
- 1 teaspoon dried oregano (preferably Mexican oregano)
- 1/2 teaspoon cayenne pepper
- 1 teaspoon salt
- 1/2 teaspoon black pepper
- 1 can (14.5 ounces) diced tomatoes (fire-roasted if available)
- 1 can (15 ounces) tomato sauce
- 2 cups beef broth (low-sodium)
- 1 can (15 ounces) kidney beans, drained and rinsed
- 1 can (15 ounces) black beans, drained and rinsed
- 1 tablespoon Worcestershire sauce
- 1 teaspoon cocoa powder
- Shredded cheddar cheese (for serving)
- Sour cream or Greek yogurt (for serving)
- Fresh cilantro, chopped (for serving)
- Green onions, sliced (for serving)
- Cornbread or tortilla chips (for serving)
- Lime wedges (for serving)
Instructions
- Prep your ingredients first. Dice the onion and bell pepper, mince the garlic and jalapeños, and measure out your spices.
- Heat the olive oil in your Dutch oven over medium-high heat until it shimmers. Add the ground beef and let it cook without moving it for about 4-5 minutes to form a deep brown crust. Break the beef into large chunks and cook for another 3-4 minutes.
- Remove the beef with a slotted spoon and set aside. Leave about 2 tablespoons of rendered fat in the pot.
- Add the diced onion and bell pepper to the pot. Cook over medium heat, stirring occasionally, until the onions are translucent and starting to brown at the edges, about 5-6 minutes. Scrape up any browned bits from the bottom.
- Add the garlic and jalapeños and cook for 1 minute until fragrant, stirring constantly.
- Sprinkle the spice blend (chili powder, cumin, smoked paprika, oregano, cayenne, salt, and pepper) over the vegetables. Stir and cook for 1 minute to toast the spices.
- Return the browned beef to the pot. Add the diced tomatoes (with their juices), tomato sauce, beef broth, Worcestershire sauce, and cocoa powder. Stir everything together, scraping the bottom of the pot.
- Bring the chili to a boil, then reduce the heat to low. Cover the pot with the lid slightly ajar and let it simmer for 25 minutes, stirring occasionally.
- Add the drained and rinsed beans to the pot. Stir gently to combine, then let the chili simmer uncovered for another 10-15 minutes to thicken.
- Taste and adjust seasoning with more salt, cayenne, or hot sauce as desired.
- Remove from heat and let the chili rest for 5-10 minutes before serving. Serve hot with desired toppings.
Notes
For best results, brown the beef well to develop deep flavor. Toast the spices before adding liquid. Add beans at the end to prevent them from becoming mushy. Chili tastes even better the next day. For a thicker chili, simmer uncovered longer or mash some beans against the pot. For a spicier version, leave seeds in jalapeños or add chipotle peppers in adobo.
Nutrition
- Serving Size: 1 serving (about 1.5
- Calories: 420
- Sugar: 8
- Sodium: 680
- Fat: 20
- Saturated Fat: 7
- Carbohydrates: 28
- Fiber: 9
- Protein: 32
Keywords: chili, beef chili, bean chili, one-pot dinner, comfort food, easy dinner, game day food, meal prep


