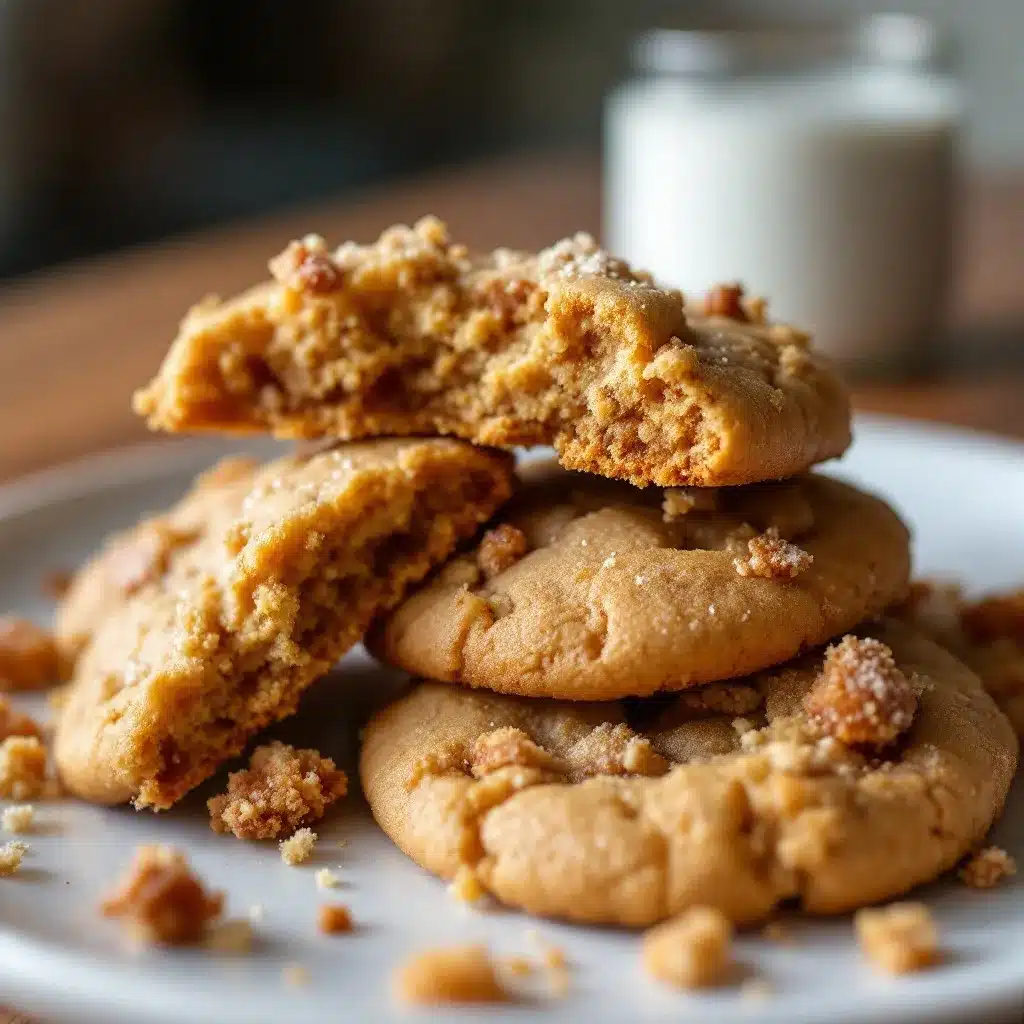
You know that moment when you pull a tray out of the oven and the kitchen smells like a fancy French patisserie? It’s not just sugar and butter. It’s deeper. Nuttier. That specific scent of milk solids browning until they turn a deep, toasted amber. That’s the anchor here. The apple cider isn’t just a flavor additive; it’s the structural backbone that gives these cookies their signature chew.
I remember the first time I tried reducing apple cider for baking. I had a whole pot bubbling away, watching the liquid shrink into a syrup so thick it coated the back of a spoon like honey. I was worried it would make the dough too wet. It didn’t. It made them perfect. The pectin in the cider, combined with the Maillard reaction from the brown butter, creates this texture that is almost impossibly tender on the inside but holds its shape perfectly on the outside.
People ask me why I bother reducing the cider instead of just using apple juice or apple extract. Honestly, it’s about concentration. Apple juice is mostly water. If you bake with it, you get a flat, cakey result. Reducing it by 75% concentrates the apple flavor and adds a subtle tartness that cuts through the richness of the butter. It’s not a complicated step, but it changes the entire game.
I’ve tested this recipe dozens of times. Some batches were too flat, some too cakey. But this version? It’s the one that stays in my rotation every October. It’s the kind of cookie that disappears before you can even finish plating them. No fanfare, no fancy decorations. Just pure, tactile comfort. That sticky, chewy center is the whole point.
Why You’ll Love This Recipe
This isn’t just another fall cookie. It’s a lesson in how simple ingredients, when treated with respect, can create something genuinely complex. I’ve spent years tweaking butter-to-flour ratios and reducing times for the cider, and this balance is the one that works every single time. It’s reliable, but it feels special enough to serve to guests who don’t know you baked it.
- Quick & Easy Prep: While reducing the cider takes time, the actual cookie assembly is straightforward. You likely have all the pantry staples on hand, making this a perfect last-minute treat for unexpected guests or a mid-afternoon craving.
- Simple Ingredients: No obscure flours or hard-to-find spices. Just butter, apples, flour, and sugar. The magic happens in the technique, not the shopping list.
- Perfect for Gifting: These cookies travel well and stay fresh for days. They make a thoughtful, homemade gift for teachers, neighbors, or friends. Pair them with a bag of no-bake peanut butter granola bites for a complete snack box.
- Crowd-Pleaser: Even people who usually stick to chocolate chip cookies love these. The flavor is familiar but elevated. It’s nostalgic without being boring.
- Unbelievably Delicious: The combination of toasted butter and concentrated apple creates a depth of flavor that just isn’t possible with standard recipes. It’s next-level comfort food.
What makes this recipe different is the emphasis on texture. Most apple cookies are cakey. These are chewy. The brown butter adds a nutty richness that pairs perfectly with the slight tartness of the reduced cider. It’s a balance that keeps you coming back for one more bite. It’s the kind of cookie that makes you close your eyes after the first bite, just to really feel the texture.
What Ingredients You Will Need
This recipe relies on high-quality, simple ingredients. Because there are so few of them, each one plays a critical role. You don’t need fancy equipment or exotic spices. You just need to pay attention to the quality of your butter and your apples.
For the Dough
- Unsalted Butter: 1 cup (226g), unsalted. I recommend using a high-quality European-style butter like Kerrygold or Plugrá. The higher fat content makes a noticeable difference in the richness and color of the brown butter.
- Reduced Apple Cider: 1/4 cup (60ml). This needs to be reduced from about 2 cups of regular cider. See the preparation method for details. This is the star ingredient.
- Granulated Sugar: 1 cup (200g). This helps create the crisp edges.
- Light Brown Sugar: 1 cup (220g). Packed. This is what gives the cookies their chewiness and moisture.
- Eggs: 2 large eggs, room temperature. Room temperature eggs emulsify better with the butter, creating a smoother dough.
- Vanilla Extract: 1 tablespoon. Use pure vanilla, not imitation. The flavor needs to stand up to the strong apple.
- All-Purpose Flour: 2 1/4 cups (280g). Don’t overmeasure. Spoon it into the cup and level it off.
- Baking Soda: 1 teaspoon. Helps the cookies spread and brown.
- Salt: 1 teaspoon. Balances the sweetness.
- Cinnamon: 1 1/2 teaspoons. Adds warmth without overpowering the apple.
- Nutmeg: 1/4 teaspoon. Optional, but adds a subtle depth.
For the Topping (Optional but Recommended)
- Flaky Sea Salt: A pinch on top after baking. Enhances the flavor.
- Chopped Pecans or Walnuts: 1/2 cup. Adds crunch. I like pecans for their buttery flavor.
If you can’t find good apple cider, look for fresh-pressed juice at a farmers market. Avoid the shelf-stable kind in the juice aisle; it’s often pasteurized and lacks the fresh apple flavor. Also, if you’re making these in winter, you can use apple sauce, but reduce the liquid in the recipe slightly, as applesauce has a different water content.
Equipment Needed
You don’t need much, but having the right tools makes a huge difference in consistency.
- Medium Saucepan: For reducing the apple cider. A heavy-bottomed pot prevents scorching.
- Mixing Bowls: One large for wet ingredients, one medium for dry.
- Hand Mixer or Stand Mixer: A hand mixer is fine, but a stand mixer makes creaming the butter and sugars much easier and faster.
- Baking Sheets: Light-colored aluminum sheets are best. Dark sheets can cause the bottoms to burn too quickly.
- Parchment Paper: Always line your baking sheets. Cleanup is so much easier, and it prevents sticking.
- Cooling Rack: Essential for stopping the cooking process once the cookies come out of the oven.
- Measuring Cups and Spoons: Accuracy is key in baking. Don’t eyeball the flour.
- Silicone Spatula: For scraping down the sides of the bowl to ensure everything is incorporated.
If you don’t have a stand mixer, a strong arm and a whisk will work, but it will take longer to cream the butter and sugars properly. Also, make sure your saucepan is large enough to hold the cider with room to bubble. It will foam up significantly as it reduces.
Preparation Method
- Reduce the Apple Cider (Time: 20-30 minutes): Pour 2 cups of apple cider into a medium saucepan. Bring to a boil over medium-high heat, then reduce to a simmer. Let it cook, stirring occasionally, until it reduces to about 1/4 cup. It should be thick and syrupy. Remove from heat and let it cool completely. This step is crucial for flavor concentration.
- Preheat and Prep: Preheat your oven to 350°F (175°C). Line two large baking sheets with parchment paper. This ensures even baking and easy cleanup.
- Brown the Butter: In a medium saucepan over medium heat, melt 1 cup of unsalted butter. Watch it closely. It will foam up, then subside. You’ll see brown specks form at the bottom and smell a nutty aroma. This is brown butter. Immediately remove from heat and pour into a heatproof bowl. Let it cool for 10-15 minutes so it doesn’t cook the eggs later.
- Mix Wet Ingredients: In a large bowl, combine the cooled brown butter, cooled reduced apple cider, granulated sugar, and brown sugar. Whisk vigorously for about 2 minutes until the mixture is smooth and slightly glossy. This helps dissolve the sugar and creates a chewier cookie.
- Add Eggs and Vanilla: Add the two eggs and vanilla extract to the butter mixture. Whisk again until fully combined. The mixture might look slightly separated at first, but keep whisking.
- Combine Dry Ingredients: In a separate bowl, whisk together the flour, baking soda, salt, cinnamon, and nutmeg. This ensures even distribution of the leavening agents.
- Make the Dough: Gradually add the dry ingredients to the wet ingredients, mixing on low speed or by hand until just combined. Do not overmix. Overmixing develops gluten, which leads to tough cookies.
- Chill the Dough (Optional but Recommended): If you have time, chill the dough for 30 minutes. This helps the flavors meld and prevents the cookies from spreading too much. If you’re in a hurry, you can skip this, but the cookies may be slightly thinner.
- Scoop and Bake: Scoop tablespoon-sized portions of dough onto the prepared baking sheets, spacing them about 2 inches apart. Bake for 10-12 minutes, or until the edges are golden brown and the centers are still soft. They will firm up as they cool.
- Cool and Serve: Let the cookies cool on the baking sheet for 5 minutes, then transfer to a wire rack to cool completely. Sprinkle with flaky sea salt if desired.
The key here is not to overbake. These cookies should look slightly underdone in the center when you take them out. They will continue to cook on the hot baking sheet. If you bake them until they look fully done, they will be dry.
Cooking Tips & Techniques
Browning butter is an art form. If you walk away for even 30 seconds, it can go from perfect to burnt. The smell is your best indicator. When it smells like toasted hazelnuts, it’s done. If it smells like burnt toast, you’ve waited too long. In that case, start over. Burnt butter cannot be fixed.
Another common mistake is using cold butter and eggs. If your butter is too cold when you mix it with the sugar, it won’t cream properly. If your eggs are too cold, they can cause the butter to seize. Room temperature ingredients are non-negotiable for a smooth, emulsified dough.
Don’t skip the chilling step if you can help it. Warm dough spreads faster in the oven. Chilled dough holds its shape better, giving you that thick, chewy center. If you’re baking in a hot kitchen, chilling is even more important.
Use a cookie scoop for uniform sizing. This ensures that all the cookies bake at the same rate. If you scoop them by hand, some will be tiny and burn, while others will be large and undercooked.
Keep an eye on the oven. Ovens vary. If your cookies are browning too fast on the bottom, try moving them to a higher rack or using a double layer of parchment paper. If they’re not browning enough, try a lower rack or a darker baking sheet.
Let the brown butter cool completely before mixing it with the sugar and eggs. If it’s still warm, it will melt the sugar and create a greasy dough. This is a common pitfall for beginners.
Variations & Adaptations
While the classic version is my favorite, there are many ways to tweak this recipe to suit your taste or dietary needs.
- Gluten-Free Option: Substitute the all-purpose flour with a 1:1 gluten-free flour blend. Ensure the blend contains xanthan gum, or add 1/2 teaspoon if it doesn’t. The texture may be slightly more crumbly, but the flavor will still be great.
- Vegan Adaptation: Use vegan butter (like Miyoko’s or Earth Balance) and flax eggs (1 tablespoon ground flaxseed mixed with 3 tablespoons water per egg) in place of the eggs. The cookies will be slightly denser, but still delicious.
- Add Chocolate Chips: Stir in 1/2 cup of semi-sweet or dark chocolate chips. The bitterness of the chocolate pairs beautifully with the apple and brown butter. This is a personal favorite variation.
- Spice It Up: Add a pinch of cardamom or ginger for a spicier profile. This works well if you’re serving these with coffee or tea.
- Dried Fruit: Add 1/2 cup of chopped dried cranberries or raisins. These add bursts of sweetness and chewiness.
If you’re making these for a crowd, consider doubling the recipe. They freeze well, so you can make a large batch and freeze the dough balls for later baking. Just add 1-2 minutes to the baking time if you bake them frozen.
Serving & Storage Suggestions
These cookies are best served slightly warm, straight out of the oven. The aroma is irresistible. They pair wonderfully with a cup of hot coffee or a glass of cold milk. If you want to elevate the serving experience, serve them with a slice of sharp cheddar cheese on the side. The saltiness of the cheese complements the sweetness of the cookies.
For storage, keep the cookies in an airtight container at room temperature for up to 5 days. Place a piece of bread in the container with the cookies to keep them soft. The bread will absorb excess moisture and stay stale itself, but the cookies will remain chewy.
To freeze the baked cookies, place them in a single layer on a baking sheet and freeze until solid. Then transfer them to a freezer-safe bag or container. They will last for up to 3 months. Thaw at room temperature before serving.
You can also freeze the dough balls. Scoop the dough onto a baking sheet and freeze until solid. Then transfer to a freezer bag. Bake directly from frozen, adding 1-2 minutes to the baking time. This is a great option for having fresh-baked cookies on demand.
If you’re making these for a party, consider slicing them into smaller portions. They are rich and flavorful, so a smaller cookie is often more satisfying than a large one.
Nutritional Information & Benefits
While these cookies are a treat, they do offer some nutritional benefits. Apples are a good source of fiber and vitamin C. The brown sugar and butter provide energy, but the reduced cider adds flavor without excessive sugar. Each cookie contains approximately 150-180 calories, depending on size.
These cookies are not gluten-free or dairy-free by default, but adaptations are easy. They do contain eggs, nuts (if added), and gluten. If you have allergies, please check the ingredients carefully.
From a wellness perspective, I love that these cookies use real fruit instead of artificial flavorings. The apple cider provides a natural sweetness and complexity that artificial extracts can’t match. It’s a way to enjoy a dessert that feels a bit more wholesome, even if it’s still indulgent.
Remember, moderation is key. These are meant to be savored, not consumed in bulk. Enjoy one or two with your morning coffee or afternoon tea, and you’ll be satisfied.
Conclusion
These Best Chewy Brown Butter Apple Cider Cookies are more than just a recipe. They’re a celebration of fall flavors, transformed through simple techniques into something extraordinary. The combination of nutty brown butter and concentrated apple cider creates a cookie that is deeply flavorful and texturally perfect.
I hope you try this recipe and find it as comforting and delicious as I do. Feel free to customize it with your favorite add-ins, like chocolate chips or nuts. The base recipe is flexible enough to accommodate your preferences.
If you make these cookies, I’d love to hear how they turn out. Leave a comment below with your thoughts, or share a photo on social media. Tag me so I can see your creations. And if you enjoyed this recipe, check out my easy apple nachos with peanut butter drizzle for another apple-inspired treat.
Baking is a process of discovery and joy. I hope these cookies bring you that same sense of satisfaction. Happy baking!
Frequently Asked Questions
Can I use apple juice instead of apple cider?
It’s not recommended. Apple juice is thinner and less flavorful. If you must use apple juice, you’ll need to reduce it for a longer time to achieve the same concentration. Fresh-pressed cider is best for its robust flavor.
Do I have to brown the butter?
Yes, it’s a key component of this recipe. Browned butter adds a nutty, complex flavor that regular melted butter doesn’t have. Skipping this step will result in a flatter, less interesting cookie.
Can I make the dough ahead of time?
Absolutely. You can store the dough in the refrigerator for up to 3 days. Let it come to room temperature for 15-20 minutes before scooping and baking for best results.
Why are my cookies too flat?
This usually happens if the dough is too warm or if the butter is over-melted. Chilling the dough before baking helps. Also, ensure you’re measuring your flour correctly. Too little flour can lead to flat cookies.
How do I know when the apple cider is reduced enough?
It’s ready when it reduces to about 1/4 cup and has the consistency of thin syrup. It should coat the back of a spoon. If it’s too watery, it won’t provide enough flavor. If it’s too thick, it might make the dough dry.
Pin This Recipe!
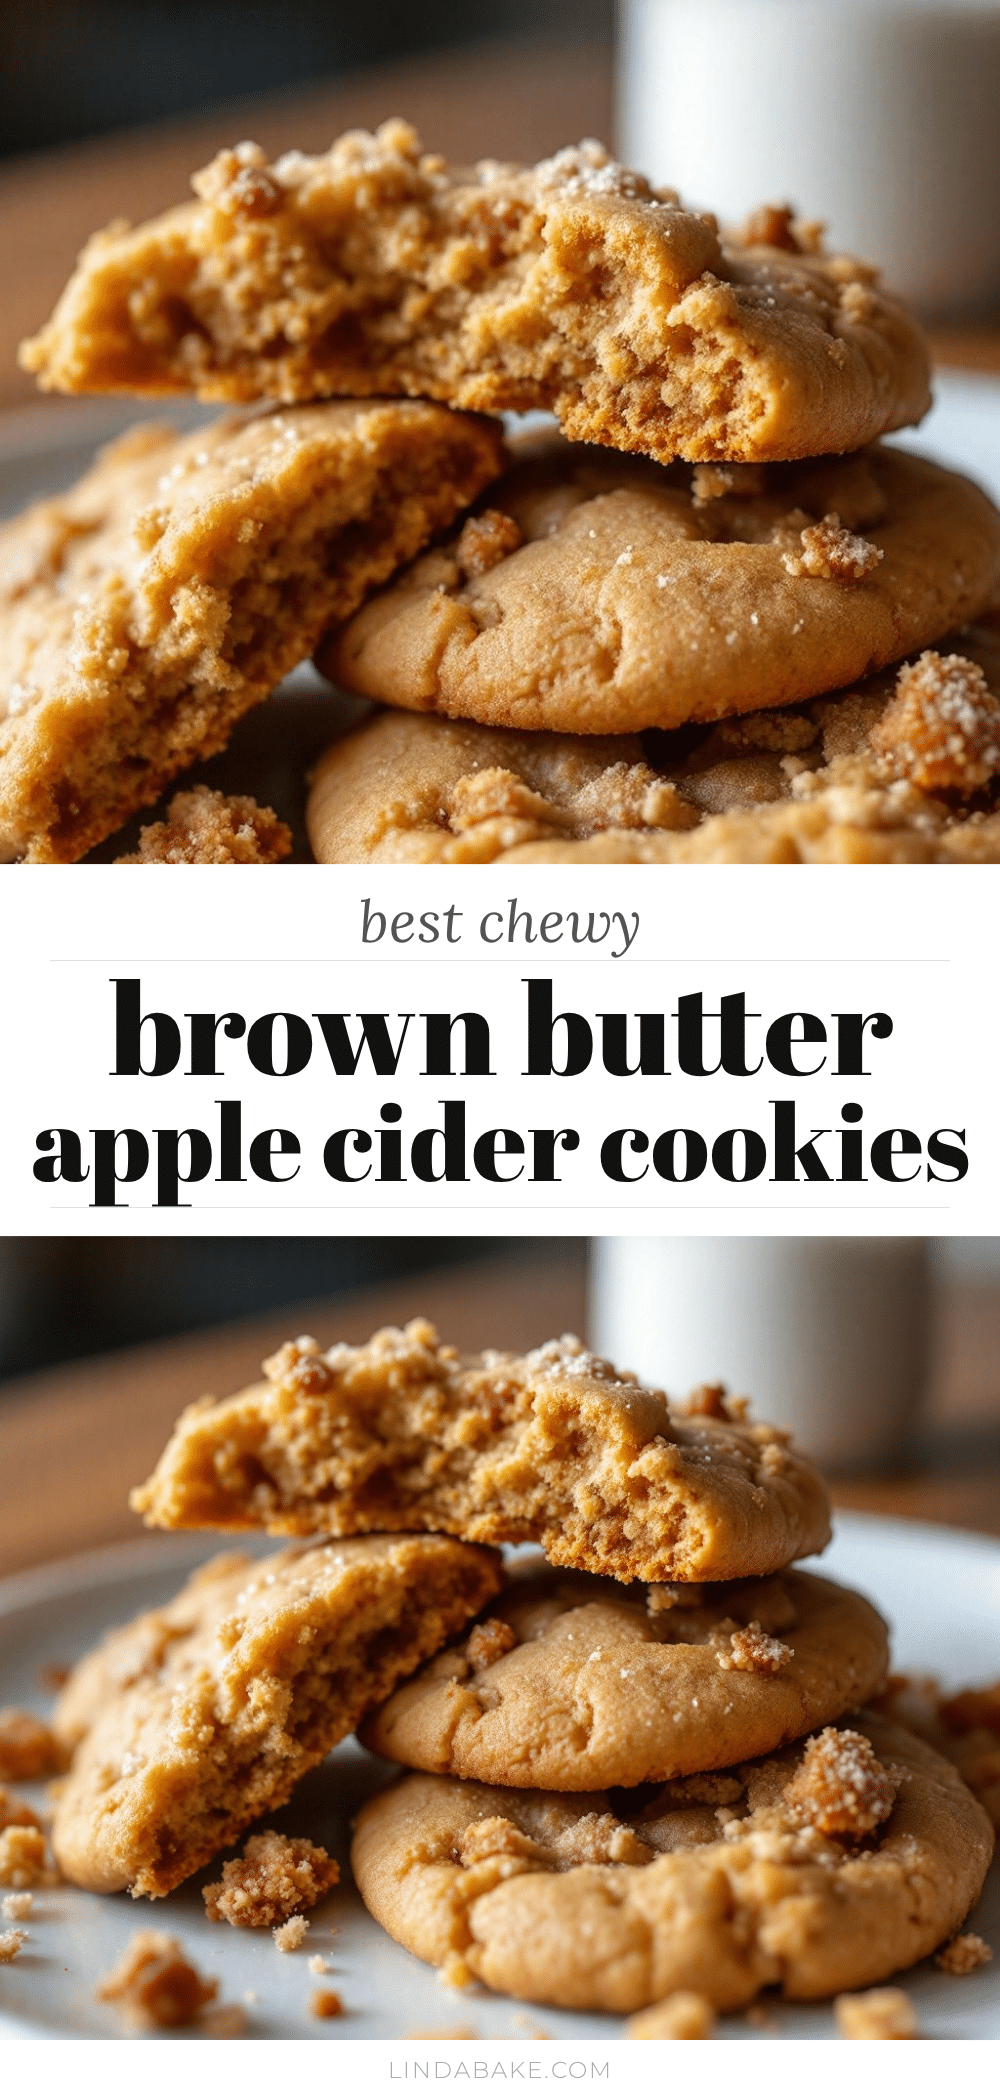
Best Chewy Brown Butter Apple Cider Cookies

These cookies feature nutty brown butter and concentrated reduced apple cider to create a signature chewy texture with crisp edges and a tender, flavorful center.
- Prep Time: 30 minutes
- Cook Time: 12 minutes
- Total Time: 42 minutes
- Yield: 24 servings 1x
- Category: Dessert
- Cuisine: American
Ingredients
- 1 cup (226g) unsalted butter
- 2 cups apple cider (to reduce to 1/4 cup)
- 1 cup (200g) granulated sugar
- 1 cup (220g) light brown sugar, packed
- 2 large eggs, room temperature
- 1 tablespoon pure vanilla extract
- 2 1/4 cups (280g) all-purpose flour
- 1 teaspoon baking soda
- 1 teaspoon salt
- 1 1/2 teaspoons cinnamon
- 1/4 teaspoon nutmeg (optional)
- Flaky sea salt for topping (optional)
- 1/2 cup chopped pecans or walnuts (optional)
Instructions
- Pour 2 cups of apple cider into a medium saucepan. Bring to a boil over medium-high heat, then reduce to a simmer. Cook until reduced to about 1/4 cup and syrupy. Let cool completely.
- Preheat oven to 350°F (175°C). Line two large baking sheets with parchment paper.
- Melt 1 cup of unsalted butter in a medium saucepan over medium heat. Watch closely until it foams, subsides, and forms brown specks with a nutty aroma. Remove from heat and pour into a heatproof bowl. Let cool for 10-15 minutes.
- In a large bowl, combine the cooled brown butter, cooled reduced apple cider, granulated sugar, and brown sugar. Whisk vigorously for about 2 minutes until smooth and glossy.
- Add the two eggs and vanilla extract to the butter mixture. Whisk until fully combined.
- In a separate bowl, whisk together the flour, baking soda, salt, cinnamon, and nutmeg.
- Gradually add the dry ingredients to the wet ingredients, mixing on low speed or by hand until just combined. Do not overmix.
- Chill the dough for 30 minutes if time permits (optional but recommended).
- Scoop tablespoon-sized portions of dough onto prepared baking sheets, spacing them about 2 inches apart.
- Bake for 10-12 minutes, or until edges are golden brown and centers are still soft.
- Let cookies cool on the baking sheet for 5 minutes, then transfer to a wire rack to cool completely. Sprinkle with flaky sea salt if desired.
Notes
Ensure butter and eggs are at room temperature for proper emulsification. Do not overbake; cookies will firm up as they cool. If using gluten-free flour, ensure the blend contains xanthan gum. Dough can be frozen for up to 3 months.
Nutrition
- Serving Size: 1 cookie
- Calories: 165
- Sugar: 16
- Sodium: 120
- Fat: 8
- Saturated Fat: 5
- Carbohydrates: 22
- Fiber: 0.5
- Protein: 2
Keywords: brown butter cookies, apple cider cookies, chewy cookies, fall baking, autumn recipes, easy cookie recipe


