I figured a standard 9-inch pumpkin pie was the only way to get that authentic autumn flavor. It took about ten minutes for that assumption to fall apart completely. I was standing in my kitchen, staring at a pie pan that looked like it had been designed for a family of twelve rather than the two of us. The filling was too much, the crust was going to go soggy, and let’s face it, I wasn’t going to eat twelve slices before it spoiled. It was just wasteful, and honestly, it felt wrong to bake something so large for just a quiet evening at home.
The solution wasn’t buying a smaller pan, though I did try that first. It was actually about scaling down the ingredients with precision. I realized that making a small-batch pumpkin pie for two didn’t mean compromising on the texture or the spice blend. It meant being intentional about every teaspoon of cinnamon and nutmeg. The first time I tried this, I was skeptical. Would it set properly? Would it taste like a diluted version of the real thing?
What happened instead was surprising. The pie came out of the oven with a custard that was incredibly rich and dense, not watery or thin. The flavors were concentrated, more vibrant than the massive versions I used to make for holidays. It tasted like the essence of fall, captured in just two perfect slices. It wasn’t just a substitute; it was an upgrade for our specific needs.
We ended up sharing it with a cup of tea, sitting on the couch with the windows open to the cool air. There was no guilt about leftovers, no freezer burn, and no need to ration the last slice for weeks. It was just perfect, right then and there. That little pan became our new tradition for cozy nights, proving that sometimes less really is more.
Why You’ll Love This Recipe
This small-batch pumpkin pie for two isn’t just a quick fix; it’s a result of years of tweaking ratios to get that perfect custard texture without the hassle of a full-sized pie. I’ve tested this dozens of times, ensuring that the balance of spices hits just right for your palate. It’s designed for people who want the comfort of homemade dessert without the commitment of baking for a crowd.
Here is why this recipe has become a staple in our kitchen:
- Quick & Easy: This comes together in under 30 minutes, including prep time. It is perfect for those busy weeknights when you want something sweet but don’t want to spend hours in the kitchen.
- Simple Ingredients: You likely already have everything in your pantry. No fancy grocery trips are needed for obscure spices or hard-to-find items. It relies on staples like pumpkin puree, spices, and cream.
- Perfect for Date Night: Great for intimate dinners, cozy weekends, or just treating yourself to a little luxury without the leftovers hanging around.
- Crowd-Pleaser: Even though it’s small, it always gets rave reviews. It’s impressive enough for guests but manageable enough for a quiet night in.
- Unbelievably Delicious: The texture is silky and smooth, with a flavor profile that is richer and more intense than traditional large pies because the spices are more concentrated.
What makes this recipe different from the rest is the attention to detail in the filling. By using a smaller volume, we can control the cooking process better, preventing the common issue of a cracked or weepy custard. Whether you use a store-bought crust or make your own, the filling is the star here. It’s the kind of dessert that makes you close your eyes after the first bite. It’s comfort food reimagined—faster, but with the same soul-soothing satisfaction.
What Ingredients You Will Need
This recipe uses simple, wholesome ingredients to deliver bold flavor and satisfying texture without the fuss. The beauty of a small-batch pie is that every ingredient plays a crucial role, so quality matters more than quantity. You don’t need expensive, artisanal items, but you do need fresh, good-quality staples.
Here is what you will need to make this cozy dessert:
- For the Crust:
- 1/2 cup all-purpose flour (provides the base structure)
- 1/4 teaspoon salt (balances the sweetness)
- 2 tablespoons unsalted butter, cold and cubed (adds flakiness)
- 2-3 tablespoons ice water (binds the dough; use sparingly)
- For the Filling:
- 1/2 cup pumpkin puree (not pumpkin pie mix; check labels for 100% pure pumpkin)
- 1/4 cup heavy cream (ensures a rich, creamy texture)
- 1/4 cup milk (balances the richness of the cream)
- 2 large eggs, room temperature (helps the custard set properly)
- 1/3 cup granulated sugar (adjust to taste if you prefer less sweet)
- 1/4 teaspoon ground cinnamon (warm, classic spice)
- 1/8 teaspoon ground nutmeg (adds depth and complexity)
- 1/8 teaspoon ground ginger (provides a subtle zing)
- 1/4 teaspoon vanilla extract (enhances the overall flavor profile)
I recommend using a reliable brand for your canned pumpkin, like Libby’s, as it has a consistent texture that works well in custards. If you are making your own puree, make sure to drain it thoroughly to remove excess water, which can make the pie runny. For the crust, if you prefer a gluten-free option, you can use a 1:1 gluten-free flour blend, though the texture might be slightly more crumbly. You can also swap the heavy cream with full-fat coconut milk for a dairy-free version, though the flavor will be slightly different.
Equipment Needed
You don’t need a lot of fancy gadgets to make this pie. A standard 6-inch round pie pan or a similar small-sized baking dish is essential. If you don’t have a small pan, you can use a standard 8-inch square baking dish, but you may need to adjust the baking time slightly.
- 6-inch Pie Pan: This is the ideal size. Glass or ceramic pans work best for even heating.
- Mixing Bowls: One small bowl for the dry ingredients and one medium bowl for the wet ingredients.
- Fork or Pastry Blender: For cutting the butter into the flour if you are making a homemade crust.
- Whisk: Essential for blending the eggs and cream smoothly without lumps.
- Measuring Spoons and Cups: Precision is key in small-batch baking, so accurate measurements are important.
If you are short on space or budget, a simple glass pie plate from a thrift store works just as well as a new one. Just make sure it is clean and dry. For the crust, if you don’t have a pastry blender, you can use your fingers to rub the butter into the flour, which is actually a great way to keep the butter cold.
Preparation Method
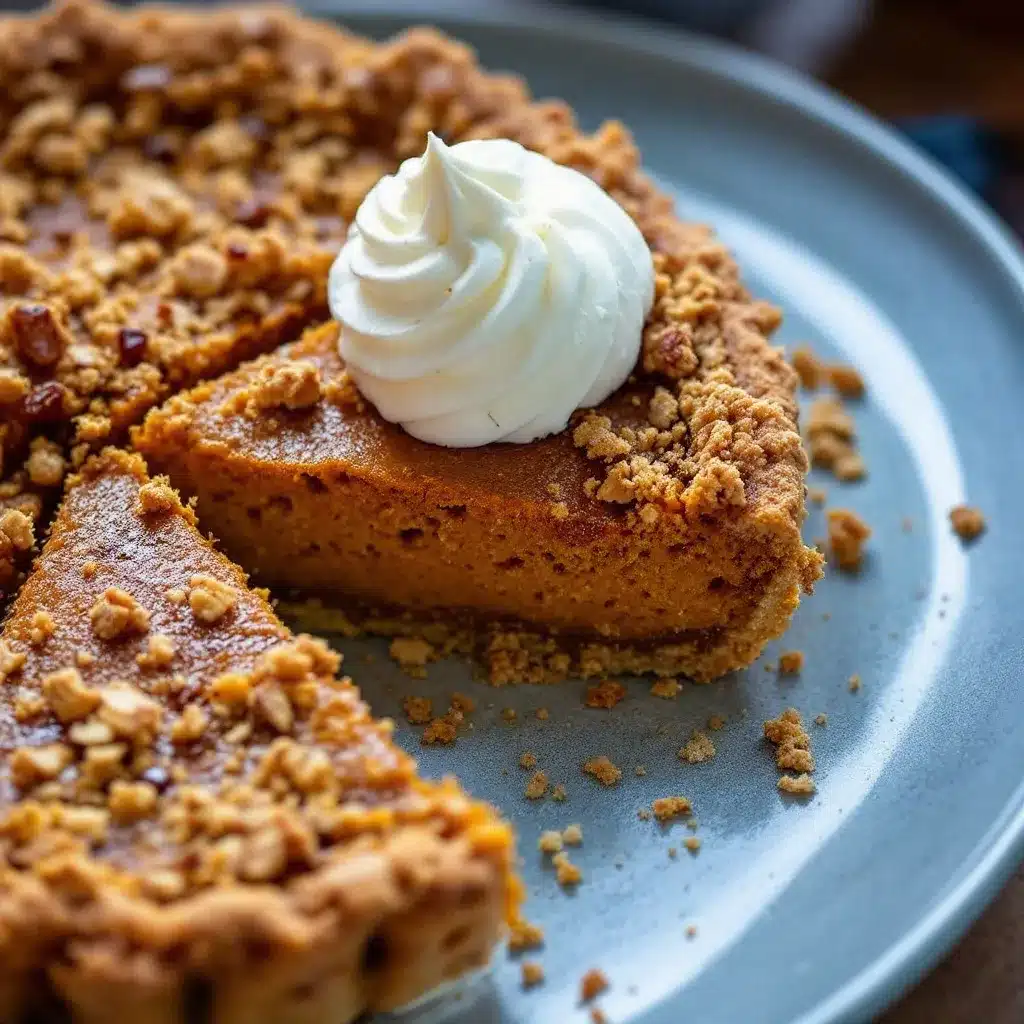
Making this small-batch pumpkin pie for two is straightforward if you follow these steps carefully. The key is to keep the crust cold and the filling smooth.
- Prepare the Crust: In a small bowl, mix the flour and salt. Add the cold, cubed butter. Use a fork or your fingers to cut the butter into the flour until the mixture resembles coarse crumbs. Add ice water, one tablespoon at a time, mixing gently until the dough just comes together. Do not overwork it. Shape the dough into a disk, wrap it in plastic, and refrigerate for at least 30 minutes. (Time: 10 minutes prep + 30 minutes chill)
- Preheat the Oven: While the dough chills, preheat your oven to 375°F (190°C). Place a baking sheet on the lower rack to catch any potential drips. (Time: 5 minutes)
- Roll Out the Crust: On a lightly floured surface, roll the dough into a circle about 6 inches in diameter. Gently transfer it to the 6-inch pie pan. Trim any excess edges and crimp the sides with your fingers or a fork. Prick the bottom of the crust with a fork to prevent bubbling. (Time: 5 minutes)
- Make the Filling: In a medium bowl, whisk the eggs until smooth. Add the sugar, cinnamon, nutmeg, ginger, and vanilla. Whisk until combined. Then, stir in the pumpkin puree, heavy cream, and milk. Mix until the filling is completely smooth and uniform. (Time: 5 minutes)
- Assemble the Pie: Pour the filling into the prepared crust. Make sure the edges are clean so the crust bakes properly. (Time: 2 minutes)
- Bake: Place the pie on the center rack of the oven. Bake for 35-40 minutes, or until the edges are set but the center still has a slight jiggle. The center will firm up as it cools. (Time: 40 minutes)
- Cool: Remove the pie from the oven and let it cool on a wire rack for at least 30 minutes before slicing. This allows the custard to set completely. (Time: 30 minutes)
Troubleshooting Tip: If the crust edges start to brown too quickly, cover them with a small strip of aluminum foil. This is common in smaller pies due to the higher ratio of crust to filling.
Cooking Tips & Techniques
Getting the perfect custard texture is all about temperature control. One of the biggest mistakes people make is overbaking the pie. Remember, the center should still be slightly jiggly when you take it out. It will continue to cook from residual heat as it cools. If it looks completely firm in the pan, it will likely be dry and crumbly once sliced.
Another important tip is to ensure your eggs are at room temperature. Cold eggs can shock the mixture and make it harder to blend smoothly. If you forgot to take them out, just place them in a bowl of warm water for a few minutes.
For the crust, keeping everything cold is crucial. If the butter melts before baking, you won’t get those flaky layers. Work quickly and handle the dough as little as possible. If your kitchen is warm, consider chilling the pan for 10 minutes before baking to help the crust hold its shape.
I also recommend tasting your pumpkin puree before adding all the sugar. Some brands are sweeter than others. Adjust the sugar accordingly to match your preference. This level of control is one of the benefits of making a small batch.
Finally, let the pie cool completely. Slicing it while it’s warm will result in a mess. The custard needs time to set, and patience here pays off with cleaner slices and better texture.
Variations & Adaptations
This recipe is quite flexible, allowing you to customize it to your tastes or dietary needs. Here are a few variations I’ve tried that work well:
- Spiced Latte Twist: Add 1 tablespoon of instant espresso powder to the filling. It enhances the pumpkin flavor without making it taste like coffee. This pairs wonderfully with a cup of morning coffee.
- Maple Bourbon Glaze: Replace half the sugar with maple syrup and add a teaspoon of bourbon to the filling. This adds a deep, rich flavor that complements the spices beautifully.
- Ginger Snap Crust: Instead of making a traditional crust, crush ginger snap cookies and mix with melted butter. Press this into the pan for a chewy, spicy base that adds extra texture.
- Dairy-Free Option: Use coconut cream instead of heavy cream and milk. The result is richer and slightly coconutty, which works surprisingly well with pumpkin spices.
- Low-Sugar Version: Use a sugar substitute like erythritol or monk fruit. You may need to adjust the amount based on the sweetness level of your chosen sweetener.
I personally love the maple bourbon version for holiday gatherings. It feels special and different from the standard recipe. The ginger snap crust is also a great option if you want something with more crunch and flavor complexity.
Serving & Storage Suggestions
This pie is best served at room temperature or slightly chilled. It pairs well with a dollop of whipped cream or a drizzle of caramel sauce. For a non-dairy option, coconut whipped cream works beautifully.
- Serving: Slice into two equal portions. Garnish with a sprinkle of cinnamon or a few fresh cranberries for color.
- Storage: Cover the pie loosely with plastic wrap or aluminum foil. Store in the refrigerator for up to 3 days.
- Freezing: This pie can be frozen, but the texture may change slightly. Wrap tightly in plastic and foil, and freeze for up to 1 month. Thaw in the refrigerator overnight before serving.
- Reheating: If you prefer warm pie, microwave a slice for 15-20 seconds. Avoid baking the whole pie again, as it may dry out.
The flavors actually develop and meld together over the first day, making it even better on day two. This is a great feature for meal prep or when you want dessert ready to go.
Nutritional Information & Benefits
This small-batch pumpkin pie is a lighter dessert option compared to traditional large pies. Pumpkin is rich in vitamins A and C, as well as fiber. The smaller portion size helps control calorie intake, making it a guilt-free treat.
- Calories: Approximately 350-400 calories per slice (depending on crust and filling variations).
- Macronutrients: Balanced mix of carbohydrates from the pumpkin and sugar, fats from the cream and butter, and protein from the eggs.
- Dietary Notes: Contains gluten, dairy, and eggs. Use the substitutions mentioned earlier for gluten-free or dairy-free options.
- Health Benefits: Pumpkin provides antioxidants and supports eye health. The spices like cinnamon may help regulate blood sugar levels.
I appreciate that this recipe allows me to enjoy dessert without feeling overwhelmed by the sugar content. It’s a mindful way to indulge.
Conclusion
This small-batch pumpkin pie for two is a game-changer for anyone who loves pumpkin but hates the waste. It’s easy to make, delicious, and perfect for intimate settings. I hope you try this recipe and find it as satisfying as I do. Feel free to customize it with your favorite spices or toppings.
If you make this pie, I’d love to hear how it turns out for you. Please leave a comment below with your thoughts or share your variations. You can also tag me on social media if you post a photo. Happy baking!
FAQs
Can I use a 9-inch pie pan for this recipe?
Yes, but the filling will be very thin. You will need to reduce the baking time significantly, and the texture may not be as custard-like. It’s better to use a smaller pan for the intended result.
What if I don’t have a 6-inch pie pan?
You can use a small ramekin or an 8-inch square baking dish. Adjust the baking time accordingly, checking for doneness a few minutes earlier than the recipe suggests.
Can I make the crust ahead of time?
Absolutely. You can make the dough and refrigerate it for up to 3 days or freeze it for up to a month. Let it thaw in the refrigerator before rolling and baking.
Why did my pie crack?
Cracking usually happens from overbaking or cooling too quickly. Ensure you remove the pie when the center still jiggles slightly, and let it cool gradually at room temperature.
Can I use pumpkin pie mix instead of pure pumpkin?
No, pumpkin pie mix already contains sugar and spices. Using it will throw off the balance of the recipe. Stick to 100% pure pumpkin puree for the best results.
Pin This Recipe!
Small-Batch Pumpkin Pie for Two: 2 Easy Slices
A perfectly scaled-down pumpkin pie recipe designed for two people, offering rich, concentrated flavors and a silky custard texture without the waste of a full-sized pie.
- Prep Time: 30 minutes
- Cook Time: 40 minutes
- Total Time: 70 minutes
- Yield: 2 servings 1x
- Category: Dessert
- Cuisine: American
Ingredients
- 1/2 cup all-purpose flour
- 1/4 teaspoon salt
- 2 tablespoons unsalted butter, cold and cubed
- 2–3 tablespoons ice water
- 1/2 cup pumpkin puree (100% pure)
- 1/4 cup heavy cream
- 1/4 cup milk
- 2 large eggs, room temperature
- 1/3 cup granulated sugar
- 1/4 teaspoon ground cinnamon
- 1/8 teaspoon ground nutmeg
- 1/8 teaspoon ground ginger
- 1/4 teaspoon vanilla extract
Instructions
- In a small bowl, mix flour and salt. Cut in cold butter until mixture resembles coarse crumbs. Add ice water one tablespoon at a time until dough comes together. Shape into a disk, wrap, and refrigerate for at least 30 minutes.
- Preheat oven to 375°F (190°C). Place a baking sheet on the lower rack to catch drips.
- Roll dough into a 6-inch circle on a floured surface. Transfer to a 6-inch pie pan, trim edges, crimp sides, and prick the bottom with a fork.
- In a medium bowl, whisk eggs until smooth. Add sugar, cinnamon, nutmeg, ginger, and vanilla; whisk to combine. Stir in pumpkin puree, heavy cream, and milk until smooth.
- Pour filling into the prepared crust, ensuring edges are clean.
- Bake on the center rack for 35-40 minutes, until edges are set but the center still has a slight jiggle.
- Cool on a wire rack for at least 30 minutes before slicing to allow the custard to set.
Notes
Keep crust ingredients cold for flakiness. Ensure eggs are at room temperature for smooth blending. Do not overbake; the center should jiggle slightly as it will firm up while cooling. If crust edges brown too quickly, cover with foil. Pumpkin puree must be 100% pure, not pie mix.
Nutrition
- Serving Size: 2 slices
- Calories: 375
- Sugar: 28
- Sodium: 150
- Fat: 18
- Saturated Fat: 10
- Carbohydrates: 45
- Fiber: 3
- Protein: 6
Keywords: pumpkin pie, small batch, dessert for two, fall baking, easy pumpkin pie, gluten-free option, dairy-free option


