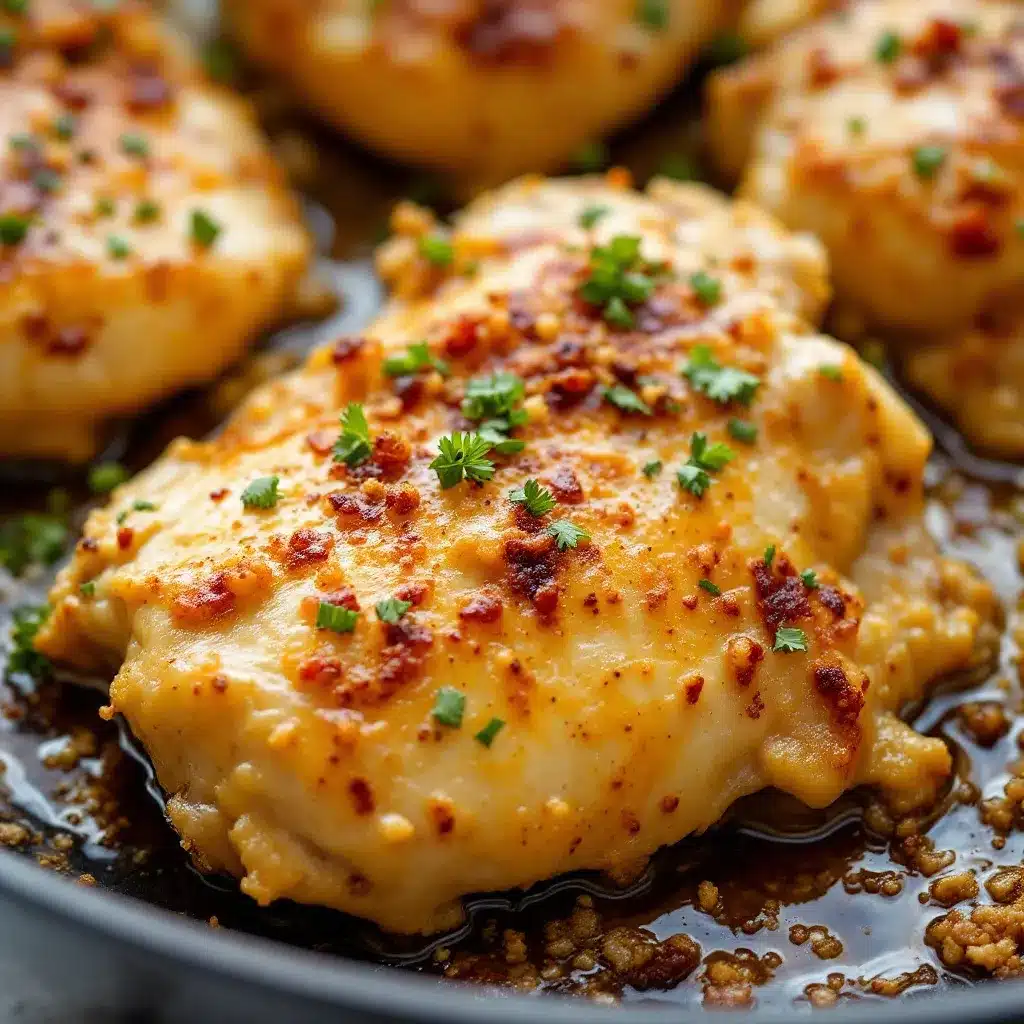
The skin is shatteringly crisp, like thin glass breaking under the pressure of a fork, and that is the whole point. I don’t care about the sauce yet. I don’t care about the garlic aroma drifting through the kitchen. I care about that audible crack when you bite into chicken thighs that have been treated with respect. Honestly, most people boil their chicken. They steam it until it’s gray. They serve it with a side of sadness. Not here. We are chasing texture first. Flavor follows, but texture is the king.
I remember standing in my kitchen last Tuesday, staring at a sheet pan that looked like a disaster zone. Flour dust everywhere. Oil smoking. But when I pulled it out, the thighs were golden brown and completely dry to the touch. No soggy bits. No pale spots. Just pure, unadulterated crunch. I took one bite and closed my eyes. It was that specific kind of satisfaction that makes you forget about your to-do list for five whole minutes. You know that feeling? When food just works?
This recipe for Crispy One-Pan Garlic Butter Chicken Thighs isn’t about fancy techniques or expensive gadgets. It’s about patience and heat. It’s about letting the skin get hot enough to render the fat out of the meat while simultaneously crisping up the outside. It’s a physical process. You can see it happening. The bubbles in the butter slow down. The edges curl up. The color deepens from pale pink to a rich, mahogany brown.
I’ve made this dish so many times that I can do it in my sleep. But I still get excited about it. Maybe because it’s easy. Maybe because it tastes like something from a restaurant. Or maybe because it reminds me that good food doesn’t have to be complicated. Sometimes it just needs to be hot, salty, and buttery. And garlic. Lots of garlic.
The reason this stuck with me is simple. It’s the only way I eat chicken thighs now. Once you try them crispy, the soft, steamed version feels wrong. It feels like a mistake. This recipe changed my relationship with poultry. It turned a cheap, tough cut into something luxurious. Something worth waiting for. Something that makes your house smell like heaven. That’s the promise. One pan. One meal. One perfect bite.
Why You’ll Love This Recipe
Let’s be real for a second. Weeknights are chaotic. You come home tired. You’re hungry. You don’t want to scrub three pots and a baking sheet. This Crispy One-Pan Garlic Butter Chicken Thighs recipe solves that problem. It’s designed for real life, not for Instagram photoshoots. Here is why this dish actually works when you’re exhausted:
- Quick & Easy: The prep takes about ten minutes. The cooking takes thirty. That’s it. You can have dinner on the table before your kids finish their homework. It’s perfect for busy weeknights or when you just want to sit down and relax.
- Simple Ingredients: You don’t need a specialty store. You likely already have chicken thighs, butter, garlic, and spices in your kitchen. No fancy grocery trips needed. Just grab what you have and start cooking.
- Perfect for Date Night: It sounds fancy, but it’s not. It’s great for impressing a partner without stressing out in the kitchen. Pair it with a simple salad and you’re set. It feels special, but it’s actually super low effort.
- Crowd-Pleaser: Kids usually hate chicken thighs because they’re often mushy. These are different. The crispy skin makes them fun to eat. Adults love the flavor. It’s a win-win for the whole family.
- Unbelievably Delicious: The texture and flavor combo is next-level comfort food. The garlic butter sauce pools at the bottom of the pan, and you want to dip everything in it. Bread, veggies, the chicken itself. It’s addictive.
What makes this recipe different from the rest? It’s the dry brine. Or rather, the drying step. Most recipes skip this. They put wet chicken in the oven and wonder why the skin steams instead of crisps. We pat the chicken dry. We let it sit. We get it ready for the heat. Whether it is a special technique like this, or the perfectly balanced seasoning profile, make it clear this isn’t just another version—it’s your best version.
This recipe isn’t just good—it is the kind that makes you close your eyes after the first bite. It’s comfort food reimagined—healthier, faster, but with the same soul-soothing satisfaction. Perfect for impressing guests without stress, or turning a simple meal into something memorable. And if you ever need a side dish that doesn’t compete with the chicken, check out these refreshing mango jalapeno agua fresca to cut through the richness.
What Ingredients You Will Need
This recipe uses simple, wholesome ingredients to deliver bold flavor and satisfying texture without the fuss. The magic here is in the quality of the basics. You don’t need expensive cuts, but you do need the right ones. Chicken thighs are non-negotiable. Breast meat dries out too fast. Thighs have the fat content to stay juicy while the skin crisps up. If you use breasts, you’ll be overcooking them by the time the skin is done. Stick with thighs. Bone-in, skin-on is best. Boneless works, but the skin won’t get as crispy.
Here is what you need to gather before you start. Keep it simple.
- Chicken Thighs: Bone-in, skin-on. About 2 to 3 pounds. Look for uniform sizes so they cook evenly. If they are huge, you might need to trim some fat, but leave enough to keep them moist.
- Unsalted Butter: Half a cup. I recommend Plugrá or a high-quality European butter for better browning. Salted butter works, but you’ll need to reduce the added salt later.
- Garlic Cloves: Six to eight cloves. Fresh is key. Pre-minced jarred garlic tastes metallic and flat. Peel them yourself. Smash them lightly to release the oils.
- Olive Oil: Two tablespoons. This helps prevent the butter from burning. Butter burns easily at high heat. Oil raises the smoke point slightly. It’s a safety net.
- Dried Oregano: One teaspoon. Adds a subtle earthiness that balances the richness of the butter.
- Red Pepper Flakes: Half a teaspoon. Optional, but recommended. Just a little heat to wake up the palate. Don’t go crazy. You want warmth, not fire.
- Smoked Paprika: One teaspoon. This gives the chicken that deep, reddish color and a subtle smoky note. It’s not the same as regular paprika. Don’t swap it.
- Salt and Black Pepper: Generous amounts. Kosher salt is best because it adheres well to the skin. Coarse black pepper adds a nice crunch.
- Fresh Parsley: A handful, chopped. For garnish. It adds color and a fresh contrast to the heavy garlic butter.
- Lemon: One lemon, cut into wedges. Squeezing fresh acid over the rich chicken cuts the fat and brightens the whole dish. Essential.
For substitutions, if you can’t have dairy, you can swap the butter for ghee or a high-heat plant-based oil, though the flavor profile will change. For a gluten-free option, this recipe is naturally gluten-free, just ensure your paprika and spices are certified gluten-free. If you want more veggies, throw in some potatoes or broccoli, but note that they will need more time than the chicken. For a similar easy dinner vibe, you might also enjoy these easy Thai coconut curry pulled pork if you want to switch proteins but keep the one-pan convenience.
Equipment Needed
You don’t need a fancy kitchen to make this. Just the basics.
- Oven-Safe Skillet: This is the most important tool. Cast iron is ideal because it holds heat well and promotes even browning. Stainless steel works too. Avoid non-stick if you want maximum crisp, as you can’t get the pan hot enough without damaging the coating. If you only have non-stick, use low-medium heat and be patient.
- Baking Sheet: Optional. If your skillet isn’t oven-safe, you can sear the chicken in a regular pan and finish it on a baking sheet. But one pan is easier.
- Tongs: Heavy-duty tongs. You need to flip the chicken without tearing the skin. Flimsy tongs will rip it.
- Paper Towels: Lots of them. For drying the chicken. This is non-negotiable for crispiness.
- Small Bowl: For mixing your spices before sprinkling them on the chicken.
If you don’t have a cast iron skillet, a heavy-bottomed stainless steel skillet is your next best bet. Avoid thin aluminum pans; they have hot spots and will burn your garlic before the chicken is cooked. Also, make sure your skillet is large enough to hold the chicken in a single layer. Crowding creates steam. Steam kills crisp. If you have too much chicken, cook it in batches. Don’t skip this step.
Preparation Method
Let’s get into the weeds. Here is exactly how to make it happen. Follow these steps closely.
Step 1: Prep and Dry the Chicken (10 Minutes)
Take your chicken thighs out of the fridge. Pat them dry. And I mean dry. Use paper towels to remove every bit of moisture. This is the secret. Wet skin steams. Dry skin crisps. If the skin is damp, keep patting. Do the same for the other side. Once they are dry, sprinkle them generously with salt and pepper. Let them sit on the counter while you prep the rest. This air-drying step helps the skin tighten up.
Step 2: Heat the Pan (5 Minutes)
Place your oven-safe skillet over medium-high heat. Let it get hot. Add the olive oil. Swirl it around. When the oil shimmers and moves easily, it’s ready. Do not skip this. A cold pan will just make greasy chicken.
Step 3: Sear the Chicken (10 Minutes)
Place the chicken thighs in the pan, skin-side down. Do not move them. Let them sear. You want a deep golden brown crust. This takes about 6 to 8 minutes. Resist the urge to peek. Listen to the sizzle. If it’s too loud, turn the heat down slightly. If it’s silent, turn it up. Once the skin is crisp and releases easily from the pan, flip the thighs. Cook the other side for 2 minutes. This seals in the juices.
Step 4: Add Aromatics and Butter (2 Minutes)
Reduce the heat to medium. Add the butter to the pan. Once it melts and foams, add the smashed garlic cloves and the dried spices (oregano, paprika, red pepper flakes). Stir constantly for about 30 seconds. Do not let the garlic burn. It should smell fragrant and golden. If it starts to brown too fast, take the pan off the heat for a moment.
Step 5: Finish in the Oven (15-18 Minutes)
Transfer the skillet to a preheated 400°F (200°C) oven. Bake for 15 to 18 minutes. The internal temperature of the chicken should reach 165°F (74°C). The skin should be dark golden and very crispy. The garlic in the butter should be tender and sweet, not bitter.
Step 6: Rest and Serve (5 Minutes)
Remove the pan from the oven. Let the chicken rest for 5 minutes. This allows the juices to redistribute. If you cut into it immediately, the juices run out and the meat dries up. Sprinkle with fresh parsley. Squeeze lemon wedges over the top. Serve immediately with the garlic butter sauce from the pan.
Cooking Tips & Techniques
Here are some pro tips I’ve learned the hard way.
- Dry is Dry: I cannot stress this enough. If your chicken is wet, it won’t crisp. Use fresh paper towels. If the skin is still damp after the first pat, pat it again.
- Don’t Crowd the Pan: If you have too much chicken, the moisture from the chicken will get trapped. It will steam. Cook in batches if you have to. Better to cook twice than serve soggy chicken.
- Watch the Garlic: Garlic burns fast. If you are using a very hot pan, the garlic might burn before the chicken is done in the oven. To prevent this, you can add the garlic later, or use a lower oven temperature. But for this recipe, medium-high heat followed by 400°F oven works well. Just keep an eye on it.
- Use a Thermometer: Visual cues are good, but a thermometer is better. Chicken thighs can be tricky. They need to be cooked through, but not mushy. 165°F is the safe zone. Go up to 175°F if you want fall-off-the-bone tenderness, but the skin might soften slightly.
- Resist the Flip: When searing, let the chicken develop a crust. If you try to flip it too early, the skin will stick and tear. It will release on its own when it’s ready.
I once tried to rush this recipe. I turned the heat up too high and burned the garlic. The whole batch tasted bitter. I had to throw it out. Lesson learned. Patience pays off. Also, if you don’t have an oven-safe skillet, finish the chicken on a baking sheet. It’s not ideal, but it works. Just make sure the chicken is seared well on the stovetop first.
Variations & Adaptations
This recipe is a template. You can tweak it to fit your taste.
- Herb Swap: If you don’t like oregano, use thyme or rosemary. Fresh herbs are great, but add them at the end so they don’t burn. Dried herbs go in with the garlic.
- Spicy Version: Add more red pepper flakes. Or use cayenne pepper. If you like heat, drizzle with hot sauce after cooking. This pairs well with the richness of the butter.
- Veggie Add-In: Throw in some baby potatoes or asparagus spears. Toss them in the butter sauce before putting the chicken in the oven. Note that potatoes will take longer to cook, so par-boil them first or cut them small.
- Dairy-Free: Swap butter for ghee or avocado oil. The flavor will be different, but the technique remains the same. Ghee has a higher smoke point and a similar nutty flavor to browned butter.
- Lemon Herb: Add lemon zest to the butter mixture. It adds a bright, citrusy aroma that cuts through the fat. Very refreshing.
I once made this with soy sauce instead of salt. It was weirdly good. The umami from the soy sauce paired well with the garlic. It was like an Asian-inspired version. Try it if you’re bored with the classic profile. It’s a fun twist for a Tuesday night.
Serving & Storage Suggestions
Serve this hot. Right out of the pan. It pairs beautifully with roasted vegetables, a simple green salad, or crusty bread to soak up the garlic butter. For a lighter side, try these fresh quinoa avocado sushi salad bowls to balance the heavy meal.
To store leftovers, let them cool completely. Place them in an airtight container in the fridge for up to 3 days. The skin will soften in the fridge. This is normal. To crisp it back up, reheat in a skillet over medium heat or in the oven at 350°F. Do not microwave it. Microwaving makes the skin rubbery and the meat tough.
You can also freeze this dish. Wrap the chicken tightly in plastic wrap and foil. Freeze for up to 3 months. Thaw in the fridge overnight before reheating. The texture might be slightly different after freezing, but the flavor will still be good.
Nutritional Information & Benefits
Chicken thighs are higher in fat than breasts, but they are also more flavorful and juicy. They are a good source of protein, iron, and zinc. The skin contains healthy fats, though it is calorie-dense. If you are watching your calorie intake, you can remove the skin after cooking. However, you miss out on the best part.
Garlic has anti-inflammatory properties and supports immune health. Butter provides fat-soluble vitamins like A, D, E, and K. This recipe is naturally gluten-free and low-carb if you skip the bread. It’s a satisfying meal that keeps you full for hours. Just be mindful of portion sizes if you are tracking macros.
Conclusion
This Crispy One-Pan Garlic Butter Chicken Thighs recipe is a game-changer. It’s easy, it’s delicious, and it’s crispy. I hope you try it. Customize it with your favorite herbs or spices. Make it your own. And when you do, let me know how it turns out. Leave a comment below. Share your photos. I love seeing your creations.
Cooking should be fun. It should bring people together. This dish does that. It’s simple, but it’s special. So grab your skillet, get your garlic ready, and make some magic. You won’t regret it.
Frequently Asked Questions
Can I use chicken breasts instead of thighs?
Yes, but they will cook faster and dry out more easily. Reduce the cooking time by about 5-7 minutes. Keep a close eye on them to avoid overcooking.
Why is my chicken skin not crispy?
Likely because it wasn’t dry enough before cooking. Make sure to pat it thoroughly with paper towels. Also, ensure your pan is hot enough before adding the chicken.
Can I make this in an air fryer?
Yes. Cook at 375°F for 15-18 minutes, flipping halfway. The skin will get crispy, but you won’t get the garlic butter sauce in the pan. You’ll need to melt the butter and garlic separately and drizzle it on top.
How do I know when the chicken is done?
Use a meat thermometer. The internal temperature should reach 165°F. If you don’t have one, cut into the thickest part. The juices should run clear, not pink.
Can I prepare this ahead of time?
You can season the chicken and let it sit in the fridge for up to 24 hours before cooking. This actually helps the skin dry out further, leading to better crispiness. Just take it out of the fridge 20 minutes before cooking to take the chill off.
Pin This Recipe!
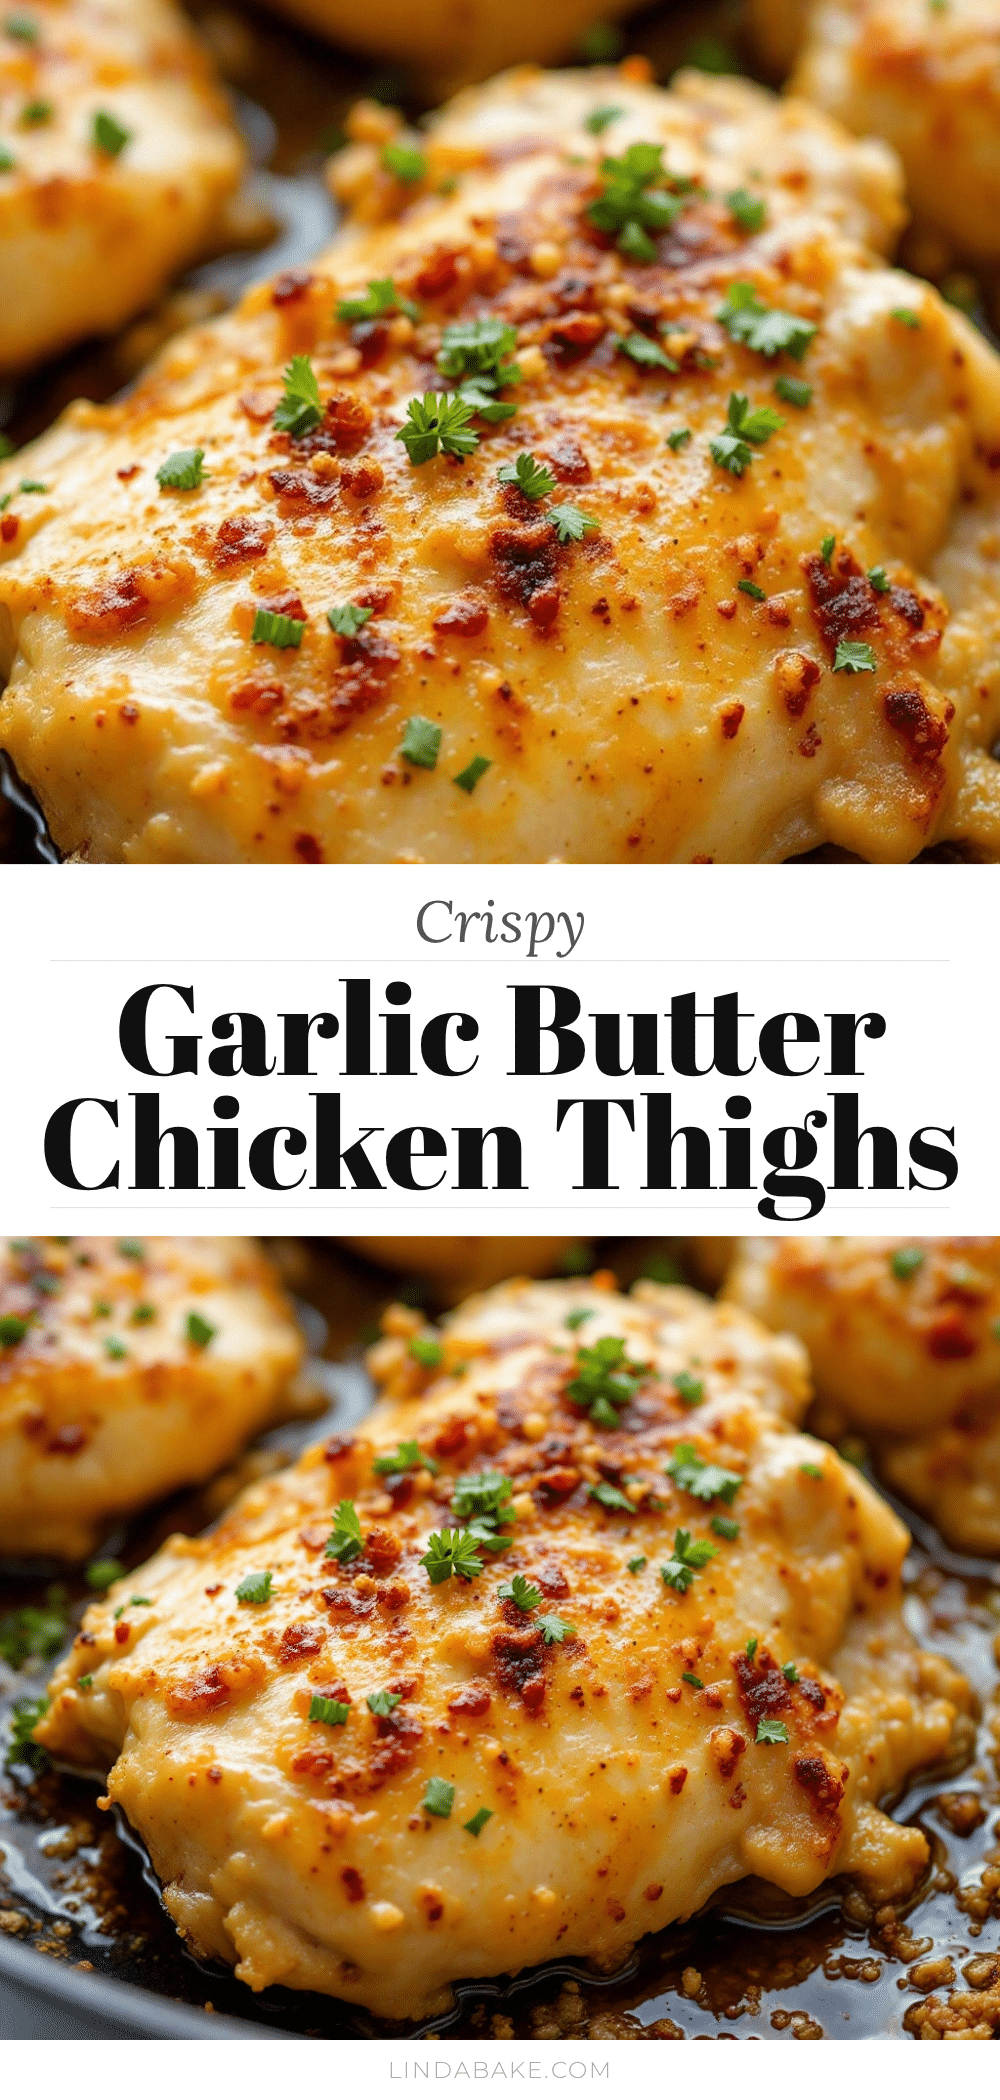
Crispy One-Pan Garlic Butter Chicken Thighs

Achieve shatteringly crisp chicken thighs with this easy one-pan recipe. Bone-in, skin-on thighs are seared and finished in the oven with garlic butter for a flavorful, textured dinner.
- Prep Time: 10 minutes
- Cook Time: 30 minutes
- Total Time: 40 minutes
- Yield: 4 servings 1x
- Category: Main Course
- Cuisine: American
Ingredients
- 2 to 3 pounds bone-in, skin-on chicken thighs
- 1/2 cup unsalted butter
- 6 to 8 cloves garlic, peeled and smashed
- 2 tablespoons olive oil
- 1 teaspoon dried oregano
- 1/2 teaspoon red pepper flakes
- 1 teaspoon smoked paprika
- Kosher salt and coarse black pepper
- Fresh parsley, chopped (for garnish)
- 1 lemon, cut into wedges
Instructions
- Pat chicken thighs completely dry with paper towels and season generously with salt and pepper. Let sit on the counter to air-dry.
- Heat an oven-safe skillet (preferably cast iron) over medium-high heat. Add olive oil and swirl until shimmering.
- Place chicken thighs skin-side down in the hot pan. Sear without moving for 6-8 minutes until the skin is deep golden brown and releases easily. Flip and cook for 2 minutes.
- Reduce heat to medium. Add butter to the pan. Once melted and foaming, add garlic, oregano, paprika, and red pepper flakes. Stir constantly for 30 seconds until fragrant.
- Transfer the skillet to a preheated 400°F (200°C) oven. Bake for 15-18 minutes until internal temperature reaches 165°F (74°C).
- Remove from oven and let rest for 5 minutes. Garnish with fresh parsley and serve with lemon wedges.
Notes
Ensure chicken is completely dry before cooking to maximize crispiness. Do not crowd the pan; cook in batches if necessary. Garlic burns easily, so watch it closely when adding to the hot pan. If using salted butter, reduce added salt. For dairy-free, swap butter for ghee or high-heat oil.
Nutrition
- Serving Size: 1-2 chicken thighs p
- Calories: 650
- Sodium: 800
- Fat: 45
- Saturated Fat: 18
- Carbohydrates: 2
- Protein: 50
Keywords: chicken thighs, crispy chicken, one pan dinner, garlic butter chicken, easy weeknight dinner, keto friendly, gluten free