For a while, I just accepted that roasted root vegetables weren’t going to taste like anything other than boiled dirt with a slightly charred edge. You know the feeling? You throw carrots and parsnips on a tray, toss them with oil, and pray for the best. Usually, they end up soggy in the middle or burnt at the tips. It was a consistent disappointment, honestly. I had tried the high-heat method, the low-and-slow method, and even the foil packet trick that some internet gurus swear by. None of it worked. The carrots stayed hard. The beets leaked purple everywhere and stained my baking sheets permanently. It was just one of those kitchen frustrations I dealt with because I knew I *should* be eating more vegetables. But I didn’t want to eat more vegetables that tasted like compromise.
Then came the Tuesday in late November when I was tired, hungry, and refused to order takeout again. I had a bag of mismatched roots in the crisper drawer that were starting to shrivel. I decided to stop treating them like delicate flowers and start treating them like sturdy survivors. I cut them into uniform chunks, yes, but I also made sure they had space. Real space. No crowding the pan. I tossed them in a mixture of oil and a splash of vinegar before they even hit the oven. I didn’t know it then, but that acid was the secret. It breaks down the surface just enough to let the sugar caramelize instead of steam.
The smell that came out of the oven was different. It wasn’t just “cooked veg.” It was sweet, tangy, and deeply savory. The edges were crisp, almost like chips, while the centers were creamy and soft. I took a bite and actually closed my eyes. It wasn’t a dramatic revelation, just a quiet realization that I had been doing it wrong for years. The Crispy Roasted Root Vegetable Medley with Balsamic Glaze became my go-to not because it’s fancy, but because it finally delivers on the promise of what a roasted vegetable should be. It’s simple, it’s forgiving, and it makes even the pickiest eaters ask for seconds.
Why You’ll Love This Recipe
This isn’t just another side dish that sits in the background while the main event gets all the attention. This recipe is the star of the table, and here is why it works so well. I have tested this method dozens of times, tweaking the ratios and temperatures, to get it right for your home kitchen. It’s not about perfection; it’s about flavor and texture that actually satisfy.
- Crispy Edges, Creamy Centers: The secret lies in the pre-toss with acid and the spacing on the pan. You get that restaurant-quality crunch without needing a deep fryer.
- Simple Ingredients: You likely have most of this in your pantry already. Root vegetables, oil, vinegar, and a few herbs. No fancy grocery trips needed.
- Perfect for Meal Prep: These veggies actually taste better the next day. The flavors meld together overnight, making them perfect for lunchboxes or quick weeknight dinners.
- Versatile Base: They pair well with everything from roast chicken to the creamy no-mayo chicken salad wraps I make when I want something light but filling.
- Unbelievably Delicious: The balsamic glaze adds a sweet-tart finish that cuts through the earthiness of the beets and carrots. It’s comfort food reimagined.
What makes this different from other roasted veg recipes is the attention to detail in the prep. Most people skip the step of drying the vegetables after washing, which leads to steaming instead of roasting. I learned that the hard way. Once you start patting them dry and letting them sit in the oven with room to breathe, everything changes. It’s the kind of recipe that makes you feel like a pro cook without any of the stress.
What Ingredients You Will Need
This recipe uses simple, wholesome ingredients to deliver bold flavor and satisfying texture without the fuss. The beauty of a root vegetable medley is its flexibility. You can use whatever is in season or whatever is on sale at your local market. The key is choosing vegetables with similar densities so they cook at the same rate. If you use huge potatoes and tiny pearl onions, you’ll end up with mushy onions and hard potatoes. Here is what you need to get started.
- Carrots: 1 pound, peeled and cut into 1-inch chunks. Look for fresh, firm carrots. Old, wilted ones will not crisp up nicely. I prefer organic when possible to avoid pesticide residue, but conventional works fine if washed thoroughly.
- Parsnips: 1 pound, peeled and cut into 1-inch chunks. Parsnips are like sweeter, earthier carrots. If you can’t find them, you can substitute with more carrots or turnips.
- Beets: 2 medium beets, peeled and cubed. Pre-cooked beets can be used, but raw beets roasted in the oven develop a deeper, richer flavor. Handle with care as they stain everything purple!
- Red Onion: 1 large red onion, cut into 1-inch wedges. Red onion holds its shape better than yellow onion during high-heat roasting and adds a nice pop of color.
- Extra Virgin Olive Oil: 3 tablespoons. Use a good quality oil. I recommend Bertolli or a local cold-pressed brand for the best flavor profile. Cheap oil can taste bitter when roasted.
- Balsamic Vinegar: 1 tablespoon. This is crucial for the initial toss. It helps break down the cell walls for better caramelization.
- Sea Salt and Black Pepper: To taste. Use kosher salt for easier distribution. Freshly cracked pepper adds a necessary bite.
- Garlic Powder: 1 teaspoon. I use garlic powder instead of fresh garlic in the initial toss because fresh garlic burns easily in the oven. You can add fresh minced garlic in the last 5 minutes if you prefer.
- Fresh Thyme: 2 sprigs. Or 1 teaspoon of dried thyme. Thyme pairs beautifully with root vegetables and adds an aromatic, woodsy note.
- Balsamic Glaze: 2 tablespoons for finishing. You can buy this or reduce balsamic vinegar in a saucepan until syrupy. Store-bought is fine for convenience.
If you are looking for a gluten-free or vegan option, this recipe is naturally both. Just ensure your balsamic glaze doesn’t contain added honey if you are strictly vegan. For a nut-free version, skip any garnishes like nuts or seeds. The substitution options are endless. Swap parsnips for rutabaga, or add sweet potatoes if you want a softer texture. The base method remains the same.
Equipment Needed
You don’t need fancy gadgets for this. A few basic tools will get you the best results. The most important item is a large, heavy-duty baking sheet. I use a rimmed half-sheet pan, preferably the heavy aluminum ones from Lodge or Chicago Metallic. They distribute heat evenly, which prevents hot spots that burn the edges.
A second baking sheet is highly recommended. Crowding is the enemy of crispiness. If you can, use two pans so the vegetables have space between them. If you only have one pan, roast in two batches. It’s worth the extra effort. You will also need a large mixing bowl for tossing the vegetables. A silicone spatula helps get every bit of oil and seasoning coated onto the roots.
For the balsamic glaze, a small saucepan is needed if you are making it from scratch. A simple whisk will do the trick. If you buy pre-made glaze, you can skip this entirely. Finally, a sharp chef’s knife and a peeler are essential for prepping the vegetables. Uniform cuts ensure even cooking. If your knife is dull, you’ll crush the vegetables instead of cutting them, which releases too much moisture. Keep your knives sharp, people. It makes cooking safer and more enjoyable.
Preparation Method
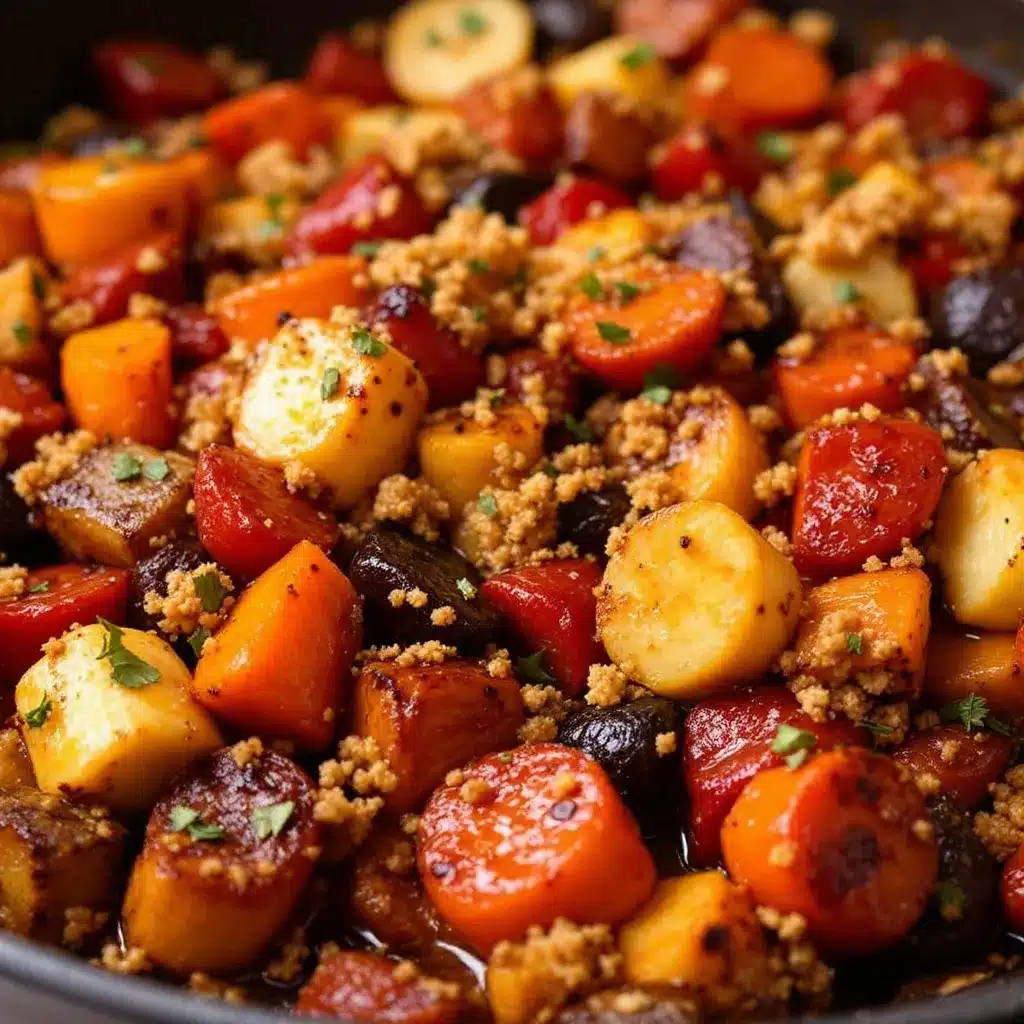
Getting the Crispy Roasted Root Vegetable Medley with Balsamic Glaze ready is straightforward, but the steps matter. Follow these instructions carefully for the best texture and flavor.
- Preheat the Oven: Set your oven to 425°F (220°C). This high temperature is necessary to caramelize the natural sugars in the vegetables. Allow the oven to fully preheat for at least 15 minutes. An underheated oven will steam the veggies instead of roasting them.
- Prep the Vegetables: Peel the carrots, parsnips, and beets. Cut them into uniform 1-inch cubes. Cut the red onion into wedges, keeping the root end intact to hold the layers together. Uniformity is key here. If a piece is too small, it will burn. If it’s too big, it will remain raw in the center.
- Dry Thoroughly: This is the step most people skip. After washing the vegetables, pat them completely dry with paper towels or a clean kitchen towel. Any excess water will turn to steam in the oven, preventing crisping. Let them sit on a rack for 10 minutes if you have time.
- Season and Toss: In a large bowl, combine the dried vegetables with olive oil, balsamic vinegar, garlic powder, salt, and pepper. Toss until every piece is lightly coated. The balsamic vinegar will bubble slightly as it hits the oil—this is normal.
- Arrange on Pan: Line your baking sheet(s) with parchment paper for easy cleanup. Spread the vegetables in a single layer. Do not overlap them. If they are touching, they will steam. Leave space between each piece. This might seem like a lot of pans, but it’s necessary.
- Roast: Place the pans in the oven. Roast for 20 minutes. Then, remove the pans and flip the vegetables over. This ensures even browning on all sides. Return to the oven and roast for another 15-20 minutes, or until the edges are dark brown and crispy, and the centers are tender when pierced with a fork.
- Add Herbs: If using fresh thyme, add the sprigs to the pan during the last 5 minutes of roasting. This prevents the leaves from burning and turning bitter.
- Finish with Glaze: Remove the pan from the oven. Drizzle the balsamic glaze over the hot vegetables while they are still steaming. The heat will help the glaze stick and caramelize slightly. Toss gently to coat.
- Serve: Serve immediately while hot and crispy. Garnish with fresh parsley or cracked pepper if desired.
Common mistake alert: Do not salt the vegetables too early if you are meal prepping. Salt draws out moisture. If you are eating them right away, salt before roasting. If you are storing them, add fresh salt after reheating to maintain crispiness.
Cooking Tips & Techniques
I’ve learned a few things the hard way so you don’t have to. First, never skip the drying step. I once rushed this and ended up with soggy carrots that tasted bland. The moisture was the culprit. Second, use parchment paper. It prevents sticking and makes cleanup a breeze. Without it, you’ll be scrubbing burnt sugar off your pan for hours.
Another tip is to check your vegetables halfway through. Ovens vary. Some run hot, some run cold. If you see dark spots forming too quickly, lower the temperature by 25°F. You want golden brown, not black. Also, the size of your cuts matters. If you cut them too small, they will turn into crisps or chips. If you want tender chunks, stick to 1-inch pieces.
Multitasking is key here. While the vegetables roast, you can prepare your main dish or make the balsamic glaze. The roasting time is about 40 minutes total, which is a good window for other tasks. Just remember to set a timer. It’s easy to get distracted and leave them in until they are charcoal.
For extra crispiness, you can add a teaspoon of cornstarch to the oil mixture. It creates a thin crust on the outside of the vegetables. I don’t always do this, but it’s a great trick if you want that fried-like texture. However, the balsamic vinegar usually does enough work on its own.
Variations & Adaptations
One of the best things about this recipe is how adaptable it is. You can change it up based on what you have or what you’re in the mood for. Here are a few ideas:
- Sweet Potato Twist: Swap half the carrots for sweet potatoes. They are softer and sweeter, so they cook faster. Reduce the roasting time by 5 minutes to prevent mushiness.
- Spicy Kick: Add a pinch of cayenne pepper or red pepper flakes to the oil mixture. This pairs well with the sweetness of the balsamic glaze and adds a nice heat.
- Herb Variations: If you don’t like thyme, try rosemary or sage. Rosemary is particularly good with potatoes and carrots. Just chop it finely so it doesn’t overwhelm the dish.
- Vegan Option: This recipe is naturally vegan. Just ensure your balsamic glaze is vegan-friendly (some contain honey).
- Gluten-Free: Naturally gluten-free. No adjustments needed.
I once made this with rutabaga and celeriac instead of parsnips. It was earthier and more complex. It was a happy accident. Don’t be afraid to experiment with different root vegetables. Turnips, parsnips, salsify, and even kohlrabi can work. Just keep the sizes uniform.
Serving & Storage Suggestions
These vegetables are best served immediately after roasting, while they are still hot and crispy. They pair wonderfully with roast chicken, grilled fish, or the creamy hatch green chile chicken enchiladas for a hearty meal. They also make a great side for holiday dinners or casual weeknight suppers.
If you have leftovers, store them in an airtight container in the refrigerator for up to 4 days. They will soften in the fridge, which is normal. To reheat, use an oven or air fryer at 375°F for 10 minutes. This will restore some of the crispiness. Avoid the microwave, as it will make them soggy and rubbery.
For meal prep, roast the vegetables on Sunday and store them in containers. They make a great addition to grain bowls or salads. The flavors actually improve after a day in the fridge, as the balsamic continues to penetrate the vegetables. Just add a fresh drizzle of glaze before eating.
Nutritional Information & Benefits
Root vegetables are nutritional powerhouses. Carrots are high in beta-carotene, which converts to vitamin A and supports eye health. Parsnips provide fiber and vitamin C. Beets are rich in nitrates, which can help lower blood pressure and improve stamina. The olive oil adds healthy monounsaturated fats, which aid in nutrient absorption.
This recipe is naturally gluten-free, vegan, and dairy-free. It is low in saturated fat and high in fiber. A typical serving contains about 150 calories, with 8g of carbs, 3g of fiber, and 2g of protein. It’s a nutrient-dense side dish that supports overall wellness. I love adding this to my meals because it makes me feel energized and satisfied without the heavy feeling of a starch-heavy side.
Conclusion
Making a Crispy Roasted Root Vegetable Medley with Balsamic Glaze is easier than you think, and the results are worth the effort. It transforms humble ingredients into a dish that feels special and satisfying. I hope you try this recipe and find it becomes a staple in your kitchen, just as it has in mine. Don’t be afraid to tweak it to suit your tastes. Add more herbs, swap out vegetables, or adjust the spice level. It’s your kitchen, after all.
If you make this, I’d love to hear how it turns out. Leave a comment below with your thoughts or share a photo of your creation. Tag me on social media if you post it. I love seeing how you adapt the recipe. Thanks for reading, and happy cooking! Let’s face it, eating more vegetables doesn’t have to be boring. With a little technique and some good balsamic glaze, it can be the best part of your meal.
FAQs
Can I use frozen root vegetables?
It is not recommended. Frozen vegetables release a lot of water when thawed, which prevents them from crisping up. Always use fresh vegetables for the best results.
Why are my vegetables soggy?
This usually happens if the pan is overcrowded or if the vegetables weren’t dried thoroughly before roasting. Make sure to leave space between the pieces and pat them dry.
Can I make the balsamic glaze ahead of time?
Yes, you can. Simply reduce balsamic vinegar in a saucepan until it thickens. Let it cool and store it in a jar in the fridge for up to a month.
What other vegetables can I add?
You can add sweet potatoes, turnips, rutabaga, or celeriac. Just ensure they are cut to a similar size as the other vegetables for even cooking.
Is this recipe kid-friendly?
Absolutely. The natural sweetness of the carrots and parsnips, combined with the tangy balsamic glaze, is usually a hit with kids. It’s a great way to sneak more veggies into their diet.
Pin This Recipe!
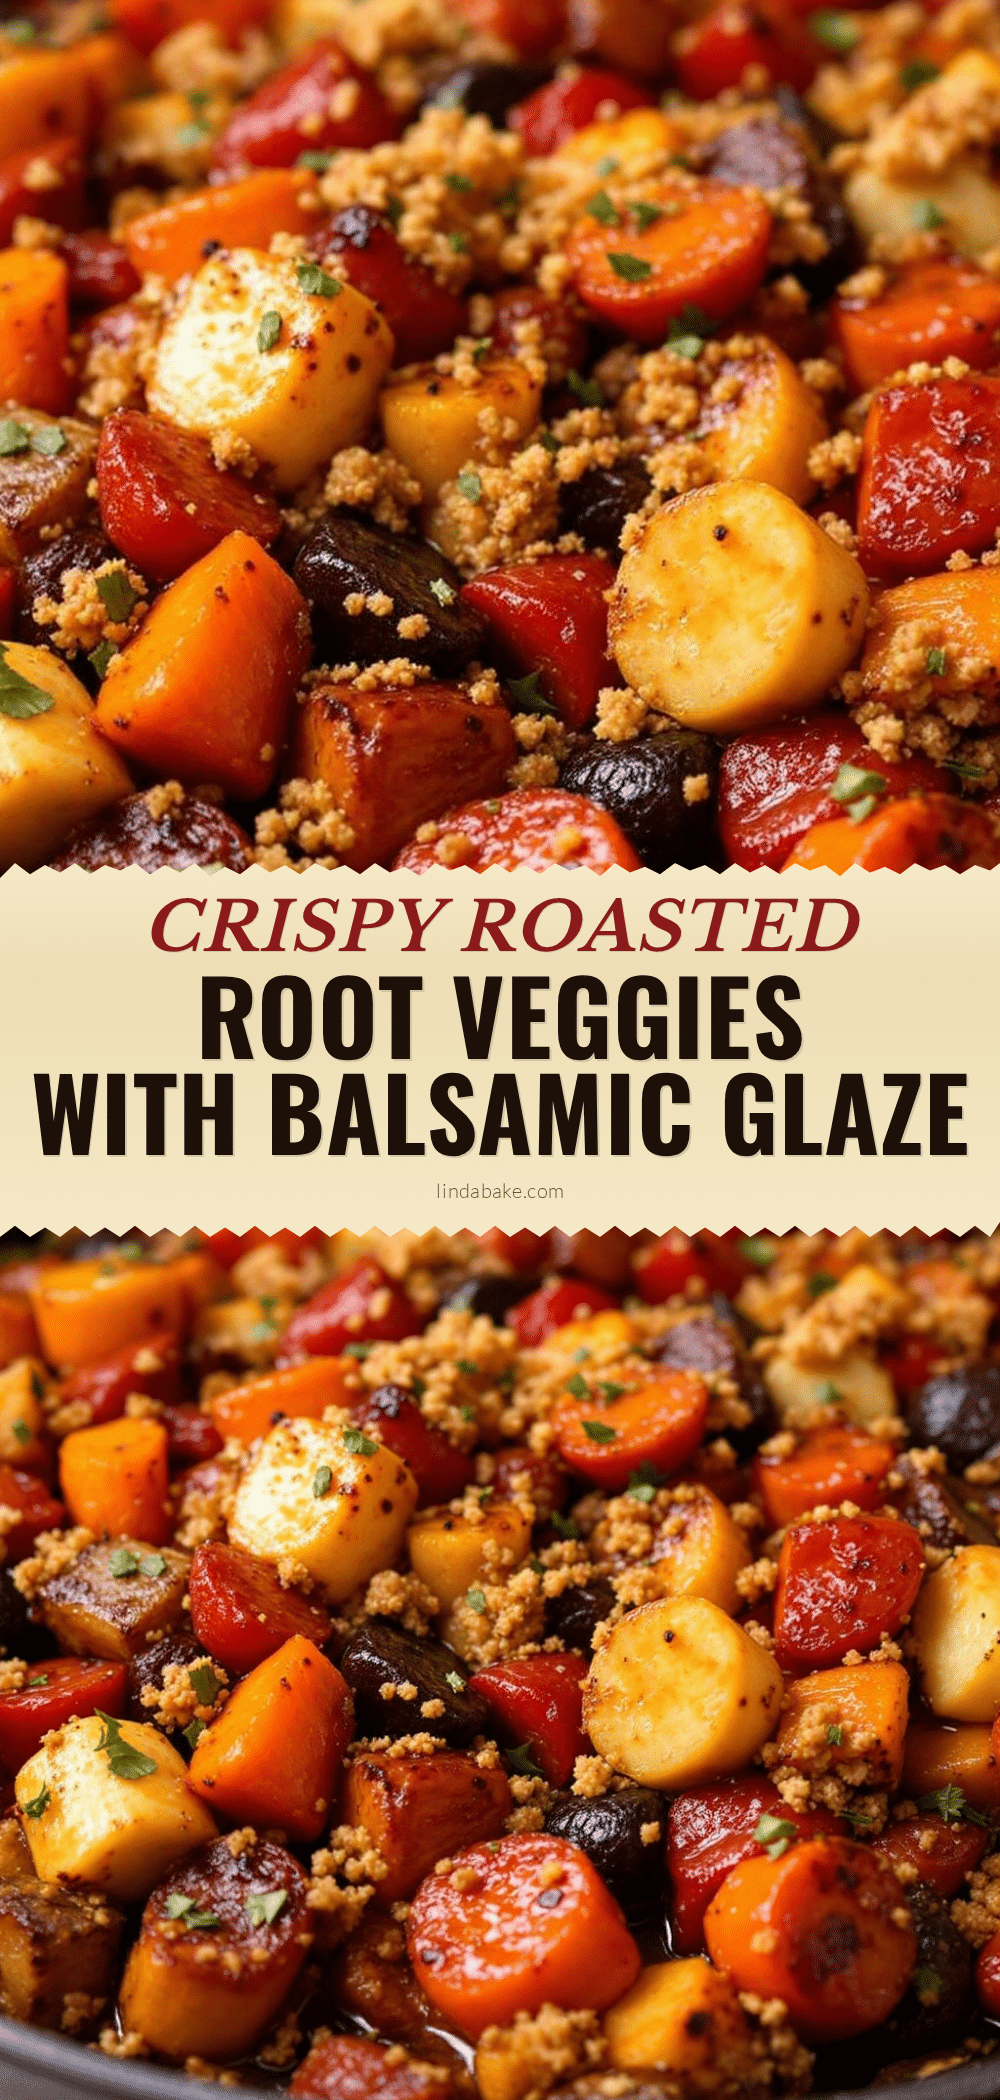
Crispy Roasted Root Vegetable Medley with Balsamic Glaze
A simple yet flavorful side dish featuring roasted root vegetables tossed in olive oil and balsamic vinegar for maximum caramelization and crispiness, finished with a sweet-tart balsamic glaze.
- Prep Time: 15 minutes
- Cook Time: 40 minutes
- Total Time: 55 minutes
- Yield: 4 servings 1x
- Category: Side Dish
- Cuisine: American
Ingredients
- 1 pound carrots, peeled and cut into 1-inch chunks
- 1 pound parsnips, peeled and cut into 1-inch chunks
- 2 medium beets, peeled and cubed
- 1 large red onion, cut into 1-inch wedges
- 3 tablespoons extra virgin olive oil
- 1 tablespoon balsamic vinegar
- 1 teaspoon garlic powder
- Sea salt and black pepper, to taste
- 2 sprigs fresh thyme (or 1 teaspoon dried thyme)
- 2 tablespoons balsamic glaze for finishing
Instructions
- Preheat oven to 425°F (220°C) and allow it to fully preheat for at least 15 minutes.
- Peel carrots, parsnips, and beets, then cut into uniform 1-inch cubes. Cut red onion into wedges.
- Wash vegetables and pat them completely dry with paper towels to ensure crispiness.
- In a large bowl, combine dried vegetables with olive oil, balsamic vinegar, garlic powder, salt, and pepper. Toss until evenly coated.
- Line baking sheet(s) with parchment paper. Spread vegetables in a single layer without overlapping to prevent steaming.
- Roast for 20 minutes, then remove pans and flip vegetables. Return to oven and roast for another 15-20 minutes until edges are dark brown and centers are tender.
- Add fresh thyme sprigs during the last 5 minutes of roasting.
- Remove from oven and drizzle with balsamic glaze while hot. Toss gently to coat.
- Serve immediately while hot and crispy.
Notes
Do not overcrowd the pan; use two sheets or roast in batches if necessary. Ensure vegetables are thoroughly dried before roasting to prevent steaming. If meal prepping, add salt after reheating to maintain crispiness. For extra crispiness, a teaspoon of cornstarch can be added to the oil mixture.
Nutrition
- Serving Size: 1 cup
- Calories: 150
- Sugar: 5
- Sodium: 120
- Fat: 8
- Saturated Fat: 1
- Carbohydrates: 8
- Fiber: 3
- Protein: 2
Keywords: roasted root vegetables, balsamic glaze, crispy vegetables, vegan side dish, gluten-free recipe, healthy dinner, meal prep


