The doorbell rang at 7:45 PM on a Tuesday, which is never a good sign when you have a full workday behind you and a sink full of dishes in front of you. It was my neighbor, holding a bag of apples she’d picked from her backyard tree, looking slightly apologetic but also desperate for company because her babysitter had canceled. I didn’t have a fancy appetizer plan, obviously, because I’m not one of those people who preps for Tuesday evenings. The only thing in my fridge that wasn’t a half-empty jar of pickles or old yogurt was a bag of Gala apples, a block of cheddar, and a tin of toffee bits I’d bought on impulse last week.
I panicked for about thirty seconds. Thirty seconds is a long time when you’re trying to look like you have your life together. But then I remembered how much I loved the sweet and salty combo from my easy apple nachos with peanut butter drizzle recipe. That was the spark. I grabbed the biggest wooden board I could find from the pantry, grabbed a sharp knife, and started slicing. It wasn’t planned. It was messy. My hands got sticky with caramel, and I almost dropped the cheese knife into the sink.
But by the time we sat down with a glass of wine, the board looked incredible. It was vibrant, crunchy, and smelled like autumn even though it was barely October. My neighbor took one bite of a caramel-dipped apple slice topped with a toffee crumble and her eyes literally widened. She asked for the recipe before she even finished chewing. Honestly, it was the best compliment I could have gotten. That unplanned night turned into a tradition. Now, whenever I have guests or just need a win in the kitchen, I pull out the ingredients for this crispy caramel apple charcuterie board. It’s not complicated, and it doesn’t require a chef’s degree. It just requires a little improvisation and a lot of good snacks.
Why You’ll Love This Recipe
Let’s be real for a second. Most charcuterie boards are just cheese and crackers. They’re fine, sure. But sometimes you want something that pops. This crispy caramel apple charcuterie board with toffee bits is different because it hits every single craving center in your brain at once. It’s sweet, it’s salty, it’s crunchy, and it’s creamy. I’ve tested this setup dozens of times, from holiday parties to last-minute weeknight treats, and it never fails to impress. Here is why this specific combination works so well:
- Quick & Easy: You don’t need to cook anything. The only “cooking” involved is melting the caramel, which takes about five minutes. It’s perfect for busy weeknights or when you’re hosting and want to spend time with your guests, not stuck in the kitchen.
- Simple Ingredients: You likely already have most of this in your pantry or fridge. Apples, cheese, nuts, and toffee bits are staples. No fancy grocery trips needed for obscure ingredients you’ll only use once.
- Perfect for Holidays: This is the ultimate holiday appetizer. The colors are festive, the flavors scream fall and winter, and it’s a crowd-pleaser that appeals to both kids and adults who might be tired of savory snacks.
- Crowd-Pleaser: I’ve served this at potlucks, dinner parties, and game day gatherings (paired with the best bacon wrapped little smokies for a full spread). It always gets rave reviews. People love the interactive nature of dipping their own apples.
- Unbelievably Delicious: The texture combo is next-level. You get the crisp snap of the apple, the gooey stretch of the caramel, the crunch of the toffee, and the sharp tang of the cheese. It’s comfort food reimagined.
What makes this recipe stand out from the rest is the balance. A lot of sweet boards can get cloying or too heavy. By adding sharp cheddar and salty nuts, you cut through the sugar perfectly. It’s not just good; it’s the kind of snack that makes you close your eyes after the first bite. It’s satisfying without being overly complicated. Plus, it looks stunning on social media, which is a nice bonus if you’re into that. It’s the kind of dish that makes a simple evening feel special, without any stress.
What Ingredients You Will Need
This recipe uses simple, wholesome ingredients to deliver bold flavor and satisfying texture without the fuss. The beauty of this board is that it relies on high-quality basics rather than processed gimmicks. You want ingredients that taste like themselves. Here is a breakdown of what you need to build the perfect board.
- Apples: You need firm, crisp apples that won’t turn to mush. Gala and Honeycrisp are my top picks because they are sweet and crunchy. Granny Smith works if you want more tartness, but it changes the vibe. Look for apples that are heavy for their size, which means they are juicy. Wash them thoroughly and keep them whole until you are ready to slice.
- Caramel Sauce: This is the star. I recommend using a high-quality store-bought caramel sauce for convenience, but homemade is nice if you have time. Look for a sauce that is thick and pourable, not runny. Brands like Smucker’s or Trader Joe’s work well. If you make your own, ensure it doesn’t get too hard when it cools.
- Toffee Bits: These add the essential crunch. You can buy them in the baking aisle near the chocolate chips, or crush up a Heath bar if you prefer. Make sure they are fresh. Old toffee bits lose their crunch and become chewy, which ruins the texture contrast you’re going for.
- Sharp Cheddar Cheese: Don’t use mild cheddar here. You need sharp or extra-sharp cheddar to balance the sweetness. Cube it into bite-sized pieces. I prefer cubes over slices because they are easier to pick up and dip. If you want a different flavor profile, Gruyère or Gouda work nicely too.
- Walnuts or Pecans: Toasted nuts add another layer of crunch and earthiness. Toasting them in a dry pan for a few minutes brings out their oils and flavor. Chop them roughly. You don’t need them powdered; you want distinct pieces to bite into.
- Pretzels: For a salty crunch that isn’t a nut, pretzel rods or chunks are great. They hold up well against the moisture of the apples. I like to break them into smaller, bite-sized pieces so they fit nicely on the board.
- Optional Add-ins: If you want to expand the board, dried cranberries or apricots add a chewy texture. White chocolate chips can be added for extra sweetness. Just remember, the more you add, the harder it is to manage. Stick to the core four or five items for the best experience.
Equipment Needed
You don’t need a lot of fancy gear for this, which is part of the appeal. Here is what you’ll need to get it done efficiently.
- Large Cutting Board: A large wooden board is ideal for presentation. It looks rustic and warm. If you don’t have one, a large platter or even a clean marble slab works. Just make sure it’s big enough to hold all the items without overcrowding.
- Sharp Knife: A good chef’s knife is essential for slicing the apples evenly. A dull knife will bruise the apples and make them look messy. Keep your knife sharp.
- Small Saucepan: If you are melting the caramel, a small saucepan works best. It gives you control over the heat. If you don’t have one, a microwave-safe bowl works fine for short bursts of heating.
- Spatula: A silicone spatula is helpful for stirring the caramel and scraping the sides of the pan. It also helps you drizzle the caramel evenly over the board.
- Small Bowls: Use small ramekins or bowls for the nuts and toffee bits. This keeps the board organized and prevents the small items from rolling away. It also makes it easier for guests to grab a handful without touching everything else.
If you are on a budget, you don’t need to buy new equipment. Use what you have. A baking sheet lined with parchment paper can work as a makeshift board if you are serving in the kitchen. The key is to have everything ready before you start melting the caramel, because once it’s hot, you want to work quickly.
Preparation Method
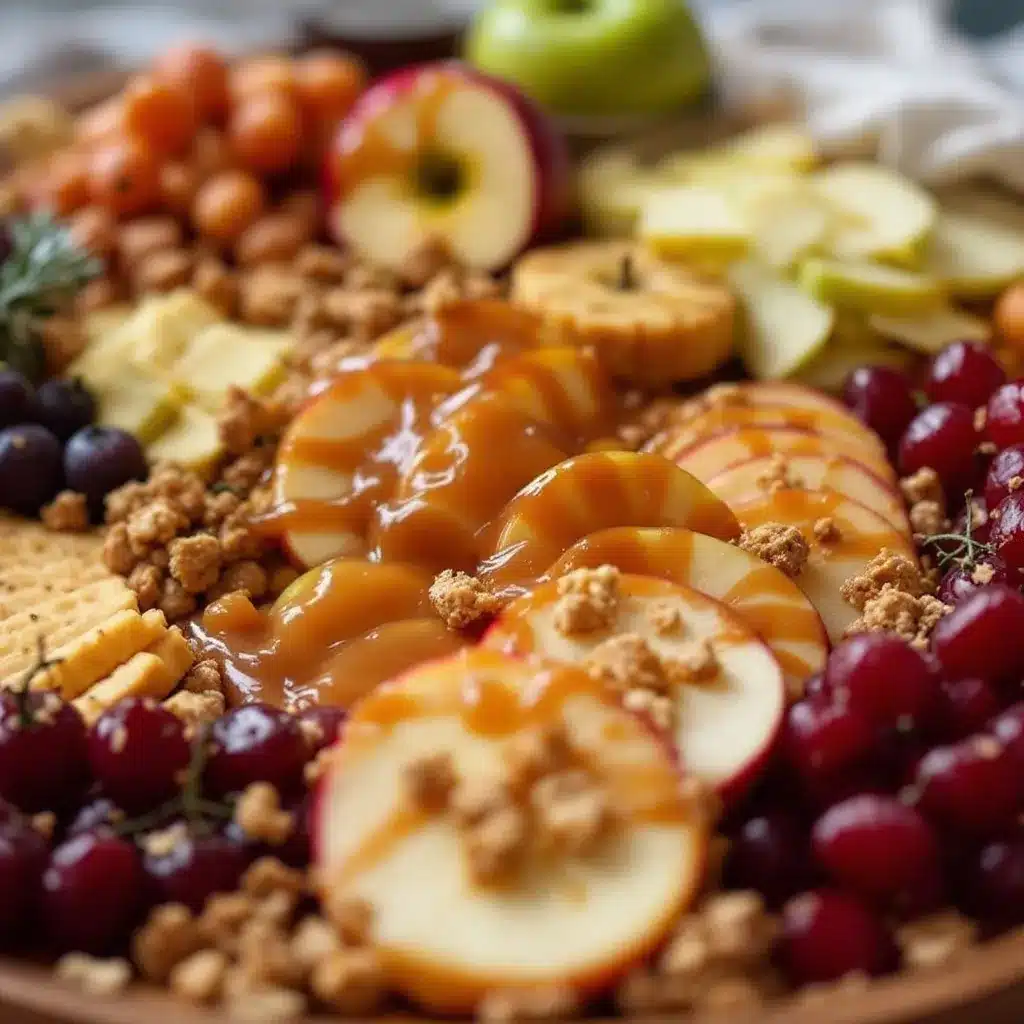
Getting this board together is straightforward, but timing is everything. You want the caramel to be warm and fluid, but not scorching hot. Follow these steps to ensure your board looks as good as it tastes.
- Prep the Apples (10 minutes): Wash and dry your apples thoroughly. Moisture is the enemy here; wet apples won’t hold the caramel well. Slice them into wedges or rounds, depending on your preference. Wedges are easier to dip. Immediately after slicing, place them on a plate lined with paper towels to absorb any excess juice. This step is crucial for keeping the board from getting soggy.
- Prepare the Cheese (5 minutes): Cut your sharp cheddar cheese into cubes. Aim for bite-sized pieces, about 1 inch on each side. If you are using a harder cheese like aged cheddar, you might need to grate it slightly or cut it into smaller chunks so it’s easier to eat. Arrange the cheese cubes in small piles or clusters on your board.
- Toast the Nuts (5 minutes): If you are using raw walnuts or pecans, toast them in a dry skillet over medium heat for about 3-4 minutes. Shake the pan frequently to prevent burning. You want them to be fragrant and slightly golden. Let them cool completely before chopping. Chopping them while they are still warm will turn them into dust, which is not what you want.
- Melt the Caramel (5 minutes): Pour your caramel sauce into a small saucepan. Heat it over low heat, stirring constantly, until it is fluid and warm. Do not let it boil. If you use a microwave, heat it in 15-second intervals, stirring in between, until it reaches a drizzling consistency. The goal is a warm, pourable liquid. If it gets too thick, add a teaspoon of milk or cream to thin it out.
- Assemble the Board (10 minutes): Start by placing the larger items on the board. Arrange the apple slices in a fan shape or scattered pattern. Place the cheese cubes in the empty spaces. Drizzle the warm caramel generously over the apples and cheese. Use a zigzag motion for a pretty effect. Don’t be shy with the caramel; it’s the binding agent.
- Add the Crunch (5 minutes): Sprinkle the toasted nuts and toffee bits over the caramel-covered areas. This ensures they stick in place. Add the pretzels around the edges for a salty contrast. Finally, add any optional dried fruits or chocolate chips. Step back and admire your work. It should look abundant and inviting.
If you notice the caramel hardening too quickly on the board, you can gently reheat it in the microwave for a few seconds and drizzle again. The key is to keep the caramel warm until the very last second.
Cooking Tips & Techniques
There are a few tricks I’ve learned over the years that make this recipe fail-proof. First, never skip the drying step for the apples. If the apples are wet, the caramel will slide right off, and you’ll end up with a sticky mess on your fingers instead of a clean bite. Pat them dry with paper towels. I usually dry them twice to be sure.
Second, watch your caramel heat. Caramel burns easily and tastes bitter if it does. Low and slow is the way to go. If you are using store-bought caramel, it’s often already sweetened, so be careful not to overheat it. Just warm it until it flows.
Third, balance is key. If you find the board too sweet, add more cheese or pretzels. If it’s too salty, add more apples or a few chocolate chips. Taste as you go. I once made a board that was so salty I couldn’t eat it, and it was a funny mistake but a costly one. Learn from my error.
Also, assemble the board just before serving. If you make it too early, the apples might brown slightly, and the caramel might soak into the pretzels, making them soft. You want everything to be crisp. If you must prepare ahead, keep the apples in an acidulated water bath (water with a little lemon juice) and drain them well right before assembling.
Finally, use a wide spatula or tongs to serve. It’s easier for guests to pick up items without touching everything else. This keeps the presentation clean and hygienic. It’s a small detail, but it makes a big difference in how the board is perceived.
Variations & Adaptations
This recipe is very flexible, so feel free to tweak it to suit your taste or dietary needs. Here are a few variations I’ve tried that work well.
- Gluten-Free Option: Simply swap the pretzels for gluten-free pretzels or rice crackers. Most toffee bits and caramel sauces are naturally gluten-free, but always check the labels to be sure. The apples, cheese, nuts, and toffee are all gluten-free by default.
- Dairy-Free Twist: Use dairy-free caramel sauce and a dairy-free cheese alternative. There are many vegan cheddar styles that melt and taste great. You can also skip the cheese entirely and add more nuts and dried fruit for a purely plant-based board.
- Chocolate Lover’s Version: Add white chocolate chips or dark chocolate chunks to the board. Drizzle melted dark chocolate over the caramel for a rich, double-chocolate effect. This is great for dessert-focused gatherings.
- Savory-Sweet Balance: Add prosciutto or bacon bits to the board. The salty, cured meat pairs surprisingly well with the sweet apples and caramel. This adds a protein element and makes the board more substantial.
- Seasonal Fruit Swap: In the winter, you can use pear slices instead of apples. Pears are softer, so handle them gently. In the summer, you might try apple slices with a berry compote instead of caramel. It’s a nice twist on the classic flavor profile.
I once tried adding peanut butter cups to the board, chopped up. It was delicious but very messy. The chocolate melted everywhere. So, stick to the simpler variations unless you want a sticky situation. The beauty of this board is its simplicity. Don’t overcomplicate it.
Serving & Storage Suggestions
This board is best served immediately after assembly. The caramel should be warm, and the apples should be crisp. If you are serving it at a party, place it on a table where guests can graze. It’s a great conversation starter. Pair it with a glass of cider, wine, or even coffee for a cozy vibe.
If you have leftovers, store the components separately. Keep the apple slices in an airtight container in the fridge to prevent browning. Store the caramel, nuts, and cheese in their own containers. The board will not hold up well in the fridge because the caramel will harden and the apples will lose their crunch. Reassemble the board the next day if you have leftovers.
To reheat the caramel, warm it gently in the microwave or on the stove. You can also serve the apples at room temperature for the best flavor. Cold apples can taste less sweet. Let them sit out for 15 minutes before serving if you refrigerated them.
The flavors develop nicely over time if you eat it within 24 hours. The caramel softens the nuts slightly, which some people prefer. But for the best texture, fresh is best. Enjoy it while it’s crisp and crunchy.
Nutritional Information & Benefits
This snack is indulgent but can be balanced. Apples provide fiber and vitamin C, which is good for your immune system. Cheese offers protein and calcium. Nuts provide healthy fats and protein. However, the caramel and toffee are high in sugar and calories. Enjoy this in moderation as a treat.
For a healthier version, use less caramel and more nuts and apples. You can also choose dark chocolate chips for added antioxidants. The key is balance. Don’t feel guilty about enjoying it; it’s a special treat.
Allergens to watch out for include nuts, dairy, and gluten (if using pretzels). Always inform your guests of the ingredients. This is a simple snack, but it can be adapted for various dietary needs.
Conclusion
This crispy caramel apple charcuterie board with toffee bits is a winner. It’s easy to make, delicious, and visually stunning. I love it because it turns simple ingredients into something special. It’s perfect for holidays, parties, or just a cozy night in.
I encourage you to customize it based on your preferences. Add your favorite nuts, swap the cheese, or try different fruits. Make it your own. I love this recipe because it brings people together. There’s something about sharing food that creates connection.
Please try it and let me know how it goes. Share your variations in the comments. I’d love to hear what you added to your board. And don’t forget to tag me on social media if you post a photo. I love seeing your creations.
Enjoy your snack time. It’s worth the effort.
Frequently Asked Questions
Can I make this board ahead of time?
You can prep the ingredients ahead, but assemble the board just before serving. The caramel will harden and the apples might brown if left too long.
What type of apples are best for this recipe?
Gala and Honeycrisp are best because they are sweet and crisp. Granny Smith works if you prefer tartness, but they are firmer.
Can I use homemade caramel sauce?
Yes, homemade caramel works great. Just ensure it is warm and fluid when you drizzle it. Store-bought is easier but equally delicious.
How do I keep the apples from browning?
Slice them right before serving. If you must prep ahead, soak them in water with a little lemon juice and dry them thoroughly before assembling.
Can I substitute the cheese?
Yes, you can use Gouda, Brie, or even a spicy pepper jack. Sharp cheddar is traditional, but feel free to experiment.
Pin This Recipe!
Crispy Caramel Apple Charcuterie Board: Easy Holiday Appetizer

A simple, no-cook holiday appetizer featuring crisp apple slices, sharp cheddar cheese, toasted nuts, and toffee bits, all drizzled with warm caramel sauce for a perfect sweet and salty crunch.
- Prep Time: 25 minutes
- Cook Time: 5 minutes
- Total Time: 30 minutes
- Yield: 8 servings 1x
- Category: Appetizer
- Cuisine: American
Ingredients
- 4–6 firm apples (Gala or Honeycrisp preferred), washed and sliced
- 1 cup sharp cheddar cheese, cut into 1-inch cubes
- 1/2 cup walnuts or pecans, toasted and chopped
- 1/2 cup toffee bits
- 1/2 cup pretzel rods or chunks, broken into bite-sized pieces
- 1 cup caramel sauce (store-bought or homemade)
- Optional: Dried cranberries, apricots, or white/dark chocolate chips
Instructions
- Wash and dry apples thoroughly. Slice into wedges or rounds and place on paper towels to absorb excess moisture.
- Cut sharp cheddar cheese into 1-inch cubes and arrange in clusters on the serving board.
- Toast walnuts or pecans in a dry skillet over medium heat for 3-4 minutes until fragrant. Let cool completely, then chop roughly.
- Warm the caramel sauce in a small saucepan over low heat or in the microwave in 15-second intervals until fluid and pourable.
- Arrange apple slices on the board. Drizzle the warm caramel generously over the apples and cheese in a zigzag pattern.
- Sprinkle toasted nuts and toffee bits over the caramel-covered areas so they adhere.
- Add pretzels around the edges and any optional add-ins like dried fruit or chocolate chips.
- Serve immediately while the caramel is warm and apples are crisp.
Notes
Ensure apples are completely dry before slicing to help caramel adhere. Toast nuts for better flavor. Assemble the board just before serving to prevent apples from browning and pretzels from getting soggy. If caramel hardens, gently reheat it. For a gluten-free option, swap pretzels for gluten-free crackers. For dairy-free, use vegan cheese and caramel.
Nutrition
- Serving Size: Approximately 1 cup
- Calories: 350
- Sugar: 32
- Sodium: 220
- Fat: 18
- Saturated Fat: 6
- Carbohydrates: 42
- Fiber: 3
- Protein: 5
Keywords: charcuterie board, apple appetizer, holiday snack, caramel apples, toffee bits, easy party food, sweet and salty snack, fall recipes


