It is 2:00 a.m., and the only thing I want is the quiet hum of the oven and the promise of something sweet that doesn’t require me to be social. The house is finally still, the kids are asleep, and the kitchen counter is my sanctuary for the next few hours. There is a specific kind of magic in making Crispy Ghost Meringue Cookies with Chocolate Chip Eyes when the rest of the world is sleeping. You know how it feels, right? That moment when you’re not cooking for anyone else, just for yourself, trying to capture a little bit of joy before the sun comes up.
I started making these little white ghosts last October, mostly because I wanted a Halloween treat that looked spooky but tasted like a cloud. Honestly, it was an accident at first. I had some leftover egg whites and a bag of chocolate chips that were about to expire. I piped them into little round shapes, popped them in the oven at a low temperature, and waited. When I pulled them out, they were crisp, airy, and completely white. I just pressed two chocolate chips in for eyes and called it a night. The next morning, my kids found them and screamed. Not in a bad way, just in a “mom, what is this?” kind of way.
These cookies have stuck with me because they are so simple, yet they feel like a party in your mouth. They are light, airy, and surprisingly sturdy once they cool. I love making them because they take zero effort but look like you spent hours in the kitchen. It’s that perfect balance of lazy and impressive. Plus, the smell of vanilla and baked sugar fills the house, which is nice when you’re trying to stay awake for your own late-night snack session.
There is something comforting about the process. You whip the whites, you pipe the shapes, you wait. It’s a slow ritual that forces you to pause. I’ve made these for Halloween parties, for school bake sales, and just for Tuesday night cravings. They always disappear fast. People think they are hard to make, but they are really just patience and a mixer. I keep a bag of these in the pantry all through fall because they are just too good to limit to one month. Let’s face it, if you can make meringue, you can rule the world, or at least your cookie jar.
Why You’ll Love This Recipe
Let’s be real for a second. Most Halloween treats are either too sugary, too messy, or just plain weird. These crispy ghost meringues are different. They are clean, crisp, and honestly, they taste like vanilla cloud. I’ve tested this recipe dozens of times, from using different types of sugar to trying various chocolate chip brands, and this is the version that works every single time. It’s not just another meringue recipe; it’s the one that actually stays crisp in humid weather (mostly) and holds its shape without collapsing.
- Quick & Easy: The active time is about 15 minutes. You whip, you pipe, you put them in the oven. That’s it. Perfect for those nights when you want a treat but don’t want to spend hours standing over a stove.
- Simple Ingredients: You likely have everything you need right now. Egg whites, sugar, vanilla, and chocolate chips. No fancy flours or weird extracts. Just pantry staples that work together beautifully.
- Perfect for Halloween: They are the ultimate spooky snack. They look adorable on a platter and are a hit with kids who think they are “magic” because they float a bit in your mouth.
- Crowd-Pleaser: Even people who say they don’t like meringue usually love these. The texture is light, not chalky, and the chocolate chips add a nice salty-sweet contrast that keeps you coming back.
- Unbelievably Delicious: The crunch is satisfying. It shatters a bit when you bite it, which is just the best feeling. It’s comfort food reimagined for the spooky season.
What makes this recipe stand out is the technique. I use a specific ratio of sugar to egg whites that ensures a glossy finish and a crisp shell without being rock hard. It’s a balance I’ve perfected over years of baking. It’s the kind of recipe that makes you close your eyes after the first bite because it’s just so light. It’s not heavy or cloying. It’s airy and sweet in all the right ways. Plus, they are naturally gluten-free, which is a huge bonus for getting them to guests with allergies. You can make these for a potluck or a party and not worry about everyone being able to eat them.
What Ingredients You Will Need
This recipe relies on the purity of a few simple ingredients to create that signature crisp texture. The key is quality. Since there are only four main components, each one matters. You don’t need fancy equipment, but you do need to pay attention to the details, especially with the egg whites.
- Egg Whites: You will need about 3 large egg whites. Room temperature egg whites whip up better and create a more stable foam, but cold ones work if you are in a rush. I always use pasteurized egg whites from a carton if I’m worried about raw eggs, but fresh eggs taste richer. Make sure there is absolutely no yolk in the whites, or they won’t whip properly. It’s a common mistake, so check twice.
- Granulated Sugar: Use standard white granulated sugar. I prefer organic cane sugar for a slightly cleaner taste, but regular sugar works fine. The sugar is what gives the meringue its structure and crunch. Do not substitute with brown sugar or honey, or the texture will be chewy, not crispy.
- Vanilla Extract: A teaspoon of pure vanilla extract adds that classic cookie flavor. I recommend using a good quality extract, like Nielsen-Massey or McCormick’s Pure Vanilla. Avoid imitation vanilla if you can help it, as it can taste chemical and overpower the delicate egg flavor.
- Chocolate Chips: Semi-sweet chocolate chips are my go-to. They provide a nice bitterness to balance the sweet meringue. You can use mini chips for a cuter look, or regular chips. I’ve also tried using chopped chocolate bars, which gives a more artisanal look, but chips are easier to handle for beginners.
- Optional: Cream of Tartar: While not strictly necessary, a pinch of cream of tartar helps stabilize the egg whites. If you have it in your pantry, add half a teaspoon. It prevents the meringue from deflating and helps keep those ghost shapes defined.
If you are dairy-free, just make sure your chocolate chips are labeled dairy-free or vegan. Most semi-sweet chips are, but some brands add milk solids. Also, if you want to get fancy, you can add a drop of purple or orange food coloring to the meringue for a spooky twist, but the classic white ghost is timeless. Keep it simple. The beauty is in the whiteness.
Equipment Needed
You don’t need a lot of fancy gear to make these, but having the right tools makes the process much easier. The most important piece of equipment is a clean, dry mixing bowl. Glass or metal bowls are best because they don’t hold onto grease like plastic might. If your bowl has any residue from previous baking sessions, your egg whites won’t whip up properly. Give it a good wash with hot soapy water and dry it thoroughly.
A hand mixer or stand mixer with a whisk attachment is essential. You need to whip the egg whites for several minutes to get those stiff peaks. Doing this by hand is possible, but it takes a lot of arm strength and time. A stand mixer is definitely the way to go if you have one. If you don’t, a hand mixer will work, just be prepared to whip for about 5-7 minutes.
You will also need two baking sheets lined with parchment paper or silicone baking mats. Parchment paper is cheaper and works great, but silicone mats are reusable and make cleanup a breeze. I prefer silicone mats because they provide an even surface for the cookies to bake on. Avoid using aluminum foil directly, as the cookies might stick and lose their shape when you try to remove them.
A piping bag with a large round tip (like a Wilton 1M or similar) is ideal for making the ghost shapes. It helps you get that cute, rounded top and the tapered bottom. If you don’t have a piping bag, you can use a Ziploc bag with the corner cut off. It’s not as pretty, but it gets the job done. Just be careful not to tear the bag while filling it with the meringue.
Preparation Method
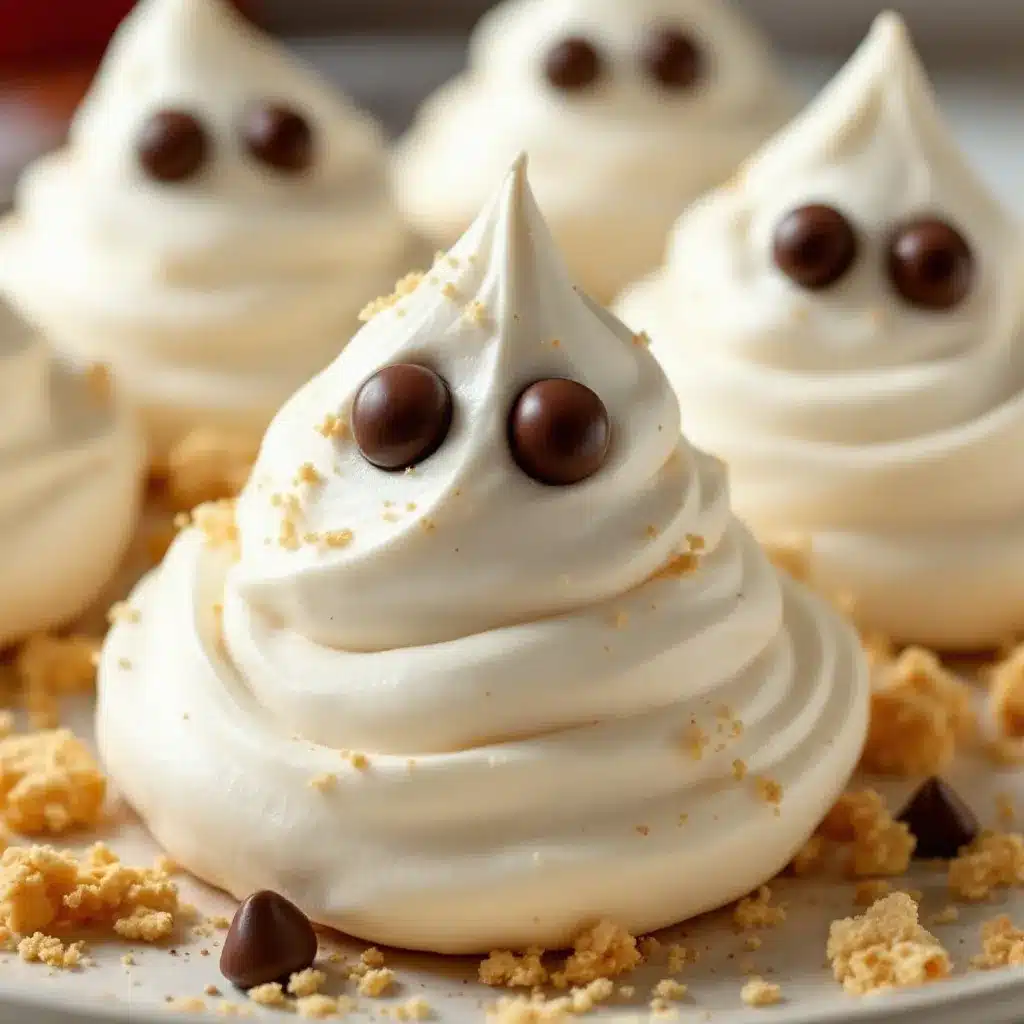
Preparing these crispy ghost meringues is straightforward, but timing is everything. Here is how to get them right every time.
- Prep your oven and pans: Preheat your oven to 200°F (95°C). This low temperature is crucial. If the oven is too hot, the meringues will brown and crack, and they won’t get that crispy texture. Line your baking sheets with parchment paper or silicone mats. Make sure the sheets are flat and smooth.
- Whip the egg whites: In a clean, dry bowl, add the egg whites and a pinch of cream of tartar if using. Start mixing on medium speed until the whites become foamy. This takes about 1-2 minutes. You are looking for large, wet bubbles.
- Add the sugar slowly: Once the whites are foamy, start adding the sugar gradually, about one tablespoon at a time, while the mixer is running. Increase the speed to high. Continue adding sugar until all of it is incorporated. This process takes about 3-4 minutes. The sugar dissolves into the whites, creating a stable foam.
- Whip to stiff peaks: Continue whipping on high speed for another 2-3 minutes. You want the mixture to be glossy, thick, and hold stiff peaks. When you lift the whisk, the meringue should stand up straight without drooping. If it droops, keep whipping. Add the vanilla extract now and mix for another 30 seconds.
- Pipe the ghosts: Transfer the meringue to a piping bag fitted with a large round tip. Pipe small mounds onto the baking sheets. To make the ghost shape, pipe a round base, then pipe a smaller, slightly irregular circle on top to look like a wavy head. You can drag the tip down to create a little tail. Space them about 2 inches apart, as they don’t spread much.
- Bake: Place the trays in the oven and bake for 1 hour and 15 minutes to 1 hour and 30 minutes. The meringues should be dry to the touch and easily lift off the parchment paper. They should still be white. If they start to brown, your oven is too hot, so turn it down slightly.
- Cool completely: Turn off the oven and leave the meringues inside with the door slightly ajar (you can wedge a wooden spoon in the door) for at least 1 hour. This slow cooling helps them dry out completely and become crisp. If you take them out while they are still warm, they might be soft.
- Add the eyes: Once the meringues are completely cool, take your chocolate chips. Gently press two chips into the top of each ghost to create eyes. If the chips don’t stick, you can melt a tiny bit of chocolate in the microwave and use it as “glue.” Let the chocolate set for a few minutes.
Cooking Tips & Techniques
There are a few tricks I’ve learned over the years that make a huge difference in the final product. First, never rush the whipping process. If your egg whites are under-whipped, the meringues will collapse in the oven. If they are over-whipped, they can become grainy. You want that glossy, smooth peak.
Another common mistake is using a bowl that isn’t completely clean. Even a tiny drop of egg yolk or grease can prevent the whites from whipping up. I always wipe my bowl with a little lemon juice or vinegar before starting, just to be safe. It removes any residual oil.
Humidity is the enemy of meringue. If you live in a humid climate, try to make these on a dry day. If it’s raining outside, the meringues might absorb moisture from the air and become soft. In that case, you might need to bake them a little longer. Also, store them in an airtight container immediately after they cool to keep them crisp.
When piping, don’t worry about making them perfect. The charm of these ghosts is their slightly irregular shape. If one looks a bit lopsided, that just makes it character. I’ve had guests tell me they prefer the “ugly” ghosts because they look more real. It’s all about having fun with it.
Finally, be patient with the cooling process. I know it’s tempting to take them out as soon as the timer goes off, but the slow cool-down is what gives them that shatteringly crisp texture. If you rush it, they might be chewy inside. Trust the process, and you’ll be rewarded with the best meringues you’ve ever had.
Variations & Adaptations
While the classic white ghost is my favorite, there are plenty of ways to mix this up. For a spooky twist, you can add a drop of purple or green food coloring to the meringue before piping. It creates a subtle, eerie tint that looks great in photos. Just be careful not to add too much, or the meringue might become watery.
You can also change up the chocolate. Instead of chocolate chips, you can use white chocolate chips for a monochrome look, or use colored candy melts to create different colored eyes. For a nutty twist, you can sprinkle some crushed pistachios or almonds on top before baking. It adds a nice crunch and visual contrast.
If you want to make these gluten-free, just ensure your chocolate chips are certified gluten-free. Most meringues are naturally gluten-free, but cross-contamination can happen with some chocolate brands. Also, you can substitute the granulated sugar with a sugar substitute like erythritol if you are watching your sugar intake, though the texture might be slightly different.
I’ve also tried adding a teaspoon of cocoa powder to the meringue for chocolate ghosts, but it changes the texture significantly, making it denser. It’s worth a try if you like chocolate, but the classic vanilla is the most reliable. You can also add a pinch of cinnamon or nutmeg for a warm spice flavor, which pairs well with the chocolate eyes.
Serving & Storage Suggestions
These cookies are best served at room temperature. They don’t need to be warmed up, and chilling them can make them soft. I like to arrange them on a white platter with some orange or black napkins for a festive Halloween display. They look great paired with a glass of cold milk or a cup of hot tea. The contrast of the crisp cookie and the warm drink is just perfect.
For storage, keep them in an airtight container at room temperature. They will stay crisp for up to two weeks. If you live in a humid area, you might want to add a packet of silica gel to the container to absorb moisture. Do not refrigerate them, as the cold and moisture will make them lose their crunch. If they do get soft, you can re-crisp them in the oven at 200°F for 10 minutes.
These cookies also freeze well. You can freeze them in a single layer on a baking sheet, then transfer them to a freezer bag. They will last for up to three months in the freezer. Thaw them at room temperature before serving. Just add the chocolate eyes after thawing, as the chocolate might bloom or lose its shine if frozen.
I often make these ahead of time for Halloween parties. They keep their shape and crispness for days, so you can prepare them a week in advance. Just wait to add the eyes until the day of the party to keep them looking fresh. They are a great make-ahead treat that takes the stress out of hosting.
Nutritional Information & Benefits
These meringues are relatively light in calories compared to other cookies, mainly because they are mostly air and sugar. Each cookie contains approximately 15-20 calories, depending on the size and chocolate used. They are naturally gluten-free, which makes them a safe option for those with celiac disease or gluten sensitivity. However, they are high in sugar, so enjoy them in moderation.
The egg whites provide a good source of protein, and the chocolate chips offer a small amount of antioxidants. While they aren’t a health food, they are a better alternative to heavy, dense cookies. I like to think of them as a “guilt-free” treat because they are so light. You can eat two or three without feeling too weighed down.
For those watching their sugar intake, you can experiment with sugar substitutes, but keep in mind that the texture and volume might change. Artificial sweeteners don’t always behave the same way as real sugar in meringues. If you are diabetic, consult with your healthcare provider before enjoying these. Overall, they are a fun, festive treat that fits into a balanced diet when enjoyed in small portions.
Conclusion
Making Crispy Ghost Meringue Cookies with Chocolate Chip Eyes is a simple joy that brings a bit of Halloween magic into your kitchen. They are easy to make, delicious to eat, and perfect for sharing with friends and family. I hope you try this recipe and enjoy the process as much as I do. Feel free to customize them with different colors or toppings to make them your own.
If you make these, I’d love to see them! Share your creations on social media and tag me. I always enjoy seeing how everyone makes these ghosts their own. Don’t forget to leave a comment below with your thoughts. Did you add any special twists? Let me know!
Happy baking, and happy Halloween! These cookies are sure to be a hit at your next party or just a nice treat for a quiet night in. Enjoy every crunchy bite.
Frequently Asked Questions
Why are my meringues soft instead of crisp?
This usually happens if the oven temperature was too low or if the meringues didn’t cool completely in the oven. Make sure to bake them until they are dry to the touch and let them cool with the oven door slightly ajar to remove moisture.
Can I use egg substitute instead of fresh egg whites?
Yes, you can use pasteurized egg whites from a carton. They work just as well and are safer if you are concerned about raw eggs. Just adjust the whipping time slightly as they may not whip up as quickly as fresh eggs.
How long do these cookies last?
Stored in an airtight container at room temperature, these cookies will stay crisp for up to two weeks. If your kitchen is humid, they may soften faster, so keep them in a dry place.
Can I make these ahead of time?
Absolutely. You can bake and cool them up to a week in advance. Just wait to add the chocolate eyes until the day you plan to serve them to keep them looking fresh and shiny.
What if I don’t have a piping bag?
You can use a Ziploc bag with the corner cut off. It won’t be as pretty, but the taste will be the same. You can also use two spoons to drop small mounds of meringue onto the baking sheet, though the shape won’t be as defined.
For more easy party snacks, check out my easy no-bake peanut butter granola bites or my easy cheddar ranch popcorn snack mix. These are perfect for game day or casual gatherings.
Pin This Recipe!
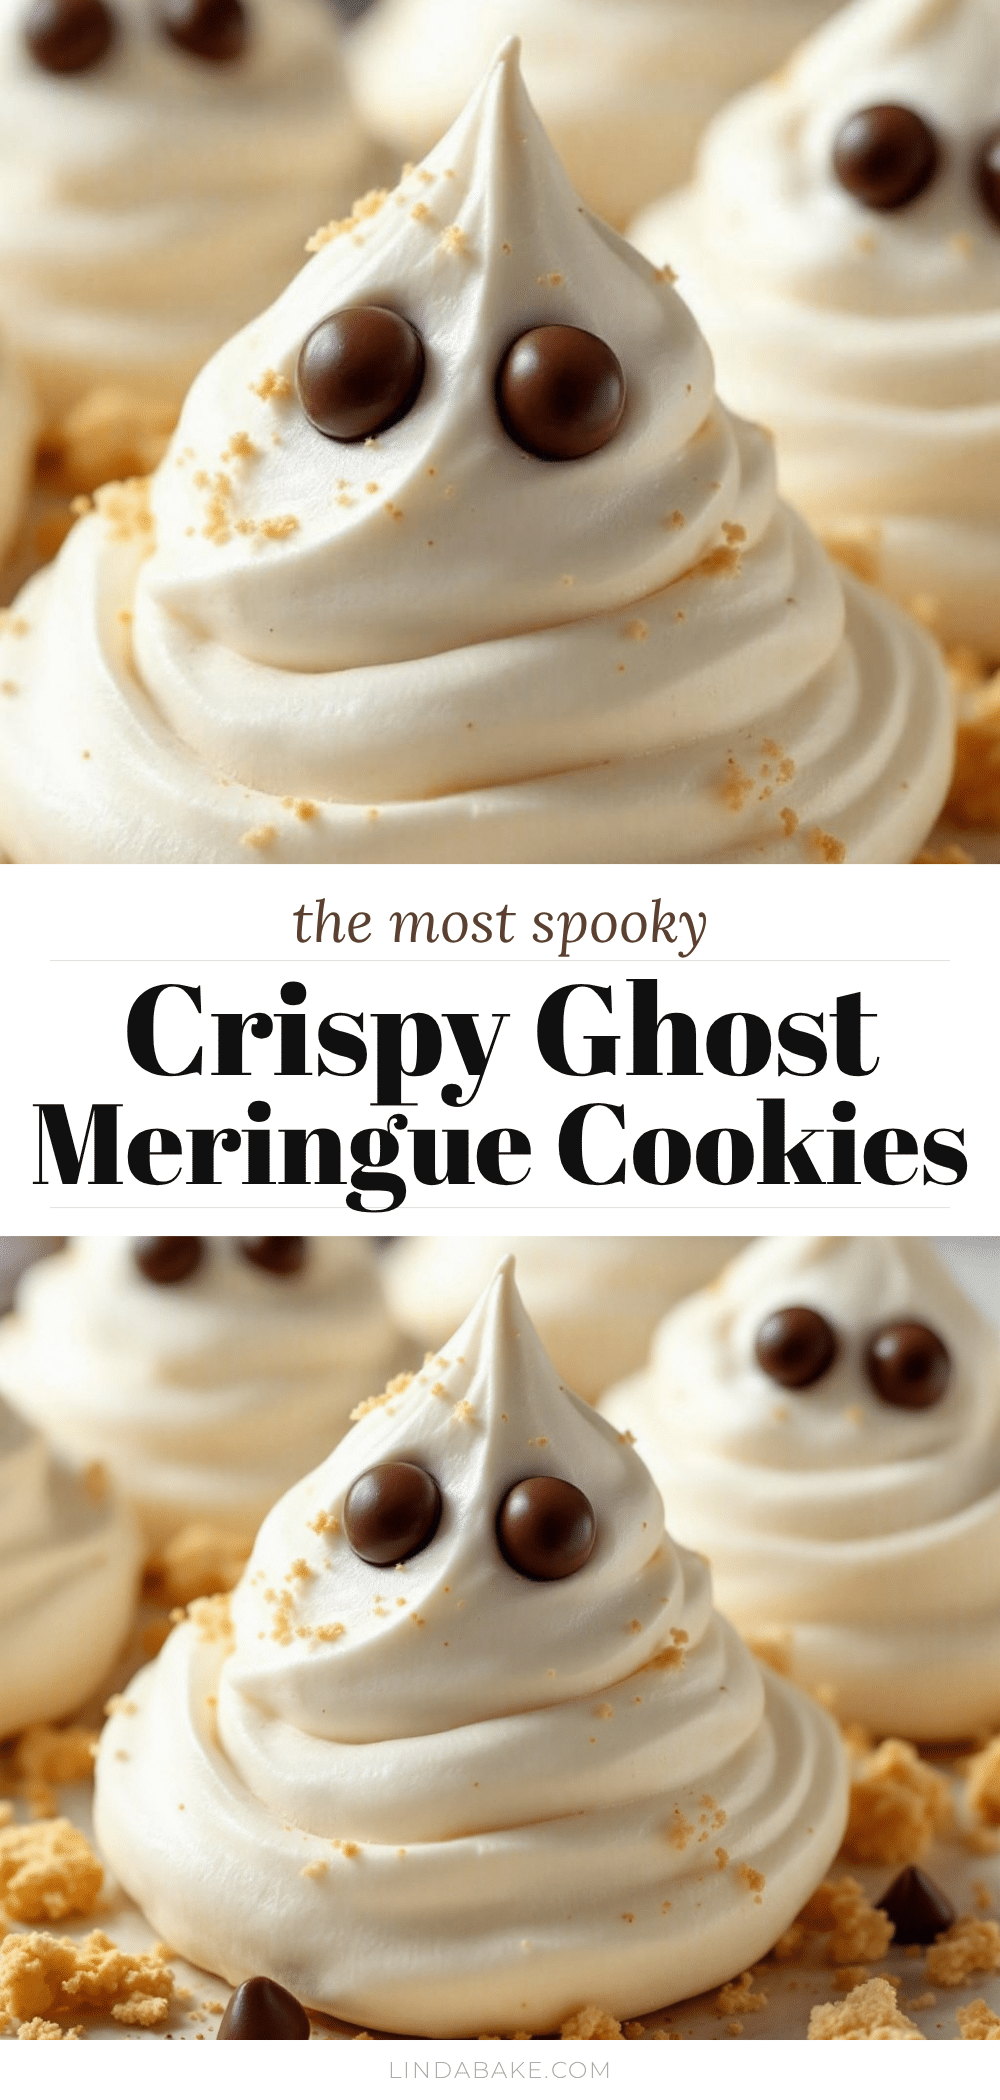
Crispy Ghost Meringue Cookies with Chocolate Chip Eyes
Light, airy, and crisp meringue cookies shaped like ghosts and decorated with chocolate chip eyes. These naturally gluten-free treats are perfect for Halloween or any time you want a simple, sweet snack.
- Prep Time: 15 minutes
- Cook Time: 1 hour 15 minutes
- Total Time: 2 hours 30 minutes
- Yield: Approximately 20-24 cookies 1x
- Category: Dessert
- Cuisine: American
Ingredients
- 3 large egg whites, room temperature
- 1 cup granulated sugar
- 1 teaspoon pure vanilla extract
- 1/2 teaspoon cream of tartar (optional)
- Semi-sweet chocolate chips (for eyes)
Instructions
- Preheat oven to 200°F (95°C). Line two baking sheets with parchment paper or silicone mats.
- In a clean, dry glass or metal bowl, add egg whites and cream of tartar (if using). Whip on medium speed until foamy (1-2 minutes).
- With the mixer running, gradually add sugar, one tablespoon at a time. Increase speed to high and continue adding sugar until incorporated (3-4 minutes).
- Whip on high speed for another 2-3 minutes until the mixture is glossy, thick, and holds stiff peaks. Add vanilla extract and mix for 30 seconds.
- Transfer meringue to a piping bag fitted with a large round tip. Pipe ghost shapes onto baking sheets, spacing them 2 inches apart.
- Bake for 1 hour and 15 minutes to 1 hour and 30 minutes, until dry to the touch and still white.
- Turn off the oven and leave meringues inside with the door slightly ajar for at least 1 hour to cool completely.
- Once cool, gently press two chocolate chips into the top of each ghost to create eyes.
Notes
Ensure all equipment is completely clean and dry, especially free of grease or egg yolk, to ensure proper whipping. Humidity can affect crispness, so store in an airtight container. If cookies soften, re-crisp in a 200°F oven for 10 minutes.
Nutrition
- Serving Size: 1 cookie
- Calories: 18
- Sugar: 4
- Carbohydrates: 4
Keywords: Halloween cookies, meringue recipe, ghost cookies, gluten-free dessert, easy baking, chocolate chip eyes, party snacks


