Third time in as many days and I still couldn’t get the webbing right without at least one strand breaking. There I was, leaning over my kitchen counter at 10 p.m. on a Tuesday, a toothpick in one hand and a half-melted blob of chocolate in the other, muttering things I won’t repeat here. The first batch of cookies sat cooling on the rack, perfectly round, perfectly peanut-buttery, and perfectly naked. No webs. Just sad, bald little cookies that looked like they were headed to a costume party without a costume.
I’d seen the photos online, of course. Those impossibly neat spider webs stretching across glossy chocolate frosting like something out of a bakery window. And I wanted that. Badly. But here’s the thing about easy spider web chocolate peanut butter cookies — they look like they require a pastry degree and a steady hand, but they don’t. They just require a little patience and the willingness to eat your mistakes. Which I did. Several times.
The breakthrough came on attempt number four, when I stopped trying to be perfect and started letting the chocolate do what chocolate does. It drips. It spreads. It makes beautiful, accidental art if you let it. And that’s when these cookies finally clicked for me — not as some fussy holiday project, but as the kind of thing you make because it’s fun and tastes ridiculous. The peanut butter base is soft without being crumbly, the chocolate is rich without being overwhelming, and that web pattern? Once you know the trick, it’s almost too easy. You’ll feel like a kitchen wizard, and nobody has to know how many practice cookies you ate along the way.
Why You’ll Love This Recipe
These cookies aren’t just cute. They’re the kind of dessert that makes people stop and ask, “Wait, you made these?” And honestly, that never gets old.
- No Chill Time Needed : The dough goes straight from bowl to oven. No waiting, no fridge space arguments.
- Pantry-Friendly Ingredients : You probably have everything already. Peanut butter, sugar, egg, chocolate chips — that’s basically it.
- Perfect for Halloween Parties : They scream spooky season without screaming “I spent three hours on this.”
- Kid-Approved and Adult-Loved : The peanut butter and chocolate combo is a universal language. Nobody fights over these.
- Surprisingly Forgiving : Mess up the web? Just swirl it into a pattern and call it abstract spider art.
What sets this recipe apart is the texture. Most peanut butter cookies turn out either too dry or too greasy. I tested this one until the crumb was just right — tender, slightly sandy in that perfect peanut butter way, but sturdy enough to hold a layer of chocolate without falling apart. And the web technique? It’s not about precision. It’s about contrast. The dark chocolate against the pale peanut butter cookie, the thin white drizzle cutting through it all. It looks like you tried harder than you actually did.
This is the cookie you bring to a Halloween potluck when you want to impress without stress. It’s the one your kids will want to help decorate (and honestly, their webs will probably look cooler than yours). And it’s the one you’ll make again in November, just because you have leftover chocolate chips and a craving for something homemade.
What Ingredients You Will Need
This recipe keeps things simple. No weird extracts, no specialty flours, no hunting through three different stores for one obscure ingredient. Everything here is a staple you likely already have, which is exactly how weeknight baking should feel.
For the Peanut Butter Cookie Base:
- 1 cup creamy peanut butter (I prefer Skippy or Jif for consistent texture — natural peanut butter that separates can make the dough too oily)
- 1 cup granulated sugar (plus a little extra for rolling)
- 1 large egg (room temperature, so it mixes in evenly)
- 1 teaspoon vanilla extract (pure, not imitation, if you have it)
- ½ teaspoon baking soda (helps them spread just enough without turning into pancakes)
- ¼ teaspoon salt (skip this if your peanut butter is already salted)
For the Chocolate Topping and Web:
- 1 cup semi-sweet chocolate chips (I use Ghirardelli — they melt smooth and taste rich without being bitter)
- 1 tablespoon coconut oil or vegetable shortening (this helps the chocolate thin out enough for dipping and drizzling)
- 2 tablespoons white chocolate chips or melting wafers (for the spider web lines)
Ingredient Notes and Substitutions:
- Peanut butter : Crunchy works if you want texture in the cookie, but creamy gives a smoother base for the chocolate topping. Avoid natural or homemade peanut butter here — the oil separation can make the cookies spread too much and turn greasy.
- Sugar : You can substitute up to half the granulated sugar with light brown sugar for a slightly softer, more caramel-like cookie. Just note the color will be darker.
- Chocolate chips : Dark chocolate or milk chocolate both work. Dark chocolate gives a nice contrast to the sweet peanut butter cookie. Milk chocolate makes it sweeter overall.
- Coconut oil : Refined coconut oil has no coconut flavor. If you only have unrefined, it adds a faint coconut taste that actually pairs nicely with chocolate.
- White chocolate : You can skip the white chocolate web and just do a drizzle of melted semi-sweet chocolate for a simpler look. Or use a fork to create a crosshatch pattern with the dark chocolate alone.
Equipment Needed
You don’t need much for these cookies, which is part of the appeal. Here’s what you’ll want on hand:
- Mixing bowls : One medium bowl for the dough, one small microwave-safe bowl for melting chocolate.
- Electric mixer or sturdy wooden spoon : The dough comes together easily by hand, but a hand mixer speeds things up. I actually prefer mixing by hand — it’s harder to overwork the dough.
- Baking sheet : A standard half-sheet pan works perfectly. Line it with parchment paper or a silicone baking mat for easy cleanup.
- Cookie scoop or tablespoon : A 1.5-tablespoon scoop gives consistent cookie sizes. If you don’t have one, just use a regular tablespoon and level it off.
- Toothpick or skewer : For dragging the white chocolate into web patterns. A wooden skewer works better than a toothpick because it holds more chocolate.
- Wire cooling rack : Essential for letting the chocolate set properly. If you don’t have one, you can let them set on parchment paper, but it takes longer.
- Small piping bag or zip-top bag : For drizzling the white chocolate. A zip-top bag with the corner snipped off works perfectly and costs nothing.
I’ve made these with a cheap cookie scoop from the grocery store and a fork from my drawer. You really don’t need fancy equipment. Just make sure your baking sheet isn’t warped — uneven heat is the enemy of consistent cookies.
Preparation Method
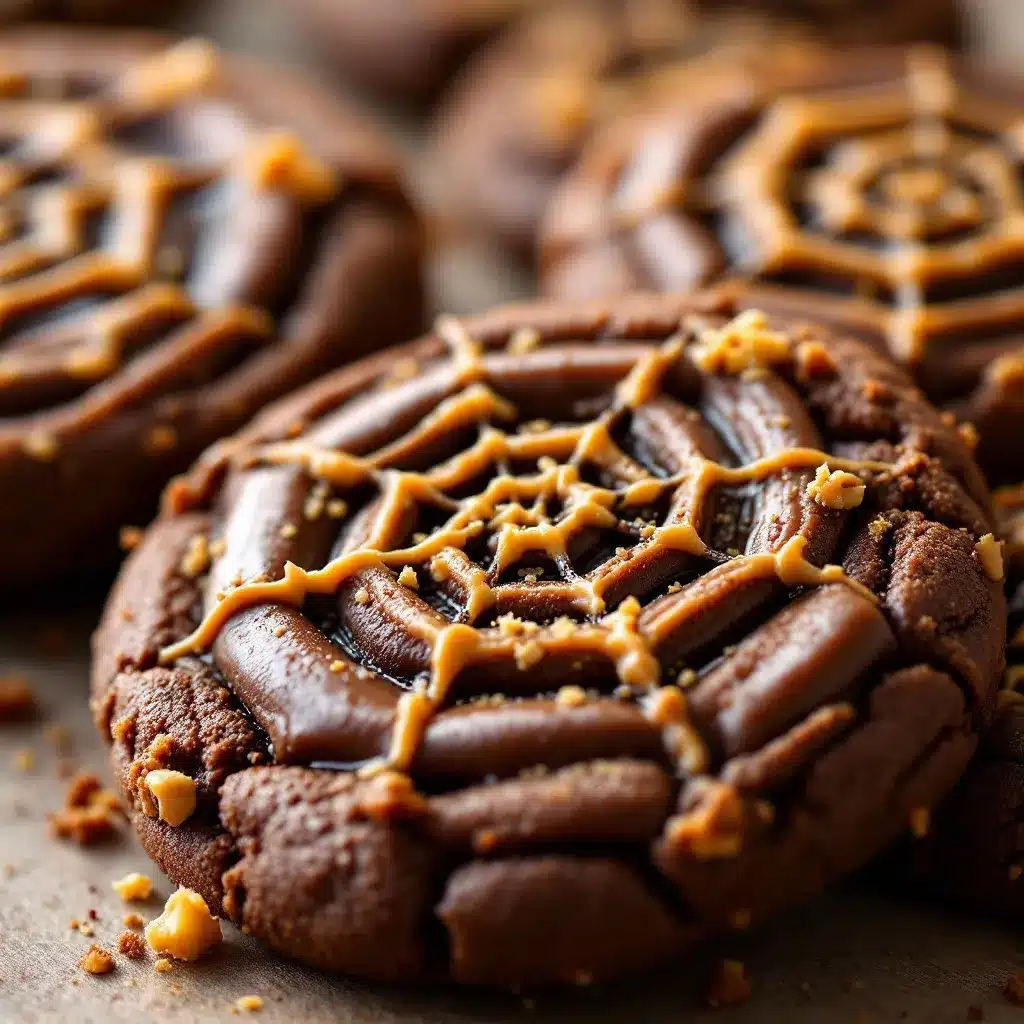
- Preheat your oven to 350°F (175°C) and line a baking sheet with parchment paper. This is important — the cookies will stick to an unlined sheet because of the peanut butter’s oil content.
- Make the cookie dough. In a medium bowl, combine 1 cup creamy peanut butter, 1 cup granulated sugar, 1 large egg, 1 teaspoon vanilla extract, ½ teaspoon baking soda, and ¼ teaspoon salt. Stir until a soft, cohesive dough forms. It’ll look a little crumbly at first, but keep mixing. It comes together. If it feels too dry, add 1 tablespoon of milk. If it feels too sticky, add 1 tablespoon of flour.
- Portion the dough. Scoop out rounded tablespoons of dough (about 1.5 tablespoons each) and roll them into balls. Roll each ball in a small bowl of extra granulated sugar — this gives them a slight crackle on top and a little extra sweetness.
- Create the crisscross pattern. Place the dough balls on the prepared baking sheet, about 2 inches apart. Flatten each ball slightly with the tines of a fork, making a crisscross pattern on top. Press firmly enough to flatten to about ½-inch thick, but not so hard that the cookies crack around the edges.
- Bake. Bake for 8-10 minutes, until the edges are lightly golden and the centers look set but still slightly soft. They will continue to cook on the hot baking sheet after you pull them out. Don’t overbake — dry peanut butter cookies are sad cookies.
- Cool completely. Let the cookies cool on the baking sheet for 5 minutes, then transfer them to a wire cooling rack. They need to be completely cool before you add the chocolate, or the topping will slide right off.
- Melt the semi-sweet chocolate. In a small microwave-safe bowl, combine 1 cup semi-sweet chocolate chips and 1 tablespoon coconut oil. Microwave in 30-second intervals, stirring between each, until smooth and fully melted. This usually takes about 90 seconds total. Don’t overheat — chocolate seizes up if you get it too hot.
- Dip the cookies. Working one at a time, dip the top of each cooled cookie into the melted chocolate. Gently twist and lift, letting the excess drip back into the bowl. Place the dipped cookies back on the parchment paper, chocolate side up.
- Let the chocolate set slightly. Wait about 5-10 minutes until the chocolate is no longer wet but still soft to the touch. You want it tacky, not hard. This is the sweet spot for the web.
- Melt the white chocolate. In another small bowl, melt 2 tablespoons white chocolate chips with ½ teaspoon coconut oil. Microwave in 20-second bursts, stirring each time. Transfer to a small piping bag or a zip-top bag with a tiny corner snipped off.
- Draw the web. Pipe a small circle of white chocolate in the center of each cookie. Then pipe 3-4 concentric circles around it, spaced about ¼ inch apart. Working quickly, drag a toothpick or skewer from the center circle outward through all the rings, like spokes on a wheel. Repeat every ¼ inch around the cookie. The white chocolate will pull into a web pattern as you drag through it.
- Let set completely. Allow the cookies to sit at room temperature until the chocolate is fully firm, about 30-45 minutes. If you’re impatient (I get it), pop them in the fridge for 15 minutes.
Cooking Tips & Techniques
I learned most of these the hard way, so you don’t have to. Let’s talk about what actually goes wrong with these cookies and how to fix it.
The dough is too crumbly. This happens when your peanut butter is on the drier side or if you’re using natural peanut butter. Fix it by adding 1 tablespoon of milk or water. The dough should feel soft and pliable, not cracking at the edges when you roll it.
The cookies spread too much. If your cookies turn into flat discs, your peanut butter might be too oily. Next time, use a commercial brand like Jif or Skippy. Also, make sure your baking soda isn’t expired — old leavener leads to flat cookies.
The chocolate topping slides off. This means your cookies weren’t cool enough when you dipped them. Wait the full cooling time. I know it’s hard. Do it anyway. Also, make sure your chocolate isn’t too thin — if it’s runny, it won’t stick properly. Add a little more chocolate chips to thicken it up.
The web pattern looks like a mess. That’s okay. Honestly, a messy web looks more like a real spider web anyway. But if you want cleaner lines, work faster. The white chocolate sets quickly, and once it’s firm, dragging through it just breaks it. If your white chocolate has thickened too much, reheat it for 10 seconds.
Multitasking tip : While the cookies bake, melt your semi-sweet chocolate so it has time to cool slightly. While the dipped cookies set, melt your white chocolate. This keeps everything moving without rushing.
Variations & Adaptations
One of the best things about this recipe is how easy it is to tweak. Here are a few ways I’ve played with it:
- Gluten-Free Version : This recipe is naturally gluten-free since there’s no flour. Just double-check your peanut butter and chocolate chips are certified gluten-free if that’s a concern.
- Vegan Adaptation : Use a flax egg (1 tablespoon ground flaxseed mixed with 3 tablespoons water, let sit for 5 minutes) and dairy-free chocolate chips. The coconut oil in the topping is already vegan-friendly.
- Spooky Season Twist : Add ¼ teaspoon of cinnamon and a pinch of cayenne to the dough for a Mexican hot chocolate vibe. It pairs beautifully with the peanut butter.
- White Chocolate Base : Swap the semi-sweet chocolate for white chocolate and use dark chocolate for the web. It looks like a negative image of the original and tastes completely different.
- Mini Cookie Version : Use a teaspoon scoop instead of a tablespoon and bake for 6-7 minutes. Perfect for party platters or lunchbox surprises. I’ve tucked these into easy no-bake peanut butter granola bites for a fun snack combo.
- Add-In Option : Fold ¼ cup of mini chocolate chips into the dough before baking. Double the chocolate, double the fun.
Serving & Storage Suggestions
These cookies are best at room temperature, when the chocolate is firm but the cookie is still soft. Serve them on a Halloween-themed platter with a side of cold milk or hot apple cider. They also look fantastic arranged in a circle around a small bowl of candy corn or pumpkin-shaped candies.
If you’re bringing them to a party, let the chocolate set completely before stacking. I usually arrange them in a single layer in a wide container with parchment paper between layers if I have to stack them. They’re sturdy enough to travel, but the chocolate can scuff if it rubs against another cookie.
Storage:
- Room temperature : Store in an airtight container for up to 5 days. They actually get slightly softer on day two, which some people prefer.
- Refrigerator : They’ll keep for up to a week in the fridge. The chocolate stays firmer, but the cookie gets a little denser. Let them sit out for 10 minutes before eating.
- Freezer : Freeze the undecorated cookies for up to 3 months. Thaw at room temperature, then dip and decorate. I do this all the time — it’s how I prep for Halloween parties without going crazy the day before.
Don’t store these with softer baked goods like copycat pumpkin cream cheese muffins, because the moisture will soften the chocolate topping. Keep them with other crisp cookies or on their own.
Nutritional Information & Benefits
Let’s be real — these are cookies, not health food. But they’re not as bad as you might think. Here’s the breakdown per cookie (based on 18 cookies):
- Calories : 185
- Fat : 11g
- Carbohydrates : 20g
- Protein : 5g
- Fiber : 2g
- Sugar : 15g
The peanut butter provides a solid dose of protein and healthy monounsaturated fats, which helps keep you fuller longer than a regular sugar cookie. Dark chocolate contains antioxidants and a little bit of iron. And because these cookies are naturally flourless, they’re a great option for anyone avoiding gluten.
That said, they’re still a treat. I make them for celebrations and weekends, not everyday snacking. Balance, you know?
If you’re watching your sugar intake, you can reduce the sugar in the dough to ¾ cup without affecting the texture too much. The cookies won’t be as sweet, but the chocolate topping adds plenty of sweetness to compensate.
Conclusion
These easy spider web chocolate peanut butter cookies are the kind of recipe that makes you look like a baking hero without actually requiring hero-level effort. They’re simple enough for a weeknight bake, impressive enough for a Halloween party, and delicious enough that you’ll make them year-round. I’ve already made them for a spooky movie night, a school bake sale, and just because I had a jar of peanut butter staring at me from the pantry.
Don’t stress about the webs being perfect. Some of my favorite batches had webs that looked more like tangled yarn than spider silk, and they still disappeared in minutes. The taste is what matters, and these cookies deliver on that front every single time.
I’d love to hear how yours turn out. Did you try a variation? Did your kids go wild decorating? Drop a comment below and let me know. And if you’re looking for more easy treats to round out your Halloween spread, check out these cheddar ranch popcorn snack mix or this creamy buffalo chicken dip for a savory balance. Happy baking, and may your webs be ever in your favor!
Frequently Asked Questions
Can I use natural peanut butter for these cookies?
You can, but the texture might be different. Natural peanut butter has more oil that can separate, making the cookies spread more and turn greasy. If you only have natural peanut butter, stir it really well before measuring, and expect slightly flatter cookies. They’ll still taste great.
How do I keep the chocolate from seizing up?
Don’t let any water get into the chocolate. Even a tiny drop can cause it to seize into a grainy mess. Also, microwave in short bursts and stir between each one. If your chocolate does seize, you can sometimes save it by stirring in 1 teaspoon of coconut oil or vegetable shortening.
Can I make these cookies ahead of time?
Absolutely. You can make the dough up to 3 days ahead and keep it in the fridge. Let it come to room temperature before scooping and baking. Or bake the cookies, freeze them undecorated, and add the chocolate topping the day you need them.
My white chocolate won’t melt smoothly. What’s wrong?
White chocolate is finicky. It scorches easily and doesn’t like high heat. Use low power in the microwave (50% power) and stir every 15 seconds. Adding a little coconut oil helps it melt more smoothly. If it’s still clumpy, you might have overheated it — start fresh with new chips.
Can I double this recipe?
Yes, and I do it all the time. The dough doubles easily, and the cookies freeze well. Just bake in batches and let the baking sheet cool completely between batches. A hot baking sheet will make the dough spread too fast.
Pin This Recipe!
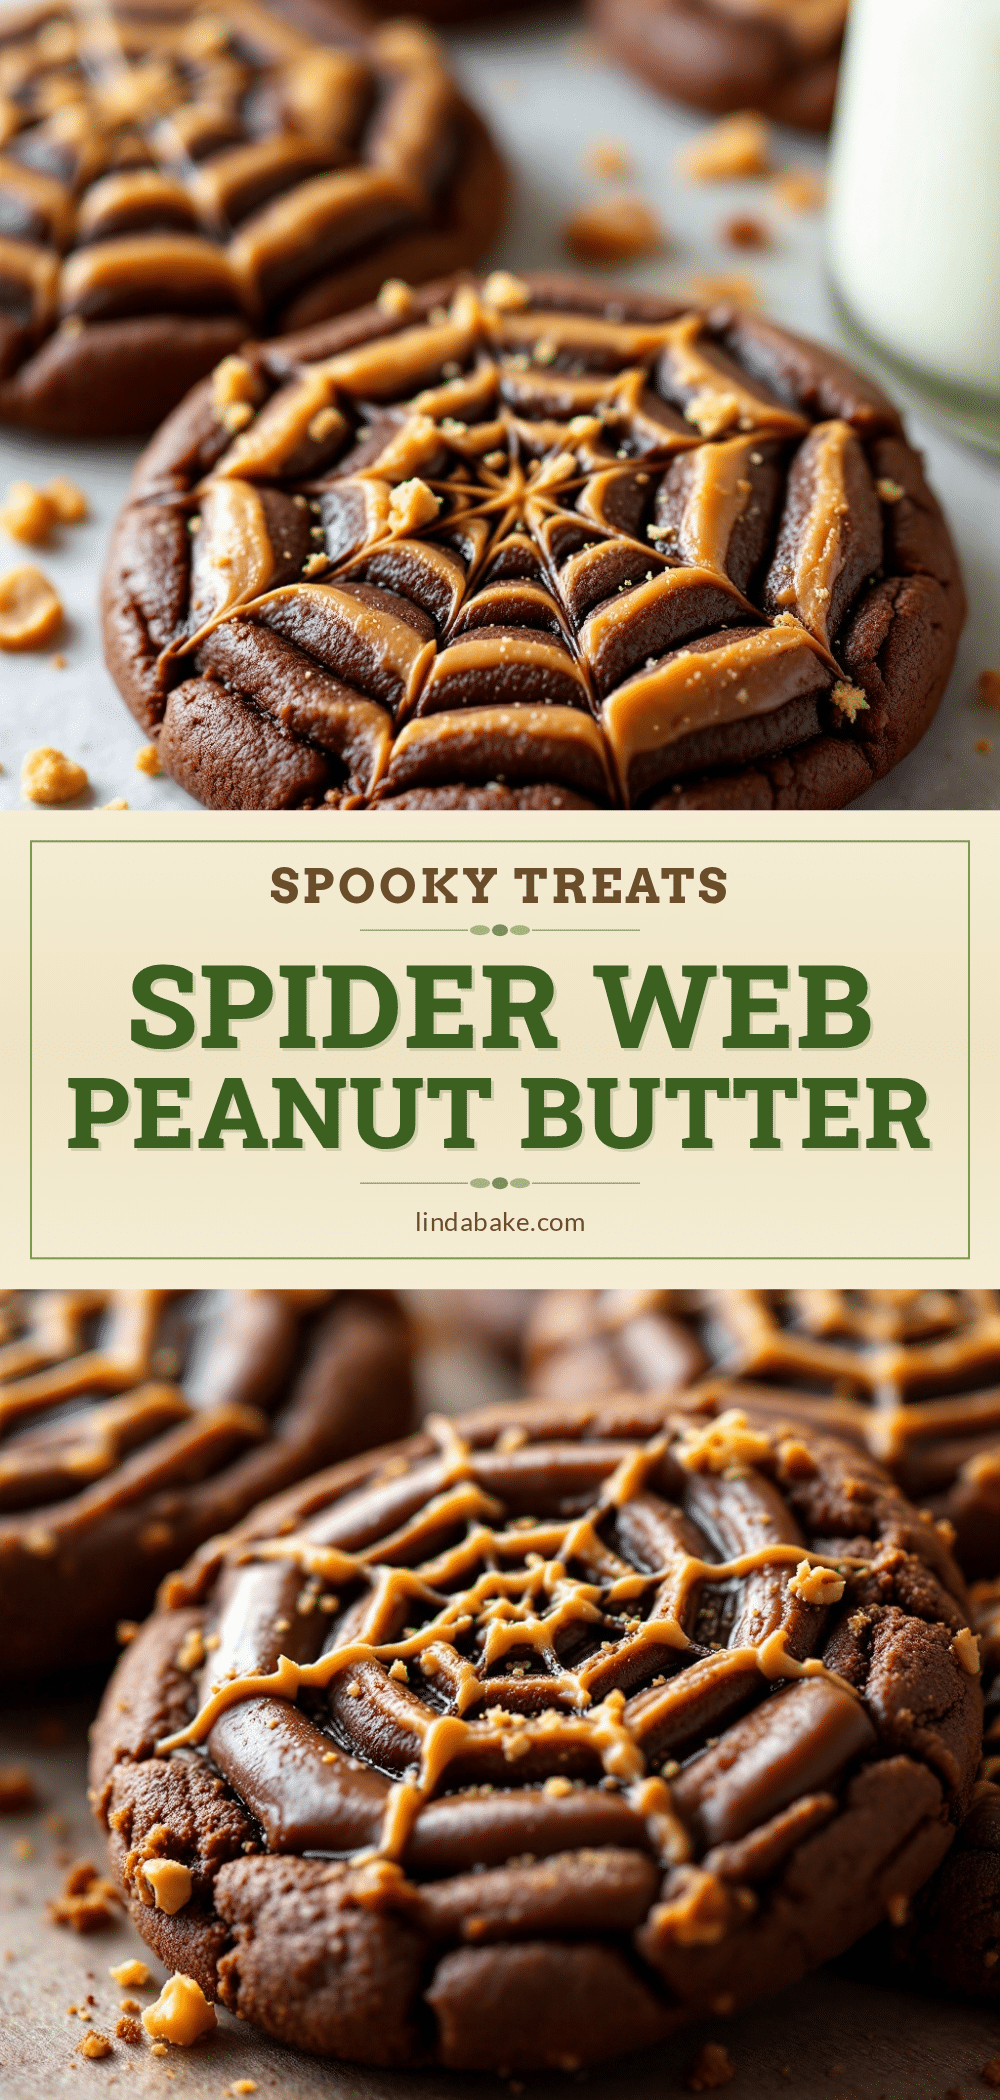
Easy Spider Web Peanut Butter Cookies

These easy spider web chocolate peanut butter cookies look like they require a pastry degree, but they don’t. With a soft peanut butter base, rich chocolate topping, and a simple web pattern, they’re perfect for Halloween parties or any time you want to impress without stress.
- Prep Time: 15 minutes
- Cook Time: 10 minutes
- Total Time: 1 hour 10 minutes (including cooling and setting time)
- Yield: 18 cookies 1x
- Category: Dessert
- Cuisine: American
Ingredients
- 1 cup creamy peanut butter (Skippy or Jif recommended)
- 1 cup granulated sugar (plus extra for rolling)
- 1 large egg (room temperature)
- 1 teaspoon vanilla extract (pure preferred)
- ½ teaspoon baking soda
- ¼ teaspoon salt (omit if peanut butter is salted)
- 1 cup semi-sweet chocolate chips (Ghirardelli recommended)
- 1 tablespoon coconut oil or vegetable shortening
- 2 tablespoons white chocolate chips or melting wafers
Instructions
- Preheat oven to 350°F (175°C) and line a baking sheet with parchment paper.
- In a medium bowl, combine 1 cup creamy peanut butter, 1 cup granulated sugar, 1 large egg, 1 teaspoon vanilla extract, ½ teaspoon baking soda, and ¼ teaspoon salt. Stir until a soft, cohesive dough forms. If too dry, add 1 tablespoon milk; if too sticky, add 1 tablespoon flour.
- Scoop rounded tablespoons of dough (about 1.5 tablespoons each) and roll into balls. Roll each ball in extra granulated sugar.
- Place dough balls on prepared baking sheet about 2 inches apart. Flatten each with a fork in a crisscross pattern to about ½-inch thick.
- Bake for 8-10 minutes until edges are lightly golden and centers look set but still soft. Cool on baking sheet for 5 minutes, then transfer to a wire rack to cool completely.
- In a small microwave-safe bowl, combine 1 cup semi-sweet chocolate chips and 1 tablespoon coconut oil. Microwave in 30-second intervals, stirring between each, until smooth (about 90 seconds total).
- Dip the top of each cooled cookie into melted chocolate, letting excess drip off. Place back on parchment paper, chocolate side up.
- Let chocolate set for 5-10 minutes until tacky but not hard.
- In another small bowl, melt 2 tablespoons white chocolate chips with ½ teaspoon coconut oil in 20-second bursts. Transfer to a small piping bag or zip-top bag with a tiny corner snipped off.
- Pipe a small circle of white chocolate in the center of each cookie, then 3-4 concentric circles around it, spaced about ¼ inch apart. Quickly drag a toothpick or skewer from the center outward through all rings, repeating every ¼ inch around the cookie to create a web pattern.
- Let cookies sit at room temperature until chocolate is fully firm, about 30-45 minutes (or 15 minutes in the fridge).
Notes
For best results, use commercial peanut butter like Jif or Skippy to avoid excess oil. Natural peanut butter may cause cookies to spread too much. The web pattern doesn’t need to be perfect—messy webs look more realistic. Cookies can be frozen undecorated for up to 3 months; thaw and decorate when ready.
Nutrition
- Serving Size: 1 cookie
- Calories: 185
- Sugar: 15
- Sodium: 120
- Fat: 11
- Saturated Fat: 4
- Carbohydrates: 20
- Fiber: 2
- Protein: 5
Keywords: spider web cookies, peanut butter cookies, Halloween cookies, easy cookies, chocolate peanut butter cookies, no chill cookies, flourless cookies


