“Wait—you can freeze a sandwich?” My brother-in-law stared at me like I’d just suggested we could freeze a live goldfish. It was a Tuesday night, and I was packing lunches for the upcoming school week. I’d just slid a row of ham and cheese sandwiches into the freezer, and he looked genuinely concerned. That moment, right there, is why this recipe exists. Because yes, you absolutely can freeze a sandwich. The trick is doing it without ending up with a soggy, sad bread situation. And honestly, that took me a few tries to figure out.
I started making these easy no-soggy ham and cheese freezer sandwiches out of pure necessity. Mornings in our house are chaotic—there’s no gentle way to put it. Between finding missing shoes and convincing my youngest that socks are not optional, making a fresh, thoughtful lunch feels impossible. So I started batch-prepping. I tested different breads, different cheeses, different assembly methods. I learned the hard way that some ingredients turn into a watery mess when thawed. But after a few (okay, several) experiments, I landed on a method that actually works. The bread stays soft, the cheese stays melty, and the ham stays, well, hammy. No sogginess. No texture nightmares. Just a perfectly good sandwich that tastes like you made it that morning.
These sandwiches have become our little secret weapon for busy weeks. They save time, they save stress, and they make lunch packing feel almost effortless. I think that’s the real reason this recipe stuck with me—it solved a problem I didn’t even know I could solve.
Why You’ll Love These Easy No-Soggy Ham and Cheese Freezer Sandwiches
Let me tell you why these sandwiches have earned a permanent spot in my freezer. I’ve tested this method more times than I can count, tweaking and adjusting until it was just right. Here’s what makes them special:
- Quick & Easy: You can assemble a dozen sandwiches in about 15 minutes. That’s it. Fifteen minutes for a week’s worth of lunches.
- Simple Ingredients: Nothing fancy here. You probably have most of these items in your fridge and pantry right now. No weird breads or hard-to-find cheeses.
- Perfect for Busy Mornings: Grab one from the freezer, toss it in a lunchbox, and go. By lunchtime, it’s perfectly thawed and ready to eat. It’s like having a personal lunch assistant.
- Crowd-Pleaser: Kids love them. Adults love them. Even my picky nephew asked for seconds, and that’s saying something.
- No Soggy Bread: This is the game-changer. The secret is all in the assembly technique. I’ll share it below, and trust me, it works.
What makes this recipe different from every other freezer sandwich tutorial out there? It’s the little things. Like using a barrier ingredient that prevents moisture from seeping into the bread. Or wrapping each sandwich individually so they freeze flat and stack neatly. Or the specific type of cheese that holds up best to freezing and thawing. I didn’t just throw ingredients together and hope for the best. I tested, I failed, I adjusted, and I perfected. This is my best version, and I’m confident you’ll love it.
These sandwiches are the kind of thing that makes you feel like you’ve got your act together, even on the most chaotic mornings. And honestly, that feeling is priceless.
What Ingredients You Will Need
This recipe uses simple, everyday ingredients to create sandwiches that freeze beautifully and taste fresh. Here’s what you’ll need:
For the Sandwiches
- Bread: 24 slices of sturdy bread (white, whole wheat, sourdough, or Texas toast work great). Avoid very soft or thin breads like brioche or white sandwich bread—they can get mushy.
- Deli Ham: 1 pound, thinly sliced. I prefer honey ham or smoked ham for extra flavor. Look for pre-sliced or ask your deli counter to slice it thin.
- Cheese: 12 slices of cheese (provolone, Swiss, cheddar, or American). Provolone melts beautifully and holds up well to freezing. Swiss adds a nice nutty flavor.
- Butter or Margarine: 4 tablespoons, softened. This goes on the outside of the bread to prevent freezer burn and add richness.
- Mustard or Mayo (optional): A thin spread adds flavor, but be careful not to use too much—excess moisture can cause sogginess. Dijon mustard is my personal favorite.
For the Barrier Layer

- Cream Cheese: 4 ounces, softened. This is the secret ingredient! A thin layer of cream cheese on the inside of both bread slices creates a moisture barrier that keeps the bread from getting soggy.
For Wrapping and Freezing
- Plastic Wrap: To wrap each sandwich individually. This prevents freezer burn and keeps the sandwiches fresh.
- Freezer-Safe Bags: To store the wrapped sandwiches. I recommend gallon-sized zip-top bags.
- Parchment Paper (optional): If you want to label them, you can write the date and type of sandwich on a small piece of parchment and slip it into the bag.
That’s it! Simple, straightforward ingredients that come together to create something truly convenient. I personally prefer using a sturdy sourdough bread—it holds up beautifully and adds a nice tangy flavor that complements the ham and cheese. If you’re looking for a gluten-free option, use your favorite gluten-free bread, just make sure it’s sturdy enough to hold the fillings.
Equipment Needed
You don’t need any fancy equipment for this recipe. Here’s what you’ll need:
- Butter Knife or Spatula: For spreading the cream cheese and butter.
- Cutting Board: A clean surface for assembling the sandwiches.
- Plastic Wrap: For wrapping each sandwich individually.
- Freezer-Safe Bags: For storing the wrapped sandwiches.
- Sharp Knife (optional): If you want to cut the sandwiches in half before freezing (great for smaller appetites or lunchboxes).
I’ve tried using wax paper and aluminum foil for wrapping, but plastic wrap works best. It clings tightly to the sandwich, preventing air from getting in and causing freezer burn. If you don’t have plastic wrap, you can use freezer-safe parchment paper, but make sure it’s sealed tightly. I learned that the hard way when I found a frosty sandwich in my freezer that tasted like cardboard. Not my finest moment.
Preparation Method
Follow these steps carefully, and you’ll have perfect freezer sandwiches every time. Trust the process—it works.
Step 1: Prepare Your Workstation
Clear a clean counter space. Lay out your bread slices, ham, cheese, softened cream cheese, softened butter, and plastic wrap. Having everything ready makes assembly quick and efficient. I like to line up the bread slices in pairs, so I can work assembly-line style.
Step 2: Spread the Cream Cheese Barrier
Take one slice of bread and spread a thin, even layer of softened cream cheese on one side. Do the same with the other slice that will be the top of the sandwich. This cream cheese layer is the key to preventing sogginess. It creates a barrier that keeps the moisture from the ham and cheese away from the bread. Don’t skip this step—I promise it makes all the difference. Use about 1 teaspoon per slice, spread evenly to the edges.
Step 3: Add the Fillings
On the bottom slice of bread (the one with cream cheese), place a slice or two of ham. Fold the ham to fit neatly on the bread. Then add a slice of cheese. If you’re using mustard or mayo, spread a very thin layer on the ham before adding the cheese. Remember, less is more here. You want flavor, not moisture.
Step 4: Assemble the Sandwich
Place the top slice of bread (cream cheese side down) on top of the fillings. Press down gently to secure everything. If you’re cutting the sandwiches in half, do it now. I find that cutting them diagonally makes them feel more like a real lunch, but straight cuts work fine too.
Step 5: Butter the Outside
Spread a thin layer of softened butter on the outside of both bread slices. This step is optional but highly recommended. The butter adds richness and helps prevent freezer burn. It also gives the bread a slightly softer texture when thawed. Use about 1/2 teaspoon per slice.
Step 6: Wrap Individually
Place each sandwich in the center of a sheet of plastic wrap. Wrap it tightly, making sure there are no air pockets. Fold the ends under the sandwich to create a neat package. The tighter the wrap, the better the sandwich will freeze. I like to double-wrap if I’m planning to store them for more than a week.
Step 7: Bag and Freeze
Place the wrapped sandwiches in a freezer-safe bag. Squeeze out as much air as possible before sealing. Label the bag with the date and type of sandwich. I also like to write “thaw in lunchbox” so no one forgets. Lay the bag flat in the freezer. The sandwiches will freeze flat, making them easy to stack and store.
Step 8: Thaw and Enjoy
When you’re ready to eat, simply grab a sandwich from the freezer and place it in a lunchbox. By lunchtime (about 3-4 hours), it will be perfectly thawed and ready to eat. The bread will be soft, the cheese will be melty, and there will be no sogginess. It’s like magic, but it’s really just good science.
Cooking Tips & Techniques
I’ve made plenty of mistakes with freezer sandwiches, so you don’t have to. Here are my best tips for success:
- Don’t Skip the Cream Cheese: I know it sounds weird, but trust me. The cream cheese barrier is non-negotiable. It’s the only thing that truly prevents the bread from getting soggy. I tried using butter alone, and the bread was still a little damp. Cream cheese works better because it’s thicker and creates a more effective seal.
- Use Sturdy Bread: Soft, airy breads like brioche or white sandwich bread will get mushy when thawed. Stick with heartier options like sourdough, whole wheat, or Texas toast. If you love soft bread, try using a slightly thicker slice.
- Don’t Overload the Fillings: It’s tempting to pile on the ham and cheese, but too much filling can make the sandwich difficult to wrap and can create excess moisture. Stick with one or two slices of ham and one slice of cheese per sandwich.
- Wrap Tightly: Air is the enemy of frozen food. Make sure your plastic wrap is tight and there are no gaps. If you’re storing the sandwiches for more than a month, double-wrap them for extra protection.
- Label Everything: I can’t tell you how many times I’ve found a mystery sandwich in the back of my freezer. Always label your bags with the date and type of sandwich. It saves so much confusion later.
- Freeze Flat: Lay the sandwiches flat in the freezer. This helps them freeze evenly and makes them easier to stack. If you’re short on space, you can stand them upright once they’re frozen.
One thing I learned the hard way: don’t use fresh tomatoes or lettuce in freezer sandwiches. They release too much moisture and turn into a sad, soggy mess. If you want to add veggies, do it fresh on serving day. The same goes for pickles—they can make the bread soggy too.
Variations & Adaptations
These sandwiches are endlessly customizable. Here are some of my favorite variations:
Turkey and Swiss
Swap the ham for thinly sliced turkey and use Swiss cheese instead of provolone. This is a classic combo that freezes beautifully. Add a thin layer of cranberry sauce for a holiday-inspired twist.
Roast Beef and Cheddar
Use thinly sliced roast beef and sharp cheddar cheese. A thin spread of horseradish sauce adds a nice kick. This is my husband’s favorite variation.
Veggie and Hummus
For a meatless option, skip the ham and use a thin layer of hummus instead of cream cheese. Add roasted red peppers, cucumber slices, and spinach. This version is best eaten within a week of freezing.
Italian Sub Style
Layer salami, pepperoni, ham, and provolone cheese. Add a thin spread of Italian dressing or olive oil. This is perfect for anyone who loves a good sub sandwich.
Breakfast Sandwich
Use Canadian bacon or breakfast ham, add a slice of cheddar, and spread a thin layer of maple syrup on the bread. This makes a great grab-and-go breakfast option.
I’ve tried all of these variations, and they all work beautifully. My personal favorite is the turkey and Swiss with a touch of cranberry sauce. It feels fancy, but it’s just as easy to make as the classic ham and cheese.
Serving & Storage Suggestions
These sandwiches are designed for convenience, but here are a few tips to make the most of them:
- Thaw in the Lunchbox: The easiest way to thaw these sandwiches is to place them directly in a lunchbox in the morning. By lunchtime, they’ll be perfectly thawed and ready to eat. No microwave needed.
- Serve Cold or at Room Temperature: These sandwiches are best enjoyed cold or at room temperature. If you prefer a warm sandwich, you can microwave it for 30-45 seconds, but be careful not to overheat it, or the bread can become tough.
- Pair with Sides: These sandwiches pair beautifully with a handful of chips, some fresh fruit, or a simple side salad. For a complete lunchbox, add some rainbow veggie and hummus bento lunchbox cups or no-bake peanut butter granola bites for a sweet finish.
- Storage: Store the wrapped sandwiches in the freezer for up to 3 months. For best quality, try to eat them within 1-2 months. The cream cheese barrier helps maintain freshness, but the bread can start to dry out after longer storage.
- Reheating: If you want to reheat a sandwich, unwrap it and place it in a toaster oven at 350°F for 5-7 minutes. This will warm the sandwich without making the bread soggy. Microwaving works too, but the bread can become chewy.
One thing I love about these sandwiches is that the flavors actually meld together as they freeze. The ham and cheese seem to marry in a way that makes the sandwich taste even better than a freshly made one. It’s a nice surprise.
Nutritional Information & Benefits
Here’s a rough estimate of the nutritional content per sandwich (based on one sandwich made with white bread, ham, and provolone cheese):
- Calories: Approximately 350-400
- Protein: 20-25 grams
- Fat: 15-20 grams
- Carbohydrates: 30-35 grams
- Fiber: 2-3 grams
- Sodium: 800-1000 mg
These sandwiches are a good source of protein, which helps keep you full and satisfied throughout the day. The ham provides essential B vitamins and iron, while the cheese adds calcium for strong bones. If you use whole wheat bread, you’ll get extra fiber and nutrients.
For a lower-sodium option, look for low-sodium ham and cheese. You can also reduce the amount of cheese or use a lower-fat variety. If you’re watching your calorie intake, these sandwiches are a reasonable option for a balanced lunch, especially when paired with fresh fruit or vegetables.
I personally love that these sandwiches offer a good balance of protein, fat, and carbs. They keep my kids full until after-school snacks, and they don’t leave me feeling sluggish in the afternoon. It’s comfort food that works for real life.
Conclusion
These easy no-soggy ham and cheese freezer sandwiches have honestly changed the way I think about lunch prep. They’re simple, they’re reliable, and they solve a problem that so many of us face: how to get a good lunch on the table without losing your mind in the morning. The cream cheese barrier is the secret weapon, and once you try it, you’ll wonder why you didn’t think of it sooner.
I encourage you to customize these sandwiches to your liking. Try different cheeses, different meats, different breads. Make them your own. That’s the beauty of this recipe—it’s a template, not a rulebook. And if you come up with a variation you love, I’d love to hear about it. Drop a comment below or tag me in your photos. I’m always looking for new ideas.
Thank you for stopping by and giving this recipe a chance. I hope it makes your mornings a little easier and your lunches a lot more delicious. Happy sandwich making, friends!
Frequently Asked Questions
Can I use mayonnaise instead of cream cheese?
You can, but I don’t recommend it. Mayonnaise has a higher water content than cream cheese, which means it’s less effective at preventing sogginess. Cream cheese creates a thicker, more reliable moisture barrier. If you love the flavor of mayo, try mixing a small amount with the cream cheese, but don’t use it alone.
How long do these sandwiches last in the freezer?
These sandwiches will stay fresh in the freezer for up to 3 months. For best quality, I recommend eating them within 1-2 months. The cream cheese barrier helps maintain freshness, but the bread can start to dry out or develop freezer burn after longer storage. Always wrap them tightly to maximize their shelf life.
Can I add vegetables like lettuce or tomato?
I don’t recommend adding fresh vegetables like lettuce, tomato, or cucumber before freezing. These vegetables have high water content and will release moisture as they thaw, making the bread soggy. If you want to add veggies, do it fresh on serving day. You can also use roasted red peppers or sun-dried tomatoes, which have less moisture.
Do I need to thaw the sandwich before eating?
No, you don’t need to thaw the sandwich before eating. Simply place it in a lunchbox in the morning, and it will be perfectly thawed by lunchtime (about 3-4 hours). If you’re in a hurry, you can microwave it for 30-45 seconds, but be careful not to overheat it. For best texture, I recommend letting it thaw naturally.
Can I use gluten-free bread for this recipe?
Yes, you can use gluten-free bread, but choose a sturdy variety. Some gluten-free breads are very soft and can become mushy when thawed. Look for a brand that holds its shape well, like a gluten-free sourdough or a hearty multigrain option. The cream cheese barrier is especially important with gluten-free bread, as it can be more prone to sogginess.
Pin This Recipe!
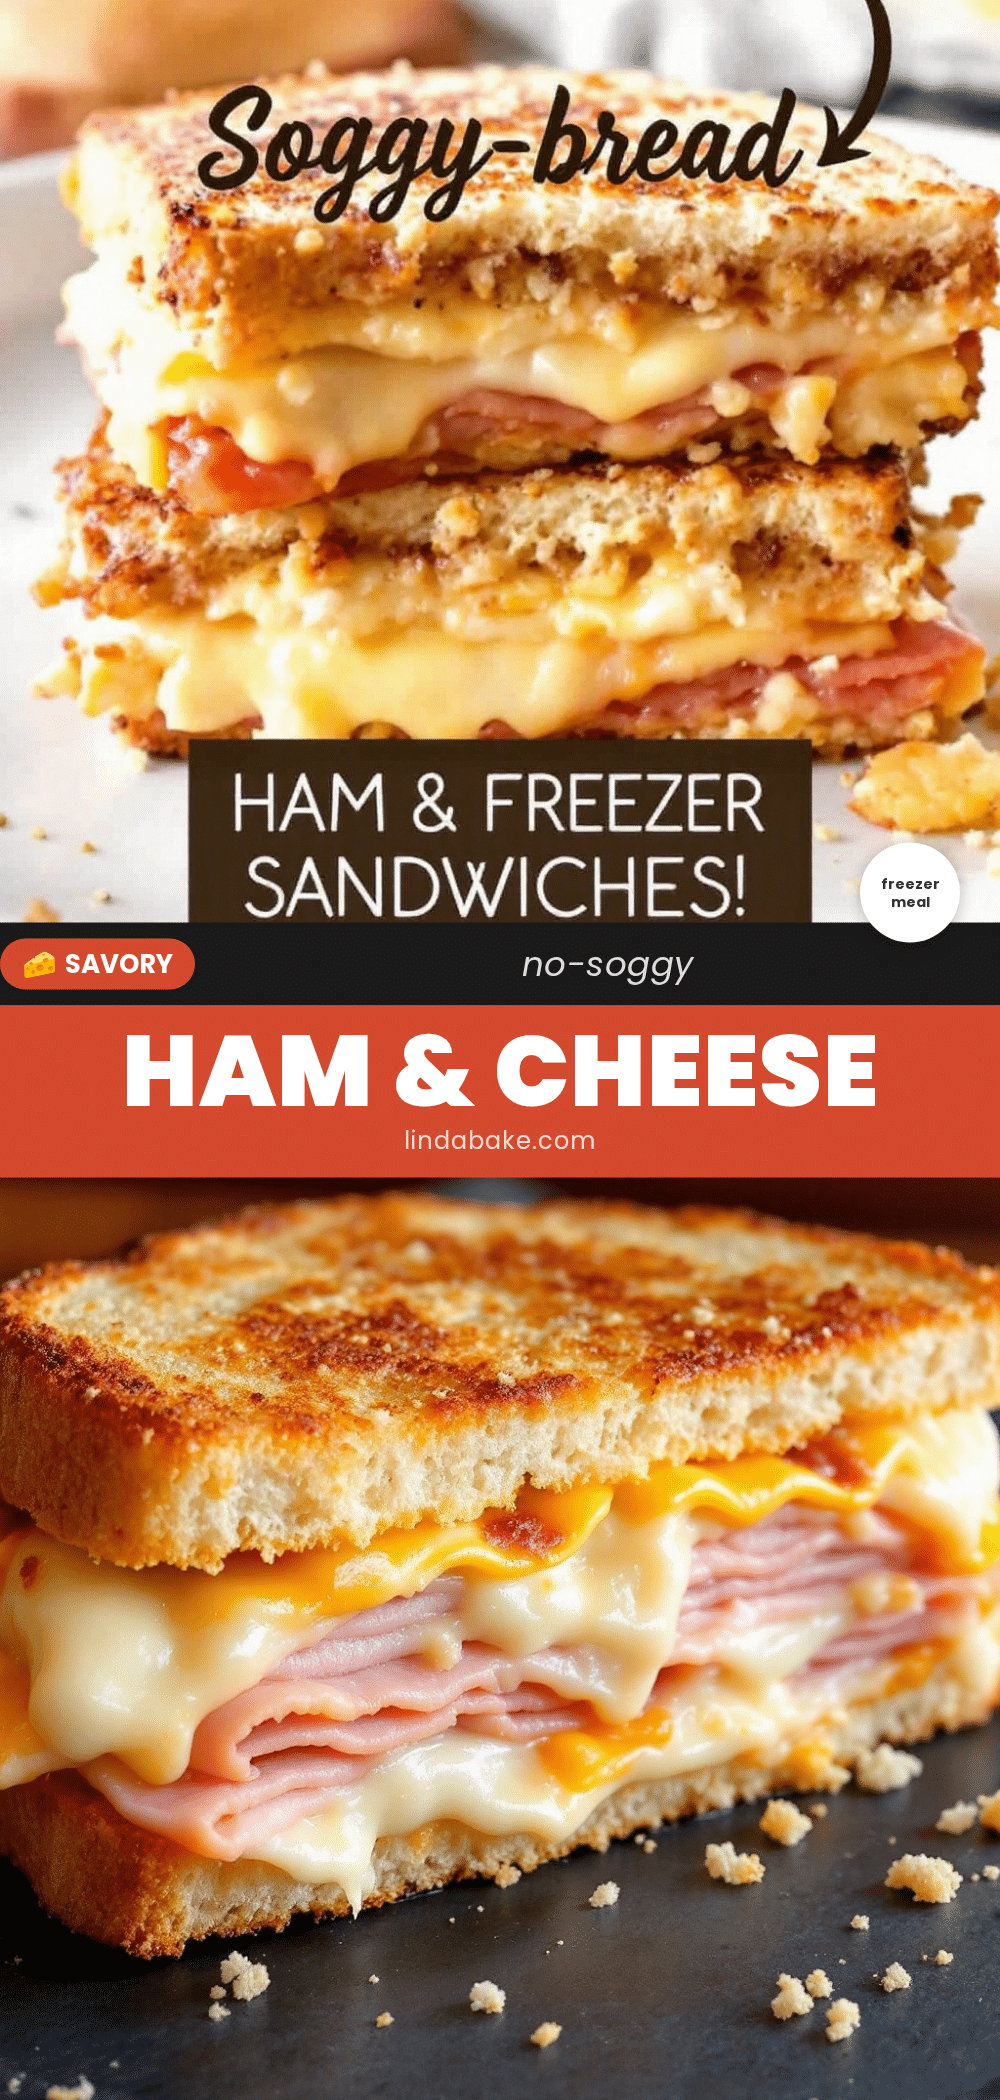
Easy No-Soggy Ham and Cheese Freezer Sandwiches

These freezer-friendly ham and cheese sandwiches stay perfectly soft and never soggy, thanks to a cream cheese barrier. Perfect for busy mornings, they can be assembled in 15 minutes and thaw by lunchtime.
- Prep Time: 15 minutes
- Cook Time: 0 minutes
- Total Time: 15 minutes
- Yield: 12 servings 1x
- Category: Main Course
- Cuisine: American
Ingredients
- 24 slices sturdy bread (white, whole wheat, sourdough, or Texas toast)
- 1 pound thinly sliced deli ham (honey ham or smoked ham)
- 12 slices cheese (provolone, Swiss, cheddar, or American)
- 4 tablespoons butter or margarine, softened
- Mustard or mayo (optional, for spreading)
- 4 ounces cream cheese, softened
- Plastic wrap for wrapping
- Freezer-safe bags for storage
- Parchment paper (optional, for labeling)
Instructions
- Prepare your workstation: Clear a clean counter space and lay out all ingredients and supplies.
- Spread the cream cheese barrier: Spread a thin, even layer of softened cream cheese on one side of each bread slice (about 1 teaspoon per slice).
- Add the fillings: On the bottom slice (cream cheese side up), place a slice or two of ham, then a slice of cheese. If using mustard or mayo, spread a very thin layer on the ham before adding the cheese.
- Assemble the sandwich: Place the top slice of bread (cream cheese side down) on top of the fillings. Press gently. Cut in half if desired.
- Butter the outside: Spread a thin layer of softened butter on the outside of both bread slices (about 1/2 teaspoon per slice).
- Wrap individually: Place each sandwich in the center of a sheet of plastic wrap and wrap tightly, folding ends under. Double-wrap for longer storage.
- Bag and freeze: Place wrapped sandwiches in a freezer-safe bag, squeeze out air, seal, and label with date and type. Lay flat in the freezer.
- Thaw and enjoy: Grab a sandwich from the freezer and place in a lunchbox. It will be perfectly thawed in 3-4 hours. Serve cold or at room temperature.
Notes
Do not add fresh vegetables like lettuce or tomato before freezing; add them fresh on serving day. The cream cheese barrier is essential to prevent sogginess. For best quality, eat within 1-2 months. To reheat, unwrap and toast in a toaster oven at 350°F for 5-7 minutes.
Nutrition
- Serving Size: 1 sandwich
- Calories: 375
- Sugar: 3
- Sodium: 900
- Fat: 18
- Saturated Fat: 9
- Carbohydrates: 33
- Fiber: 2.5
- Protein: 22
Keywords: freezer sandwiches, ham and cheese, no-soggy, meal prep, lunchbox, easy, make-ahead


