My niece took one bite of these ghost-shaped meringue cookies, stopped mid-chew, and whispered “Auntie, it disappears on my tongue.” And honestly? That’s the exact moment I knew this recipe was a keeper. She wasn’t being polite—she was genuinely startled by how light and airy they were. I had spent the whole afternoon testing batches, trying to get that perfect crisp shell with a soft, marshmallowy center. Watching her little face light up while she grabbed another ghost from the plate made every cracked meringue and failed piping attempt totally worth it.
These aren’t just any Halloween cookies. They’re the kind that feel like magic—crisp on the outside, tender on the inside, and shaped like tiny ghosts that practically float off the baking sheet. I wanted something that looked spooky but tasted like a cloud. Something you could make with simple pantry ingredients but still impress everyone at the Halloween party. And after a few messy tries (and one batch that looked more like sad blobs than ghosts), I finally cracked the code.
The secret? Room temperature egg whites, a patient hand with the sugar, and a low, slow bake that dries them out without browning. It’s not complicated, but it does ask for a little attention. And trust me, when you pull a tray of perfectly piped ghost meringues out of the oven, you’ll feel like a kitchen wizard. These cookies have officially become my go-to for Halloween gatherings, classroom treats, and even just a fun weekend project with the kids. They’re light, they’re crunchy, and they’re just spooky enough to be festive without being scary.
Why You’ll Love This Recipe
I’ve tested this recipe six times (yes, six) to get it just right. Here’s why these ghost meringues deserve a spot on your Halloween baking list:
- Only 4 Ingredients: Egg whites, sugar, cream of tartar, and vanilla extract. That’s it. You probably have everything in your kitchen right now.
- Naturally Gluten-Free: No flour means these are safe for guests with gluten sensitivities. Everyone can grab a ghost without worry.
- Low-Fat Treat: Meringues are practically fat-free. They satisfy that sweet tooth without the heavy feeling.
- Kid-Friendly Activity: Piping ghosts is easy enough for little hands with a little guidance. My niece helped me pipe an entire batch last weekend.
- Make-Ahead Friendly: These cookies stay crisp for days when stored properly. Perfect for prepping before a party.
- Customizable: Add a drop of food coloring, sprinkle edible glitter, or pipe on chocolate faces. Each ghost can have its own personality.
What makes this version different from other meringue recipes? It’s the technique. I whip the egg whites to stiff peaks with cream of tartar for stability, then add the sugar slowly so it dissolves completely. That step is crucial—it gives you that smooth, glossy meringue that pipes beautifully and holds its shape. No weeping, no cracking, no sticky mess. Just perfect little ghosts every time.
These cookies aren’t just good for Halloween. They’re the kind of treat that makes you feel like a kid again. The first bite cracks open that delicate shell, and then the whole thing just melts. It’s pure, simple joy. And honestly, isn’t that what baking should be about?
What Ingredients You Will Need
This recipe uses simple, wholesome ingredients that come together to create something truly special. No fancy extracts or hard-to-find items—just pantry staples that do the heavy lifting.
- 3 large egg whites (room temperature, about 100 grams) – Room temperature egg whites whip up higher and hold more air. Cold eggs take forever to foam, so let them sit out for 30 minutes before starting.
- ¾ cup granulated sugar (150 grams) – Regular white sugar works best. Don’t use powdered sugar—it contains cornstarch and won’t dissolve the same way. Superfine sugar is great if you have it, but granulated is totally fine.
- ¼ teaspoon cream of tartar – This stabilizes the egg whites and helps them hold their shape. If you don’t have it, substitute with ½ teaspoon lemon juice or white vinegar.
- ½ teaspoon vanilla extract – Pure vanilla gives the best flavor, but imitation vanilla works too. You can swap in almond extract or peppermint for a different vibe.
- Mini chocolate chips or black decorating gel (optional, for eyes) – I like using mini chocolate chips because they stay put. Black gel works too, but add it after baking so it doesn’t run.
Ingredient Tips from My Kitchen:
I use large eggs from a local farm when I can find them—they have stronger whites that whip up beautifully. But store-bought eggs work perfectly too. Just make sure no yolk gets into the whites. Even a tiny speck of fat will prevent them from whipping properly. If you’re nervous, separate each egg into a small bowl first, then add the white to your mixing bowl.
For the sugar, I’ve tried organic cane sugar and it works fine, but the cookies come out slightly less white. Regular granulated sugar gives that pure white ghost color we’re after. And please, please use cream of tartar. I skipped it once thinking it wouldn’t matter, and my meringues deflated into flat, sticky puddles. Not cute.
Substitution Options:
- Use ½ teaspoon lemon juice instead of cream of tartar
- Swap vanilla with almond, peppermint, or coconut extract
- Add a pinch of salt if using unsalted egg whites (though egg whites naturally contain sodium)
- For color, use gel food coloring—liquid will deflate the meringue
Equipment Needed
You don’t need a professional bakery setup for these ghost meringues, but the right tools make a big difference. Here’s what I use:
- Electric stand mixer or hand mixer – Whipping egg whites by hand takes forever and you’ll get tired arms. A mixer does the job in minutes. I prefer my stand mixer with the whisk attachment, but a hand mixer works great too.
- Large mixing bowl – Glass or metal works best. Plastic bowls can retain grease, which ruins meringue. Make sure your bowl is completely clean and dry.
- Piping bag with a round tip – A large round tip (like Wilton 1A or 2A) gives you control over the ghost shape. No piping bag? Use a zip-top bag with the corner snipped off. It’s not as precise, but it works.
- Baking sheet lined with parchment paper – Parchment is non-negotiable. Wax paper will stick, and silicone mats can sometimes cause spreading. Parchment gives you clean, easy release.
- Digital kitchen scale – Not required, but highly recommended. Weighing your egg whites ensures consistency. I use a cheap scale from Amazon and it’s been perfect for years.
- Cooling rack – Meringues need to cool completely before storage. A wire rack lets air circulate underneath so they don’t trap moisture.
Budget-Friendly Alternatives:
If you don’t own a piping bag, grab a pack of disposable piping bags from the grocery store—they’re under $5. Or use a sturdy zip-top bag. I’ve made dozens of batches with the bag method and they turn out just fine. The key is snipping a small opening so you can control the flow.
For the mixer, a $20 hand mixer from Target works perfectly. I used one for years before upgrading to a stand mixer. The meringues were just as good.
Preparation Method
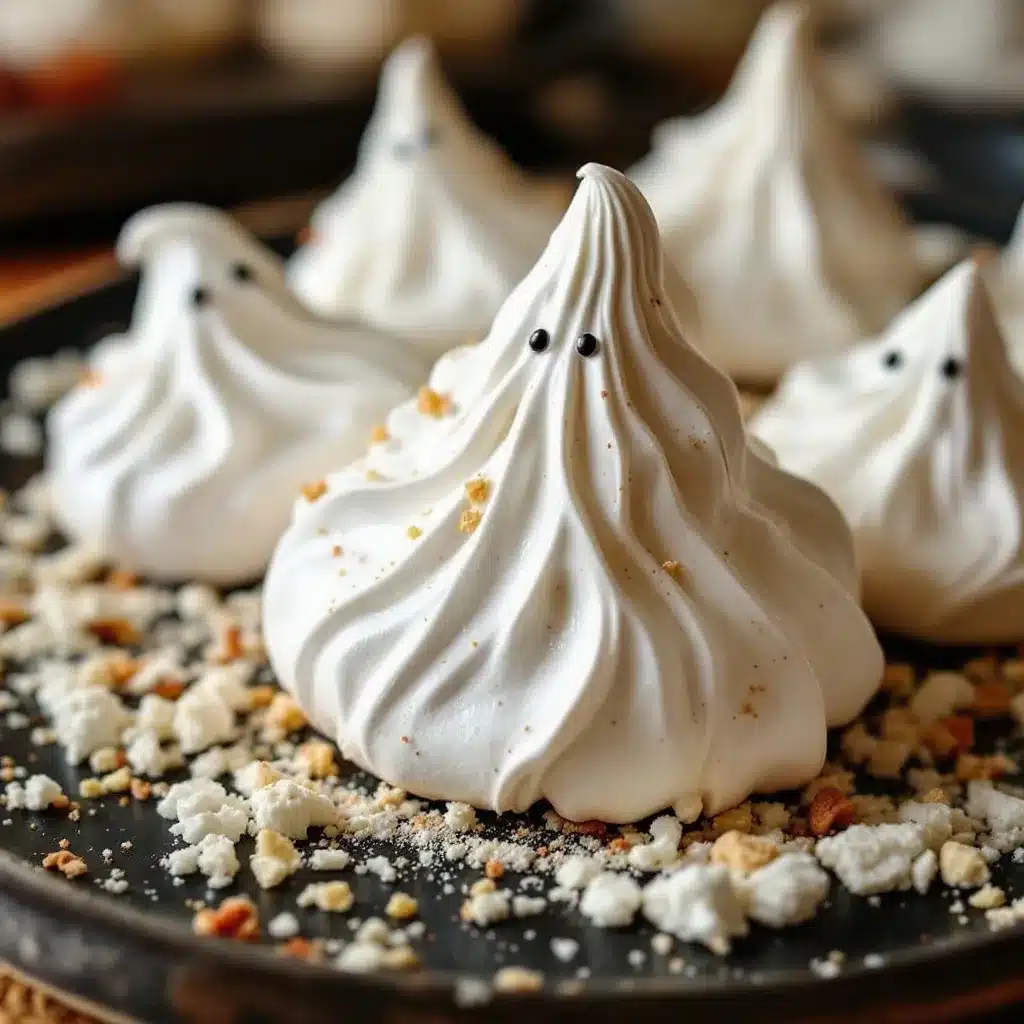
Let’s make some ghost meringues! This process takes about 20 minutes of active work plus 1.5 hours of baking time. Plan ahead so your meringues have time to cool completely in the oven.
- Preheat your oven to 200°F (93°C). Yes, that low. We’re drying the meringues, not baking them. Line two baking sheets with parchment paper. Set them aside.
- Separate your eggs carefully. Crack each egg and pass the yolk between the shell halves, letting the white fall into a small bowl. Transfer each white to your mixing bowl. This way, if one yolk breaks, you only lose one egg instead of the whole batch. I learned this the hard way—ruined three eggs before I started separating individually.
- Add the cream of tartar to the egg whites. Start whipping on medium speed. After about 30 seconds, you’ll see foamy bubbles forming. The mixture will look like soapy water. That’s good—it means air is getting in there.
- Gradually add the sugar. With the mixer running on medium-high, add the sugar one tablespoon at a time. Wait about 10 seconds between each addition. This slow process lets the sugar dissolve completely. If you dump it all in at once, your meringue will be grainy. Trust me, I’ve done it. It’s not pretty.
- Keep whipping until stiff peaks form. This takes about 5-7 minutes total with a stand mixer, or 8-10 minutes with a hand mixer. You’ll know it’s ready when you lift the whisk and the meringue stands up straight without drooping. The mixture should look glossy and white, like marshmallow fluff. Rub a little between your fingers—if it feels smooth, the sugar has dissolved. If it feels gritty, keep whipping.
- Add the vanilla extract. Drizzle it in and whip for another 10 seconds until combined. Don’t overmix at this stage or you’ll deflate the meringue.
- Transfer the meringue to a piping bag. If you’re using a zip-top bag, stand it up in a tall glass and fold the edges over the rim. Spoon the meringue in carefully, trying not to deflate it. Twist the top of the bag closed.
- Pipe the ghosts. Hold the bag straight up and down, about ½ inch above the parchment. Squeeze gently to create a round base, then lift the bag straight up while squeezing to form a tall teardrop shape. Stop squeezing and pull the bag away quickly. You want a little point on top—that’s the ghost’s head. Space them about 1 inch apart—they don’t spread much, but they need a little breathing room.
- Add the eyes. If using mini chocolate chips, gently press two into each ghost before baking. Place them close together near the top of the teardrop. Don’t push too hard or you’ll deflate the meringue. If using black gel, wait until after baking to add the eyes.
- Bake for 1.5 hours. Place both sheets in the oven. Bake at 200°F (93°C) for 90 minutes. Do not open the oven door during baking—the temperature drop can cause cracking. After 90 minutes, turn off the oven but leave the meringues inside to cool completely, about 1-2 hours. This slow cooling prevents cracking and ensures they dry all the way through.
- Test for doneness. A fully baked meringue should lift easily off the parchment. The bottom should be dry, not sticky. If they stick, return them to the turned-off oven for another 30 minutes.
Sensory Cues to Watch For:
When you’re whipping the meringue, listen for the sound change. At first, it’s sloshy and liquid. As peaks form, the sound becomes quieter and more rhythmic. The mixture will start clinging to the sides of the bowl. When you stop the mixer and lift the whisk, the meringue should form a stiff peak that doesn’t curl over. That’s your visual cue that it’s ready.
During baking, you won’t see much change—that’s normal. The meringues will stay white and might puff slightly. If they start turning golden, your oven is too hot. Crack the door open slightly to bring the temperature down.
Cooking Tips & Techniques
I’ve made more batches of meringue than I care to count, and I’ve messed up plenty. Here’s what I’ve learned so you don’t have to repeat my mistakes.
Room Temperature Eggs Are Non-Negotiable.
Cold egg whites don’t whip up as high. They take forever to foam and often end up dense. Let your eggs sit on the counter for 30 minutes before starting. In a hurry? Place the whole eggs (in their shells) in a bowl of warm water for 5 minutes. It’s not perfect, but it helps.
Clean Equipment Matters.
Any trace of grease or yolk will ruin your meringue. Wash your bowl and whisk with hot, soapy water, then wipe them down with white vinegar on a paper towel. The vinegar removes any residual fat. I do this every single time, even when I think my bowl is clean.
Don’t Overwhip.
Once you hit stiff peaks, stop. Overwhipping causes the meringue to become dry and grainy. The bubbles start breaking apart, and your meringue will deflate during baking. If you see the mixture starting to look curdled or separate, you’ve gone too far. Unfortunately, you can’t fix overwhipped meringue—you have to start over. So watch carefully.
Low and Slow is the Way.
High heat makes meringues crack and brown. Keep your oven at 200°F (93°C) and be patient. If your oven runs hot (mine does), use an oven thermometer to check. I keep one hanging in my oven at all times. They’re cheap and save you from ruined batches.
Humidity is Your Enemy.
Meringues absorb moisture from the air. Don’t make these on a rainy or humid day—they’ll turn out sticky and soft. Wait for a dry day. If you live in a humid climate (I feel your pain), store them with a silica gel packet in an airtight container. It sounds weird, but it works.
My Biggest Failure:
I once tried to double the batch and whip everything in a too-small bowl. The meringue splattered everywhere, I overwhipped trying to incorporate all the sugar, and the ghosts came out flat and chewy. My kitchen looked like a snowstorm hit it. Now I always make single batches and use the right size bowl. Learn from my mess.
Variations & Adaptations
These ghost meringues are a blank canvas. Here are some ways to make them your own:
Chocolate Ghosts: Sift 1 tablespoon of unsweetened cocoa powder into the sugar before adding it to the egg whites. Fold it in gently after the meringue reaches stiff peaks. The ghosts will be pale brown with a subtle chocolate flavor. My nephew loves these—he calls them “chocolate clouds.”
Peppermint Ghosts: Replace the vanilla extract with ½ teaspoon peppermint extract. Crush a few candy canes and sprinkle the pieces on top of the ghosts before baking. The red and white specks look festive and taste amazing. These are perfect for a winter-themed party.
Rainbow Ghosts: Divide the meringue into small bowls and add a drop of gel food coloring to each. Layer the colors in the piping bag for a tie-dye effect. I did this for a birthday party and the kids went wild. Just be gentle when mixing the color—overmixing will deflate the meringue.
Vegan Version: Use aquafaba (the liquid from a can of chickpeas) instead of egg whites. 3 tablespoons of aquafaba equals one egg white. Whip it with cream of tartar just like regular egg whites. It takes a little longer to reach stiff peaks, but it works. I’ve tested this for a friend with egg allergies and the ghosts came out perfectly crisp.
Spiced Ghosts: Add ½ teaspoon of pumpkin pie spice to the sugar before whipping. The cinnamon, nutmeg, and ginger give the meringues a warm, fall flavor. These are amazing served alongside a cup of hot apple cider.
Personal Favorite: I love making a batch of ghost meringues and serving them with a bowl of creamy matcha green tea tiramisu parfaits for a fun dessert spread. The light, airy meringues balance the rich, creamy parfaits perfectly. It’s become my go-to for Halloween dinner parties.
Serving & Storage Suggestions
Serving: These ghost meringues are best served at room temperature. Arrange them on a platter with a few spooky decorations—fake spiderwebs, plastic spiders, or orange and black sprinkles. They look adorable piled in a glass jar or arranged on a cake stand. Kids love grabbing them by the “head” and munching on the crispy shell.
What to Serve With Them:
- Hot chocolate or warm apple cider
- Pumpkin spice lattes
- A bowl of fresh fruit for contrast
- Other Halloween treats like pumpkin cream cheese muffins for a full spread
- Ice cream—crumble the meringues on top for a crunchy topping
Storage: Store meringues in an airtight container at room temperature. Do not refrigerate—the moisture will make them sticky. They’ll stay crisp for up to 2 weeks if stored properly. I keep mine in a glass jar with a tight lid on the counter. If you live in a humid area, add a food-safe silica gel packet to the container. It absorbs moisture and keeps the meringues crunchy.
Freezing: You can freeze baked meringues for up to 3 months. Place them in a single layer in a freezer-safe container with parchment between layers. Thaw at room temperature for 30 minutes before serving. They won’t be quite as crisp as fresh, but they’re still delicious.
Reheating: If your meringues lose their crunch, place them on a baking sheet in a 200°F (93°C) oven for 10 minutes. Let them cool completely before storing again. This restores the crisp texture.
Flavor Development: Meringues taste best within the first week. After that, they start absorbing ambient flavors from the air. Store them away from strong-smelling foods like onions or garlic. I learned this when my meringues started tasting faintly like leftover chili. Not ideal.
Nutritional Information & Benefits
Per serving (2 ghost meringues, about 20 grams):
- Calories: 45
- Fat: 0g
- Carbohydrates: 11g
- Sugar: 11g
- Protein: 1g
- Sodium: 15mg
Health Benefits: Meringues are naturally fat-free and cholesterol-free since they’re made only from egg whites and sugar. They’re a lighter alternative to butter cookies or brownies. The egg whites provide a small amount of protein, and the sugar gives a quick energy boost. Obviously, these are still a treat—but they’re a treat you can feel a little better about.
Dietary Considerations:
- Gluten-free: Yes, no flour involved
- Nut-free: Yes, as written
- Dairy-free: Yes, no dairy products
- Vegan: Only with aquafaba substitution
- Low-fat: Naturally fat-free
Potential Allergens: Egg whites. If you have an egg allergy, use the aquafaba substitution mentioned in the variations section.
My Personal Take: I love that these cookies satisfy my sweet tooth without weighing me down. After a big Halloween dinner, I can grab a couple of ghosts and feel like I had dessert without the heavy feeling. They’re light, fun, and don’t leave me regretting that extra helping of chili.
Conclusion
These crispy ghost-shaped meringue cookies are everything I want in a Halloween treat—simple, spooky, and absolutely delicious. They’re made with basic ingredients you probably already have, they look impressive on a dessert table, and they’re light enough that you can eat a handful without feeling guilty. Plus, they’re naturally gluten-free and fat-free, so almost everyone can enjoy them.
I hope you give these a try. Don’t be afraid to make them your own—add colors, change the extract, or experiment with different shapes. The first batch might not be perfect, but that’s okay. My first batch looked like sad, flat blobs, and they still disappeared within an hour. That’s the magic of meringues.
If you make these ghost meringues, I’d love to hear how they turned out. Drop a comment below and let me know if your kids helped pipe the ghosts, or if you tried a fun variation. Tag me in your photos on social media—I always love seeing your creations. And if you’re looking for more Halloween snack ideas, check out my cheddar ranch popcorn snack mix for a savory option that balances out all the sweetness.
Happy Halloween, and happy baking. These little ghosts are waiting to disappear—right into your mouth.
Frequently Asked Questions
Can I make these ghost meringues without a piping bag?
Absolutely. Use a sturdy zip-top bag with the corner snipped off. You won’t get as precise a shape, but they’ll still look like ghosts. You can also use a spoon to drop rounded mounds onto the parchment and shape them with the back of the spoon. They’ll be more rustic, but just as tasty.
Why did my meringues turn out sticky?
Sticky meringues usually mean they weren’t baked long enough or the humidity was too high. Make sure you bake them for the full 90 minutes and let them cool completely in the turned-off oven. If you live in a humid area, store them with a silica gel packet to keep them crisp.
Can I use liquid food coloring for these meringues?
Liquid food coloring adds moisture, which can deflate your meringue. Stick with gel or powder food coloring if you want to add color. Add it after the meringue reaches stiff peaks and fold gently with a spatula. A little goes a long way.
How do I know when the meringue is whipped enough?
Lift the whisk attachment straight up. The meringue should form a stiff peak that stands up without drooping. Rub a small amount between your fingers—it should feel smooth, not gritty. If it’s gritty, the sugar hasn’t dissolved, so keep whipping.
Can I double this recipe?
Yes, but make sure your mixer bowl is large enough. A stand mixer can handle a double batch, but a hand mixer might struggle. I recommend making two separate batches for best results. Overcrowding the bowl makes it harder to incorporate air, and you’ll end up with denser meringues.
If you enjoyed these ghost meringues, you might also love my no-bake peanut butter granola bites for an easy, no-oven-required snack that’s perfect for lunchboxes. Happy baking!
Pin This Recipe!
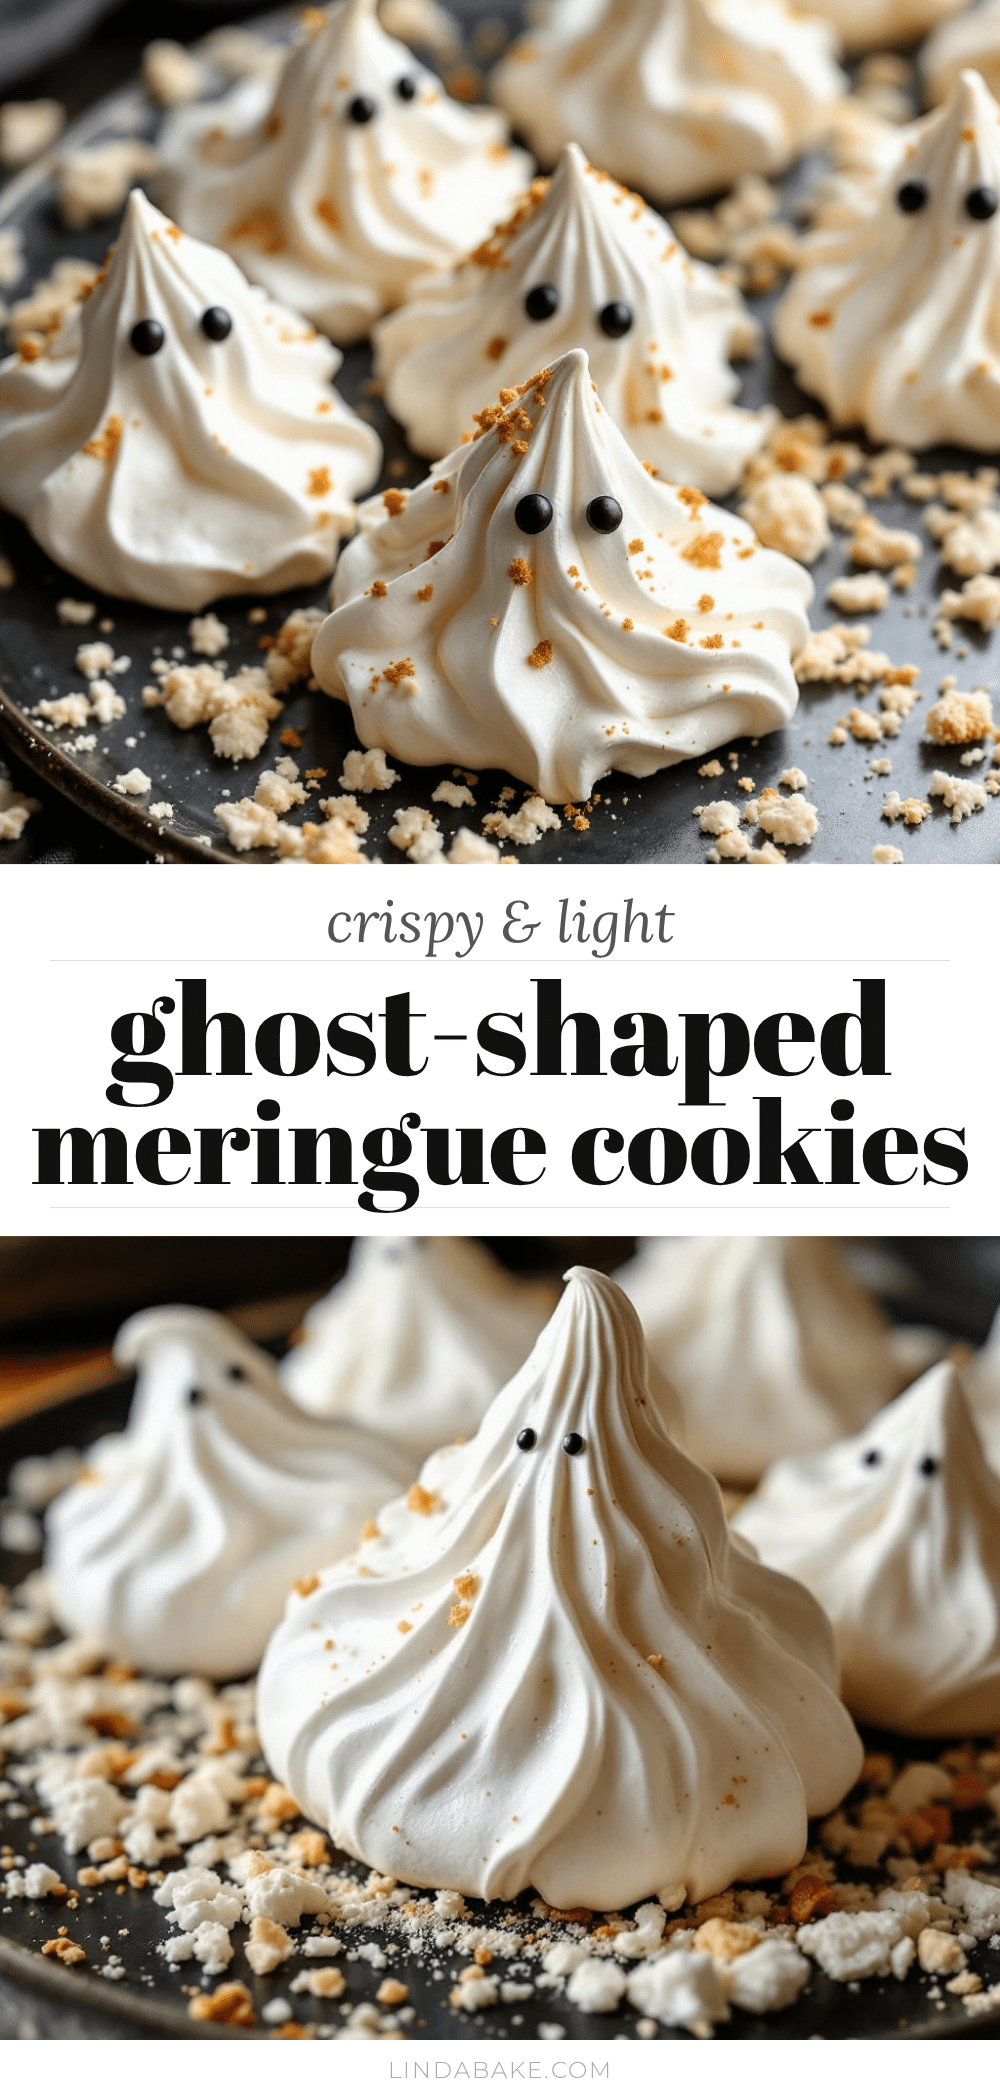
Best Crispy Ghost Meringue Cookies Easy Halloween Recipe
These ghost-shaped meringue cookies are crisp on the outside, tender on the inside, and shaped like tiny ghosts that practically float off the baking sheet. Made with simple pantry ingredients, they’re naturally gluten-free and fat-free, perfect for Halloween parties or a fun weekend project with the kids.
- Prep Time: 20 minutes
- Cook Time: 1 hour 30 minutes
- Total Time: 2 hours 50 minutes (including cooling)
- Yield: 24 servings 1x
- Category: Dessert
- Cuisine: American
Ingredients
- 3 large egg whites (room temperature, about 100 grams)
- ¾ cup granulated sugar (150 grams)
- ¼ teaspoon cream of tartar
- ½ teaspoon vanilla extract
- Mini chocolate chips or black decorating gel (optional, for eyes)
Instructions
- Preheat your oven to 200°F (93°C). Line two baking sheets with parchment paper.
- Separate your eggs carefully, transferring each white to your mixing bowl. Ensure no yolk gets into the whites.
- Add the cream of tartar to the egg whites. Start whipping on medium speed until foamy bubbles form, about 30 seconds.
- Gradually add the sugar one tablespoon at a time, waiting about 10 seconds between each addition, with the mixer running on medium-high.
- Continue whipping until stiff peaks form, about 5-7 minutes with a stand mixer or 8-10 minutes with a hand mixer. The meringue should be glossy and white, and feel smooth when rubbed between your fingers.
- Add the vanilla extract and whip for another 10 seconds until combined.
- Transfer the meringue to a piping bag fitted with a round tip, or use a zip-top bag with the corner snipped off.
- Pipe ghosts onto the prepared baking sheets: hold the bag straight up, squeeze gently to create a round base, then lift straight up while squeezing to form a tall teardrop shape. Space them about 1 inch apart.
- If using mini chocolate chips, gently press two into each ghost for eyes before baking. If using black gel, add eyes after baking.
- Bake for 1.5 hours at 200°F (93°C). Do not open the oven door during baking.
- After 90 minutes, turn off the oven but leave the meringues inside to cool completely, about 1-2 hours.
- Test for doneness: a fully baked meringue should lift easily off the parchment with a dry bottom.
Notes
Room temperature egg whites are essential for proper whipping. Ensure all equipment is completely clean and grease-free. Do not make on humid days. Store in an airtight container at room temperature for up to 2 weeks. For vegan version, use aquafaba instead of egg whites.
Nutrition
- Serving Size: 2 ghost meringues (a
- Calories: 45
- Sugar: 11
- Sodium: 15
- Carbohydrates: 11
- Protein: 1
Keywords: ghost meringue cookies, Halloween cookies, meringue cookies, gluten-free cookies, low-fat cookies, egg white cookies, spooky treats


