By the third time I made these chocolate peanut butter protein balls in one week, I stopped pretending I was just “testing the recipe.” I was standing in my kitchen at 10 p.m. on a Tuesday—wearing sweatpants, holding a sticky spoon—and I realized I wasn’t going to stop making them until someone physically removed the peanut butter from my pantry.
It started innocently enough. I needed a quick snack that wouldn’t derail my afternoon energy crash. Something I could grab without thinking, without heating up the oven, without a sink full of dishes. I mixed the first batch in a single bowl—no food processor, no double boiler, no fuss. And then I ate one. Then two. Then I texted my sister a photo with the caption “danger zone.”
Here’s the thing about no-bake protein balls: they sound simple, and they are. But getting the texture right—not too dry, not too sticky, with that perfect fudgy bite—takes a little finesse. The first batch crumbled. The second was too sweet. The third? That one disappeared before lunch.
These little guys have become my emergency snack, my post-workout refuel, my “I need something sweet but I don’t want to bake a whole cake” solution. And honestly? They might become yours too.
Why You’ll Love This Recipe
Let me tell you why these protein balls are about to become a permanent fixture in your fridge. I’ve tested this recipe at least a dozen times—sometimes with friends who have dietary restrictions, sometimes just for myself when I needed a quick win. Here’s what makes them stand out:
- Quick & Easy: Five minutes. That’s it. Mix, roll, eat. No oven, no waiting, no complicated techniques.
- Simple Ingredients: You probably have most of these in your kitchen right now. No obscure superfood powders or trips to three different stores.
- Perfect for Meal Prep: Make a batch on Sunday and you’ve got snacks for the whole week. They’re my go-to for busy mornings when I’m running out the door.
- Crowd-Pleaser: I’ve brought these to work, to soccer practice, to family gatherings—and they disappear every single time. Kids love them. Adults love them. Even my dad who “doesn’t do healthy snacks” asked for the recipe.
- Unbelievably Delicious: The combo of rich cocoa, creamy peanut butter, and just enough sweetness hits that spot between indulgence and fuel. You won’t feel like you’re eating a “healthy” snack.
What makes these different from every other protein ball recipe out there? It’s the texture. I spent weeks tweaking the ratio of wet to dry ingredients until I got that perfect fudgy consistency that doesn’t crumble when you bite into it. No dry, dusty balls here. Just soft, satisfying bites that actually taste like dessert.
This recipe is the kind that makes you close your eyes after the first bite. It’s comfort food reimagined—healthier, faster, but with the same soul-soothing satisfaction. Perfect for impressing guests without stress, or turning a simple snack into something memorable.
What Ingredients You Will Need
This recipe uses simple, wholesome ingredients that work together to deliver bold chocolate-peanut butter flavor without any fuss. Most of these are pantry staples, which makes these protein balls perfect for spontaneous snack cravings.
- Rolled oats, 1 cup (90g) — Use old-fashioned rolled oats for the best texture. Quick oats work in a pinch but give a softer, less chewy result. I prefer Bob’s Red Mill for consistent texture.
- Creamy peanut butter, ½ cup (130g) — Natural peanut butter works great, but make sure it’s well-stirred. If using regular peanut butter, look for one with minimal added sugar. The oil separation in natural brands can affect consistency, so give it a good mix before measuring.
- Honey or maple syrup, ¼ cup (60ml) — Honey gives a slightly floral sweetness, while maple syrup adds a subtle caramel note. Both work beautifully. For a vegan option, use maple syrup.
- Cocoa powder, 3 tablespoons (15g) — Unsweetened cocoa powder is key here. Dutch-process gives a deeper, more mellow chocolate flavor, while natural cocoa powder is brighter and more intense. I’ve used both and honestly, they’re both delicious.
- Protein powder, ¼ cup (25g) — Vanilla or chocolate protein powder both work. I’ve tested this with whey, pea protein, and collagen peptides—all work, but the texture varies slightly. Whey gives the smoothest result. If using plant-based protein, you might need an extra tablespoon of peanut butter to bind everything together.
- Ground flaxseed, 2 tablespoons (14g) — This helps bind the mixture and adds a boost of omega-3s. You can skip it or substitute with chia seeds if needed.
- Dark chocolate chips, ¼ cup (45g) — Optional but highly recommended. Mini chocolate chips distribute more evenly. I like Enjoy Life brand for allergy-friendly options.
- Pinch of sea salt — Don’t skip this! Salt enhances the chocolate and peanut butter flavors dramatically.
- Vanilla extract, ½ teaspoon — Adds warmth and rounds out the flavors. Pure vanilla extract is best, but imitation works fine.
Substitution Guidance: For a nut-free version, swap peanut butter with sunflower seed butter or tahini. For gluten-free, use certified gluten-free oats. If you don’t have protein powder, add an extra ¼ cup of oats and 1 tablespoon of cocoa powder instead.
Equipment Needed
You don’t need much for this recipe—that’s part of the beauty. Here’s what you’ll need:
- Large mixing bowl — Any medium-to-large bowl works. I use a ceramic one because it doesn’t slide around on the counter.
- Measuring cups and spoons — Accurate measurements matter here, especially for the peanut butter and honey. Pack your oats firmly when measuring.
- Rubber spatula or wooden spoon — For mixing everything together. A sturdy spatula makes scraping the sides easy.
- Parchment paper or silicone baking mat — For rolling and storing the balls. Prevents sticking without extra oil.
- Small cookie scoop (optional but helpful) — A 1-tablespoon scoop gives uniform balls. I bought mine for $8 and it’s one of my most-used kitchen tools.
- Refrigerator-safe container — For storing the finished protein balls. A glass container with a tight lid works best.
If you don’t have a cookie scoop, just use your hands—lightly wet them to prevent sticking. I’ve made these in a tiny apartment kitchen with just a bowl and a spoon, so don’t overthink the equipment.
Preparation Method
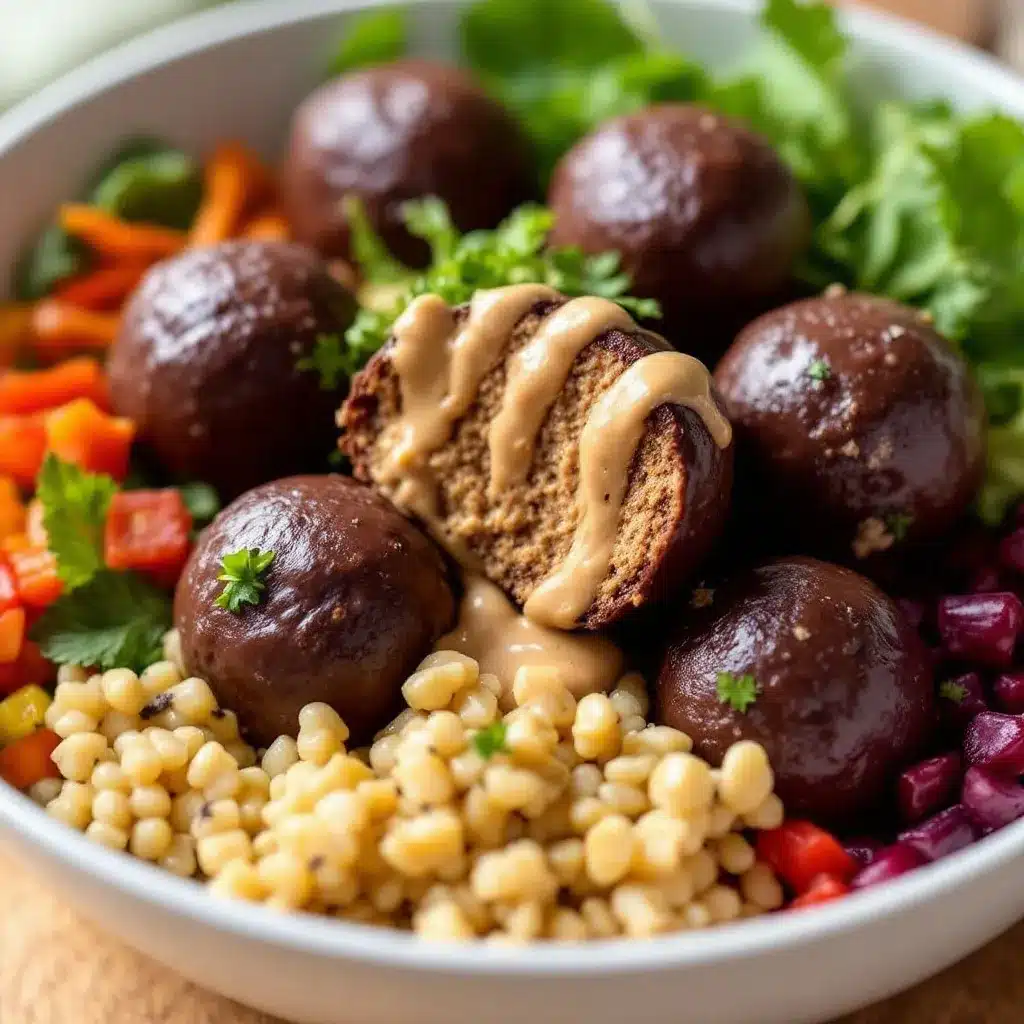
This comes together in about five minutes flat. No baking, no waiting, no complicated steps. Here’s how to do it:
- Combine the dry ingredients. In a large mixing bowl, add 1 cup rolled oats, 3 tablespoons cocoa powder, ¼ cup protein powder, and 2 tablespoons ground flaxseed. Whisk them together with a fork to break up any clumps. This step takes 30 seconds but makes a big difference in even distribution.
- Add the wet ingredients. Spoon in ½ cup creamy peanut butter, ¼ cup honey or maple syrup, and ½ teaspoon vanilla extract. Don’t dump them all on top of each other—place them in separate spots so they incorporate more easily.
- Mix everything together. Use your rubber spatula to stir, starting from the bottom and folding upward. The mixture will look dry at first—don’t panic. Keep mixing. As the peanut butter and honey work their way through, it’ll come together into a thick, slightly sticky dough. This usually takes about 1-2 minutes of vigorous stirring.
- Check the consistency. The dough should hold together when pressed between your fingers. If it’s too dry (crumbly and won’t stick), add 1 tablespoon of peanut butter or honey. If it’s too sticky (sticks to your hands excessively), add 1 tablespoon of oats. I’ve had to adjust both ways depending on the brand of peanut butter I used.
- Fold in the chocolate chips. Sprinkle ¼ cup dark chocolate chips over the dough and fold them in gently. Save a few to press onto the tops of the balls for a prettier presentation.
- Roll into balls. Using your hands or a small cookie scoop, portion the dough into 1-tablespoon-sized balls. Roll them between your palms until smooth. If the dough sticks to your hands, lightly wet your palms with cold water. You should get about 14-16 balls depending on size.
- Chill (optional but recommended). Place the balls on a parchment-lined plate or container and refrigerate for at least 30 minutes. This firms them up and makes them easier to handle. I’ve eaten them immediately—they’re softer but still delicious.
- Store and enjoy. Transfer the chilled protein balls to an airtight container. Keep them in the fridge for up to two weeks, or freeze for up to three months.
Sensory cues: The dough should feel like a thick, slightly sticky cookie dough. When you press it, it should hold its shape without cracking. The smell is incredible—rich chocolate and warm peanut butter mixing together. You’ll know it’s right when you can roll a ball without it falling apart.
Cooking Tips & Techniques
After making these protein balls more times than I care to admit, I’ve learned a few things the hard way. Here are my best tips:
- Don’t overmix. Once the ingredients come together, stop. Overmixing can make the texture dense and almost greasy. You want them tender, not tough.
- Temperature matters. If your peanut butter is cold from the fridge, it won’t mix well. Let it sit at room temperature for 10-15 minutes before starting. Same goes for honey—if it’s crystallized, warm it slightly in a bowl of hot water.
- Wet hands for rolling. This is the single best trick I’ve learned. Lightly dampen your palms before rolling each ball. The dough won’t stick, and you’ll get perfectly smooth spheres every time.
- Taste as you go. Before you roll all the balls, taste a small piece of the dough. Adjust sweetness, salt, or cocoa powder to your preference. Once they’re rolled, it’s harder to fix.
- My biggest failure: The first time I made these, I used crunchy peanut butter and old oats. The texture was gritty and the balls fell apart. I learned two things: always use creamy peanut butter for binding, and fresh oats make a huge difference. Old oats absorb moisture unevenly and create dry spots.
- Timing strategy: Make these while you’re waiting for something else to cook. They come together in the time it takes to boil water or toast bread. Multitasking at its finest.
Variations & Adaptations
One of the best things about this recipe is how easy it is to customize. Here are some variations I’ve tried and loved:
- Vegan version: Swap honey for maple syrup or agave nectar. Use vegan chocolate chips and plant-based protein powder. Everything else is already plant-based.
- Nut-free alternative: Substitute peanut butter with sunflower seed butter or WowButter. The texture stays similar, and the chocolate covers any slight flavor difference. Perfect for school-safe snacks.
- Extra protein boost: Add 1-2 tablespoons of hemp seeds or chia seeds along with the dry ingredients. This bumps up the protein and adds healthy fats without changing the flavor much.
- Flavor twists: Try adding ½ teaspoon of cinnamon, a pinch of cayenne for heat, or 1 tablespoon of instant espresso powder for a mocha vibe. My personal favorite is adding orange zest—it pairs beautifully with chocolate.
- Lower sugar option: Use sugar-free chocolate chips and reduce the honey to 2 tablespoons. The protein powder adds sweetness, so you won’t miss it as much as you’d think.
- Different add-ins: Swap chocolate chips for dried cherries, chopped almonds, shredded coconut, or cacao nibs. Each gives a completely different personality to the balls.
I once made a batch with crushed pretzels mixed in—salty, sweet, crunchy, and absolutely dangerous. Just saying.
Serving & Storage Suggestions
These protein balls are versatile when it comes to serving. Here’s how I like to enjoy them:
- Temperature: Serve them straight from the fridge for a firm, fudgy texture. At room temperature, they’re softer and almost melt-in-your-mouth. Both are delicious—it just depends on your mood.
- Presentation: Arrange them on a small plate or in a mason jar for a beautiful snack display. Press a few extra chocolate chips on top for visual appeal. They make great hostess gifts when packed in a little tin with a ribbon.
- Pairings: These go beautifully with a glass of cold milk, a cup of coffee, or a mug of hot tea. For a post-workout snack, pair them with a refreshing mango jalapeño agua fresca for a sweet-spicy contrast that’s incredibly satisfying.
- Storage: Keep them in an airtight container in the refrigerator for up to 2 weeks. They also freeze beautifully—place them in a single layer on a baking sheet, freeze for an hour, then transfer to a freezer bag. They’ll keep for up to 3 months. Thaw in the fridge overnight or at room temperature for 10 minutes.
- Flavor development: Honestly, these taste even better after a day in the fridge. The flavors meld together, the texture firms up, and the chocolate chips set perfectly. If you can wait, make them a day ahead.
Nutritional Information & Benefits
Here’s the approximate nutritional breakdown per ball (based on 15 balls):
- Calories: 140-160
- Protein: 7-9g
- Carbohydrates: 16-18g
- Fiber: 3-4g
- Fat: 7-9g
- Sugar: 8-10g (depending on sweetener)
These numbers vary based on your specific ingredients, but the general picture is a balanced snack with protein, healthy fats, and complex carbs. The oats provide steady energy, the peanut butter offers heart-healthy monounsaturated fats, and the cocoa powder is packed with antioxidants. Ground flaxseed adds omega-3 fatty acids and fiber, which supports digestion.
Dietary considerations: This recipe is naturally vegetarian and can easily be made vegan, gluten-free (with certified oats), and dairy-free (with dairy-free chocolate chips). It contains peanuts—use sunflower seed butter for a nut-free option.
I love that these protein balls feel like a treat but actually fuel my body. They’re my go-to when I need something between meals that won’t leave me crashing an hour later.
Conclusion
These easy no-bake chocolate peanut butter protein balls are proof that healthy snacks don’t have to be complicated or boring. They come together in five minutes, use ingredients you probably already have, and taste like dessert—but actually keep you full and energized.
I’ve made these for road trips, for afternoon slumps, for post-workout refuels, and for late-night cravings. Every time, they deliver. The best part? You can tweak them endlessly to match your taste. More chocolate? Go for it. A pinch of sea salt on top? Absolutely. Swap in almond butter or sunflower seed butter? Works like a charm.
If you make these (and I really hope you do), I’d love to hear how they turn out. Drop a comment below—tell me what variations you tried, how your family liked them, or if you discovered a new favorite combination. And if you’re looking for more easy snack ideas, check out these peanut butter banana sushi roll-ups for another fun, no-bake treat that kids and adults both love.
Happy rolling, friends. Your fridge is about to get a whole lot more interesting.
Frequently Asked Questions
Can I make these protein balls without protein powder?
Yes, absolutely. Simply omit the protein powder and add an extra ¼ cup of rolled oats plus 1 tablespoon of cocoa powder. The texture will be slightly different—a bit more oat-y and less dense—but they’ll still taste great.
How long do these protein balls last at room temperature?
They’re best kept refrigerated, but they can sit at room temperature for up to 2-3 hours without issues. If you’re taking them on a road trip or to work, pack them in a cooler bag or eat them within a few hours.
Can I use crunchy peanut butter instead of creamy?
You can, but I don’t recommend it. Crunchy peanut butter doesn’t bind as well, and the texture can be inconsistent. If that’s all you have, add an extra tablespoon of honey to help with binding.
Are these protein balls safe for kids?
Yes, they’re a great kid-friendly snack! Just be mindful of the choking hazard from whole chocolate chips for very young children. You can chop the chips smaller or use mini chocolate chips. Also, check for any nut allergies before serving.
Can I double this recipe?
Definitely. This recipe doubles beautifully—just use a larger bowl and mix thoroughly. I often make a double batch on Sunday and stash half in the freezer for later. They’re perfect for busy weeks when you need grab-and-go snacks ready to go.
Pin This Recipe!
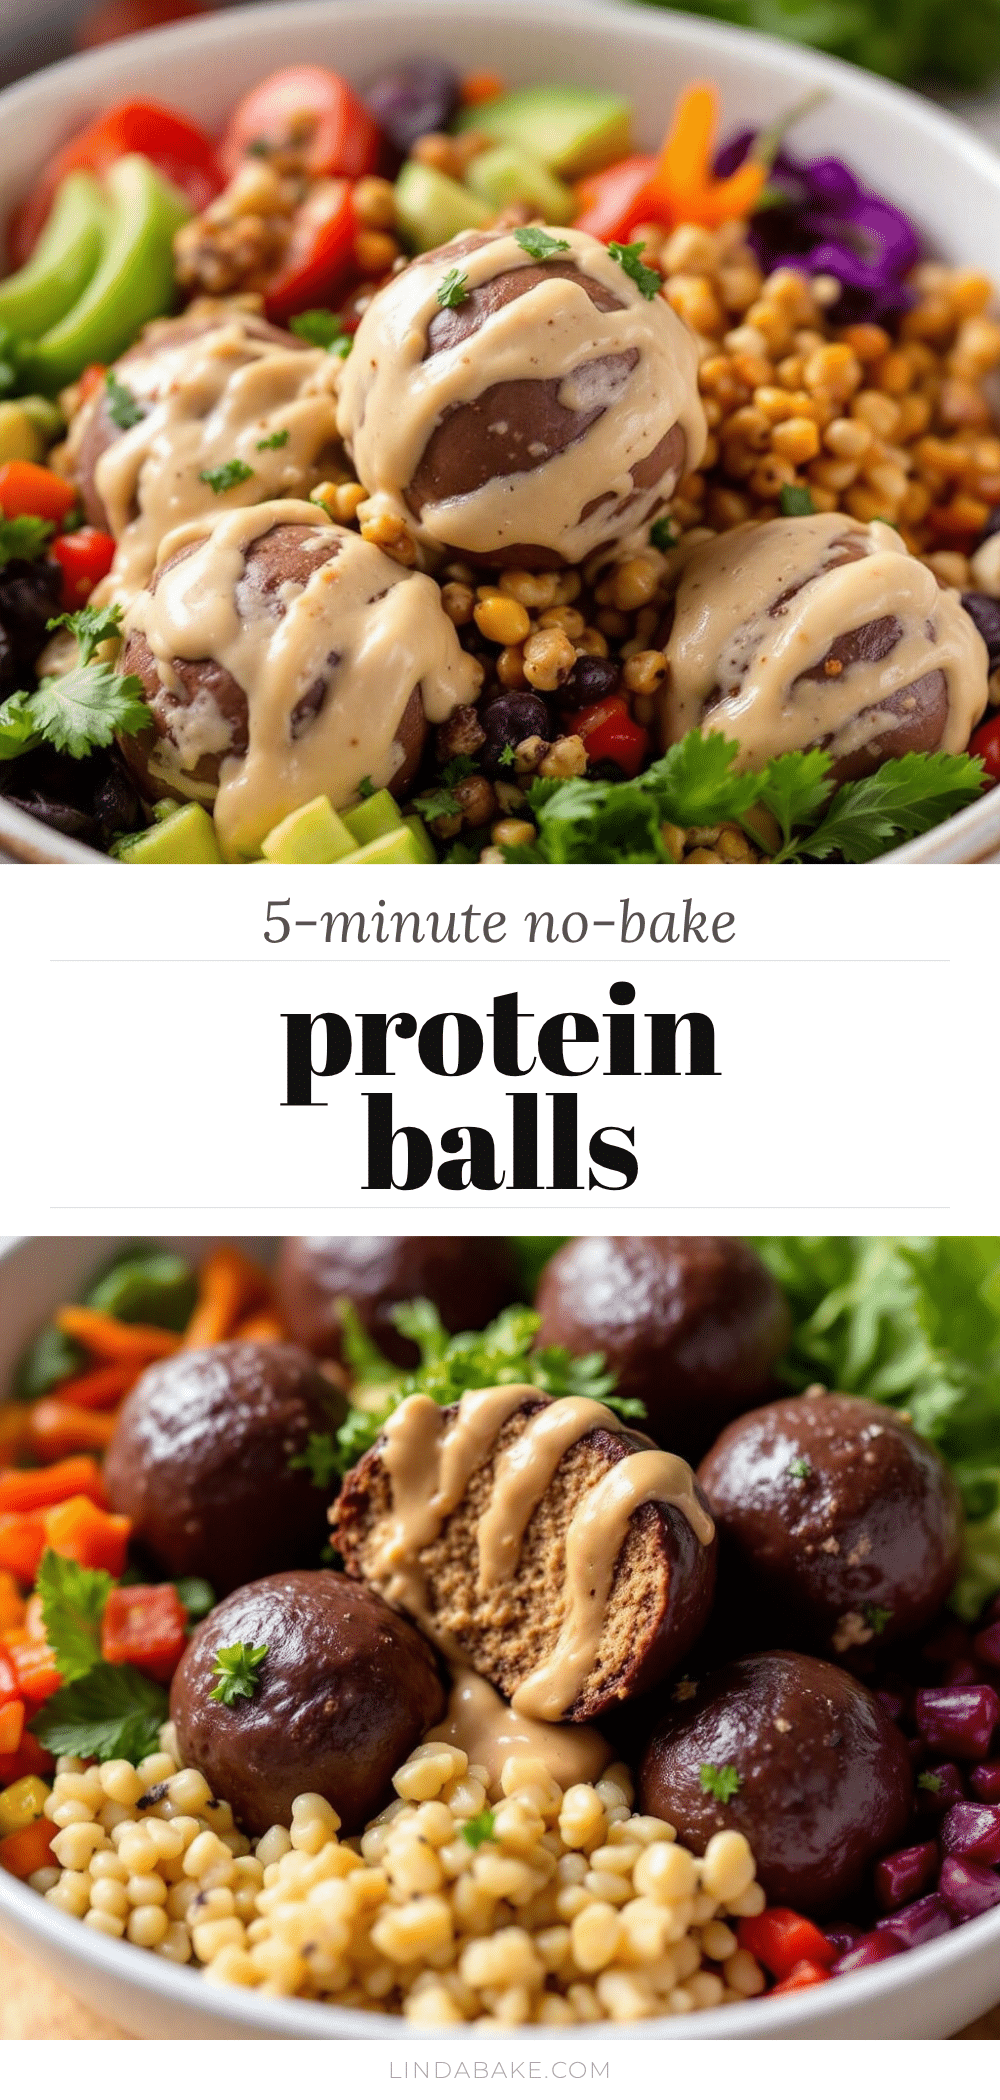
Easy No-Bake Chocolate Peanut Butter Protein Balls: 5-Minute Recipe
These no-bake chocolate peanut butter protein balls come together in just five minutes with simple ingredients. They’re the perfect healthy snack for meal prep, post-workout refueling, or satisfying a sweet craving without turning on the oven.
- Prep Time: 5 minutes
- Cook Time: 0 minutes
- Total Time: 5 minutes
- Yield: 14-16 balls 1x
- Category: Snack
- Cuisine: American
Ingredients
- 1 cup (90g) rolled oats
- ½ cup (130g) creamy peanut butter
- ¼ cup (60ml) honey or maple syrup
- 3 tablespoons (15g) unsweetened cocoa powder
- ¼ cup (25g) vanilla or chocolate protein powder
- 2 tablespoons (14g) ground flaxseed
- ¼ cup (45g) dark chocolate chips (optional)
- Pinch of sea salt
- ½ teaspoon vanilla extract
Instructions
- In a large mixing bowl, combine 1 cup rolled oats, 3 tablespoons cocoa powder, ¼ cup protein powder, and 2 tablespoons ground flaxseed. Whisk together with a fork to break up clumps.
- Add ½ cup creamy peanut butter, ¼ cup honey or maple syrup, and ½ teaspoon vanilla extract. Place them in separate spots in the bowl.
- Stir with a rubber spatula, starting from the bottom and folding upward, until a thick, slightly sticky dough forms (about 1-2 minutes).
- Check consistency: the dough should hold together when pressed. If too dry, add 1 tablespoon peanut butter or honey. If too sticky, add 1 tablespoon oats.
- Fold in ¼ cup dark chocolate chips gently. Reserve a few to press onto tops for presentation.
- Using your hands or a small cookie scoop, portion dough into 1-tablespoon-sized balls and roll between palms until smooth. Lightly wet hands if dough sticks.
- Place balls on a parchment-lined plate or container and refrigerate for at least 30 minutes to firm up (optional but recommended).
- Transfer to an airtight container and store in the refrigerator for up to 2 weeks, or freeze for up to 3 months.
Notes
For best texture, use creamy peanut butter and fresh rolled oats. If dough is too dry, add extra peanut butter or honey; if too sticky, add more oats. Wet hands lightly to prevent sticking when rolling. These taste even better after a day in the fridge as flavors meld.
Nutrition
- Serving Size: 1 ball
- Calories: 140160
- Sugar: 810
- Sodium: 5080
- Fat: 79
- Saturated Fat: 23
- Carbohydrates: 1618
- Fiber: 34
- Protein: 79
Keywords: no-bake protein balls, chocolate peanut butter protein balls, healthy snack, easy protein balls, 5-minute recipe, meal prep snack, gluten-free protein balls, vegan protein balls


