The Saturday before Halloween, I found myself alone in the kitchen with the afternoon sun slanting through the window and a bag of candy corn I’d bought on impulse. I wasn’t planning anything elaborate. I just wanted something that felt like fall without turning on the oven. The kids were at a friend’s house, the house was quiet, and the only thing I wanted was a little kitchen project that felt like play.
I had a box of orange jello and a box of yellow jello in the pantry, and suddenly the idea just clicked. Candy corn in jello form. It was one of those ideas that feels so obvious you can’t believe you haven’t thought of it before. I grabbed a can of evaporated milk from the back of the cupboard, and within fifteen minutes, I had three layers of color sitting in a glass cup on my counter. No stress, no complicated techniques. Just simple, colorful fun.
That first batch was a little messy, to be honest. The layers bled into each other because I rushed. But I learned something that day—patience with jello is rewarded with those clean, satisfying stripes. By the third attempt, I had it down. And now, this is the treat I bring to every Halloween party and potluck. It’s the one that makes people stop and say, “Wait, you can do that with jello?”
So here it is. My easy candy corn layered jello cups. No fancy equipment, no weird ingredients, and a result that looks way more impressive than the effort it takes. If you’ve ever wanted to make something that feels like a little bit of kitchen magic, this is it.
Why You’ll Love This Recipe
Let me tell you why these little cups of sunshine have become my go-to for fall gatherings. First off, they are ridiculously easy. I’m talking about a recipe that a beginner can nail on the first try. Honestly, if you can boil water and stir, you’ve got this. Each layer takes about fifteen minutes to set in the fridge, so the total active time is maybe twenty minutes. The rest is just waiting.
- Quick & Easy : Comes together in under 30 minutes of active time, perfect for last-minute Halloween treats or a fun weekend project with the kids.
- Simple Ingredients : No fancy grocery trips needed. You likely already have everything in your kitchen—just jello boxes, evaporated milk, and water.
- Perfect for Halloween : Great for classroom parties, trick-or-treat gatherings, or just a fun after-school snack that celebrates the season.
- Crowd-Pleaser : Always gets rave reviews from kids and adults alike. There’s something about those bright, nostalgic colors that makes everyone smile.
- Unbelievably Delicious : The creamy, milky middle layer balances the bright fruit flavors perfectly. It’s like eating a cloud that tastes like candy corn.
What makes this recipe different from the rest? It’s the technique. I’ve tested this more times than I care to admit, and I’ve figured out exactly how to get those clean, sharp layers without the colors bleeding together. The secret is in the temperature of each layer before you pour the next one. I’ll share that little trick in the method section.
This recipe isn’t just good—it’s the kind that makes you close your eyes after the first bite. It’s comfort food reimagined for the fall season. Perfect for impressing guests without stress, or turning a simple afternoon into something memorable.
What Ingredients You Will Need
This recipe uses simple, everyday ingredients to deliver those iconic candy corn colors and a creamy texture that makes these cups irresistible. Most of these are pantry staples, so you might already have everything you need.
- 1 box (3 oz) orange gelatin dessert mix (I prefer Jell-O brand for consistent results, but store brands work fine too)
- 1 box (3 oz) yellow or lemon gelatin dessert mix (Lemon gives the best bright yellow color, but any yellow flavor works)
- 1 can (12 oz) evaporated milk (This is the secret to the creamy white layer. Don’t substitute with regular milk—it won’t set properly)
- 2 cups boiling water (Divided—1 cup for each jello flavor)
- 1 cup cold water (Divided—½ cup for each jello flavor)
- Nonstick cooking spray (A light spritz on your measuring cup makes pouring so much easier)
For the Creamy White Layer:
- 1 packet (0.25 oz) unflavored gelatin (Knox brand is my go-to)
- ¼ cup cold water (For blooming the unflavored gelatin)
- ½ cup boiling water (For dissolving the bloomed gelatin)
- 1 can (12 oz) evaporated milk (Yes, another can—you’ll use two total)
- 2 tablespoons sugar (Optional, if you want a slightly sweeter white layer)
- 1 teaspoon vanilla extract (Adds a lovely warmth to the creamy layer)
I recommend using clear plastic cups so you can see the beautiful layers. You can find them at any grocery store or party supply shop. Trust me, the visual effect is half the fun. For the jello, I’ve tried different brands, and Jell-O gives the brightest, most vibrant colors. If you’re using store-brand gelatin, you might need to adjust the water slightly—check the package instructions.
One thing I learned the hard way: don’t use fat-free evaporated milk. It doesn’t set as firmly, and your white layer will be a little sad and wobbly. Go for the full-fat version for best results.
Equipment Needed
You don’t need much for this recipe, which is part of its charm. Here’s what you’ll need:
- 8 to 10 clear plastic cups (5 to 6 ounces each. I like the ones that look like small dessert cups)
- 2 small mixing bowls (For preparing each jello flavor separately)
- 1 medium saucepan (For boiling water and melting gelatin)
- Liquid measuring cup (A 2-cup glass one with a spout works best for pouring)
- Measuring spoons
- Whisk (For stirring the gelatin until completely dissolved)
- Refrigerator space (You’ll need room for the cups to sit undisturbed while setting)
- Small offset spatula or butter knife (For gently smoothing the top of each layer if needed)
If you don’t have clear plastic cups, small glass jars or ramekins work beautifully. I’ve even used shot glasses for mini versions—perfect for parties. The key is to use something transparent so the layers show through. I picked up a pack of 50 plastic cups at the dollar store for under three dollars, and they’ve lasted me through several batches.
A quick tip: spray your measuring cup with a light coating of nonstick spray before measuring the evaporated milk. It slides right out without sticking. Such a small thing, but it makes cleanup so much easier.
Preparation Method
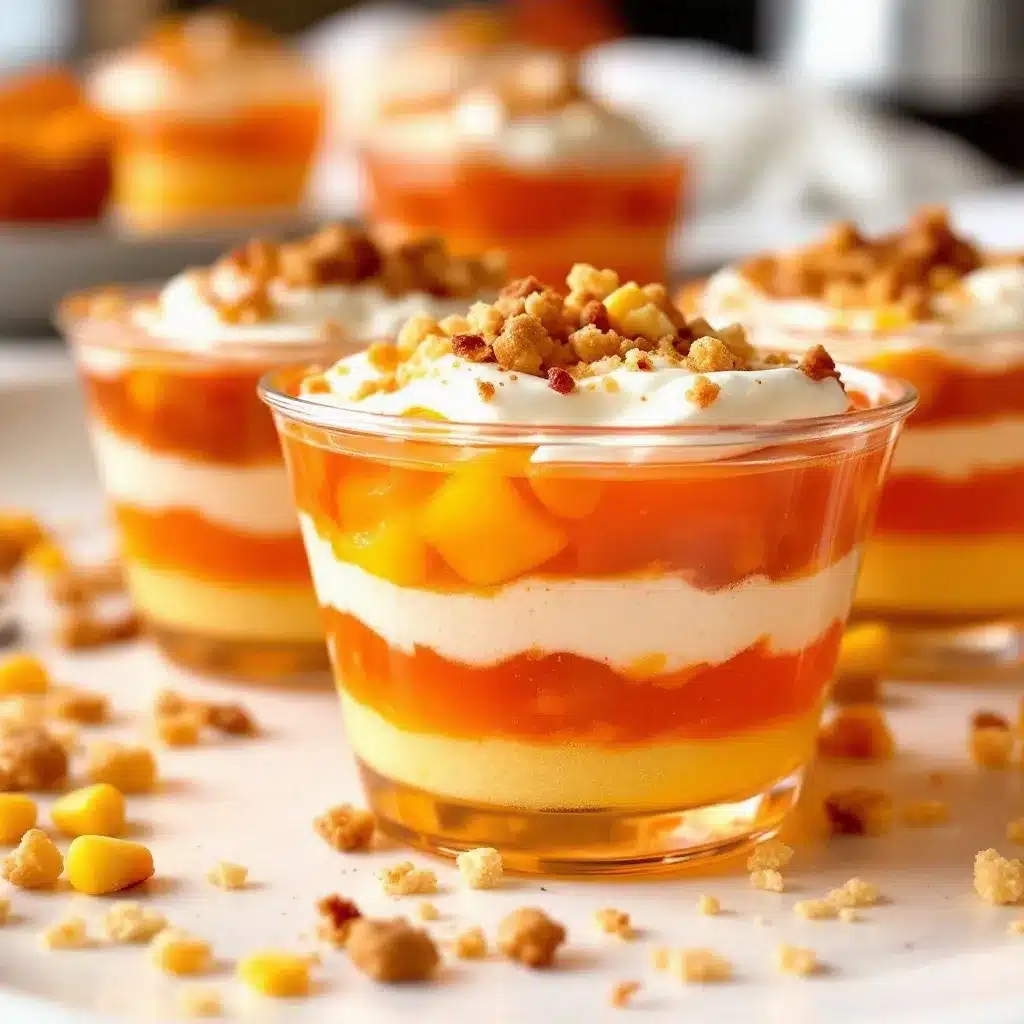
Okay, let’s get to the fun part. I’m going to walk you through this step by step, with all the little tips I’ve picked up along the way. Take your time with the cooling steps—that’s the secret to those beautiful, clean layers.
Step 1: Prepare the Orange Layer
In a small mixing bowl, empty the orange gelatin mix. Add 1 cup of boiling water and stir for 2 minutes until the granules are completely dissolved. Then stir in ½ cup of cold water. Set aside to cool to room temperature. This takes about 20 minutes. Don’t rush this—if the gelatin is too warm when you pour it, it can melt the previous layer.
Step 2: Pour the First Layer
Once the orange gelatin has cooled to room temperature (it should feel just barely warm to the touch), divide it evenly among your cups. Fill each cup about one-third full. Place the cups in the refrigerator and let them set for 15 to 20 minutes, or until the gelatin is firm but still slightly tacky on top. You want it set enough that the next layer won’t sink in, but not so firm that the layers don’t stick together.
Step 3: Prepare the Creamy White Layer
While the orange layer is setting, make the creamy white layer. In a small bowl, sprinkle the unflavored gelatin over ¼ cup of cold water. Let it sit for 5 minutes to bloom—it will look like a thick, spongy mass. In a small saucepan, bring ½ cup of water to a boil. Remove from heat and stir in the bloomed gelatin until completely dissolved. Whisk in the evaporated milk, sugar (if using), and vanilla extract. Stir until smooth. Let this cool to room temperature as well.
Step 4: Pour the Second Layer
Once the orange layer is set and the white mixture has cooled to room temperature, gently pour the white mixture over the orange layer. Fill each cup about two-thirds full. Return the cups to the refrigerator and let set for another 15 to 20 minutes.
Step 5: Prepare the Yellow Layer
In a clean bowl, empty the yellow gelatin mix. Add 1 cup of boiling water and stir for 2 minutes until dissolved. Stir in ½ cup of cold water. Let this cool to room temperature.
Step 6: Pour the Final Layer
Once the white layer is set and the yellow gelatin is cool, carefully pour the yellow mixture over the white layer, filling the cups to the top. Return to the refrigerator and let set for at least 2 hours, or until fully firm.
Step 7: Serve and Enjoy
Once fully set, these are ready to serve. They’ll hold their shape beautifully for up to 3 days in the refrigerator. If you want to get fancy, you can top each cup with a dollop of whipped cream and a few pieces of actual candy corn for garnish.
Pro Tip: If you notice the layers starting to bleed into each other, your gelatin was probably too warm when you poured it. Next time, let it cool a little longer. I’ve made this mistake more than once, and it’s still delicious—just not as pretty.
Cooking Tips & Techniques
After making these cups about a dozen times (seriously, I became obsessed), I’ve collected some tips that make the process smoother and the results more consistent.
Temperature is everything. I cannot stress this enough. Each layer needs to be at room temperature before you pour it over the previous layer. If it’s too warm, it will melt the set gelatin and create a muddy, blended mess. If it’s too cold, it might start setting before you pour it. Room temperature is the sweet spot. I usually set my timer for 20 minutes after mixing, and that’s usually perfect.
Use a gentle hand when pouring. Don’t just dump the gelatin into the cup. Pour it slowly over the back of a spoon held just above the previous layer. This minimizes the impact and helps keep the layers distinct. I learned this trick from making layered desserts like easy matcha green tea tiramisu parfaits, and it works like a charm here too.
Don’t skip the bloom step for the unflavored gelatin. I know it seems fussy, but blooming the gelatin in cold water before dissolving it in hot water ensures it activates properly. If you skip this, your white layer might not set firmly. Trust me on this one—I’ve made that mistake, and it was not pretty.
Work in batches if you’re making a lot. If you’re making these for a party, it’s tempting to try to do all the layers at once. But honestly, it’s easier to make one batch of each color at a time. The cooling process gives you natural breaks, so use that time to clean up or prep the next layer.
Patience is your friend. The hardest part of this recipe is waiting for each layer to set. But those clean, beautiful stripes are worth it. Put on a movie, set your timers, and don’t rush. Your future self will thank you.
One more thing: if you’re making these with kids, it’s a great project. Just be prepared for a few messy layers. That’s part of the fun. My kids love helping with the pouring, and even when the layers get a little wobbly, they’re proud of what they made.
Variations & Adaptations
One of the best things about this recipe is how easy it is to adapt. Here are some variations I’ve tried and loved:
Halloween Candy Corn Colors: Use orange, yellow, and white for the classic candy corn look. This is the original and still my favorite.
Thanksgiving Harvest Colors: Swap the yellow for a deep red or cranberry flavor, and use orange and white. It gives a beautiful fall harvest look that’s perfect for Thanksgiving dessert tables.
Patriotic Fourth of July: Use red, white, and blue gelatin flavors. The technique is exactly the same, just with different colors. My family loves these for summer barbecues. They’re a great alternative to heavier desserts when it’s hot outside.
Dairy-Free Version: Substitute the evaporated milk with full-fat coconut milk. The texture will be slightly different—a little softer—but the flavor is amazing. Just make sure you use the full-fat version, not the light one.
Keto/Low-Sugar Version: Use sugar-free gelatin mixes and substitute the evaporated milk with unsweetened almond milk mixed with a little heavy cream. You can also skip the sugar in the white layer. The texture won’t be quite as firm, but it’s a great option if you’re watching your sugar intake.
Adult Version: Add a splash of vodka or rum to each layer before pouring. About 1 tablespoon per cup of gelatin mixture works well. Just note that alcohol can affect how firmly the gelatin sets, so you might need to add a little extra unflavored gelatin to compensate.
I once made a batch with lime, orange, and lemon flavors for a summer party, and they were a huge hit. The citrus combination was so refreshing. You can really get creative with the flavor combinations once you know the basic technique.
Serving & Storage Suggestions
These candy corn jello cups are best served chilled, straight from the refrigerator. The cold temperature keeps the layers firm and the flavors bright. I like to serve them in their clear cups so everyone can see the beautiful stripes.
Presentation Ideas: For Halloween parties, I sometimes place each cup on a small plate with a few pieces of candy corn scattered around. You can also top each cup with a dollop of whipped cream and a single candy corn piece for a finishing touch. If you’re feeling extra festive, add a tiny Halloween-themed paper straw or a cocktail umbrella.
Complementary Dishes: These cups pair beautifully with other light desserts. I often serve them alongside creamy no-mayo chicken salad wraps for a fun lunch combo, or with a batch of easy peanut butter banana sushi roll-ups for kids for an after-school treat. The lightness of the jello balances out richer foods perfectly.
Storage Instructions: These cups will keep in the refrigerator for up to 3 days. Cover them with plastic wrap or a lid to prevent them from absorbing any fridge odors. Do not freeze them—the texture will become watery and grainy when thawed.
Reheating: These are meant to be eaten cold, so no reheating is needed. If you’ve stored them for a day or two, just pull them out of the fridge and let them sit at room temperature for 5 minutes before serving. This takes the chill off and allows the flavors to shine.
One thing I love about these cups is that they actually taste better the next day. The flavors meld together, and the texture becomes even more silky. So don’t be afraid to make them a day ahead.
Nutritional Information & Benefits
While these jello cups are definitely a treat, they’re surprisingly light compared to many other desserts. Here’s the approximate nutritional breakdown per serving (based on one cup made with regular gelatin and full-fat evaporated milk):
| Nutrient | Amount per Serving |
|---|---|
| Calories | 120-150 |
| Total Fat | 4-6g |
| Saturated Fat | 2.5-4g |
| Cholesterol | 15-20mg |
| Sodium | 80-100mg |
| Total Carbohydrates | 18-22g |
| Sugars | 16-20g |
| Protein | 4-5g |
Health Benefits: Gelatin is a good source of collagen, which supports joint health, skin elasticity, and digestion. The evaporated milk provides calcium and vitamin D for bone health. While these aren’t a health food by any stretch, they’re a lighter alternative to heavy cakes and pies.
Dietary Considerations: This recipe can be made gluten-free (check your gelatin labels), and with the dairy-free substitution mentioned above, it can also be made lactose-free. For a lower-sugar option, use sugar-free gelatin mixes.
Potential Allergens: This recipe contains dairy (evaporated milk). It is nut-free, egg-free, and soy-free as written.
I personally love that these cups satisfy my sweet tooth without leaving me feeling heavy or sluggish. They’re a fun, festive treat that doesn’t derail my healthy eating habits entirely. Everything in moderation, right?
Frequently Asked Questions
Can I use sugar-free gelatin for this recipe?
Yes, absolutely! Sugar-free gelatin works perfectly. Just follow the same instructions. The texture will be slightly different—a bit softer—but the layers will still set beautifully. I’ve made this with sugar-free orange and lemon gelatin, and it turned out great.
Why did my layers bleed into each other?
This usually happens when the gelatin you’re pouring is too warm. Each layer needs to be at room temperature before you pour it over the previous layer. Also, make sure the previous layer is fully set—it should be firm to the touch, not jiggly. If you rush this step, the colors will blend together.
Can I make these in a large dish instead of individual cups?
You can, but it’s trickier to get clean layers in a large dish because the surface area is larger and the gelatin sets unevenly. If you want to try it, use a glass loaf pan or a 9×9 square dish. You’ll need to increase the setting time for each layer—about 30 to 40 minutes instead of 15 to 20. Once fully set, cut into squares to serve.
How far in advance can I make these?
You can make these up to 3 days in advance. They actually taste better the next day as the flavors meld. Just keep them covered in the refrigerator. If you’re making them for a party, I recommend making them the day before so you’re not stressed on the day of the event.
Can I use fresh fruit juice instead of gelatin mix?
You can, but it requires more unflavored gelatin to set. Fresh fruit juice doesn’t have the same setting properties as commercial gelatin mixes. If you want to try it, you’ll need about 1 tablespoon of unflavored gelatin per cup of juice. The texture will be softer and more like a panna cotta than a firm jello. It’s delicious, just different.
Conclusion
These easy candy corn layered jello cups are more than just a pretty dessert. They’re a little bit of kitchen magic that anyone can make. No fancy skills, no expensive equipment, just simple ingredients and a little patience. The first time you peel back the plastic wrap and see those perfect, clean stripes, you’ll feel like a culinary artist.
I love this recipe because it brings people together. There’s something about those bright, nostalgic colors that makes everyone smile. Kids love the fun layers, adults appreciate the light, refreshing taste, and everyone is impressed by how professional they look. It’s the kind of recipe that makes you look like a hero with almost no effort.
So go ahead and give it a try. Make a batch for your next Halloween party, or just for a fun afternoon project with the kids. Customize the colors and flavors to match any holiday or occasion. And when you see those beautiful layers come together, take a moment to appreciate the simple joy of creating something beautiful with your own hands.
I’d love to hear how yours turn out. Drop a comment below and let me know what color combinations you tried, or tag me in your photos on social media. Happy cooking, friends. You’ve got this.
Pin This Recipe!
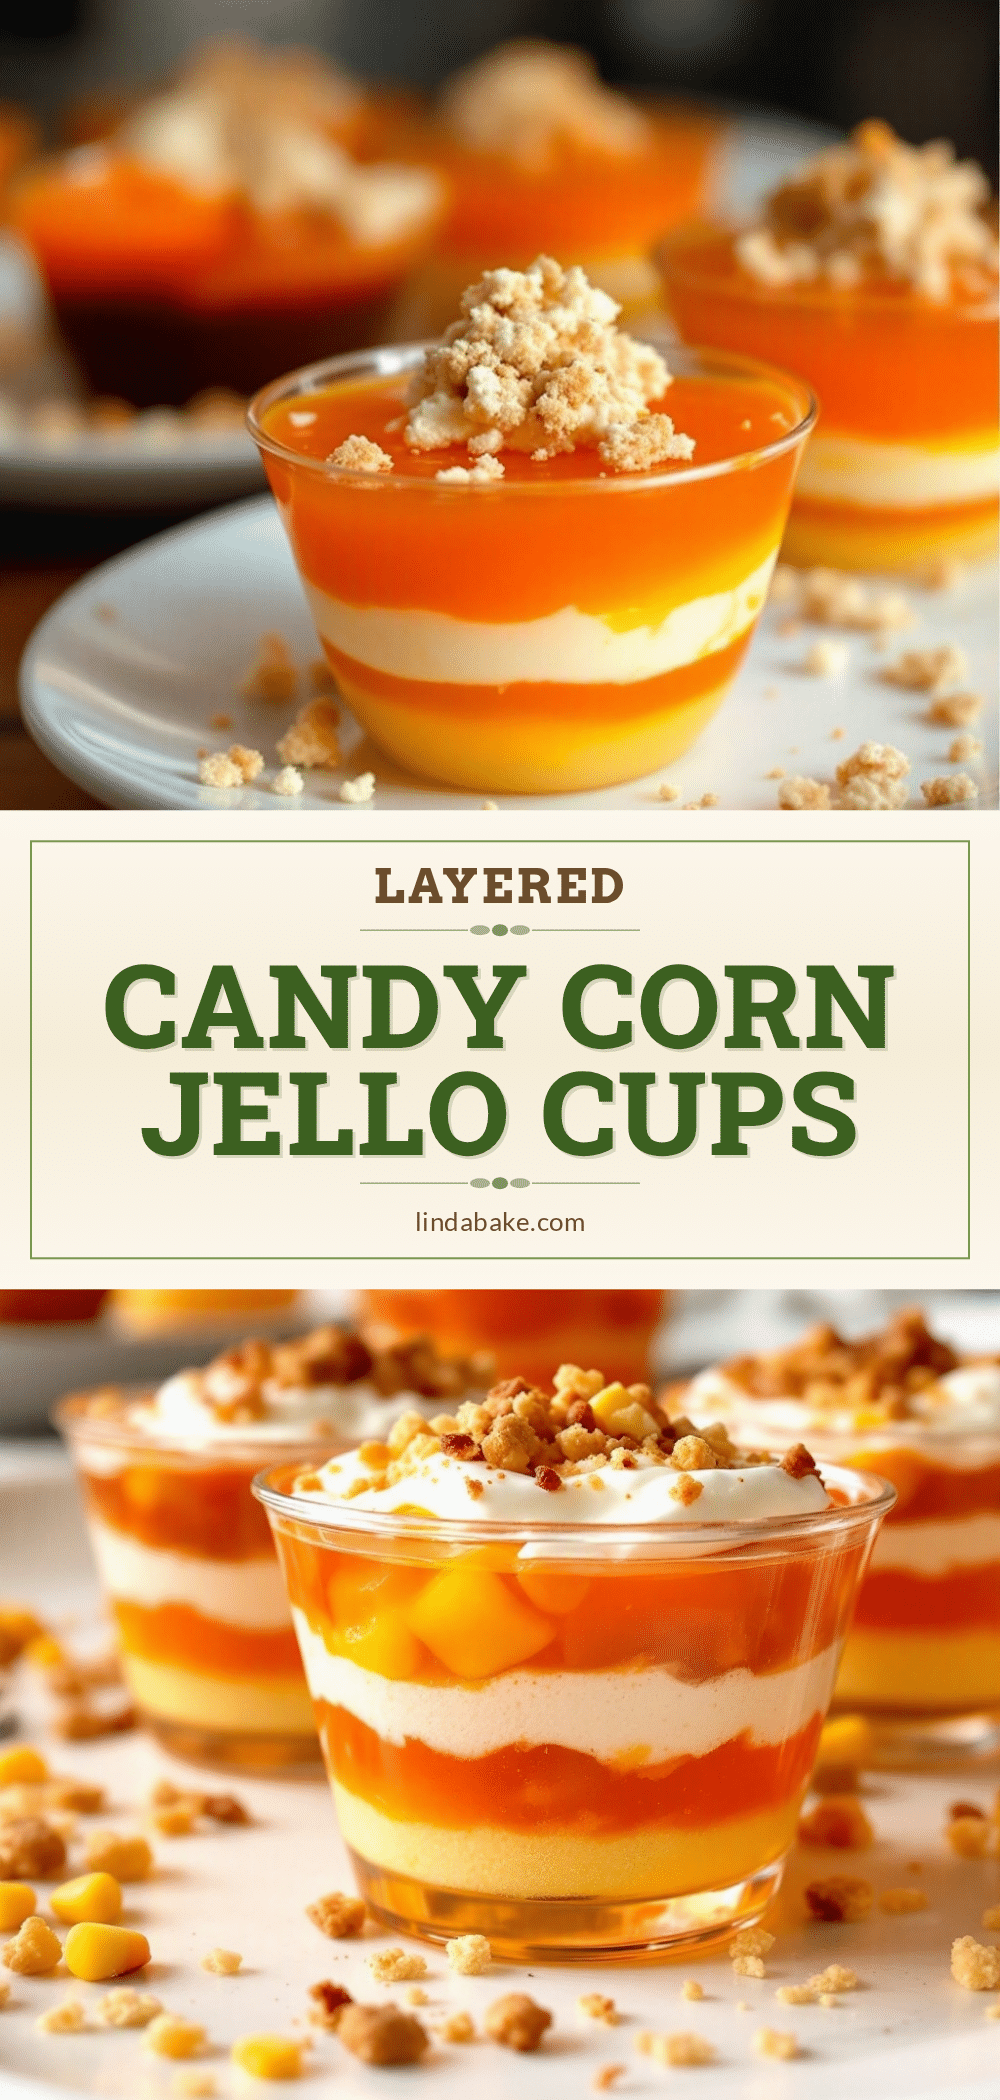
Easy Candy Corn Layered Jello Cups
These easy candy corn layered jello cups are a fun, no-bake Halloween treat with bright orange, creamy white, and yellow layers. Made with simple ingredients, they look impressive but are surprisingly simple to make.
- Prep Time: 20 minutes
- Cook Time: 0 minutes
- Total Time: 2 hours 40 minutes (includes setting time)
- Yield: 8 to 10 servings 1x
- Category: Dessert
- Cuisine: American
Ingredients
- 1 box (3 oz) orange gelatin dessert mix
- 1 box (3 oz) yellow or lemon gelatin dessert mix
- 2 cans (12 oz each) evaporated milk
- 2 cups boiling water (divided)
- 1 cup cold water (divided)
- Nonstick cooking spray
- 1 packet (0.25 oz) unflavored gelatin
- ¼ cup cold water (for blooming unflavored gelatin)
- ½ cup boiling water (for dissolving bloomed gelatin)
- 2 tablespoons sugar (optional)
- 1 teaspoon vanilla extract
Instructions
- Prepare the Orange Layer: In a small mixing bowl, empty the orange gelatin mix. Add 1 cup of boiling water and stir for 2 minutes until the granules are completely dissolved. Then stir in ½ cup of cold water. Set aside to cool to room temperature (about 20 minutes).
- Pour the First Layer: Once the orange gelatin has cooled to room temperature, divide it evenly among 8 to 10 clear plastic cups, filling each about one-third full. Refrigerate for 15 to 20 minutes, or until the gelatin is firm but still slightly tacky on top.
- Prepare the Creamy White Layer: In a small bowl, sprinkle the unflavored gelatin over ¼ cup of cold water. Let it sit for 5 minutes to bloom. In a small saucepan, bring ½ cup of water to a boil. Remove from heat and stir in the bloomed gelatin until completely dissolved. Whisk in the evaporated milk, sugar (if using), and vanilla extract. Stir until smooth. Let this cool to room temperature.
- Pour the Second Layer: Once the orange layer is set and the white mixture has cooled, gently pour the white mixture over the orange layer, filling each cup about two-thirds full. Refrigerate for another 15 to 20 minutes.
- Prepare the Yellow Layer: In a clean bowl, empty the yellow gelatin mix. Add 1 cup of boiling water and stir for 2 minutes until dissolved. Stir in ½ cup of cold water. Let this cool to room temperature.
- Pour the Final Layer: Once the white layer is set and the yellow gelatin is cool, carefully pour the yellow mixture over the white layer, filling the cups to the top. Refrigerate for at least 2 hours, or until fully firm.
- Serve and Enjoy: Once fully set, serve chilled. Optionally, top with whipped cream and a few pieces of candy corn for garnish.
Notes
Temperature is key: each layer must be at room temperature before pouring to prevent bleeding. Pour slowly over the back of a spoon for clean layers. Do not use fat-free evaporated milk as it won’t set properly. These cups taste even better the next day and can be stored in the refrigerator for up to 3 days.
Nutrition
- Serving Size: 1 cup
- Calories: 120150
- Sugar: 1620
- Sodium: 80100
- Fat: 46
- Saturated Fat: 2.54
- Carbohydrates: 1822
- Protein: 45
Keywords: candy corn, jello cups, Halloween dessert, layered jello, no-bake dessert, easy treat, fall dessert


