My brother-in-law, Mark, is a man of strong opinions. He believes barbecue sauce is a vegetable group, that pineapple has no business on a pizza, and that most “game day dips” are just sad, watery bowls of disappointment. So when he announced he was bringing the dip to our family’s championship watch party, I braced myself. I honestly thought he’d show up with a block of melted Velveeta and a can of Ro-Tel, which is fine — but fine isn’t winning football food. What he actually pulled out of that slow cooker changed my mind about what a tailgate dip could be. It was thick, it was loaded, and every single chip came up with a bit of everything — meat, beans, cheese, and that perfect little kick of heat. I had to ask for the recipe three times before he finally texted it to me, and now I’m pretty sure I make it more than he does.
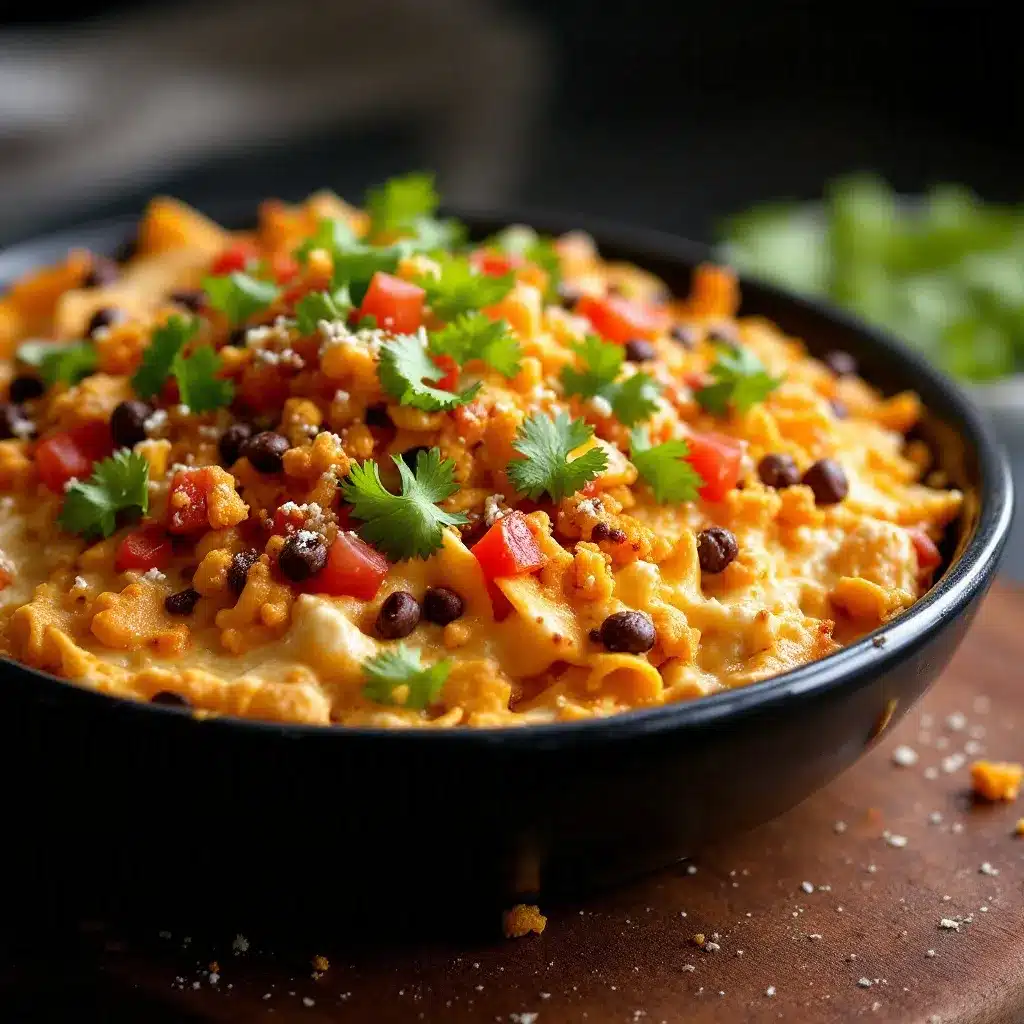
This Ultimate Loaded Nacho Tailgate Dip is the kind of recipe that makes you forget you’re eating from a paper plate. It’s got seasoned ground beef, refried beans, a creamy cheese layer, and all the classic nacho fixings piled high. It’s not a thin, soupy mess — it holds its shape on a chip, which is honestly the highest compliment I can give any dip. If you’re looking for something that feeds a crowd, disappears fast, and doesn’t require you to hover over the stove during the game, this is it.
Why You’ll Love This Recipe
I’ve tested this dip at three different gatherings now, and it’s never let me down. Here’s why it’s become my go-to for any game day, potluck, or casual get-together:
- Quick & Easy: From start to finish, this comes together in about 30 minutes. Most of that time is just letting it bubble in the oven or slow cooker.
- Simple Ingredients: Ground beef, canned beans, block cheese, and a few pantry spices. No fancy grocery store trips required.
- Perfect for Tailgating: It travels well, stays warm in a slow cooker, and feeds a crowd without any last-minute fuss.
- Crowd-Pleaser: I’ve watched picky eaters, health-conscious friends, and kids all go back for seconds. It’s that universal.
- Unbelievably Delicious: The combination of creamy, savory, cheesy, and slightly spicy is just next-level comfort food. You will close your eyes after the first bite.
What makes this recipe different from the dozens of other nacho dips out there? It’s the layering. Instead of just mixing everything together into a one-note sludge, we build distinct layers that let each ingredient shine. The refried beans create a sturdy base, the seasoned beef adds hearty flavor, and the cheese sauce is actually made from scratch — no processed cheese logs here. It’s the kind of dip that feels both indulgent and intentional, which is exactly what you want when you’re feeding people you actually like.
This recipe is for the moments when you want to impress without the stress. It’s the dip that gets talked about long after the final whistle blows, and honestly, that’s the best kind of win.
What Ingredients You Will Need
This recipe uses simple, mostly pantry-stable ingredients to deliver big, bold flavor. Here’s everything you’ll need to build the ultimate loaded nacho tailgate dip:
For the Beef Layer
- 1 pound ground beef (80/20 works well — the fat adds flavor, just drain it)
- 1 small yellow onion, finely diced (about ½ cup)
- 2 cloves garlic, minced
- 1 tablespoon chili powder
- 1 teaspoon ground cumin
- ½ teaspoon smoked paprika (adds a subtle smokiness)
- ½ teaspoon salt
- ¼ teaspoon black pepper
- ¼ cup water (helps the seasoning meld into the meat)
For the Cheese Layer
- 2 tablespoons unsalted butter
- 2 tablespoons all-purpose flour
- 1½ cups whole milk (use 2% if that’s what you have, but avoid skim)
- 2 cups sharp cheddar cheese, freshly shredded from a block (pre-shredded bagged cheese contains anti-caking agents that make the sauce grainy)
- ½ teaspoon salt
- ¼ teaspoon cayenne pepper (optional, for heat)
For the Base & Toppings
- 1 can (16 ounces) refried beans (I prefer traditional, but vegetarian works too)
- 1 cup sour cream
- 1 cup salsa (mild, medium, or hot — your call)
- 1 cup shredded Mexican blend cheese (for the top layer of melty goodness)
- Optional toppings: sliced jalapeños, diced tomatoes, sliced black olives, chopped green onions, fresh cilantro
Ingredient Tips & Substitutions: For a leaner option, use ground turkey or chicken instead of beef — just add a little extra oil when browning. If you’re dairy-sensitive, you can swap the cheddar and Mexican blend for your favorite dairy-free shreds, though the texture will be slightly different. I recommend using a block of cheese and shredding it yourself; it really does make a difference in how smoothly the sauce comes together. For the refried beans, look for a brand with simple ingredients — just beans, oil, and salt. It’s worth it.
Equipment Needed
You don’t need a lot of fancy gear for this one, which is part of the beauty. Here’s what you’ll need:
- Large skillet (for browning the beef)
- Medium saucepan (for the cheese sauce)
- Whisk (to keep the cheese sauce smooth)
- 9×13-inch baking dish or a similarly sized oven-safe dish
- Cutting board and knife
- Wooden spoon or spatula
- Measuring cups and spoons
If you don’t have a 9×13 dish, you can use a cast-iron skillet or even a deep-dish pie plate — just adjust the layering accordingly. For tailgating, you can also assemble this in a slow cooker instead of baking it. I’ve done both, and honestly, the slow cooker version is great for keeping it warm throughout the game. Just layer everything in and cook on low for 2-3 hours. My personal preference is the oven method for a slightly crisper top, but you can’t go wrong either way.
One tip I learned the hard way: make sure your baking dish is at least 2 inches deep. This dip is generous, and you don’t want it bubbling over onto the bottom of your oven. Trust me on that one.
Preparation Method
Let’s build this dip layer by layer. The process is straightforward, but each step matters for the final result.
- Preheat your oven to 375°F (190°C). While it’s heating, start on the beef layer.
- Cook the beef: Place your large skillet over medium-high heat. Add the ground beef and cook, breaking it apart with a wooden spoon, until it’s browned and no longer pink — about 6-8 minutes. Drain off any excess fat, leaving about a tablespoon in the pan for flavor.
- Add the aromatics: Reduce the heat to medium. Add the diced onion and cook for 2-3 minutes until it softens and becomes translucent. Stir in the minced garlic and cook for another 30 seconds until fragrant. You’ll know it’s ready when your kitchen starts smelling like a taco stand.
- Season the meat: Sprinkle the chili powder, cumin, smoked paprika, salt, and pepper over the beef mixture. Stir well to coat everything evenly. Pour in the ¼ cup of water and let it simmer for 2 minutes, stirring occasionally. This helps the spices bloom and meld into the meat. Remove from heat and set aside.
- Make the cheese sauce: In a medium saucepan over medium heat, melt the butter. Once it’s bubbling, whisk in the flour and cook for 1 minute, stirring constantly. This is your roux — it should look like a thick, golden paste. Slowly pour in the milk while whisking continuously to prevent lumps. Continue whisking until the mixture thickens enough to coat the back of a spoon, about 3-4 minutes.
- Add the cheese: Reduce the heat to low. Add the shredded cheddar cheese a handful at a time, whisking until each addition is fully melted before adding the next. Stir in the salt and cayenne pepper if using. The sauce should be smooth, creamy, and velvety. If it seems too thick, add a splash more milk. If it’s too thin, let it simmer for another minute while stirring.
- Layer the dip: Now comes the fun part. Spread the refried beans evenly across the bottom of your 9×13-inch baking dish. Use a spatula to make an even layer — it doesn’t have to be perfect, just consistent. Next, spoon the seasoned beef mixture over the beans and spread it out. Pour the cheese sauce over the beef, spreading it gently to cover. Dollop the sour cream over the cheese sauce and gently swirl it in with a knife or spoon — you want ribbons of sour cream, not a fully incorporated layer. Spoon the salsa over the top in small dollops. Finally, sprinkle the shredded Mexican blend cheese evenly over everything.
- Bake: Place the dish in the preheated oven and bake for 15-20 minutes, or until the dip is hot and bubbly and the top cheese is melted and lightly golden around the edges. If you want a slightly browned top, switch your oven to broil for the last 1-2 minutes — but watch it closely so it doesn’t burn.
- Rest and garnish: Remove the dip from the oven and let it sit for 5 minutes before serving. This allows the layers to set slightly so the dip holds together better on a chip. Top with your favorite garnishes — sliced jalapeños, diced tomatoes, black olives, green onions, and fresh cilantro all work beautifully.
Pro tip: If you’re making this for a party, you can prep all the components a day ahead — cook the beef, make the cheese sauce, and shred the cheese. Just assemble and bake right before serving. It’s a lifesaver when you’re hosting.
Cooking Tips & Techniques
I’ve made this dip more times than I can count, and I’ve definitely learned a few things along the way. Here are the tips that make the biggest difference:
Shred your own cheese. I know it’s tempting to grab the bagged shreds, but they’re coated with cellulose and potato starch to prevent clumping, which also prevents them from melting smoothly. Freshly shredded cheddar from a block gives you that silky, stretchy cheese sauce that makes this dip unforgettable. It takes two extra minutes and it’s absolutely worth it.
Don’t skip the roux. The butter and flour mixture is what thickens the cheese sauce and keeps it from separating. If you just melt cheese into milk, you’ll end up with a greasy, grainy mess. Take the time to whisk that roux — it’s the difference between a sauce that coats a chip and a sauce that slides right off.
Drain the beef well. Too much fat in the beef layer will make the dip greasy overall. After browning, tilt the skillet and spoon out as much fat as you can. Leaving a little bit is fine — it adds flavor — but you don’t want pools of grease sitting on top of the beans.
Let it rest. I know it’s hard to wait when the dip is bubbling and smelling amazing, but letting it sit for 5 minutes after baking is crucial. It allows the layers to settle and firm up slightly, so every scoop comes out clean instead of turning into a runny mess. Trust me, I’ve rushed it before and ended up with a puddle on the plate.
One mistake I made early on: I used pre-shredded cheese for the sauce and ended up with a gluey, clumpy disaster. It was edible, but not pretty. Now I always shred my own, and the texture is night and day. Learn from my failure — it’s a small step that makes a huge difference.
Variations & Adaptations
This recipe is forgiving and easy to tweak based on what you have or who you’re feeding. Here are some of my favorite variations:
- Spicy Kick: Add a diced jalapeño (seeds and ribs removed if you want less heat) to the beef while cooking. You can also stir a tablespoon of hot sauce or a teaspoon of cayenne into the cheese sauce. For extra fire, top the finished dip with pickled jalapeños and a drizzle of hot honey.
- Vegetarian Version: Skip the ground beef and add a second can of refried beans (black bean refried beans are great here) or a can of drained and rinsed black beans. You can also sauté some diced bell peppers and zucchini with the onions for extra texture and flavor.
- Slow Cooker Method: Layer everything directly in a slow cooker — beans on the bottom, then beef, then cheese sauce, then sour cream and salsa, and finally the shredded cheese. Cook on low for 2-3 hours or on high for 1-2 hours. This is perfect for tailgating because you can plug it in and let it stay warm all afternoon.
- Loaded Nacho Style: For a more traditional nacho experience, skip the baking dish and spread tortilla chips on a large sheet pan. Drizzle the cheese sauce over the chips, then top with the beef mixture, salsa, sour cream, and all your favorite fixings. Bake at 375°F for 8-10 minutes, then finish with fresh toppings. It’s messier but so worth it.
- Healthier Twist: Use ground turkey or chicken, low-fat sour cream, and reduced-fat cheese. You can also add a layer of sautéed spinach or kale between the beans and beef for extra nutrients without sacrificing flavor.
I once made a version with chorizo instead of ground beef, and it was incredible — just be sure to drain the chorizo well because it releases a lot of fat. I’ve also added a layer of corn and black bean salsa in the summer when fresh corn is in season. The sweetness of the corn balances the heat beautifully.
Serving & Storage Suggestions
This dip is best served warm, straight from the oven or slow cooker. I like to set it out with a big platter of sturdy tortilla chips — the scoop-shaped ones are ideal because they can hold a generous amount of dip without breaking. You can also serve it with fresh veggies like bell pepper strips, cucumber rounds, or celery sticks for a lighter option.
For a full game day spread, pair this dip with other crowd favorites. I love serving it alongside our Spicy Korean-Mexican Street Corn Dip for a fun flavor contrast. A pitcher of Refreshing Mango Jalapeño Agua Fresca is the perfect drink to cool things down. And if you’re looking for something to round out the meal, our Easy Cold Pepperoni Pasta Salad is a great make-ahead side that travels well.
Storage: Leftover dip can be stored in an airtight container in the refrigerator for up to 4 days. The texture will change slightly — the cheese sauce may thicken and the beans will firm up — but the flavor is still fantastic. To reheat, spoon individual portions into a microwave-safe bowl and heat in 30-second intervals, stirring between each, until hot. For larger amounts, reheat in a 350°F oven for 15-20 minutes, covered with foil to prevent drying out.
Freezing: I don’t recommend freezing this dip, as the dairy-based cheese sauce can separate and become grainy upon thawing. If you absolutely must freeze it, do so before adding the final shredded cheese layer, and thaw overnight in the refrigerator before baking. The texture won’t be quite as smooth, but it’s still tasty.
One thing I love about this dip is that the flavors actually get better after a day in the fridge. The spices meld together and the layers become more cohesive. I’ve been known to make it a day ahead on purpose, just so the leftovers are even better the next day.
Nutritional Information & Benefits
Let’s be honest — this is an indulgent game day dip, not a health food. But here’s a rough idea of what you’re looking at per serving (based on 12 servings):
Estimated Nutritional Values (per serving):
- Calories: 380
- Total Fat: 26g
- Saturated Fat: 14g
- Cholesterol: 85mg
- Sodium: 780mg
- Total Carbohydrates: 16g
- Dietary Fiber: 4g
- Sugars: 5g
- Protein: 22g
Health Highlights: Despite its indulgent nature, this dip does have some redeeming qualities. The refried beans provide fiber and plant-based protein, which help keep you full. The beef is a good source of iron and B vitamins. And if you load up on the fresh toppings like tomatoes, onions, and cilantro, you’re getting a dose of antioxidants and vitamins with every bite.
Dietary Considerations: This recipe contains dairy (milk, cheese, sour cream) and gluten (flour in the roux). For a gluten-free version, use a gluten-free all-purpose flour blend or cornstarch to thicken the cheese sauce. For a dairy-free option, use plant-based butter, milk, cheese, and sour cream — just note that the texture of the cheese sauce will be slightly different. This dip is naturally nut-free and egg-free.
My personal take? This is a treat, and treats are meant to be enjoyed without guilt. Serve it with plenty of fresh veggies on the side, drink lots of water, and savor every single bite. That’s balance, in my book.
Conclusion
This Ultimate Loaded Nacho Tailgate Dip is everything I want in a game day recipe — it’s hearty, flavorful, and comes together without a lot of stress. The layers of seasoned beef, creamy cheese, refried beans, and all the fixings create a dip that’s far more than the sum of its parts. It’s the kind of dish that makes people linger by the snack table, chip in hand, going back for just one more scoop.
I love that this recipe is flexible enough to adapt to whatever you have on hand or whoever you’re feeding. Whether you make it spicy or mild, with beef or without, in the oven or the slow cooker, it always delivers. And honestly, watching a room full of people enjoy something you made is one of the best feelings in the world.
If you give this dip a try, I’d love to hear how it turns out. Leave a comment below and let me know what variations you tried, or tag me in your photos if you share them online. And if you’re looking for more easy party food ideas, be sure to check out our Easy DIY Copycat Lunchable Bento Box for a fun, portable snack option. Happy cooking, and here’s to good food and great games!
Frequently Asked Questions
Can I make this dip ahead of time?
Absolutely. You can assemble the entire dip (without the final shredded cheese layer) up to 24 hours in advance. Cover and refrigerate, then add the shredded cheese and bake just before serving. You may need to add 5-10 minutes to the baking time since you’re starting from cold.
How do I keep the dip warm during a party?
The easiest way is to serve it directly from a slow cooker set to warm. Alternatively, you can bake it in a cast-iron skillet and place it on a warming tray or over a tea light candle warmer. Just keep an eye on it so the cheese doesn’t burn.
Can I use ground turkey instead of beef?
Yes, ground turkey works well. Since turkey is leaner, add a tablespoon of olive oil to the pan before browning, and be careful not to overcook it — turkey can dry out quickly. The seasoning will still give it plenty of flavor.
Why did my cheese sauce turn out grainy?
Grainy cheese sauce usually happens for one of three reasons: the heat was too high (cheese should melt over low heat), the cheese was pre-shredded (the anti-caking agents cause graininess), or the cheese was added too quickly. Always add cheese slowly over low heat, whisking constantly, and shred it yourself from a block for the smoothest result.
Can I add more protein to this dip?
Definitely. Cooked and crumbled chorizo, shredded rotisserie chicken, or even leftover taco meat all work great. Just add an extra layer between the beans and cheese sauce, and you’re good to go. You might need to increase the baking time slightly to ensure everything heats through.
Pin This Recipe!
Ultimate Loaded Nacho Tailgate Dip – Easy Game Day Recipe

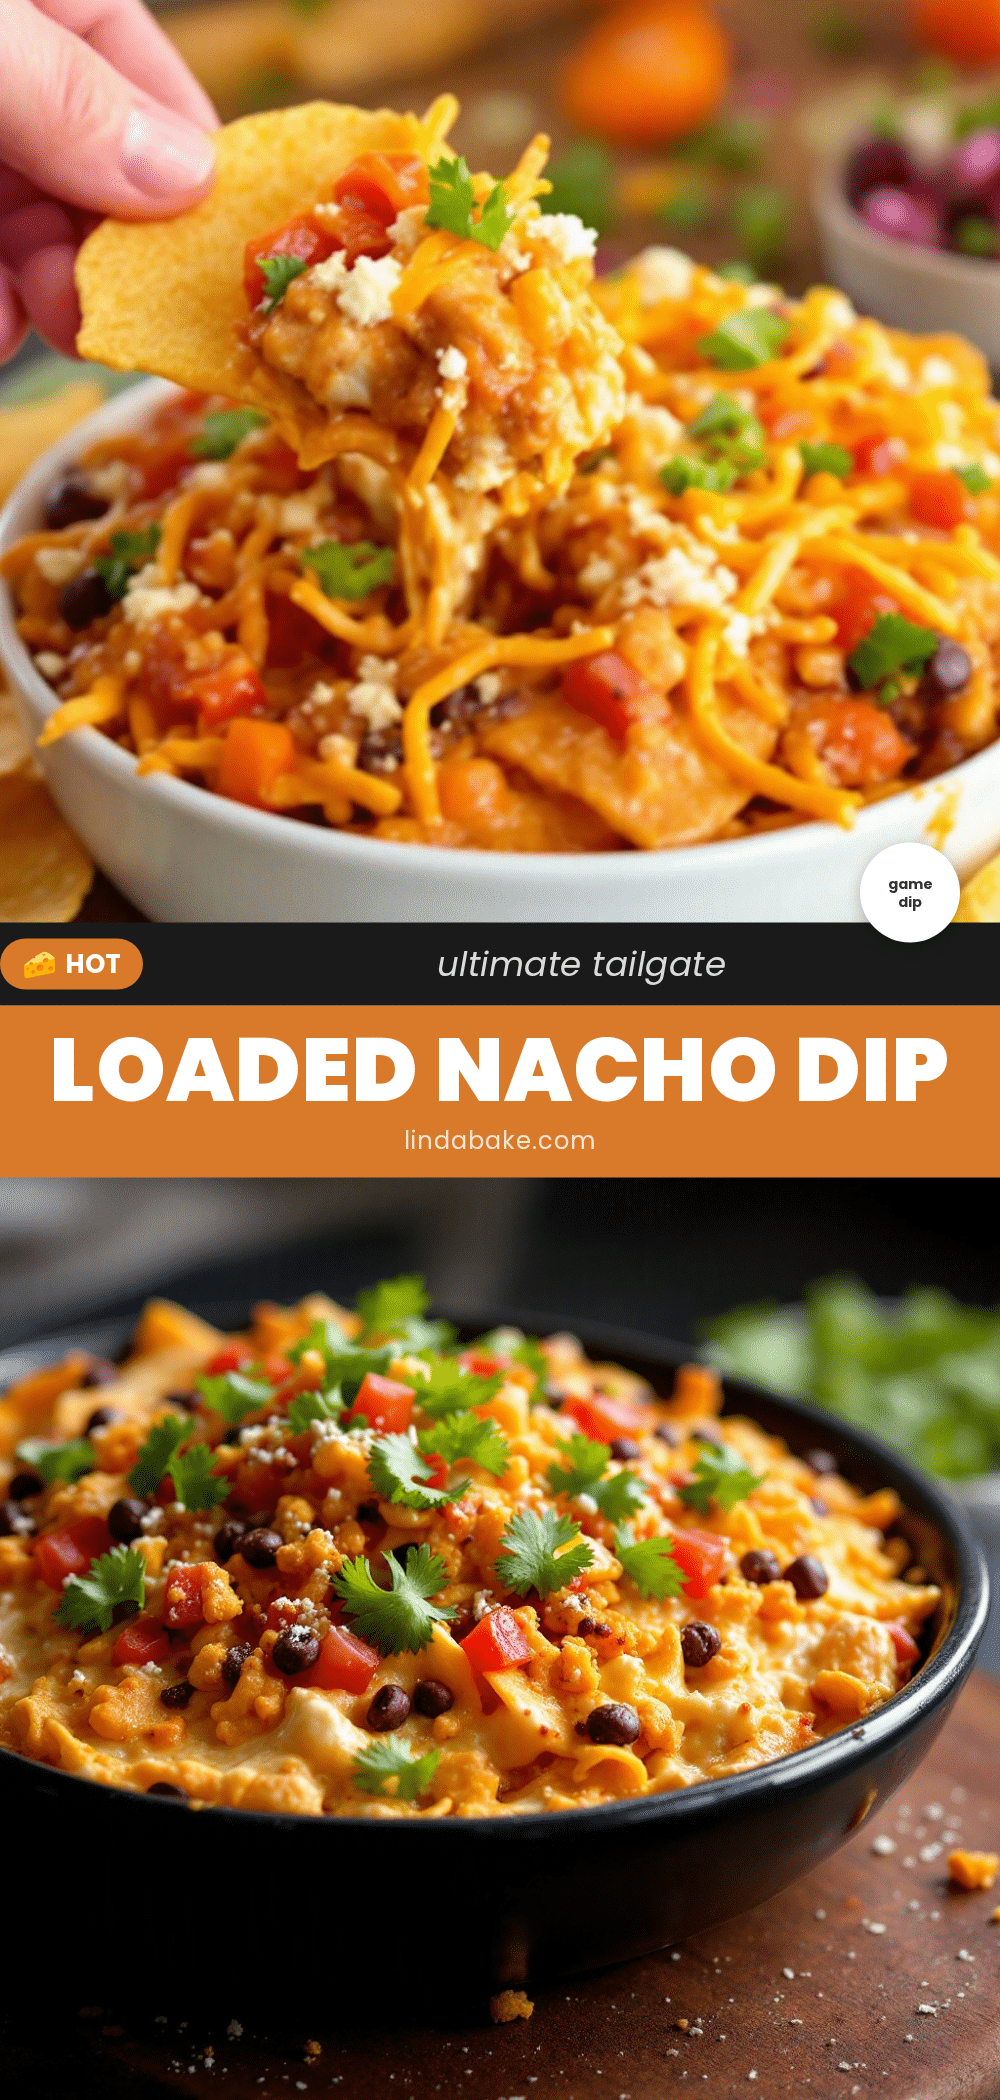
This Ultimate Loaded Nacho Tailgate Dip is a hearty, flavorful game day dip with seasoned ground beef, refried beans, a creamy cheese sauce, and all the classic nacho fixings. It’s thick, holds its shape on a chip, and feeds a crowd without any last-minute fuss.
- Prep Time: 15 minutes
- Cook Time: 20 minutes
- Total Time: 35 minutes
- Yield: 12 servings 1x
- Category: Appetizer
- Cuisine: Mexican-American
Ingredients
- 1 pound ground beef (80/20)
- 1 small yellow onion, finely diced (about ½ cup)
- 2 cloves garlic, minced
- 1 tablespoon chili powder
- 1 teaspoon ground cumin
- ½ teaspoon smoked paprika
- ½ teaspoon salt
- ¼ teaspoon black pepper
- ¼ cup water
- 2 tablespoons unsalted butter
- 2 tablespoons all-purpose flour
- 1½ cups whole milk
- 2 cups sharp cheddar cheese, freshly shredded from a block
- ½ teaspoon salt
- ¼ teaspoon cayenne pepper (optional)
- 1 can (16 ounces) refried beans
- 1 cup sour cream
- 1 cup salsa
- 1 cup shredded Mexican blend cheese
- Optional toppings: sliced jalapeños, diced tomatoes, sliced black olives, chopped green onions, fresh cilantro
Instructions
- Preheat your oven to 375°F (190°C).
- Cook the beef: Place your large skillet over medium-high heat. Add the ground beef and cook, breaking it apart with a wooden spoon, until it’s browned and no longer pink — about 6-8 minutes. Drain off any excess fat, leaving about a tablespoon in the pan for flavor.
- Add the aromatics: Reduce the heat to medium. Add the diced onion and cook for 2-3 minutes until it softens and becomes translucent. Stir in the minced garlic and cook for another 30 seconds until fragrant.
- Season the meat: Sprinkle the chili powder, cumin, smoked paprika, salt, and pepper over the beef mixture. Stir well to coat everything evenly. Pour in the ¼ cup of water and let it simmer for 2 minutes, stirring occasionally. Remove from heat and set aside.
- Make the cheese sauce: In a medium saucepan over medium heat, melt the butter. Once it’s bubbling, whisk in the flour and cook for 1 minute, stirring constantly. Slowly pour in the milk while whisking continuously to prevent lumps. Continue whisking until the mixture thickens enough to coat the back of a spoon, about 3-4 minutes.
- Add the cheese: Reduce the heat to low. Add the shredded cheddar cheese a handful at a time, whisking until each addition is fully melted before adding the next. Stir in the salt and cayenne pepper if using. The sauce should be smooth, creamy, and velvety.
- Layer the dip: Spread the refried beans evenly across the bottom of your 9×13-inch baking dish. Next, spoon the seasoned beef mixture over the beans and spread it out. Pour the cheese sauce over the beef, spreading it gently to cover. Dollop the sour cream over the cheese sauce and gently swirl it in with a knife or spoon. Spoon the salsa over the top in small dollops. Finally, sprinkle the shredded Mexican blend cheese evenly over everything.
- Bake: Place the dish in the preheated oven and bake for 15-20 minutes, or until the dip is hot and bubbly and the top cheese is melted and lightly golden around the edges. If you want a slightly browned top, switch your oven to broil for the last 1-2 minutes — but watch it closely.
- Rest and garnish: Remove the dip from the oven and let it sit for 5 minutes before serving. Top with your favorite garnishes — sliced jalapeños, diced tomatoes, black olives, green onions, and fresh cilantro all work beautifully.
Notes
Shred your own cheese from a block for the smoothest cheese sauce. Pre-shredded cheese contains anti-caking agents that can make the sauce grainy. Let the dip rest for 5 minutes after baking to allow the layers to set. You can prep all components a day ahead and assemble just before baking. For a slow cooker version, layer everything in a slow cooker and cook on low for 2-3 hours.
Nutrition
- Serving Size: 1 serving
- Calories: 380
- Sugar: 5
- Sodium: 780
- Fat: 26
- Saturated Fat: 14
- Carbohydrates: 16
- Fiber: 4
- Protein: 22
Keywords: nachos, tailgate dip, game day dip, loaded nacho dip, beef dip, cheese dip, party dip, easy appetizer


