I want a baked donut right now—something warm, spiced, and not too sweet—and I have everything except the willpower to wait for yeast dough to rise. That’s the thing about fall baking cravings: they hit hard and fast, usually when the kitchen is already messy and the afternoon light is starting to slant through the windows. So I do what I always do when impatience meets a craving for something cozy: I reach for the baking powder.
These baked pumpkin donuts with maple glaze came from one of those afternoons. I had a half-can of pumpkin puree in the fridge (leftover from something I can’t even remember), a bottle of maple syrup that was almost empty, and a desperate need for something that tasted like autumn without the fuss of deep frying. Honestly, I wasn’t expecting much. Baked donuts can be dry, or dense, or just sad versions of their fried cousins. But this batch? They came out soft, tender, and exactly what I needed.
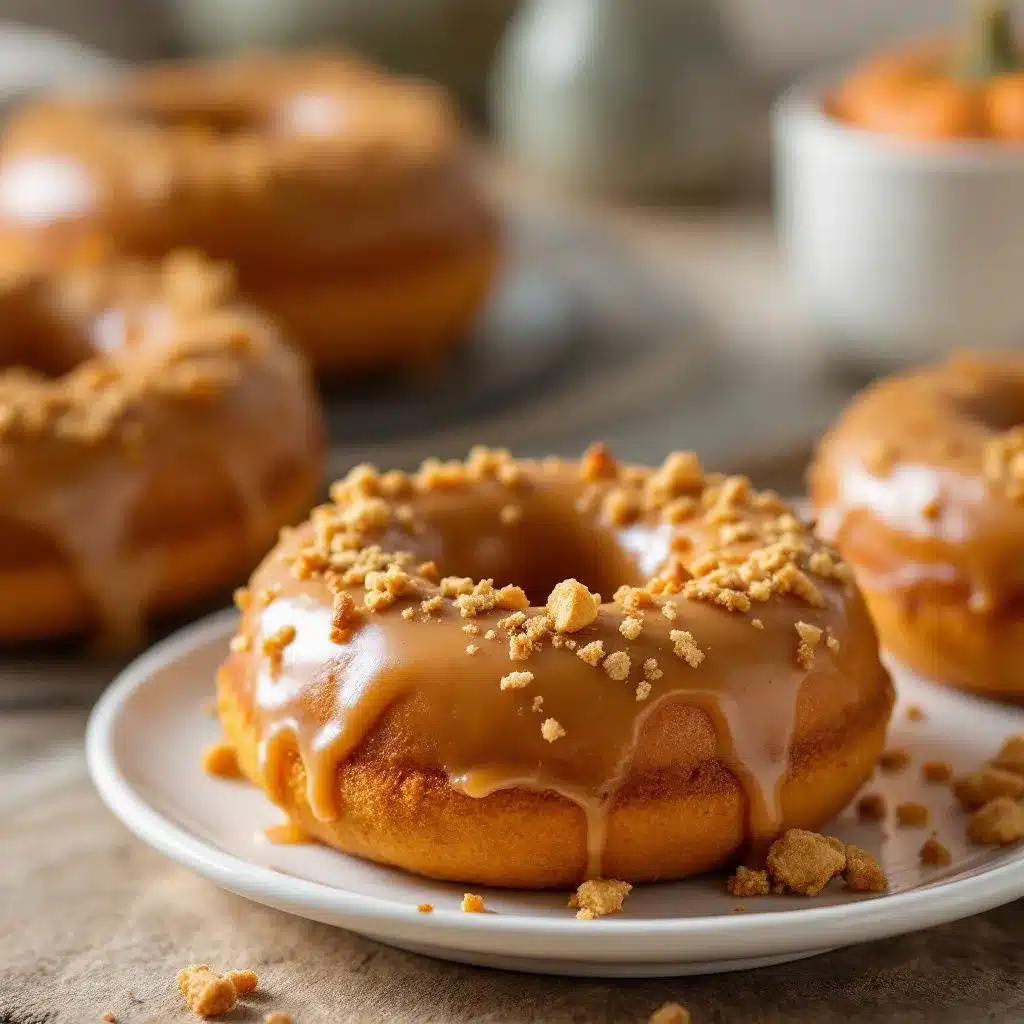
The glaze is the real star here—it sets up into this crackly, glossy shell that contrasts perfectly with the fluffy pumpkin cake underneath. And here’s the thing: you don’t need a special donut pan to make these work (though it helps). I’ve made them in muffin tins, mini loaf pans, and once, in a moment of desperation, a cast iron skillet shaped into rough rounds. They always disappear fast. This is the kind of recipe that makes you wonder why you ever bothered with fried donuts in the first place.
Why You’ll Love This Recipe
Let me tell you why this recipe has earned a permanent spot in my fall baking rotation. After testing this about six times (somebody had to eat the failures), I can confidently say these are the baked donuts you’ve been looking for.
- Quick & Easy: From mixing bowl to glazed donut in under 30 minutes. No yeast, no rising time, no deep fryer. This is weeknight baking at its finest.
- Simple Ingredients: You probably have most of these in your pantry right now. Canned pumpkin, flour, sugar, eggs, butter, and basic spices. No weird specialty items.
- Perfect for Fall Mornings: These are made for cozy October breakfasts, Thanksgiving brunch, or when you just want the house to smell like autumn.
- Crowd-Pleaser: I brought these to a pumpkin carving party last year and they were gone before the cider was poured. Kids and adults alike reach for seconds.
- Unbelievably Moist: The trick is using pumpkin puree and a touch of oil alongside the butter. It creates a texture that stays soft for days—not dry and crumbly like some baked donuts.
What makes this recipe different from the dozens of pumpkin donut recipes out there? It’s the balance. Most baked donuts lean too cakey or too dense. These hit that sweet spot between fluffy and substantial, with enough spice to taste like fall without overwhelming the pumpkin. And that maple glaze? It’s not just sweet—it has that slightly smoky, deep flavor that only real maple syrup provides. This isn’t another version of the same recipe. This is the version I make for people who say they don’t like baked donuts. It changes minds.
There’s something about the first bite that gets me every time. The way the glaze cracks slightly, the way the pumpkin spice hits your nose before the sweetness. It’s comfort food reimagined—healthier than fried, faster than yeasted, but with the same soul-soothing satisfaction. Perfect for impressing brunch guests without stress, or turning a quiet Tuesday morning into something memorable.
What Ingredients You Will Need
This recipe uses simple, wholesome ingredients to deliver big flavor and that perfect tender crumb. Most of these are pantry staples, which means you’re probably closer to fresh donuts than you think.
For the Pumpkin Donuts
- All-purpose flour, 1 ¾ cups (210g) – Spoon and level for accuracy. Too much flour makes dense donuts.
- Granulated sugar, ½ cup (100g) – Just enough sweetness without overpowering the pumpkin.
- Light brown sugar, ¼ cup (50g), packed – Adds moisture and a hint of molasses depth.
- Baking powder, 1 ½ teaspoons – The main leavener. Make sure it’s fresh (test by dropping a bit in water—it should fizz).
- Baking soda, ½ teaspoon – Helps neutralize the acidity from the pumpkin and buttermilk.
- Pumpkin pie spice, 2 teaspoons – I use McCormick or make my own blend. If you only have cinnamon, add ¼ teaspoon nutmeg and ⅛ teaspoon cloves.
- Salt, ½ teaspoon – Balances sweetness and enhances flavor.
- Canned pumpkin puree, ¾ cup (170g) – Not pumpkin pie filling. Look for 100% pure pumpkin. Libby’s is my go-to for consistent texture.
- Large eggs, 2, room temperature – Room temp eggs incorporate more air for a lighter crumb.
- Vegetable oil, ¼ cup (60ml) – Keeps the donuts moist. Canola or avocado oil work too.
- Unsalted butter, 2 tablespoons (28g), melted and cooled slightly – Adds richness and flavor.
- Buttermilk, ¼ cup (60ml) – The acidity tenderizes the gluten. No buttermilk? Add 1 teaspoon lemon juice to regular milk and let sit 5 minutes.
- Vanilla extract, 1 teaspoon – Pure vanilla makes a difference here. Skip the imitation stuff.
For the Maple Glaze
- Powdered sugar, 1 ½ cups (180g), sifted – Sifting prevents lumps. Trust me on this one.
- Pure maple syrup, 3 tablespoons (45ml) – Grade A dark amber is ideal. Do not use pancake syrup—the flavor is completely different.
- Heavy cream or milk, 1-2 tablespoons (15-30ml) – Adjust for desired consistency. Heavy cream makes a richer glaze.
- Vanilla extract, ½ teaspoon – Rounds out the maple flavor beautifully.
- Pinch of salt – Optional but recommended. It cuts the sweetness and makes the maple pop.
Ingredient Selection Tips: For the pumpkin, I recommend Libby’s for consistent moisture content. Some store brands are more watery, which can throw off the batter. If you’re using a different brand, drain any excess liquid before measuring. For the maple syrup, spend the extra dollar on real stuff. The fake stuff tastes thin and chemical in the glaze. And for the spices—if you don’t have pumpkin pie spice, mix 1 teaspoon cinnamon, ½ teaspoon ginger, ¼ teaspoon nutmeg, and ¼ teaspoon allspice. Works like a charm.
Equipment Needed
You don’t need a professional bakery setup for these donuts, but a few specific tools make the process smoother.
- Donut pan (standard 6-well) – This is the most important piece. I use the Wilton non-stick pan and it releases donuts perfectly. If you’re new to baked donuts, this is worth the $12 investment.
- Piping bag or zip-top bag – For filling the donut cavities cleanly. A spoon works but gets messy fast. I’ve learned this the hard way.
- Large mixing bowl – For dry ingredients.
- Medium mixing bowl – For wet ingredients.
- Whisk – For combining dry ingredients evenly.
- Rubber spatula – For folding the batter without overmixing.
- Cooling rack – Essential for even cooling and letting the glaze set properly.
- Small saucepan or microwave-safe bowl – For melting butter and warming glaze ingredients if needed.
- Measuring cups and spoons – Accurate measurements matter in baking.
- Kitchen scale (optional but recommended) – Weighing flour gives consistent results every time.
Budget-friendly alternatives: No donut pan? You can use a mini muffin tin (bake for 8-10 minutes) or even shape the batter into rounds on a parchment-lined baking sheet. They won’t have the classic donut shape, but they’ll taste the same. If you don’t have a piping bag, a sturdy zip-top bag with the corner snipped off works perfectly. For the cooling rack, you can use a wire baking rack from a sheet pan, or even a clean oven grate in a pinch.
Maintenance tip: Hand wash your donut pan with warm soapy water and a soft sponge. The non-stick coating can scratch in the dishwasher, and scratched pans lead to stuck donuts. I learned this after ruining my first pan.
Preparation Method
Let’s make some donuts. This process moves fast, so read through once before starting. Trust me—you don’t want to be scrambling for an ingredient mid-mix.
Step 1: Preheat and Prep the Pan
Preheat your oven to 350°F (175°C). Lightly grease your donut pan with butter or non-stick spray. I use baking spray with flour—it guarantees the donuts release cleanly. Set the pan aside while you make the batter.
Step 2: Mix the Dry Ingredients
In a large bowl, whisk together 1 ¾ cups (210g) all-purpose flour, ½ cup (100g) granulated sugar, ¼ cup (50g) packed light brown sugar, 1 ½ teaspoons baking powder, ½ teaspoon baking soda, 2 teaspoons pumpkin pie spice, and ½ teaspoon salt. Whisk until everything is evenly distributed—about 20 seconds. Make a well in the center for the wet ingredients.
Step 3: Combine the Wet Ingredients
In a medium bowl, whisk together ¾ cup (170g) canned pumpkin puree, 2 room temperature eggs, ¼ cup (60ml) vegetable oil, 2 tablespoons (28g) melted butter, ¼ cup (60ml) buttermilk, and 1 teaspoon vanilla extract. Whisk until smooth and fully combined. The mixture should look like thick, orange-tinted pudding. If it looks curdled, your ingredients were too cold—let them sit a few minutes and whisk again.
Step 4: Combine Wet and Dry
Pour the wet ingredients into the well of dry ingredients. Use a rubber spatula to fold gently, scraping from the bottom and sides. Mix just until no streaks of flour remain—about 10-12 strokes. Do not overmix! Overmixing develops gluten and makes tough donuts. A few small lumps are fine. The batter will be thick and slightly sticky.
Step 5: Fill the Donut Pan
Transfer the batter to a piping bag or zip-top bag. Cut off the tip (about ½ inch opening). Pipe the batter into each donut cavity, filling about ¾ full. Don’t overfill—they’ll puff up and lose the hole. If you don’t have a bag, use a spoon and your finger to gently spread the batter evenly. Tap the pan gently on the counter to release air bubbles.
Step 6: Bake
Bake at 350°F (175°C) for 9-11 minutes. The donuts are done when they spring back lightly when touched and a toothpick inserted comes out clean or with a few moist crumbs. The edges should be golden brown. Every oven runs differently—start checking at 9 minutes. My oven takes exactly 10 minutes, but yours might vary.
Step 7: Cool and Glaze
Let the donuts cool in the pan for 3-4 minutes. Then transfer to a wire rack to cool completely—about 10 minutes. While they cool, make the glaze. In a small bowl, whisk together 1 ½ cups (180g) sifted powdered sugar, 3 tablespoons (45ml) pure maple syrup, ½ teaspoon vanilla, and a pinch of salt. Add heavy cream or milk 1 tablespoon at a time until the glaze is thick but pourable—it should coat the back of a spoon and slowly drip off. Dip the tops of cooled donuts into the glaze, letting excess drip off. Place glazed side up on the rack. Let the glaze set for 10-15 minutes before serving.
Sensory cues: When you pipe the batter, it should feel thick but spreadable—like a soft cookie dough. During baking, your kitchen will smell like a fall candle store. The donuts should look puffed and slightly domed, with a golden bottom edge. When you dip them in glaze, you’ll hear a faint sizzle as the warm donut meets the cool glaze—that’s the sound of perfection.
Cooking Tips & Techniques
After making these donuts more times than I care to count, I’ve collected a few hard-won lessons. Here’s what I wish someone had told me.
Don’t overmix the batter. This is the number one mistake I see. Baked donuts are delicate—they don’t have the structure of a yeast donut. Overmixing develops gluten and turns your fluffy donuts into rubbery rings. Mix until the flour just disappears, then stop. A few lumps are your friends.
Room temperature ingredients matter. Cold eggs and cold buttermilk will make the melted butter seize up, creating a lumpy batter. Take your eggs and buttermilk out 30 minutes before starting. In a rush? Place eggs in a bowl of warm water for 5 minutes, and microwave the buttermilk for 10 seconds.
Pipe, don’t spoon. I know it’s an extra step, but piping gives you evenly filled cavities and clean donut shapes. Spooning tends to leave gaps and uneven thickness, which leads to some donuts being overbaked while others are underdone. A zip-top bag with a snipped corner works perfectly.
Let them cool before glazing. I once glazed donuts straight out of the pan—the glaze melted into a puddle and ran off completely. Wait until they’re cool to the touch (about 10 minutes on a rack). The glaze will set up glossy and thick instead of disappearing.
Double glaze for extra coverage. If you want that thick, bakery-style glaze layer, dip once, let set for 5 minutes, then dip again. The first layer creates a base, and the second layer gives you that satisfying crackle when you bite in.
Watch your oven like a hawk. Baked donuts go from perfect to overdone in about 60 seconds. Check at 9 minutes, even if your recipe says 11. Every oven has hot spots, and donuts are small enough to overbake quickly. The toothpick test is your best friend here.
My biggest failure: I once substituted applesauce for oil to make them “healthier.” The donuts came out gummy and dense—like pumpkin-flavored erasers. Learn from my mistake. The oil is there for moisture. If you want to reduce fat, use half oil and half applesauce, but don’t eliminate it entirely.
Variations & Adaptations
One of the best things about this recipe is how flexible it is. Here are some variations I’ve tried and loved.
Gluten-Free Version
Substitute the all-purpose flour with a 1:1 gluten-free baking flour blend (I like King Arthur Measure for Measure). Add 1 teaspoon xanthan gum if your blend doesn’t include it. The texture will be slightly more delicate, but the flavor is spot on. Let the batter rest for 5 minutes before piping to allow the flour to hydrate.
Vegan Adaptation
Replace the eggs with 2 flax eggs (2 tablespoons ground flaxseed + 6 tablespoons warm water, let sit 5 minutes). Use melted coconut oil instead of butter, and substitute the buttermilk with ¼ cup plant milk mixed with 1 teaspoon apple cider vinegar. The donuts will be slightly denser but still delicious. For the glaze, use coconut cream instead of heavy cream.
Chocolate Pumpkin Donuts
Reduce flour to 1 ½ cups and add ¼ cup unsweetened cocoa powder. Increase sugar to ¾ cup total. The chocolate-pumpkin combo is unexpectedly amazing—the pumpkin keeps the chocolate donuts moist in a way that regular chocolate donuts never are.
Spiced Maple Glaze
Add ¼ teaspoon cinnamon and a pinch of nutmeg to the glaze. This gives it a chai-like warmth that pairs beautifully with the pumpkin. I made this version for a fall brunch and got three requests for the recipe.
Savory-Sweet Twist
Reduce sugar to ¼ cup total and add ½ teaspoon black pepper and ¼ teaspoon cayenne to the dry ingredients. Use a honey-sage glaze instead of maple. This sounds weird, but trust me—it works for a sophisticated brunch option. The heat sneaks up on you in the best way.
Serving & Storage Suggestions
These donuts are best the day they’re made—the glaze stays glossy and the texture is at its peak. But they’re still pretty great the next day if you store them right.
Serving temperature: Room temperature is ideal. If you’ve refrigerated them, let them sit out for 15 minutes before serving. The glaze gets too hard when cold, and the donut loses its tenderness.
Presentation ideas: Arrange on a rustic wooden board with a dusting of cinnamon. Add a small bowl of extra maple glaze for dipping if you’re feeling indulgent. For a fall brunch, pair them with a hot apple cider or a spiced latte. They also work beautifully alongside a refreshing mango jalapeño agua fresca for a sweet-spicy contrast that’s surprisingly perfect.
Storage instructions: Store in an airtight container at room temperature for up to 2 days. Do not stack them—place them in a single layer, or use parchment paper between layers to prevent the glaze from sticking. If you live in a humid climate, the glaze may get sticky. A light dusting of powdered sugar can help, or just accept the sticky glaze as a feature, not a bug.
Freezing instructions: Freeze unglazed donuts for up to 3 months. Wrap each donut individually in plastic wrap, then place in a freezer bag. Thaw at room temperature for about 30 minutes, then glaze fresh. The glaze doesn’t freeze well—it gets weepy and separates. Always glaze after thawing.
Reheating: Microwave for 10-15 seconds for that just-baked warmth. The glaze will soften slightly, which I actually prefer. For a crisper exterior, pop them in a 300°F oven for 3-4 minutes. Avoid the toaster—the glaze melts everywhere and makes a mess.
How flavors develop: The pumpkin spice flavor actually deepens overnight. Day-old donuts taste more spiced and the maple flavor in the glaze mellows into something more caramel-like. If you can resist eating them all immediately, the second day is almost better.
Nutritional Information & Benefits
Let’s be honest—these are still donuts, not health food. But compared to fried donuts, they’re a significant upgrade.
Estimated per donut (makes 8-10): 260 calories, 9g fat, 42g carbohydrates, 4g protein, 1g fiber, 22g sugar. These numbers are approximate and depend on exact ingredients and glaze thickness.
Health benefits of key ingredients: Pumpkin puree is packed with vitamin A (great for eye health) and fiber. It also adds moisture without extra fat. The buttermilk provides calcium and probiotics. Real maple syrup contains antioxidants and minerals like zinc and manganese—though let’s be real, we’re eating it for the taste.
Dietary considerations: This recipe contains gluten, dairy, and eggs. For gluten-free and vegan options, see the variations section. These donuts are nut-free as written, making them school-friendly. If you need a lower-sugar option, reduce the sugar in the donut to ½ cup total and use a thin glaze (or skip it entirely—the donuts are good on their own).
Potential allergens: Wheat, dairy, eggs. The maple glaze contains dairy unless you substitute with plant milk.
My perspective: I think of these as a “worth it” treat. They’re not an everyday breakfast, but they’re a lovely weekend morning indulgence. The fact that they’re baked instead of fried means I feel less guilty about having seconds. And honestly, making them from scratch with real ingredients feels better than anything from a box or drive-through.
FAQs
Can I use fresh pumpkin instead of canned?
Yes, but you’ll need to roast and puree it first, then drain off excess liquid. Fresh pumpkin has more water than canned, which can make the batter too thin. Roast a sugar pumpkin at 400°F for 45 minutes, scoop out the flesh, puree it, and let it drain in a fine-mesh strainer for 30 minutes. Measure after draining.
Why did my donuts stick to the pan?
This usually happens from insufficient greasing or using a pan with scratched non-stick coating. Make sure to grease every crevice well, especially the center post. I recommend baking spray with flour—it’s more reliable than butter alone. Also, let the donuts cool in the pan for exactly 3-4 minutes before turning out. Too soon and they’ll tear; too late and they’ll steam and stick.
Can I make the batter ahead of time?
I don’t recommend it. The baking powder starts reacting as soon as it hits the wet ingredients, so the batter loses its lift over time. If you need to prep ahead, mix the dry ingredients and wet ingredients separately, then combine and bake immediately. The donuts are best fresh from the oven.
How do I get a thicker glaze?
Use less liquid. Start with 1 tablespoon of cream instead of 2, then add more a teaspoon at a time until you reach the desired consistency. The glaze should be thick enough to coat the back of a spoon and slowly drip off. If it runs off the donut completely, it’s too thin. Add more powdered sugar to thicken it.
Can I double this recipe?
Absolutely. The recipe doubles beautifully. Just make sure you have two donut pans (or bake in batches). If baking in batches, let the second batch of batter sit at room temperature while the first bakes—don’t refrigerate it, or the butter will solidify and the texture will change.
Conclusion
These baked pumpkin donuts with maple glaze are the kind of recipe that makes you look forward to fall all year. They’re quick enough for a weekday morning treat, impressive enough for brunch guests, and simple enough that you’ll actually make them instead of just pinning them. The pumpkin keeps them moist, the spices warm you from the inside out, and that maple glaze? It’s the finishing touch that turns a good donut into a memorable one.
I love how forgiving this recipe is. You can tweak the spices, swap the glaze, make them gluten-free—and they still come out delicious. That’s the mark of a great recipe, in my book. It works as written, but it also adapts to whatever you have on hand or whatever mood you’re in.
If you make these, let me know how they turn out. Did you add extra cinnamon? Try the chocolate version? Dip them twice in glaze? I’d love to hear about your version. Leave a comment below or tag me in your photos—I genuinely look forward to seeing what you create. And if you’re looking for more fall baking inspiration, don’t miss my easy matcha green tea tiramisu parfaits for another quick dessert that delivers big flavor with minimal effort.
Happy baking, friends. May your donuts be tender, your glaze be glossy, and your kitchen smell like pumpkin spice all season long.
Pin This Recipe!
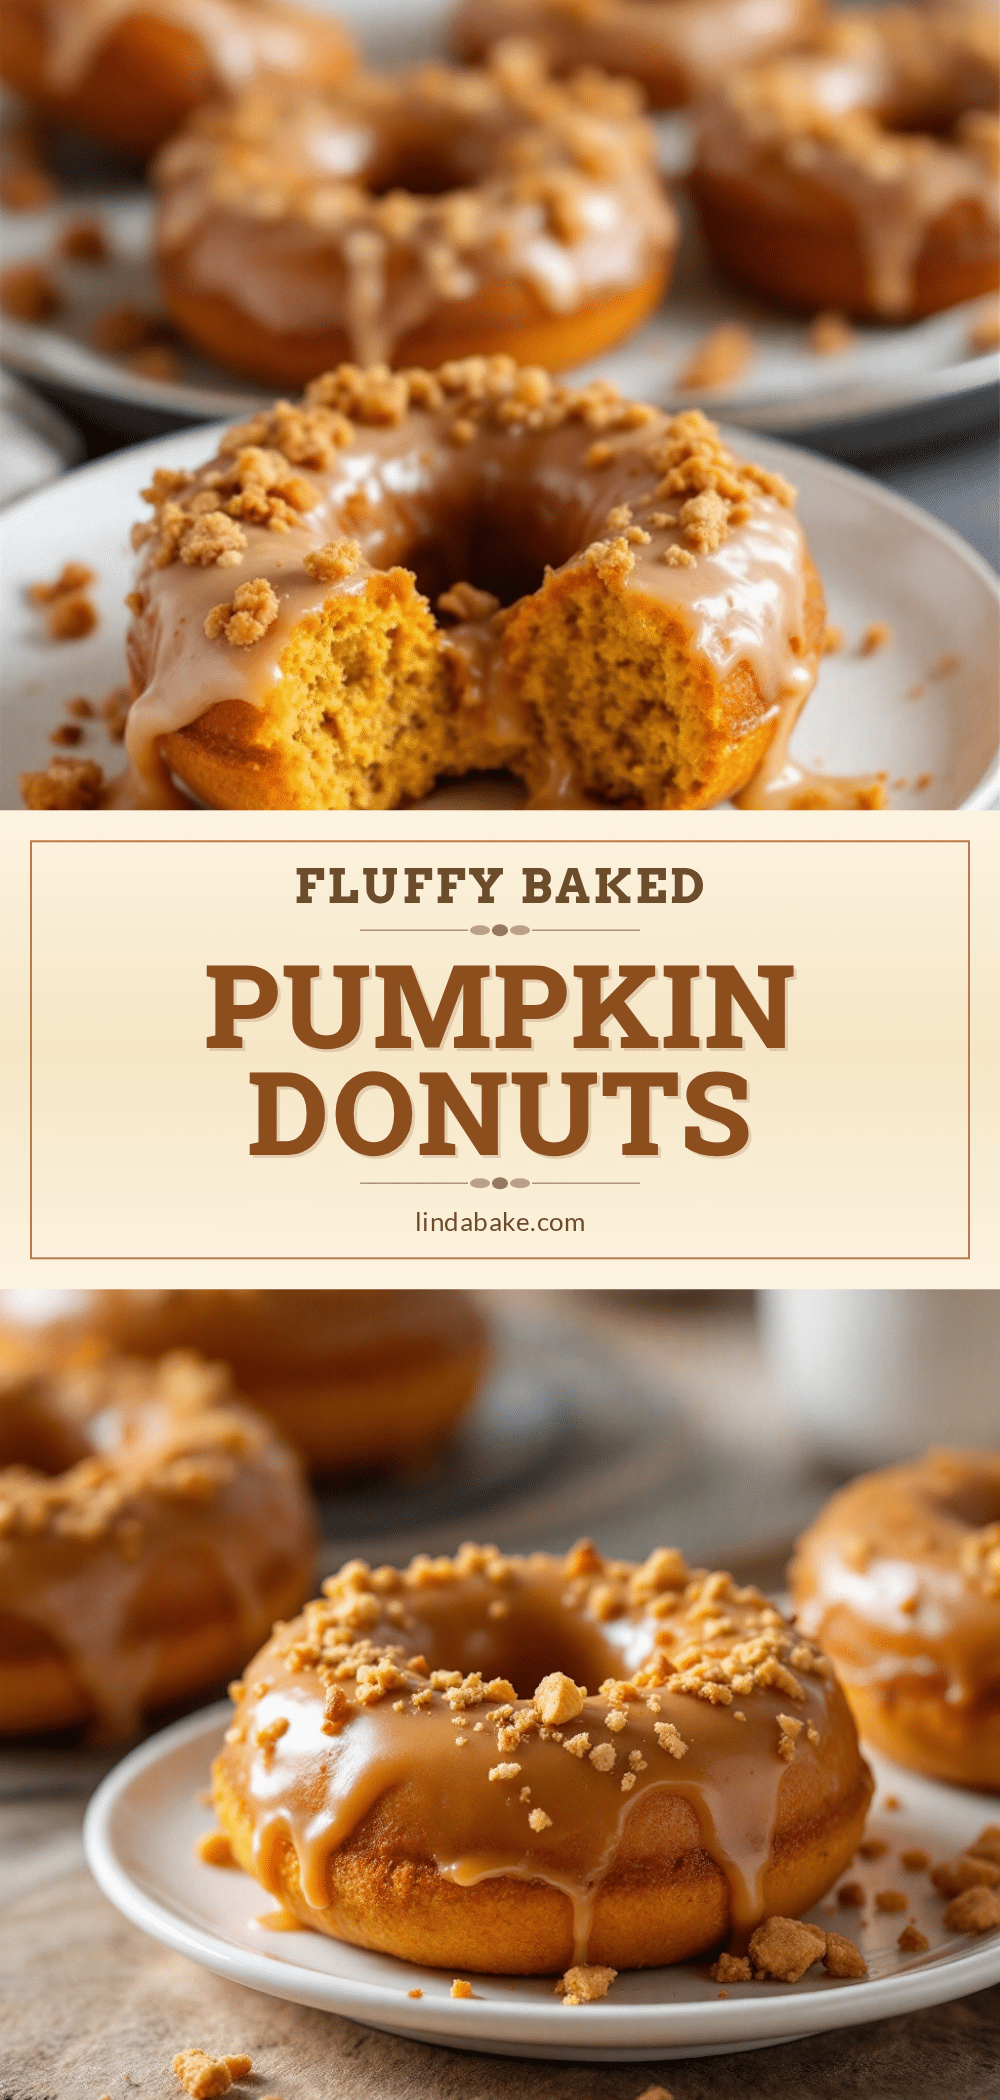
Perfect Baked Pumpkin Donuts with Easy Maple Glaze
These baked pumpkin donuts with maple glaze are soft, tender, and perfectly spiced. Ready in under 30 minutes with no yeast or deep frying, they’re the ultimate fall treat.
- Prep Time: 15 minutes
- Cook Time: 10 minutes
- Total Time: 25 minutes
- Yield: 8-10 donuts 1x
- Category: Dessert
- Cuisine: American
Ingredients
- 1 ¾ cups (210g) all-purpose flour
- ½ cup (100g) granulated sugar
- ¼ cup (50g) packed light brown sugar
- 1 ½ teaspoons baking powder
- ½ teaspoon baking soda
- 2 teaspoons pumpkin pie spice
- ½ teaspoon salt
- ¾ cup (170g) canned pumpkin puree
- 2 large eggs, room temperature
- ¼ cup (60ml) vegetable oil
- 2 tablespoons (28g) unsalted butter, melted and cooled slightly
- ¼ cup (60ml) buttermilk
- 1 teaspoon vanilla extract
- 1 ½ cups (180g) powdered sugar, sifted
- 3 tablespoons (45ml) pure maple syrup
- 1–2 tablespoons (15-30ml) heavy cream or milk
- ½ teaspoon vanilla extract
- Pinch of salt
Instructions
- Preheat oven to 350°F (175°C). Lightly grease a standard 6-well donut pan with butter or non-stick spray.
- In a large bowl, whisk together flour, granulated sugar, brown sugar, baking powder, baking soda, pumpkin pie spice, and salt. Make a well in the center.
- In a medium bowl, whisk together pumpkin puree, eggs, vegetable oil, melted butter, buttermilk, and vanilla extract until smooth.
- Pour wet ingredients into the well of dry ingredients. Fold gently with a rubber spatula until just combined (10-12 strokes). Do not overmix.
- Transfer batter to a piping bag or zip-top bag with the corner snipped off. Pipe batter into each donut cavity, filling about ¾ full. Tap pan gently to release air bubbles.
- Bake for 9-11 minutes, until donuts spring back when touched and a toothpick inserted comes out clean. Cool in pan for 3-4 minutes, then transfer to a wire rack to cool completely (about 10 minutes).
- For the glaze: In a small bowl, whisk together sifted powdered sugar, maple syrup, vanilla extract, and salt. Add heavy cream or milk 1 tablespoon at a time until thick but pourable.
- Dip tops of cooled donuts into glaze, letting excess drip off. Place glazed side up on rack. Let set for 10-15 minutes before serving.
Notes
Don’t overmix the batter; a few lumps are fine. Use room temperature ingredients for best results. Pipe batter for even filling. Let donuts cool completely before glazing. For a thicker glaze, double dip after first layer sets. Store in an airtight container at room temperature for up to 2 days. Freeze unglazed donuts for up to 3 months.
Nutrition
- Serving Size: 1 donut
- Calories: 260
- Sugar: 22
- Sodium: 200
- Fat: 9
- Saturated Fat: 3
- Carbohydrates: 42
- Fiber: 1
- Protein: 4
Keywords: baked pumpkin donuts, maple glaze, fall baking, pumpkin spice, easy donut recipe


