The plate was scraped clean before the dessert menu was even discussed. That is the moment you know you have won the room. My friend Sarah texted me at 11 PM, just asking for the link. It was the third year in a row these bites disappeared first. Honestly, I was almost surprised. I expected the turkey to be too lean, or the bacon too salty for the crowd. But the reaction was instant and loud.
Friendsgiving is a different beast than Thanksgiving with family. With family, you can get away with serving a massive roast that everyone ignores in favor of the mashed potatoes. With friends, you need to perform. You need food that looks impressive but doesn’t keep you stuck in the kitchen while they are all drinking wine and laughing in the living room. These crispy bacon-wrapped turkey bites are my secret weapon. They are small enough to eat with one hand while holding a drink, but big enough to feel like a real treat.
I started making them because I needed a protein option that wasn’t just another cheese board. Turkey is lighter than beef, which feels appropriate for the season. The bacon adds that smoky crunch that everyone craves. When I first tested the recipe, I wrapped them too loosely and the bacon slid off in the oven. Now, I have the technique down to a science. It is all about the tension and the oven temperature.
There is something quietly satisfying about watching them turn from pale pink to deep, glossy amber. You can smell them from the other room, and people start drifting toward the kitchen before you even call them. It is not just about feeding people; it is about creating that shared moment of “oh, wow” when the first bite hits. This recipe has become a staple in my rotation, and I think it will become one in yours too.
Why You’ll Love This Recipe
There are plenty of appetizers out there, but few strike this specific balance of texture and flavor. These bites are not just another variation of a wrapped meat. They are a study in contrast. You get the snap of the cured pork against the tender, juicy white meat of the turkey. It is a combination that feels sophisticated but is incredibly approachable. I have tested dozens of variations, from using different cuts of turkey to experimenting with spices, and this ratio is the winner.
Here is why this recipe stands out in the crowd:
* **Quick & Easy**: The prep work takes about ten minutes. The rest is just waiting for the oven. This is perfect for busy weeknights or last-minute gatherings where you need to look like you planned for weeks.
* **Simple Ingredients**: You likely have everything you need right now. Turkey breast, bacon, and maybe a glaze. No fancy grocery trips needed.
* **Perfect for Friendsgiving**: It fits the vibe perfectly. It is savory, shareable, and easy to eat while standing around. It works just as well for holiday parties or casual game day gatherings.
* **Crowd-Pleaser**: Kids love the bite-sized size. Adults love the savory depth. It always gets rave reviews from everyone alike.
* **Unbelievably Delicious**: The texture is next-level. The bacon renders down and crisps up, creating a savory shell that holds the moist turkey inside.
What makes this different from other bacon-wrapped appetizers is the cut of the turkey. Using thin strips of turkey breast ensures that the meat cooks at the same rate as the bacon. If you use thick chunks, the turkey dries out before the bacon gets crispy. I learned this the hard way in my first attempt. The result is a bite that is uniformly cooked and packed with flavor.
It is the kind of food that makes you close your eyes after the first bite. It is comfort food reimagined for a social setting. It allows you to impress your guests without stressing over a complicated main course. It turns a simple meal into something memorable.
What Ingredients You Will Need
This recipe relies on high-quality, simple ingredients to deliver bold flavor. The beauty of this dish is that the bacon provides the salt and smoke, so the turkey does not need much help. However, using good quality turkey makes a noticeable difference in the final texture. You want meat that is fresh and not overly processed.
Here is what you will need to make this happen:
* **Turkey Breast**: Boneless, skinless turkey breast tenderloins or thin-cut steaks. You want slices that are about 1/4 inch thick. If they are too thick, the bacon will burn before the turkey is cooked. I prefer buying the tenderloins because they are already uniform in shape.
* **Bacon**: Thick-cut bacon is non-negotiable here. Thin bacon will crisp up too fast and fall apart. Thick bacon has enough fat to render slowly, creating that perfect chewy-crisp texture. I recommend a brand with a high meat-to-fat ratio for better structure.
* **Brown Sugar**: This helps caramelize the bacon and adds a touch of sweetness that balances the salt. It also helps the bacon stick to the turkey.
* **Black Pepper**: Freshly cracked black pepper adds a bit of heat and aroma.
* **Garlic Powder**: A light dusting adds savory depth without overpowering the natural flavor of the turkey.
* **Cooking Spray**: A light mist of oil helps the bacon crisp up evenly.
You can substitute the turkey with chicken breast if you prefer, but turkey has a more distinct flavor that pairs well with bacon. For a gluten-free option, this recipe is naturally gluten-free as long as your bacon does not have added sugar or fillers. Look for bacon that lists pork and salt as the primary ingredients. In the summer, you could swap the brown sugar for a maple glaze for a different flavor profile.
Equipment Needed
You do not need a lot of fancy gear to make this recipe. A standard baking sheet is all you really need. I prefer using a rimmed baking sheet because the bacon will render out a fair amount of fat. The rim catches the grease so it does not spill over into the oven, which makes cleanup much easier.
A wire rack placed inside the baking sheet is a game-changer. It allows hot air to circulate around the entire bite, ensuring the bacon crisps on all sides. If you do not have a rack, you can use a cooling rack. Just make sure it fits inside your baking sheet.
Tongs are essential for flipping the bites. You want to handle them gently to keep the bacon wrapped tight. Paper towels are useful for blotting any excess grease if you want them to be extra crisp. I also keep a small brush handy if you decide to add a glaze at the end.
If you are making a large batch, you might need two baking sheets. Just be prepared to rotate them in the oven for even cooking. A kitchen timer is helpful too, because bacon can go from perfect to burnt very quickly.
Preparation Method

Getting these bites ready is straightforward, but precision matters. Follow these steps closely for the best results.
1. **Preheat the Oven**: Start by preheating your oven to 400°F (200°C). This high heat is crucial for crisping the bacon quickly without drying out the turkey. Line your baking sheet with parchment paper or foil for easy cleanup.
2. **Prepare the Turkey**: Pat the turkey pieces dry with paper towels. Moisture is the enemy of crispiness. If the turkey is wet, the bacon will steam instead of fry. Cut the turkey into uniform strips, about 1 inch wide and 3 inches long. Uniformity ensures even cooking.
3. **Season the Turkey**: Lightly sprinkle the turkey strips with black pepper and garlic powder. Do not add salt yet, as the bacon is already salty. Toss them gently to coat.
4. **Wrap the Bacon**: Take a strip of bacon and wrap it tightly around a piece of turkey. You want to overlap the bacon slightly so it stays in place. If the bacon is too long, you can fold it over the end. Secure it with a toothpick if needed, though the tight wrap usually holds on its own.
5. **Arrange on Sheet**: Place the wrapped bites on the prepared baking sheet. Leave a little space between each one so the air can circulate. Do not crowd the pan.
6. **First Bake**: Place the sheet in the oven and bake for 10 minutes. This starts the rendering process for the bacon.
7. **Flip and Glaze**: Remove the sheet and flip each bite. Brush the tops lightly with brown sugar or your chosen glaze. This step adds that caramelized finish.
8. **Final Bake**: Return to the oven for another 5-7 minutes. Watch them closely. You want the bacon to be deep golden brown and crispy. The turkey should be cooked through, reaching an internal temperature of 165°F (74°C).
9. **Cool and Serve**: Let them rest on a wire rack for 2 minutes. This allows the juices to redistribute and the bacon to crisp up further. Serve warm.
Cooking Tips & Techniques
I have made my share of mistakes with bacon-wrapped appetizers, and I am here to help you avoid them. The biggest mistake people make is using turkey that is too thick. If the turkey is thicker than 1/2 inch, the bacon will likely burn before the meat is safe to eat. Always aim for thin, uniform pieces.
Another common issue is the bacon sliding off. This happens when the wrap is too loose or the bacon is too slippery. Wrapping it tightly from the bottom up helps. Starting at one end and rolling it up creates tension that keeps it in place. If you are worried, use a toothpick, but try to minimize them for a cleaner presentation.
Timing is everything. Bacon varies in thickness and brand. Some brands cook faster than others. Keep an eye on the oven during the last few minutes. If the bacon is getting too dark, lower the rack position or remove the tray early. It is better to under-crisp slightly than to have burnt bits.
Using a wire rack is the best technique for even cooking. If you bake directly on the sheet, the bottom of the bacon can get soggy from the rendered fat. The rack lifts the bites out of the grease, allowing them to crisp on all sides.
Multitasking is key here. While the bites are baking, you can prepare your dipping sauce or set the table. Do not leave the oven unattended, though. Bacon can go from perfect to charcoal in seconds.
Variations & Adaptations
This recipe is a great base for experimenting with flavors. Here are a few ways to change it up:
* **Spicy Kick**: Add a pinch of cayenne pepper to the turkey before wrapping. Or use jalapeño slices inside the wrap for a spicy center.
* **Herb Infused**: Mix dried thyme or rosemary into the black pepper seasoning. This adds an earthy note that complements the turkey well.
* **Glaze Options**: Instead of brown sugar, try a honey mustard glaze or a spicy sriracha maple syrup. These add different flavor profiles that pair well with the savory bacon.
* **Dietary Tweaks**: For a lower sodium option, choose low-sodium bacon and skip any additional seasoning. You can also use turkey bacon, though it will not crisp up as well and requires a longer cooking time.
I once tried wrapping these with a thin slice of apple inside. The apple softened and added a nice tartness, but it made the wrap loose. If you try this, be sure to secure it well with toothpicks.
Serving & Storage Suggestions
Serve these bites warm, right out of the oven. They are best enjoyed within 15 minutes of cooking, as the bacon will soften as it cools. Pair them with a dipping sauce like spicy mustard, honey mustard, or a creamy ranch. The contrast of the hot, crispy bite with the cool sauce is delicious.
For storage, let them cool completely before placing them in an airtight container. They can be refrigerated for up to 3 days. To reheat, use an air fryer or a toaster oven at 350°F for 3-4 minutes. This restores the crispiness better than a microwave, which will make the bacon chewy.
You can also freeze them before cooking. Wrap them tightly and freeze for up to a month. Thaw in the refrigerator before baking. The flavors meld nicely over time, so they are great for meal prep.
Nutritional Information & Benefits
These bites are a good source of lean protein. Turkey breast is low in fat and high in protein, making it a healthier option than beef or pork alone. The bacon adds fat and flavor, so portion control is key. Each bite is about 50-70 calories, depending on the size of the bacon strip.
They are naturally gluten-free, which is great for guests with dietary restrictions. However, always check your bacon label for hidden gluten. The recipe is also low in carbohydrates, making it suitable for keto or low-carb diets if you skip the sugar glaze.
From a wellness perspective, this recipe offers a balance of macronutrients. The protein keeps you full, while the fat provides satiety. It is a satisfying snack that does not leave you feeling heavy. I like to serve them as a light appetizer before a larger meal.
Conclusion
These crispy bacon-wrapped turkey bites are a must-try for your next gathering. They are easy to make, impressive to serve, and absolutely delicious. I love how they bring people together, with everyone reaching for just one more.
Feel free to customize the spices and glazes to match your taste. I think you will find that this recipe becomes a regular part of your hosting routine. Please leave a comment below and let me know how they turned out for you. I love hearing about your adaptations.
Share this recipe with a friend who loves bacon. It is the perfect way to spread the joy. Enjoy every bite!
Frequently Asked Questions
Can I use chicken instead of turkey?
Yes, you can use chicken breast tenderloins. The cooking time is similar, but chicken may cook slightly faster. Watch them closely to avoid drying out.
How do I keep the bacon from falling off?
Wrap the bacon tightly around the turkey, starting from one end. Overlap the bacon slightly. If needed, secure with a toothpick, but remove before eating.
Can I make these ahead of time?
You can wrap them and refrigerate them for up to 24 hours before cooking. Let them come to room temperature for 15 minutes before baking for even cooking.
What is the best way to reheat them?
Use an air fryer or toaster oven at 350°F for 3-4 minutes. This restores the crispiness. Avoid the microwave, which makes the bacon soggy.
Are these gluten-free?
Yes, as long as your bacon does not contain added gluten. Most plain bacon is gluten-free, but always check the label.
Pin This Recipe!
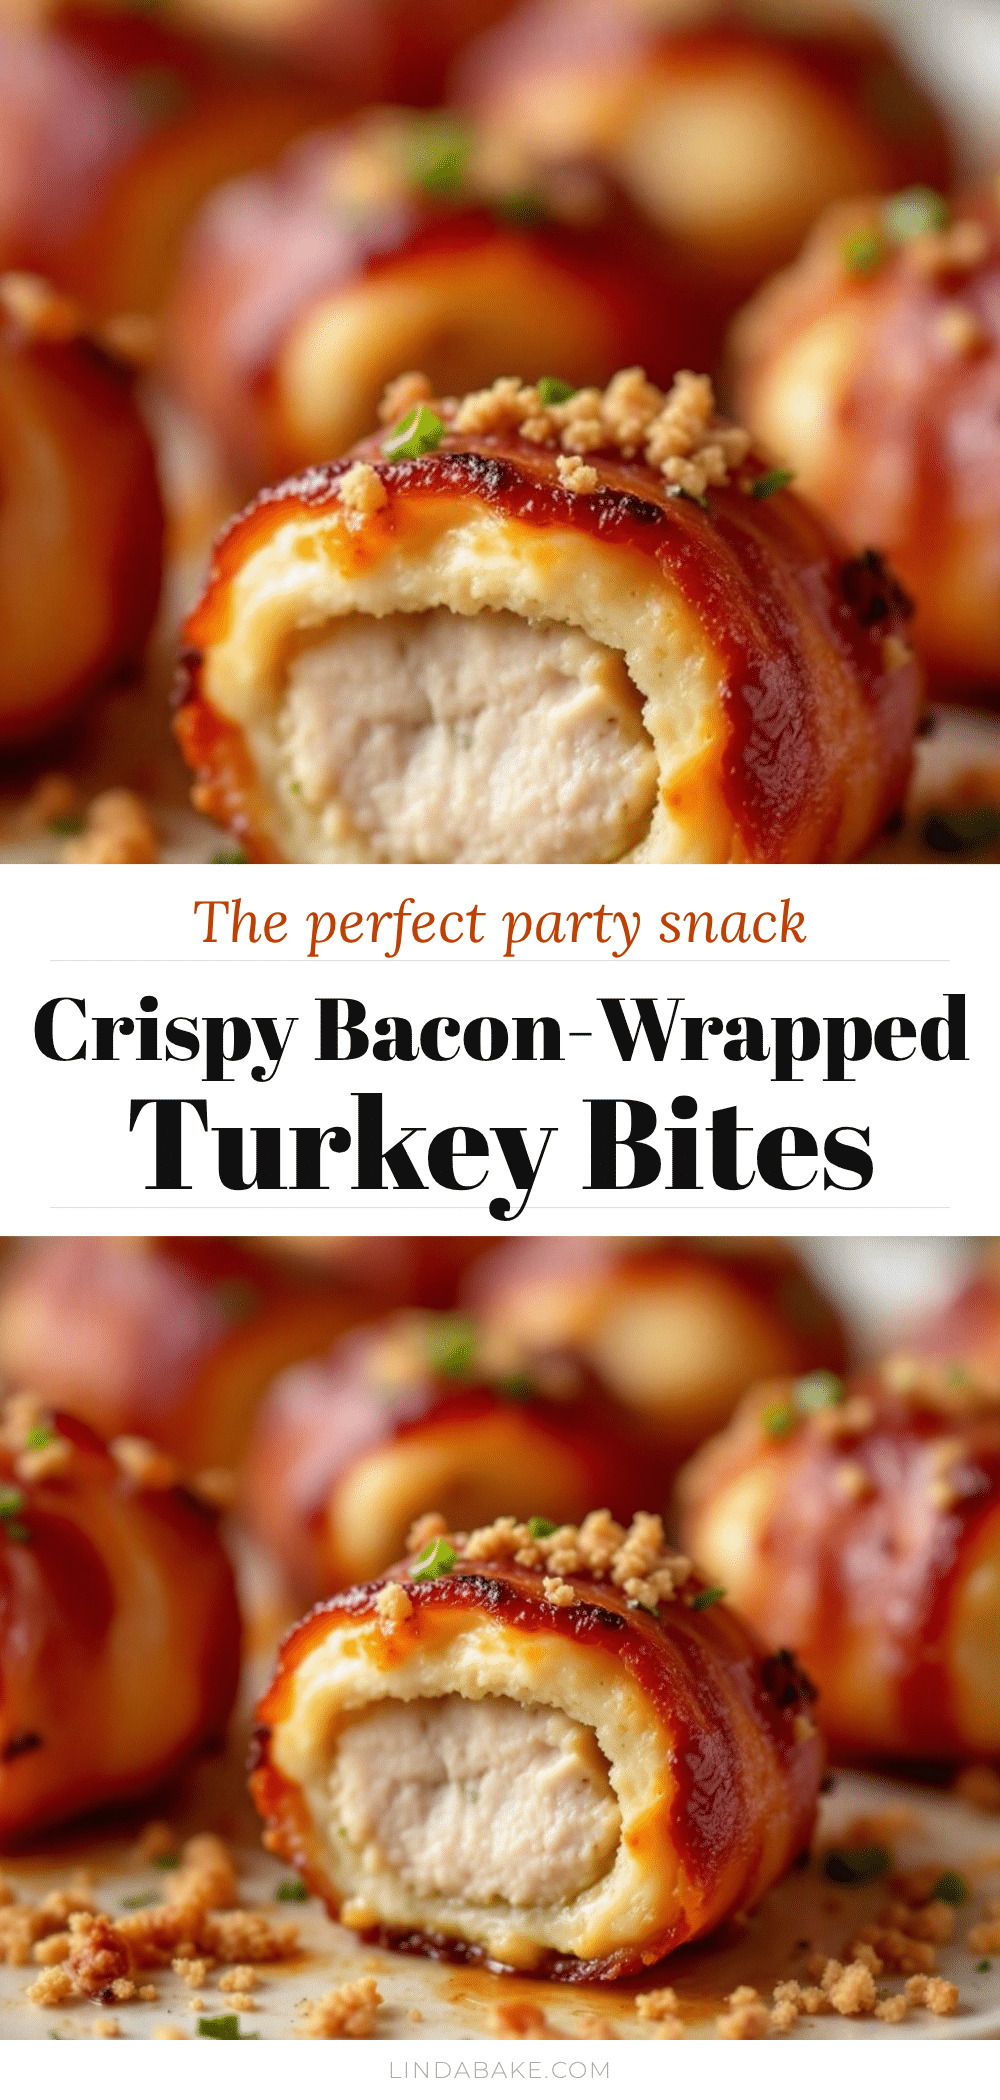
Crispy Bacon-Wrapped Turkey Bites: 20-Minute Friendsgiving Appetizer

These crispy bacon-wrapped turkey bites are a quick, savory, and shareable appetizer perfect for Friendsgiving or holiday parties. Thin turkey breast strips are wrapped in thick-cut bacon and baked until golden and crisp.
- Prep Time: 10 minutes
- Cook Time: 15-17 minutes
- Total Time: 25 minutes
- Yield: 20-24 bites
- Category: Appetizer
- Cuisine: American
Ingredients
- Boneless, skinless turkey breast tenderloins or thin-cut steaks (sliced into 1-inch wide by 3-inch long strips)
- Thick-cut bacon
- Brown sugar (for glazing)
- Freshly cracked black pepper
- Garlic powder
- Cooking spray
Instructions
- Preheat oven to 400°F (200°C). Line a rimmed baking sheet with parchment paper or foil.
- Pat turkey strips dry with paper towels to ensure crispiness. Season lightly with black pepper and garlic powder (do not add salt).
- Wrap a strip of bacon tightly around each turkey strip, overlapping slightly. Secure with a toothpick if necessary.
- Arrange bites on the baking sheet, leaving space between them for air circulation.
- Bake for 10 minutes to start rendering the bacon fat.
- Remove from oven, flip each bite, and brush lightly with brown sugar or glaze.
- Return to oven and bake for another 5-7 minutes until bacon is deep golden brown and crispy.
- Ensure turkey reaches an internal temperature of 165°F (74°C).
- Let rest on a wire rack for 2 minutes before serving.
Notes
Use thick-cut bacon to prevent burning. Ensure turkey strips are thin (1/4 inch) so they cook at the same rate as the bacon. Do not crowd the pan. For best results, serve warm within 15 minutes of cooking. Can be refrigerated for up to 3 days or frozen before cooking.
Nutrition
- Serving Size: 2-3 bites per person
- Calories: 60
- Sugar: 1
- Sodium: 180
- Fat: 4
- Saturated Fat: 1.5
- Carbohydrates: 1
- Protein: 5
Keywords: bacon wrapped turkey, friendsgiving appetizer, easy appetizer, bacon bites, turkey appetizer, holiday party food, gluten-free appetizer


