I want a bite of something sweet, but I also need to hide a little bit of savory fun in the dessert table. It is that specific Thanksgiving afternoon slump where the turkey dinner has settled, the kids are bouncing off the walls, and I am desperately trying to look like I planned this month ago. Honestly, I have the chocolate, but I am missing the turkey feathers. That is the moment you realize you need a dessert that is cute enough to stop the scrolling, but easy enough to make with leftover cake scraps. You know that feeling when you just want to roll up your sleeves and make something that looks impressive without the actual impressing part? That is exactly where I am right now.
I used to think cake pops were too much work. I spent years avoiding them because I thought they required a degree in engineering and a tempering station for chocolate. But then I tried making these cute mini turkey cake pops for Thanksgiving, and everything changed. It wasn’t about perfection; it was about having fun with the kids while the oven cooled down. I remember the first time I made them, I ended up with a turkey that looked more like a confused potato, but my niece ate it anyway. That is the beauty of this recipe. It is forgiving, it is festive, and it is the perfect way to use up that last bit of vanilla cake from the main meal.
There is something deeply satisfying about turning simple ingredients into a little character. You are not just feeding people; you are giving them a moment of joy. These little guys sit on the dessert platter and immediately draw attention. They are small, so you can have a pile of them without committing to a giant tower. I find myself smiling every time I see them lined up. It is a quiet realization that the best holiday memories are often the messy ones. I stick with this recipe because it brings a sense of playful calm to the chaotic holiday season. You know you will love the result, even if your turkey looks a little lopsided.
Why You’ll Love This Recipe
Let’s be honest for a second. Most dessert recipes online promise the world but deliver a headache. I have tested this cute mini turkey cake pops for Thanksgiving recipe dozens of times. I have made them with box mixes, from scratch, with gluten-free flour, and even with leftover pie crust crumbs (don’t judge me, it worked). The version I am sharing with you today is the one that actually makes sense for a busy holiday schedule. It is not just another fancy dessert that requires you to own a candy thermometer and three hours of free time. This is the kind of recipe that respects your intelligence and your clock.
- Quick & Easy: You can have these assembled in under an hour if you have leftover cake. If you are baking from scratch, add that time in, but the assembly part is genuinely fast. Perfect for busy weeknights or last-minute Thanksgiving prep when you are running around like a headless chicken.
- Simple Ingredients: No fancy grocery trips needed. You likely already have cake, frosting, chocolate chips, and sprinkles in your kitchen. It is pantry-friendly, which is a huge win when the store is out of everything.
- Perfect for Thanksgiving: Great for the kids’ table, holiday mornings, or just as a fun break from the heavy turkey and stuffing. It adds a playful touch to the traditional spread.
- Crowd-Pleaser: Always gets rave reviews from kids and adults alike. The kids love the turkey shape, and the adults love that it is not overly sweet.
- Unbelievably Delicious: The texture and flavor combo is next-level comfort food. The contrast between the soft cake and the crisp chocolate shell is just right.
What makes this recipe different from the rest is the scale. Big cake pops can be heavy and rich. These mini versions are bite-sized, which means you can eat two or three without feeling guilty. It is a creative twist on the classic cake pop that feels fresh and modern. Whether you are using a store-bought mix or baking a homemade vanilla cake, the technique remains the same. This isn’t just another version—it’s your best version because it is designed for real life.
This recipe isn’t just good—it is the kind that makes you close your eyes after the first bite and feel that warm holiday glow. It is comfort food reimagined—healthier, faster, but with the same soul-soothing satisfaction. Perfect for impressing guests without stress, or turning a simple meal into something memorable. I have served these at potlucks and watch them disappear in minutes. It is a small detail that makes a big impact.
What Ingredients You Will Need
This recipe uses simple, wholesome ingredients to deliver bold flavor and satisfying texture without the fuss. The magic here is in the ratio of cake to frosting. You need enough frosting to bind the crumbs together, but not so much that the pops become greasy or fall apart. I have learned this the hard way, so you do not have to. Most of these items are likely already in your pantry, which makes this a stress-free addition to your holiday prep. If you are making the cake from scratch, you will need basic baking staples. If you are using leftovers, you are already halfway there.
For the Cake Base:
- Vanilla Cake: About 2 to 3 cups of crumbled cake. (I recommend using a high-quality box mix like Betty Crocker for consistency, or a homemade vanilla cake if you prefer from scratch. The flavor should be neutral to let the chocolate shine.)
- Vanilla Frosting: About ½ cup of creamy vanilla frosting. (Cream cheese frosting works too, but it can make the mixture softer, so add it slowly. I prefer standard buttercream for easier handling.)
For the Turkey Coat:
- White Chocolate Chips: 1 cup. (I recommend Ghirardelli for the smoothest melt. They have a great cocoa butter content that makes the shell crisp up nicely.)
- Milk Chocolate Chips: ½ cup. (Used for the turkey body. Nestle Toll House or Ghirardelli both work well. Milk chocolate has a sweeter profile that kids usually prefer.)
- Dark Chocolate Chips: ¼ cup. (Used for the wattle and details. Dark chocolate provides a nice contrast in flavor and makes the red wattle pop visually.)
For the Feathers & Details:
- Orange Candy Melts: 2 tablespoons. (Essential for the beak and feet. If you cannot find these, you can mix orange food coloring into white chocolate, but candy melts are easier.)
- Orange Sprinkles: 1 tablespoon. (These are crucial for the tail feathers. Look for small orange jimmies or confetti sprinkles. They hold up better than large sprinkles.)
- Black Sprinkles: 1 teaspoon. (For the eyes. Nonpareils work best because they are small and round.)
- Edible Glue: A small bowl of melted white chocolate. (To stick the feathers on. You can also use a bit of frosting, but chocolate sets faster.)
Substitution guidance is easy here. If you want to make these gluten-free, simply use a gluten-free cake mix and ensure your sprinkles are certified gluten-free. For a dairy-free option, use dairy-free chocolate chips and frosting. I have tried almond milk frosting, and it works fine, though it takes a bit longer to set. The key is to keep the moisture levels similar to the original recipe. Seasonal variations are fun too; you could use brown sprinkles for an autumn theme, but orange is classic for Thanksgiving.
How Do I Make the Cake Crumbs?
Using a food processor is the fastest way to get fine, even crumbs. Pulse the cake until it looks like wet sand. If you do not have one, use your hands or a fork. Just make sure there are no large chunks left, or your cake pops will be lumpy.
Can I Use Store-Bought Cake?
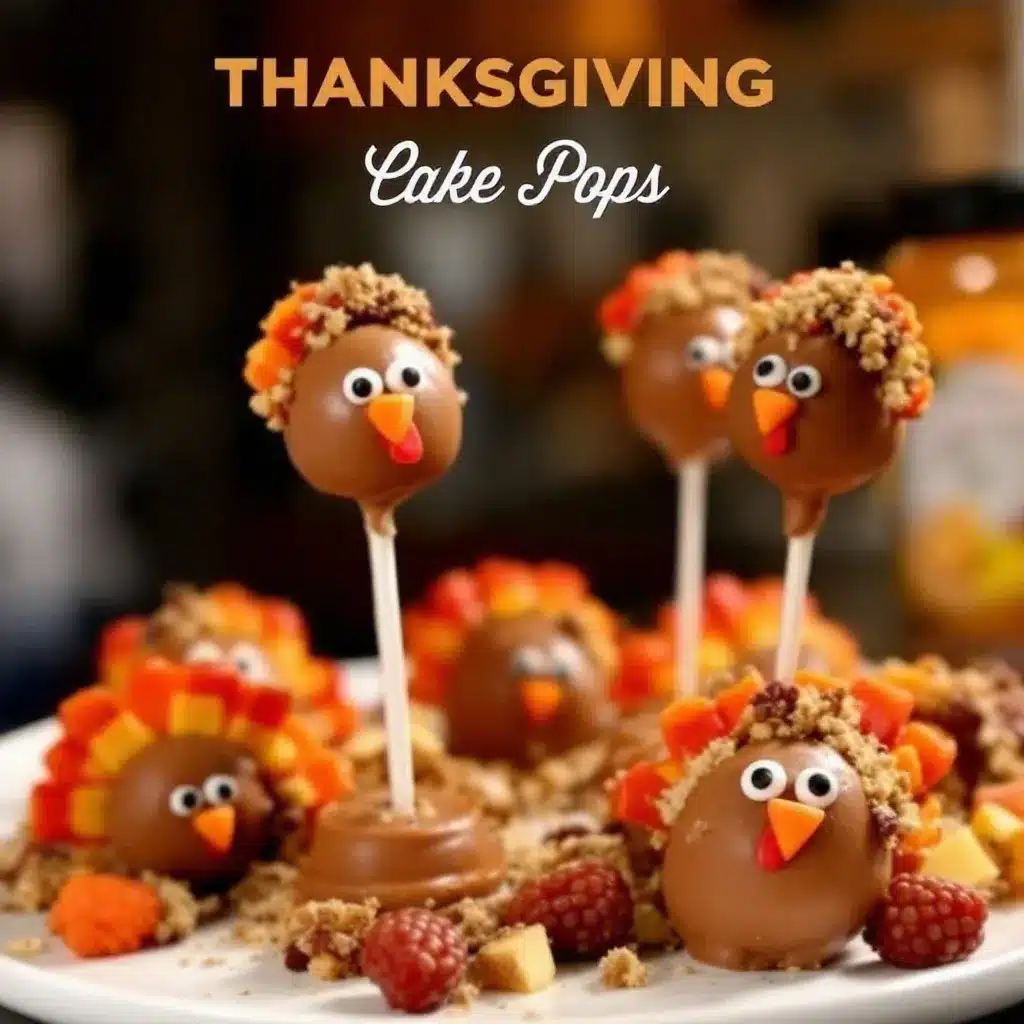
Absolutely. A store-bought round cake is perfect for this. Let it cool completely before crumbling. Warm cake will melt the frosting and make the mixture too sticky to handle.
Equipment Needed
You do not need a professional kitchen to make these cute mini turkey cake pops for Thanksgiving. The equipment list is short and likely already in your home. Having the right tools makes the process smoother, but you can definitely improvise if you are missing something. I have made these with basic kitchenware, and they turned out fine. However, some tools save a lot of time and frustration.
- Large Mixing Bowl: A wide bowl is best for mixing the cake crumbs and frosting. You need enough space to fold the ingredients together without making a mess. A glass or stainless steel bowl is ideal.
- Silicone Spatula: Essential for folding the frosting into the cake. Silicone is flexible and scrapes the bowl clean, ensuring you get all the ingredients. Rubber spatulas work too, but silicone is more durable.
- Baking Sheet: Line with parchment paper or a silicone baking mat. This is where you will roll the cake balls and let them set. Parchment paper is cheaper, but a silicone mat is reusable and easier to clean.
- Microwave-Safe Bowl: For melting the chocolate. A glass measuring cup with a spout is very helpful here. It allows you to pour the chocolate smoothly over the cake pops without dripping everywhere. I prefer glass because it does not retain heat as much as ceramic.
- Cake Pop Molds or Mini Muffin Tin: To hold the cake pops while you dip them. A mini muffin tin is more versatile and can be used for other things later. Cake pop stands are nice, but a muffin tin is cheaper and fits in the fridge easily.
- Piping Bags or Ziploc Bags: For applying the beak and eyes. Snipping off the corner of a Ziploc bag works just as well as a professional piping bag. It is a budget-friendly option that gives you control.
If you do not have a microwave, you can use a double boiler on the stove. Place a heatproof bowl over a pot of simmering water. Stir constantly to prevent burning. This method gives you more control over the temperature, which is helpful if you are new to melting chocolate. Maintenance tip: Clean your tools immediately after use. Chocolate hardens quickly and is a nightmare to scrub off later.
Preparation Method
Making these cute mini turkey cake pops for Thanksgiving is a step-by-step process. Do not rush it. The key to success is patience. If you try to move too fast, the cake balls will crack, or the chocolate will seize. Take your time, and you will be rewarded with beautiful, delicious treats. Here is how to do it right.
- Prepare the Cake Crumbs (10 minutes): Start with your cooled cake. Crumble it into a large mixing bowl. You want fine, sand-like crumbs. If there are large chunks, your cake pops will be uneven. Use your fingers or a fork to break it down. This step is crucial for the texture of the final product.
- Mix the Dough (5 minutes): Add the vanilla frosting to the crumbs. Start with ½ cup. Mix with a silicone spatula until fully combined. The mixture should hold together when you squeeze it in your hand. If it is too dry, add more frosting, one teaspoon at a time. If it is too wet, add more cake crumbs. You want a consistency like playdough. Do not overmix, or the cake will become dense.
- Roll the Balls (15 minutes): Line a baking sheet with parchment paper. Scoop small amounts of the cake mixture (about 1 tablespoon) and roll them into balls. For mini cake pops, keep them small. They should be about 1 inch in diameter. Place them on the baking sheet. Once all balls are rolled, place the sheet in the freezer for 20 minutes. This step firms them up, making them easier to dip without falling apart. Cold cake pops are your best friend here.
- Melt the Chocolate (5 minutes): While the cake balls chill, melt your chocolate chips. Place white, milk, and dark chocolate in separate microwave-safe bowls. Microwave in 30-second intervals, stirring in between. Stop when there are still a few unmelted chips and stir until smooth. Do not overheat, or the chocolate will burn. Add a teaspoon of coconut oil or shortening to thin the chocolate if it is too thick. This helps it coat smoothly.
- Dip the Turkey Body (10 minutes): Remove the cake balls from the freezer. Insert a lollipop stick into the top of each ball. Dip the ball into the milk chocolate, coating it completely. Tap off the excess chocolate gently against the side of the bowl. Place the dipped ball back into the mini muffin tin or on the parchment paper. This is the turkey’s body. Work quickly so the chocolate does not set too fast.
- Add the Feathers (5 minutes): While the milk chocolate is still wet, sprinkle the orange sprinkles over the bottom half of the cake pop. These are the tail feathers. Press them on gently so they stick. You can also use orange candy melts piped on for a more defined feather look, but sprinkles are easier and faster. Make sure to cover the bottom area well.
- Add the Beak and Eyes (10 minutes): Melt the orange candy melts or orange-tinted white chocolate. Use a piping bag or Ziploc bag to pipe a small triangle for the beak on the front of the turkey. Let it set for a minute. Then, use the melted dark chocolate to pipe two small dots for the eyes. Place black sprinkles over the wet dark chocolate if you want them to stick better. The wattle (the red part under the beak) can be made with a tiny dot of dark chocolate or orange candy melt.
- Set and Serve (15 minutes): Place the decorated cake pops in the refrigerator for 10 minutes to set the chocolate completely. Once set, they are ready to eat. You can store them in an airtight container at room temperature for up to one week.
Troubleshooting tip: If the chocolate cracks when you dip the cake pop, it means the cake ball was too cold or the chocolate was too thick. Let the cake ball sit out for a minute before dipping, and thin the chocolate with more oil. If the feathers fall off, make sure you apply them while the chocolate is still wet.
Why Do My Cake Pops Stick to the Stick?
This happens if you do not dip the stick in chocolate first. Always dip the tip of the stick into the melted chocolate before inserting it into the cake ball. This acts as glue and prevents the cake from sliding off.
Can I Make These Ahead of Time?
Yes, you can make the cake balls up to a week in advance. Store them in the freezer. When you are ready to decorate, take them out and let them thaw slightly before dipping. This saves a lot of time on the day of the party.
Cooking Tips & Techniques
There is a bit of science to cake pops, but you do not need a degree to understand it. The main challenge is getting the right balance of moisture. Too much frosting, and the cake becomes soggy. Too little, and it crumbles. I have learned this through trial and error, so you can skip the mistakes. Here are some professional techniques that will help you succeed.
Temperature Control is Key: The cake balls must be cold before dipping. This is non-negotiable. If they are room temperature, they will fall apart in the chocolate. The freezer is your best friend. But be careful not to leave them in too long, or the chocolate will crack due to the temperature shock. Let them sit out for 5 minutes after freezing.
Thinning the Chocolate: Chocolate naturally thickens as it cools. To get a smooth, glossy coat, you need to thin it. Add a teaspoon of vegetable oil, coconut oil, or shortening for every cup of chocolate chips. This does not affect the taste but improves the texture. It makes the chocolate flow better and coat the cake evenly. I always add this step, and it makes a huge difference.
Avoiding Condensation: When you take cold cake pops out of the fridge, condensation can form on the chocolate, causing spots or streaks. To avoid this, let the cake pops come to room temperature before serving. If you are decorating them in a humid kitchen, work in a cool, dry area. I once made these in a steamy kitchen, and the chocolate looked terrible. Now I always check the humidity.
Common Mistakes: The most common mistake is using warm cake. Always let the cake cool completely before crumbling. Warm cake melts the frosting, creating a greasy mixture. Another mistake is dipping too fast. Dip slowly and evenly to avoid air bubbles. If you see bubbles, tap the cake pop gently on the side of the bowl to release them.
Timing and Multitasking: Make the cake balls while the cake cools. This saves time. While the balls are chilling, melt the chocolate. This parallel processing keeps you efficient. Do not melt all the chocolate at once if you are doing a large batch. Melt in small batches to ensure it stays at the right temperature.
Consistency: Use a cookie scoop for the cake balls. This ensures they are all the same size, which makes the decoration process more uniform. It looks more professional and is easier to manage. I use a #40 scoop for these mini pops. It is a small investment that pays off in presentation.
Variations & Adaptations
While the classic turkey is adorable, you can adapt this recipe to fit different dietary needs or themes. The base technique remains the same, so you can experiment freely. Here are a few variations I have tried.
Dietary Adaptations: For a gluten-free option, use a gluten-free cake mix and ensure your sprinkles are certified gluten-free. For a dairy-free version, use dairy-free chocolate chips and frosting. I have used coconut milk frosting, and it works well, though it takes longer to set. You can also use vegan cake crumbs. The texture might be slightly different, but the flavor is still great.
Seasonal Variations: For Halloween, use orange and black sprinkles for feathers. For Christmas, use red and green sprinkles. For Easter, use pastel colors. The base cake and chocolate can remain the same. You can also change the shape of the cake balls. For Easter, make them egg-shaped. For Christmas, make them star-shaped. The possibilities are endless.
Flavor Variations: Instead of vanilla cake, try chocolate cake with white chocolate coating. This creates a “chocolate turkey” look. Or use pumpkin spice cake for a fall theme. The flavor combination is delicious. You can also add a hint of cinnamon or nutmeg to the frosting for a seasonal twist. I once made pumpkin cake pops, and they were a huge hit.
Allergen Substitutions: For nut-free kitchens, ensure all chocolate and sprinkles are certified nut-free. Many brands produce nut-free products now. You can also use sunflower seed butter instead of peanut butter in the frosting if needed. Just be aware that it may change the flavor slightly.
My Personal Variation: I sometimes add a layer of caramel inside the cake ball before dipping. It adds a gooey surprise that contrasts with the crisp chocolate. To do this, roll the cake ball in caramel sauce, then freeze it, then dip. It is a bit messier, but worth it for special occasions.
Serving & Storage Suggestions
These cute mini turkey cake pops for Thanksgiving are best served at room temperature. Cold chocolate can taste waxy, and room temperature allows the flavors to shine. Arrange them on a platter with a Thanksgiving theme. You can place them in a mason jar for a rustic look. Or use a cake pop stand for a more formal presentation.
Complementary Dishes: Serve with hot coffee or tea. The bitterness of the coffee balances the sweetness of the cake pops. Apple cider is also a great pairing. For a savory contrast, serve with cheese crackers or nuts. I often pair them with easy apple nachos with peanut butter drizzle for a sweet and savory spread.
Storage Instructions: Store in an airtight container at room temperature for up to one week. Do not refrigerate, as condensation can ruin the chocolate. If you need to store them longer, freeze the cake pops (without decoration) for up to three months. Thaw in the refrigerator before decorating.
Reheating: You do not need to reheat them. If the chocolate gets soft in a warm room, place them in the fridge for 10 minutes to firm up. Do not microwave, as this will melt the chocolate.
Flavor Development: The flavors meld together over time. The cake absorbs moisture from the frosting, making it softer and more flavorful. They taste even better on the second day. I always make them the day before the party for this reason.
How Do I Transport Them?
Use a cake box or a sturdy container. Place parchment paper between layers to prevent sticking. Keep them cool during transport. If it is a hot day, use a cooler with ice packs (but not directly touching the container).
Can I Freeze the Decorated Pops?
Yes, but it is tricky. Freeze them on a baking sheet first, then transfer to an airtight container. Thaw in the refrigerator to prevent condensation. The sprinkles may lose their crunch, but the flavor will still be good.
Nutritional Information & Benefits
These cute mini turkey cake pops for Thanksgiving are a treat, so enjoy them in moderation. Each pop contains approximately 150 calories, depending on the size and ingredients used. They are made with simple ingredients, so you know what you are eating. There are no artificial preservatives if you make them from scratch.
Health Benefits: The cake provides carbohydrates for energy. The chocolate contains antioxidants, especially if you use dark chocolate. The sprinkles add a bit of fun, though they are mostly sugar. Overall, this is a balanced treat for a special occasion.
Dietary Considerations: As mentioned, you can adapt this recipe for gluten-free and dairy-free diets. This makes it inclusive for guests with allergies. Always check labels to ensure safety. I prefer to make them from scratch so I can control the ingredients.
Allergens: This recipe contains gluten, dairy, and eggs. If you have allergies, use substitutes as noted in the variations section. Always inform your guests of the ingredients.
Personal Wellness Perspective: I believe in enjoying treats without guilt. Thanksgiving is about gratitude and connection. These cake pops are a way to celebrate that with a bit of sweetness. They are not just food; they are a memory maker. I focus on making them with love, and that makes all the difference.
Conclusion
Making these cute mini turkey cake pops for Thanksgiving is a wonderful way to add a personal touch to your holiday table. They are easy to make, delicious to eat, and adorable to look at. I hope you enjoy making them as much as I do. Feel free to customize them with your own flair. Add different sprinkles, change the flavors, or make them for other holidays. The possibilities are endless.
I love this recipe because it brings joy to the table. It is a simple act of creation that connects us to the season. Whether you are a seasoned baker or a beginner, this recipe is accessible and fun. I encourage you to try it and share your results. Did your turkey look like a potato? That is okay. It still tasted great. I want to hear about your creations.
Leave a comment below and let me know how they turned out. Share photos on social media and tag me. I love seeing your variations. Thank you for reading, and happy baking. May your Thanksgiving be filled with love, laughter, and delicious treats. If you need more easy holiday recipes, check out my best copycat pumpkin cream cheese muffins for a savory-sweet breakfast option.
FAQs
How do I keep the feathers from falling off?
Apply the sprinkles while the chocolate is still wet. Press them on gently to ensure they stick. If the chocolate sets before you apply them, the sprinkles will not adhere properly.
Can I use chocolate cake instead of vanilla?
Yes, you can. Chocolate cake with white chocolate coating creates a different look. The flavor combination is rich and delicious. Just ensure the cake is fully cooled before crumbling.
How long do these cake pops last?
They last up to one week at room temperature in an airtight container. For longer storage, freeze the undecorated cake balls for up to three months.
What if I don’t have orange candy melts?
You can tint white chocolate with orange food coloring. Or use orange frosting for the beak. It may not look as crisp, but it will still taste good.
Can I make these mini turkey cake pops for Thanksgiving ahead of time?
Yes, make the cake balls a week in advance and freeze them. Decorate the day before the party. This saves time and reduces stress on Thanksgiving day.
Pin This Recipe!
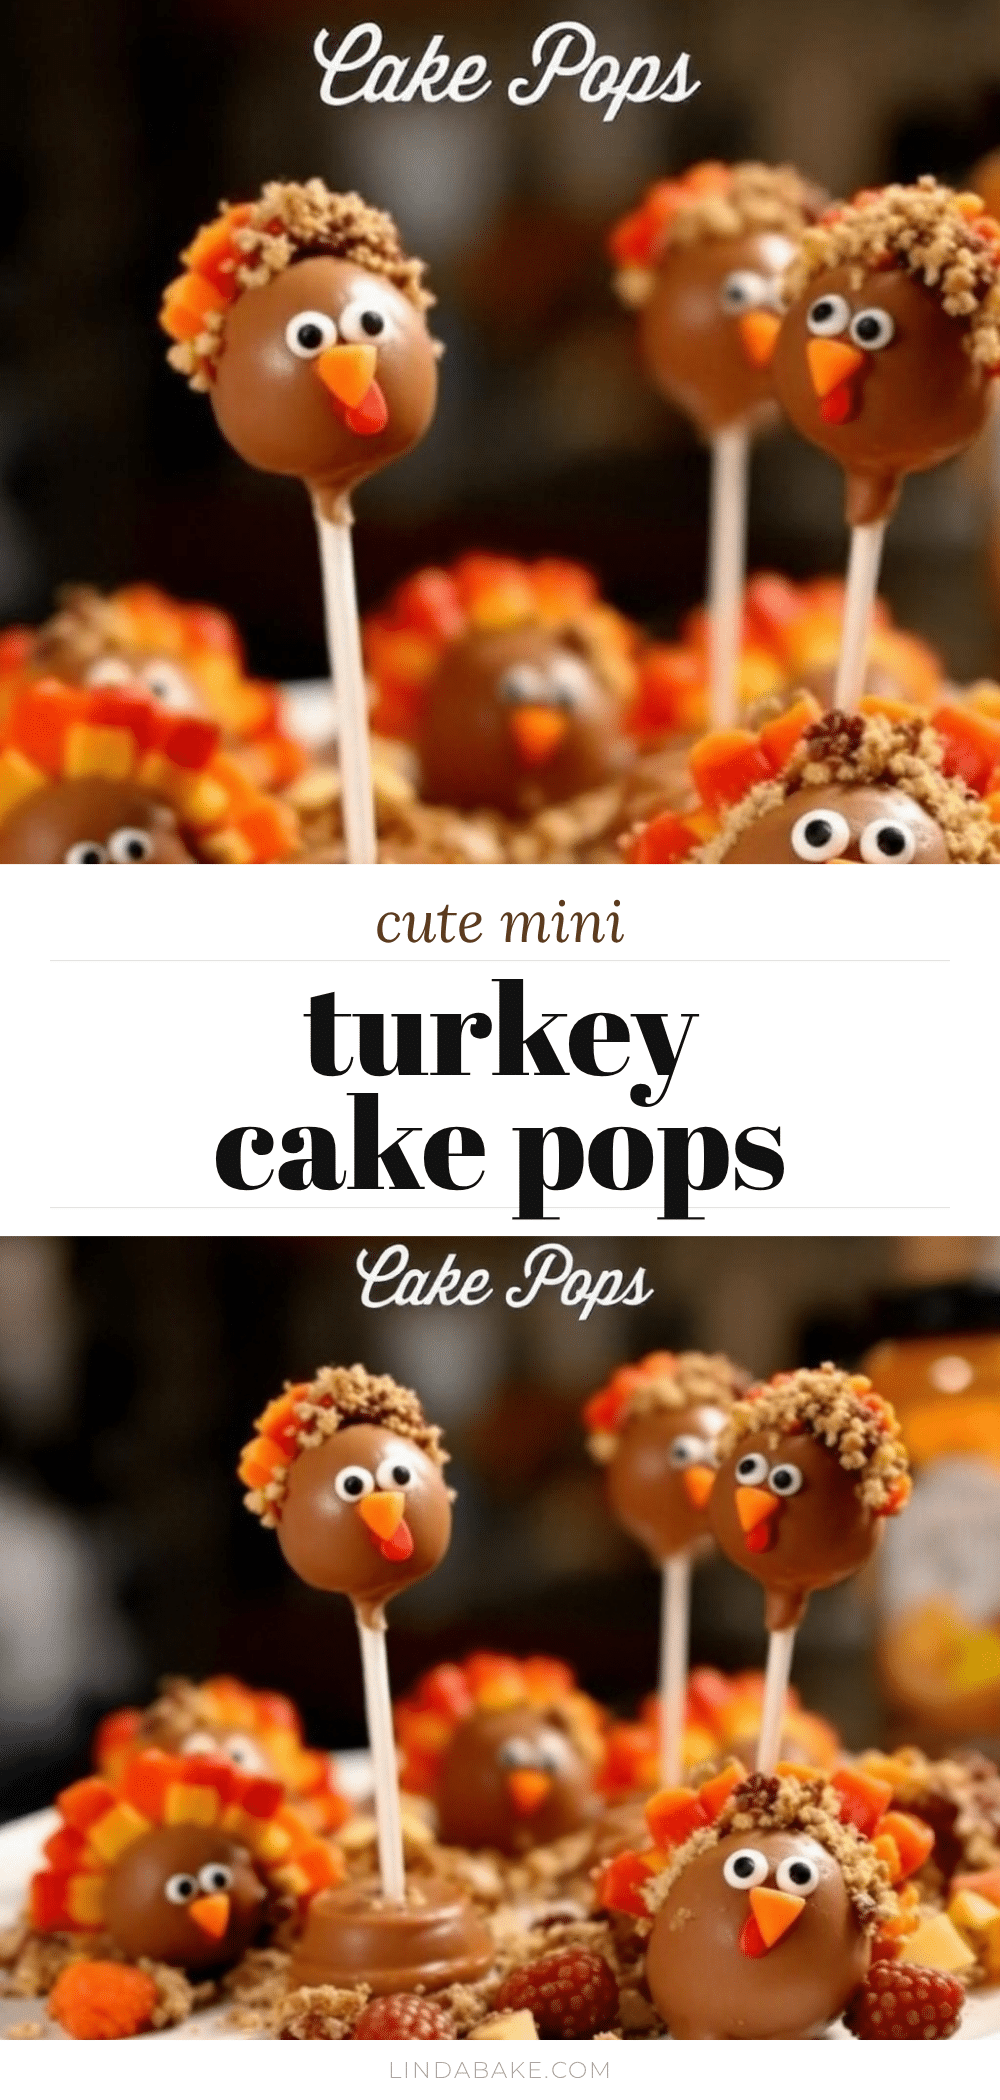
Cute Mini Turkey Cake Pops: Easy Thanksgiving Treat
These adorable mini turkey cake pops are a festive and easy Thanksgiving dessert perfect for using up leftover cake. They are bite-sized, forgiving to make, and feature a chocolate shell with orange sprinkles for feathers.
- Prep Time: 45 minutes
- Cook Time: 0 minutes
- Total Time: 45 minutes
- Yield: Approximately 20-24 mini cake pops 1x
- Category: Dessert
- Cuisine: American
Ingredients
- 2 to 3 cups crumbled vanilla cake
- ½ cup creamy vanilla frosting
- 1 cup white chocolate chips
- ½ cup milk chocolate chips
- ¼ cup dark chocolate chips
- 2 tablespoons orange candy melts
- 1 tablespoon orange sprinkles
- 1 teaspoon black sprinkles
- 1 teaspoon coconut oil or shortening (optional, for thinning chocolate)
Instructions
- Crumble the cooled vanilla cake into fine, sand-like crumbs in a large mixing bowl.
- Add the vanilla frosting to the crumbs and mix with a silicone spatula until the mixture holds together like playdough.
- Roll the mixture into 1-inch balls and place them on a parchment-lined baking sheet.
- Freeze the cake balls for 20 minutes to firm them up.
- Melt the white, milk, and dark chocolate chips separately in microwave-safe bowls in 30-second intervals, stirring until smooth. Thin with coconut oil if necessary.
- Insert lollipop sticks into the chilled cake balls (dip stick tips in chocolate first for adhesion).
- Dip each cake ball into the milk chocolate to create the turkey body, tapping off excess.
- While the milk chocolate is still wet, sprinkle orange sprinkles over the bottom half of the pop for tail feathers.
- Pipe a small orange triangle for the beak and dark chocolate dots for eyes onto the front of the turkey.
- Refrigerate for 10 minutes to set the chocolate completely before serving.
Notes
Ensure cake is completely cooled before crumbling to prevent the frosting from melting. If chocolate cracks, the cake ball was too cold or chocolate too thick; let cake balls sit out for 5 minutes after freezing. Store in an airtight container at room temperature for up to one week.
Nutrition
- Serving Size: 1 mini cake pop
- Calories: 150
- Sugar: 14
- Sodium: 50
- Fat: 8
- Saturated Fat: 5
- Carbohydrates: 18
- Fiber: 1
- Protein: 2
Keywords: Thanksgiving, cake pops, turkey dessert, mini cake pops, holiday treats, easy dessert, leftover cake recipes


