I did not trust the idea of wrapping pancake batter in dough for these spooky cute mummy pancakes. It sounded like a culinary disaster waiting to happen. Honestly, I thought the combination of sweet syrup and savory crepe would clash horribly. My kids had been begging for Halloween breakfast treats for weeks. I wanted something festive without spending hours in the kitchen. I figured a simple stack of pumpkin pancakes would have to suffice. But then I saw a photo online of a pancake wrapped in a thin pastry strip. It looked like a little ghost or a mummy. I rolled my eyes at the complexity. Who has time for that?
Yet, something about the simplicity of the ingredients made me pause. I had crepe batter ingredients sitting in the fridge. I also had leftover pancake mix. I decided to give it one try. I mixed the batter and poured it thin. Then I cut strips of dough. The process felt fiddly. I worried the dough would burn before the pancake cooked through. I watched the skillet closely. The strips turned golden brown quickly. I lifted one with a spatula. It looked surprisingly professional.
I took that first bite. The contrast was unexpected. The soft, fluffy pancake inside contrasted with the slightly chewy, buttery dough outside. It wasn’t a clash at all. It was balanced. The sweetness of the syrup soaked into the dough, creating a caramelized edge. My kids stopped talking long enough to eat. That was the moment I knew. This wasn’t a mistake. It was a winner. Now, every October, this is the first thing we make. It sticks because it turned my skepticism into a new family tradition.
Why You’ll Love This Recipe
This recipe brings together the comfort of classic breakfast with the fun of a holiday craft. It is not just food; it is an activity. You get to cook and decorate at the same time. The result is a dish that looks like it came from a high-end bakery but is actually quite simple. Here is why this version stands out from other Halloween breakfast ideas:
- Quick & Easy: While it looks intricate, the process comes together in under 45 minutes. You likely already have the ingredients on hand.
- Simple Ingredients: No fancy grocery trips needed. You need basic pantry staples like flour, eggs, milk, and perhaps some leftover crepe mix or pancake batter.
- Perfect for Kids: This is great for busy weeknights or last-minute Halloween parties. The kids love helping to wrap the “mummies.”
- Crowd-Pleaser: It always gets rave reviews from both kids and adults. Even picky eaters enjoy the familiar taste of pancakes with a fun twist.
- Unbelievably Delicious: The texture combo is next-level comfort food. The crispy dough and soft interior create a satisfying mouthfeel.
What makes this recipe different is the technique. Many people try to stuff pancakes, which often leads to leaking batter. Here, we wrap the cooked or semi-cooked pancake in a thin strip of dough. This keeps the structure intact. It is a creative twist on the classic crepe. I tested this method multiple times to ensure the dough cooks evenly without burning. This is your best version of a mummy pancake. It is the kind that makes you close your eyes after the first bite. It is comfort food reimagined for the spookiest night of the year. It is perfect for impressing guests without stress, or turning a simple meal into something memorable.
What Ingredients You Will Need
This recipe uses simple, wholesome ingredients to deliver bold flavor and satisfying texture without the fuss. You do not need specialty items. Most of these are likely already in your kitchen. The key is using the right ratios for the dough and the filling.
For the Pancake Filling
- Pancake Batter: About 1 cup of standard pancake batter. You can use a boxed mix or homemade. Homemade yields a better texture, but boxed works in a pinch.
- Milk: Whole milk adds richness. Dairy-free milk works if needed.
- Egg: One large egg binds the batter. Room temperature eggs mix easier.
- Vanilla Extract: A teaspoon of pure vanilla adds warmth and depth.
- Baking Powder: One teaspoon helps the pancakes rise. Do not skip this for fluffiness.
For the Mummy Dough Wraps
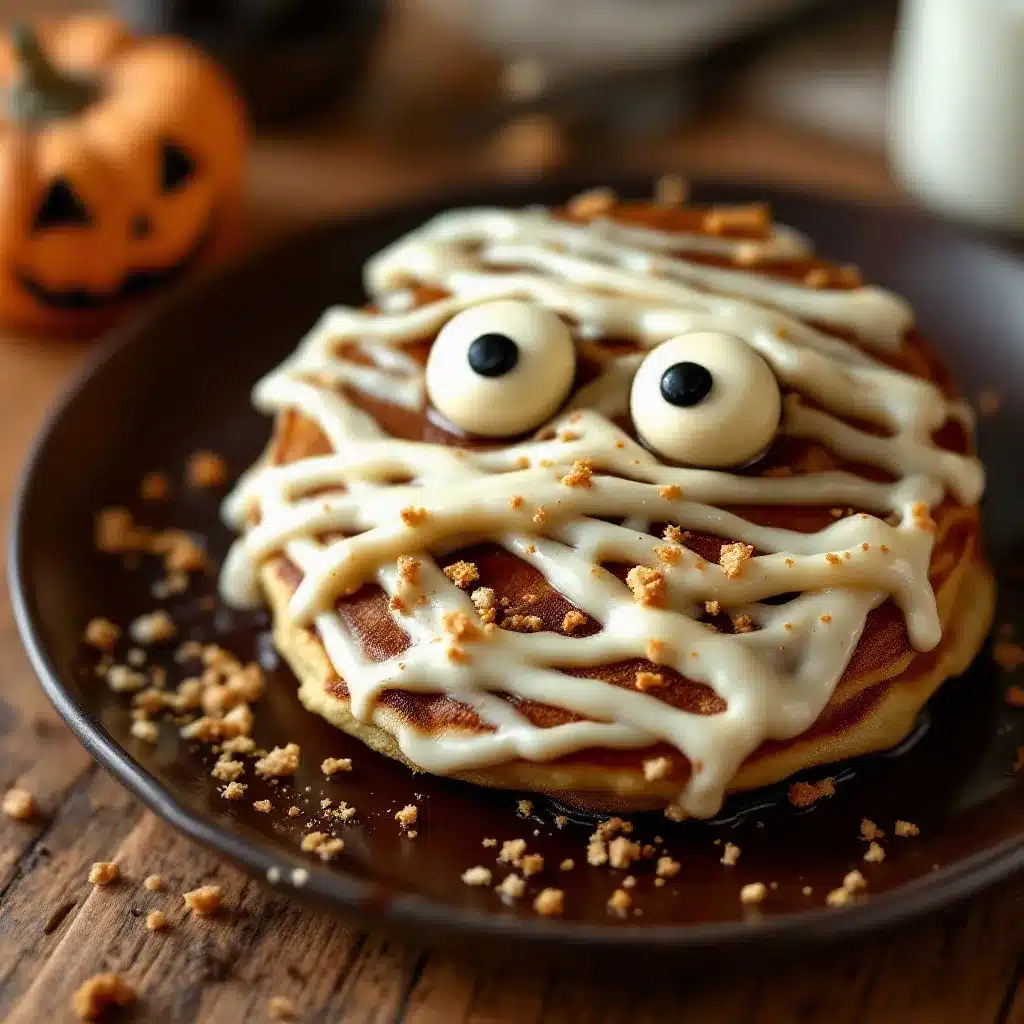
- Crepe Batter or Thin Pancake Batter: You need a very thin batter for the wraps. I recommend using a crepe recipe or thinning out leftover pancake batter with extra milk. The thinner, the better. It prevents a doughy taste.
- Butter: Unsalted butter, melted, for brushing the dough. This helps it brown nicely.
- Flour: All-purpose flour is standard. If you need gluten-free, use a 1:1 gluten-free flour blend.
For Assembly and Decoration
- Syrup: Maple syrup for drizzling. The syrup helps the dough strips stick if they are loose.
- Eyes: I use mini chocolate chips or small candies for the eyes. They are easy to find and safe for kids.
- Whipped Cream: Optional, for a fluffy “ghost” look on top.
I personally prefer using a high-quality butter for brushing. It gives a better flavor than oil. Look for firm, small-curd cottage cheese if you decide to add a ricotta filling variation, but the classic version is best kept simple. For the eyes, I find that mini chocolate chips hold their shape better than M&Ms, which can melt too much in the heat.
Equipment Needed
You do not need a lot of fancy gear to make these spooky cute mummy pancakes. A few basic tools will get you through the process smoothly.
- Non-stick Skillet: A 10-inch non-stick skillet is ideal. It prevents sticking and makes flipping easier. If you do not have one, a well-seasoned cast iron skillet works too.
- Spatula: A thin, flexible spatula is crucial for lifting the thin crepe strips without tearing them.
- Bowl and Whisk: For mixing the batter. A whisk ensures there are no lumps in the thin dough.
- Piping Bag or Ziploc Bag: Useful if you want to drizzle syrup neatly. A corner cut off a Ziploc bag works as a substitute.
- Pastry Brush: For brushing melted butter on the dough strips. Silicone brushes are easy to clean.
I have found that a smaller skillet gives you more control over the size of the mummies. If you use a large pan, the strips might be too wide and hard to wrap. Budget-friendly options include using a standard frying pan instead of a specialty crepe pan. Just keep the heat low to medium to avoid burning the delicate dough.
Preparation Method
Making these mummies requires a bit of patience, but the steps are straightforward. Follow these instructions carefully for the best results.
- Prepare the Batter (10 minutes): Whisk together your pancake ingredients in a bowl. For the filling, aim for a thick but pourable consistency. For the dough wraps, thin out your crepe or pancake batter with extra milk until it is very fluid. It should coat the back of a spoon thinly. Let both batters rest for 5 minutes. This relaxes the gluten and prevents shrinkage.
- Cook the Filling Pancakes (15 minutes): Heat your skillet over medium heat. Lightly grease with butter. Pour a small amount of the thick batter (about 1/4 cup) into the center of the pan. Cook until bubbles form on the surface and the edges look set. Flip carefully. Cook for another 30 seconds until golden. Remove and keep warm. You want these to be soft and pliable, not crispy.
- Cook the Dough Strips (15 minutes): Wipe the pan clean or use a second skillet. Pour a tiny amount of the thin batter. Swirl the pan to create a very thin crepe. Cook until the top is dry and the bottom is lightly golden. Remove immediately. The crepe will continue to cook slightly as you handle it. You need about 6-8 small crepes for the wraps.
- Cut the Strips (5 minutes): Place the cooked crepes on a cutting board. Using a knife or pizza cutter, slice each crepe into thin strips, about 1/2 inch wide. These will become the mummy wrappings. Be gentle so they do not tear.
- Assemble the Mummies (10 minutes): Take a warm filling pancake. Place it in the center of your workspace. Take a strip of the thin dough and wrap it around the pancake. Overlap the strips slightly to cover the pancake completely, leaving a small gap for the eyes. Brush the dough lightly with melted butter. This helps it brown and stick.
- Final Cook (5 minutes): Place the wrapped mummy back into the skillet over low-medium heat. Cook for 1-2 minutes on each side until the dough is golden brown and crisp. Be careful not to burn the butter. The heat inside should be hot and fluffy.
- Add the Eyes: Remove from heat. While the dough is still warm and slightly sticky, press two mini chocolate chips or candies onto the front for eyes. If the dough is cool, you can use a tiny dab of syrup to help them stick.
Troubleshooting Tip: If the dough tears while wrapping, do not panic. Just patch it with another small strip. It will still taste delicious. If the filling pancake is too dry, microwave it for 10 seconds to soften it before wrapping.
Cooking Tips & Techniques
To ensure your mummy pancakes turn out perfectly, keep these professional tips in mind. I have learned these through a few burnt batches and some successful ones.
- Heat Control is Key: Keep the heat on medium-low. The dough strips are thin and can burn quickly. If you see smoke, lower the heat immediately. You want a gentle golden brown, not black.
- Work Warm: Assemble the mummies while the pancakes are still warm. Cold pancakes become stiff and crack when wrapped. Warm pancakes bend easily.
- Don’t Overcrowd: Cook the mummies in batches. Giving them space allows the dough to crisp evenly. If you stack them, they will steam and become soggy.
- Multitasking Strategy: Have a plate ready for the cooked filling pancakes. Keep them covered with a towel to retain heat. This way, you can cook the strips and assemble in a continuous flow.
- Consistency Check: Your thin batter should be like heavy cream. If it is too thick, the strips will be doughy. If it is too thin, they will tear. Adjust with small amounts of milk or flour.
I once tried to wrap cold pancakes. They shattered like glass. Lesson learned. Always warm them up. Also, do not skip the butter brush. It adds flavor and helps the strips adhere. It is a small step that makes a big difference in texture.
Variations & Adaptations
You can customize these spooky cute mummy pancakes to suit different tastes or dietary needs. Here are a few ideas I have tried.
- Gluten-Free Option: Use gluten-free flour for both the filling and the dough. Ensure your baking powder is also gluten-free. The texture may be slightly more fragile, so handle with care.
- Vegan Version: Substitute the egg and milk with plant-based alternatives. Use a vegan butter for brushing. The dough strips hold up well with these swaps.
- Chocolate Mummies: Add cocoa powder to the thin dough batter. This creates a chocolate crepe wrap. It looks like a chocolate mummy and pairs well with peanut butter syrup.
- Fruit Filling: Instead of plain pancake batter, use a banana or pumpkin spice batter. The spices complement the Halloween theme perfectly.
- Savory Twist: Use a cheese and herb batter for the filling. Wrap it in a plain crepe. Serve with a side of tomato soup. This is a great option for adults who prefer savory breakfasts.
I often add a pinch of nutmeg to the pumpkin variation. It enhances the autumn flavor profile. For the savory version, I use cheddar cheese and chives. It is surprisingly popular with my husband. These variations allow you to keep the fun presentation while changing the flavor.
Serving & Storage Suggestions
These mummy pancakes are best served immediately after cooking. They are warm, crispy, and fluffy.
Serving Ideas
- Plating: Arrange them on a platter like a spooky campfire. Use a dark plate to make the white dough pop.
- Toppings: Drizzle with warm maple syrup. Add a dollop of whipped cream for a ghostly touch. Sprinkle with edible glitter for extra sparkle.
- Pairings: Serve with a side of crispy bacon or fruit salad. The sweetness of the pancakes balances well with salty or fresh sides.
Storage and Reheating
- Refrigerator: Store leftovers in an airtight container for up to 2 days. The dough may soften over time.
- Freezer: You can freeze the assembled mummies before cooking. Place them on a baking sheet in the freezer. Once solid, transfer to a bag. Cook from frozen, adding a minute to the cooking time.
- Reheating: Reheat in a toaster oven or skillet over low heat. This restores the crispiness of the dough. Microwaving will make them soggy.
The flavors meld nicely if you let them sit for a short time. The syrup soaks into the dough, creating a caramelized crust. This is actually better if you are meal prepping for a party.
Nutritional Information & Benefits
These pancakes are a fun treat, but they do have nutritional value.
- Calories: Each mummy pancake is approximately 250-300 calories, depending on the size and syrup used.
- Protein: The egg and flour provide a good source of protein for breakfast energy.
- Carbohydrates: The primary source of energy. Use whole grain flour for added fiber.
- Fat: Moderate fat content from butter and egg yolk. Use oil spray to reduce fat if desired.
Allergens: Contains gluten, dairy, and eggs. See variations for allergen-free options.
I like to think of this as a balanced treat. It provides energy for a day of trick-or-treating. The fun factor boosts mood, which is a benefit in itself. I try to use whole milk and real butter for better satiety. It keeps you full longer than processed snacks.
Conclusion
These spooky cute mummy pancakes are worth the extra effort. They turn a simple breakfast into a memorable event. I love how they bring my family together in the kitchen. The kids enjoy the creative aspect, and I enjoy the delicious result. Try customizing the recipe to fit your preferences. Add your favorite spices or fillings. I hope you enjoy making them as much as I do. Please leave a comment below with your own variations. Share your photos on social media and tag me. I love seeing your creations. Happy Halloween!
FAQs
Can I make the batter ahead of time?
Yes, you can prepare both batters and store them in the refrigerator for up to 24 hours. Let them come to room temperature before cooking for best results.
Why did my dough strips tear?
This usually happens if the batter is too thick or the pancakes are cold. Ensure your dough batter is very thin and warm up the filling pancakes before wrapping.
Can I freeze these pancakes?
Yes, you can freeze the assembled, uncooked mummies. Place them on a tray to freeze solid, then store in a bag. Cook from frozen, adding extra time.
What can I use for eyes if I do not have chocolate chips?
You can use small candies, raisins, or even dots of icing. Just ensure they are food-safe and easy to press onto the warm dough.
Is this recipe suitable for picky eaters?
Most picky eaters enjoy this because it tastes like regular pancakes. The fun shape makes them more willing to try it. You can keep the syrup mild if needed.
Do I need to use a crepe pan?
No, a standard non-stick skillet works perfectly. Just pour a small amount of batter and swirl it thin. The key is thinness, not the pan type.
Can I make these savory?
Absolutely. Use a cheese and herb batter for the filling. Wrap in a plain crepe. Serve with soup or salad. It is a great savory alternative.
How do I keep the mummies from falling apart?
Brush the dough strips with melted butter before wrapping. This helps them stick together. Also, handle them gently when flipping.
What is the best syrup to use?
Warm maple syrup is traditional. You can also use honey or a fruit compote for a different flavor profile.
Can I use gluten-free flour?
Yes, use a 1:1 gluten-free flour blend for both batters. The texture may be slightly more fragile, so handle with care.
How many mummies does this recipe make?
This recipe makes about 6-8 mummy pancakes, depending on the size. It serves 2-4 people as a festive breakfast.
Pin This Recipe!
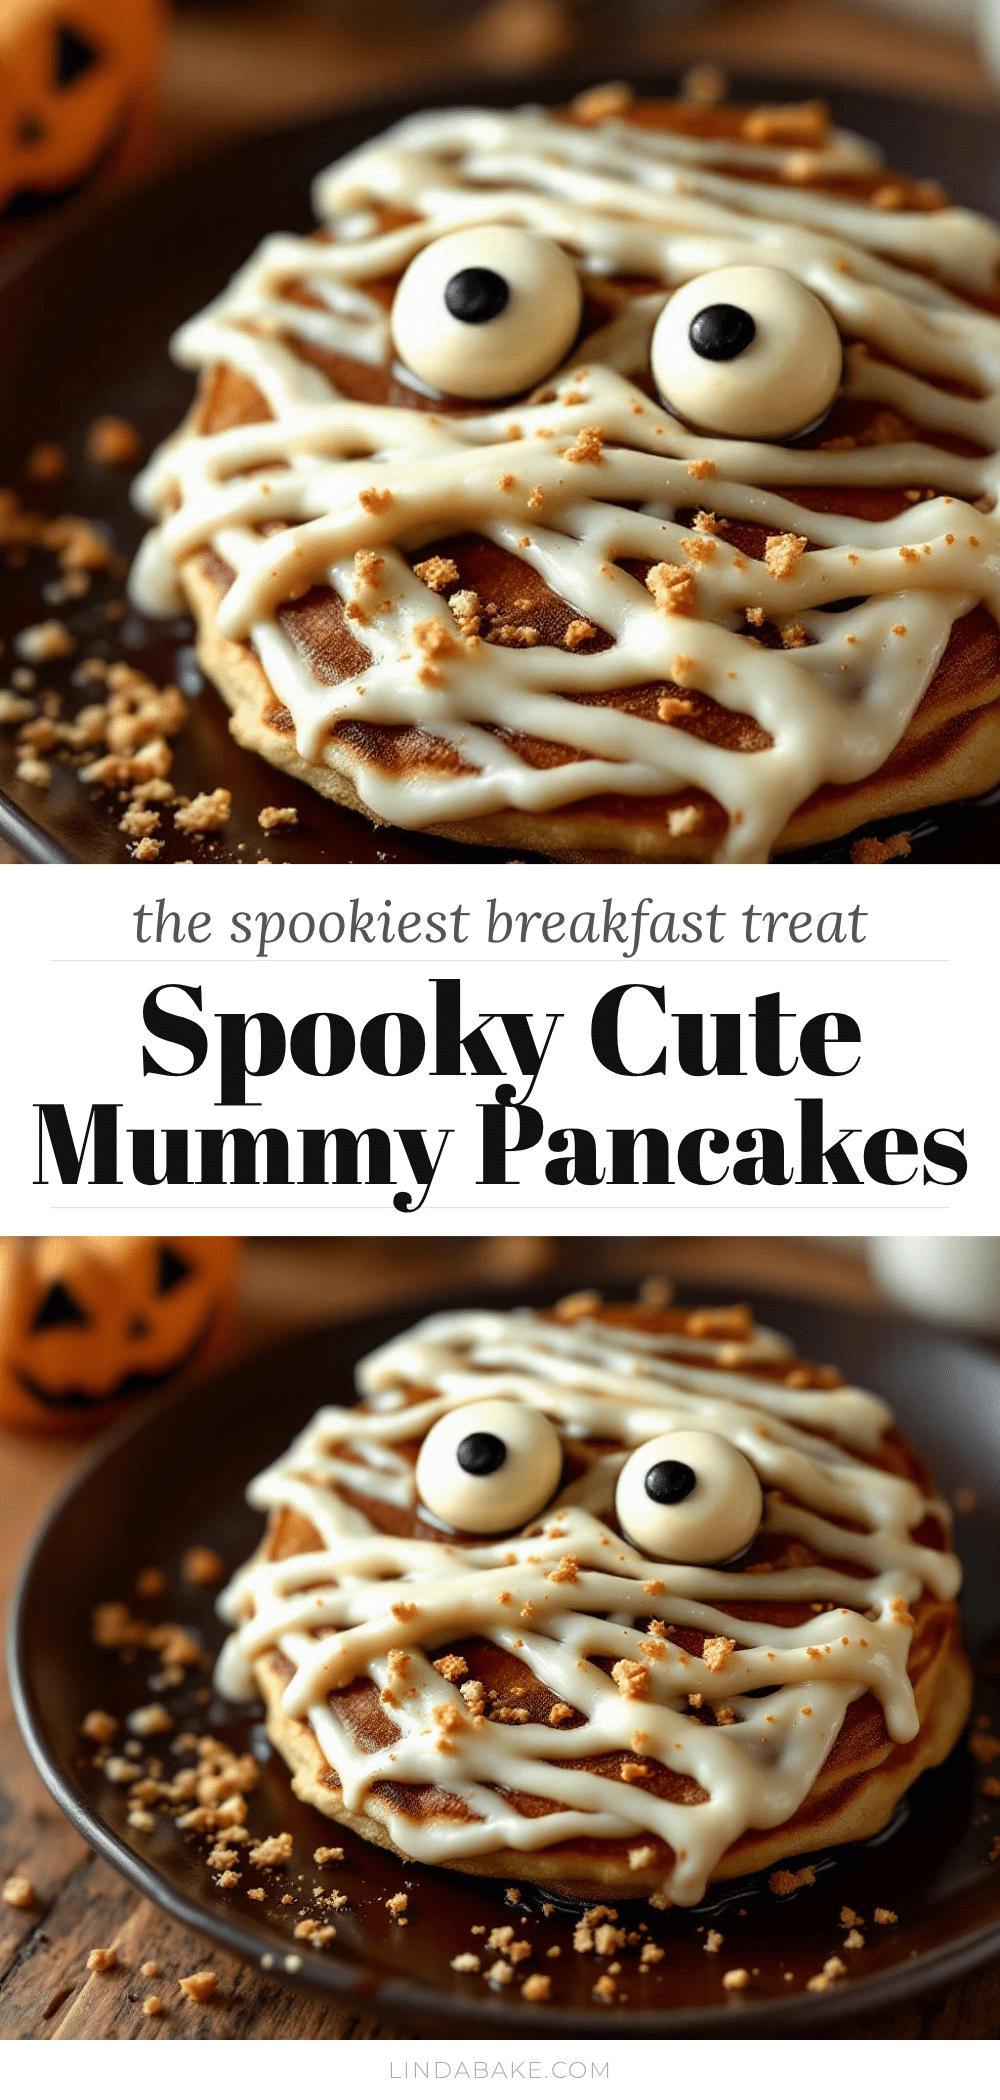
Spooky Cute Mummy Pancakes: Easy Halloween Breakfast
A festive Halloween breakfast featuring fluffy pancake filling wrapped in thin, buttery crepe strips to resemble mummies, topped with chocolate chip eyes.
- Prep Time: 10 minutes
- Cook Time: 35 minutes
- Total Time: 45 minutes
- Yield: 6-8 servings 1x
- Category: Breakfast
- Cuisine: American
Ingredients
- 1 cup pancake batter (homemade or boxed mix)
- 1 large egg
- Milk (whole or dairy-free)
- 1 tsp vanilla extract
- 1 tsp baking powder
- Thin crepe batter or thinned pancake batter
- Unsalted butter, melted (for brushing)
- All-purpose flour (or 1:1 gluten-free blend)
- Maple syrup (for drizzling)
- Mini chocolate chips or small candies (for eyes)
- Whipped cream (optional)
Instructions
- Whisk pancake ingredients for the filling until thick but pourable. Thin out crepe/pancake batter with extra milk until very fluid. Let both rest for 5 minutes.
- Heat a non-stick skillet over medium heat and lightly grease with butter. Pour about 1/4 cup of thick filling batter into the pan.
- Cook filling pancakes until bubbles form and edges are set, then flip and cook for 30 seconds until golden. Remove and keep warm.
- Wipe pan clean or use a second skillet. Pour a tiny amount of thin batter and swirl to create a thin crepe. Cook until top is dry and bottom is lightly golden. Remove immediately.
- Place cooked crepes on a cutting board and slice into 1/2 inch wide strips.
- Take a warm filling pancake and wrap it with the thin dough strips, overlapping slightly to cover the pancake but leaving a gap for eyes. Brush strips with melted butter.
- Place wrapped mummy back into skillet over low-medium heat. Cook for 1-2 minutes on each side until dough is golden brown and crisp.
- Remove from heat. Press two mini chocolate chips or candies onto the front for eyes while the dough is still warm.
- Serve immediately with maple syrup and optional whipped cream.
Notes
Keep heat on medium-low to prevent burning the thin dough. Assemble mummies while pancakes are warm to prevent cracking. If dough tears, patch with another strip. For gluten-free, use a 1:1 gluten-free flour blend. For vegan, substitute egg/milk with plant-based alternatives and use vegan butter.
Nutrition
- Serving Size: 1 mummy pancake
- Calories: 275
- Sugar: 15
- Sodium: 300
- Fat: 12
- Saturated Fat: 5
- Carbohydrates: 35
- Fiber: 1
- Protein: 6
Keywords: Halloween breakfast, mummy pancakes, easy Halloween recipes, kid-friendly breakfast, festive pancakes, crepe pancakes


