“Does it have the little bone pieces on top?” my niece asked, peering into the oven window with eyes wide enough to swallow the warm, yeasty air filling the kitchen. It was three days before Day of the Dead, and the house smelled like orange zest and toasted anise. I hadn’t made pan de muerto in years, mostly because I was terrified of it turning into a brick. But that afternoon, watching her wiggle with anticipation, I knew I had to try again. The last time I attempted this, I’d rushed the proofing and ended up with something closer to a hockey puck than a festive bread. This time, I slowed down. I let the dough breathe. And honestly? It worked.
There is something deeply comforting about the ritual of shaping this bread. It’s not just about feeding people; it’s about honoring memory. The round shape represents the circle of life, and those little bones? They are a reminder of those we’ve lost, but in a way that feels gentle, not heavy. As I rolled the dough into those signature strips and pressed them onto the loaves, I felt a connection to my grandmother, who used to make this with a mix of intuition and patience I’m still trying to master. The orange glaze she added gave it a bright, citrusy finish that cut through the richness of the butter perfectly.
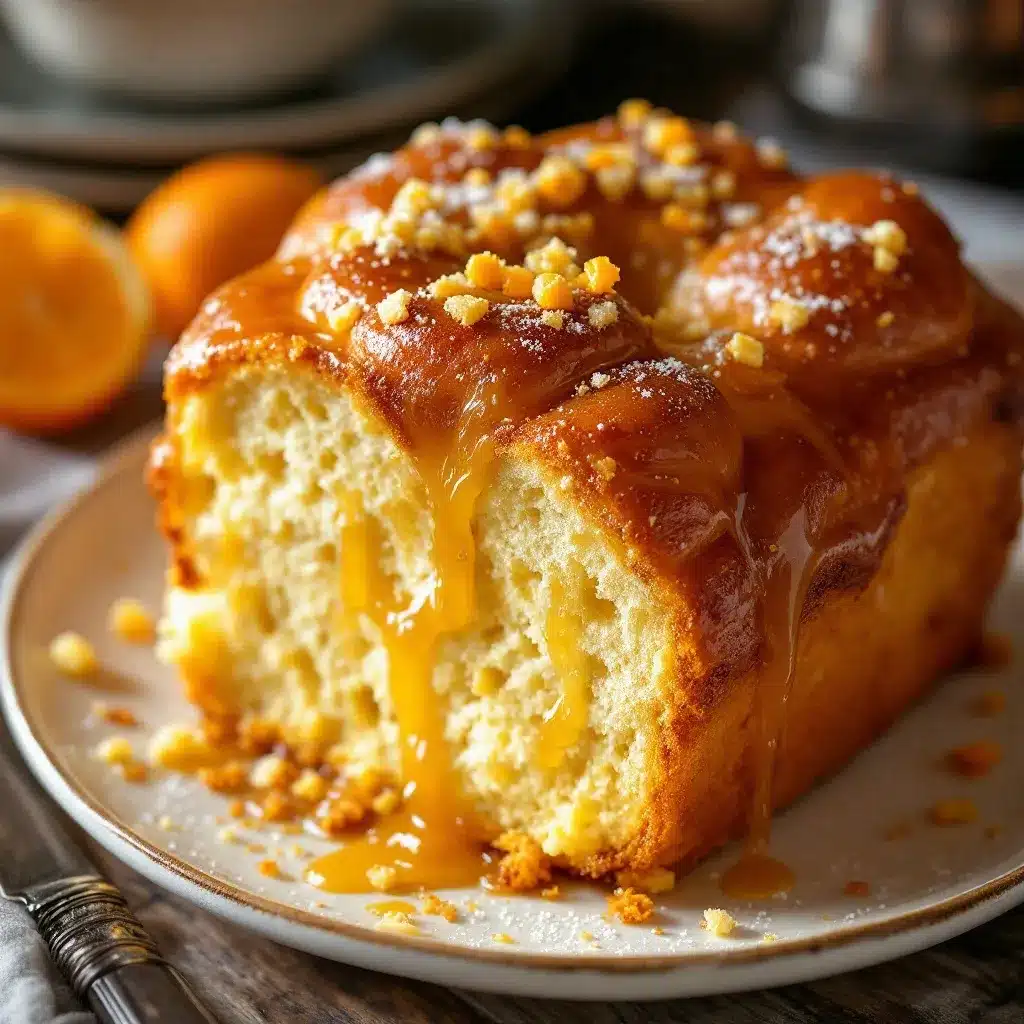
Now, when I pull these soft, pillowy loaves from the oven, the kitchen is filled with that specific, nostalgic scent of anise and citrus. It’s a smell that says “home” and “remembrance” all at once. My niece took her first bite, crumbs falling onto her apron, and declared it “better than the bakery.” That’s the moment you live for in baking. It’s not just about the recipe; it’s about the memory you’re creating in real-time. This soft pan de muerto with orange glaze is my tribute to that tradition, simplified for modern kitchens but rich in soul.
I hope sharing this process brings a little warmth to your own celebrations. Whether you’re marking the holiday or just craving something sweet and aromatic, this bread is worth the effort. It’s sturdy enough to handle your hands and delicate enough to melt in your mouth. Let’s get baking.
Why You’ll Love This Recipe
Making bread from scratch can feel intimidating, but this specific recipe has been refined through countless batches to ensure success. I’ve tested this dough with various flours and yeast types to find the perfect balance of chew and softness. Here is why this version stands out:
- Quick & Easy: While it requires proofing time, the active hands-on time is minimal. You can have this ready for a weekend breakfast or a midweek treat without spending your entire day in the kitchen.
- Simple Ingredients: You likely have most of these in your pantry. Flour, sugar, yeast, butter, eggs, and anise seeds are staples. The orange glaze uses just three items. No fancy specialty stores needed.
- Perfect for Day of the Dead: This is the traditional bread for the altar, but it’s also delicious for any autumn gathering. It pairs beautifully with café de olla or hot chocolate.
- Crowd-Pleaser: The aroma alone brings people into the kitchen. The combination of soft bread and sweet citrus glaze appeals to all ages, from toddlers to grandparents.
- Unbelievably Delicious: The texture is key here. We aim for a tender crumb that pulls apart easily, enriched with butter and eggs, then finished with a shiny, sweet glaze that adds a burst of flavor.
What makes this recipe different is the emphasis on the orange glaze. Many traditional recipes skip the glaze or use a simple sugar dusting. I prefer the glaze because it adds moisture and a bright citrus note that complements the anise. It’s the kind of bread that makes you close your eyes after the first bite, feeling the warmth spread through your chest. It’s comfort food reimagined—respectful of tradition but adapted for modern palates who love a bit of shine and sweetness on top. It’s perfect for impressing guests without stress, turning a simple meal into a memorable cultural experience.
What Ingredients You Will Need
This recipe relies on high-quality, wholesome ingredients to deliver bold flavor and satisfying texture. The anise seeds provide that classic licorice-like aroma, while the orange zest brightens everything up. Most of these items are pantry staples, making it easy to assemble.
- All-Purpose Flour: 4 to 4.5 cups (500-550g). I recommend using a bread flour blend for extra chew, but all-purpose works well for a softer crumb. Sift it to remove lumps.
- Active Dry Yeast: 2 packets (about 4.5 tsp or 14g). Make sure it’s fresh. If your yeast is old, your bread won’t rise properly.
- Warm Milk: 1 cup (240ml). Warm to about 110°F (43°C). Too hot, and you’ll kill the yeast; too cold, and it won’t activate.
- Unsalted Butter: 1/2 cup (115g), softened. This adds richness and tenderness. Room temperature butter creams easier into the dough.
- Granulated Sugar: 1/2 cup (100g). This feeds the yeast and adds sweetness. You can use honey for a slightly different flavor profile.
- Eggs: 2 large eggs, room temperature. These add structure and richness. One egg is for the dough, one is for the egg wash.
- Anise Seeds: 1 tablespoon. This is the signature flavor. Crush them slightly with a mortar and pestle for better flavor release.
- Orange Zest: From 1 large orange. Use organic oranges if possible to avoid pesticide residue. The zest provides essential oils.
- Salt: 1 teaspoon. Balances the sweetness and strengthens the gluten.
- For the Glaze: 1 cup powdered sugar, 2-3 tablespoons fresh orange juice, and a pinch of salt. Adjust juice for desired consistency.
I personally prefer using Kerrygold butter for its rich yellow color and flavor. If you are dairy-free, you can substitute the butter with a high-quality plant-based alternative, though the texture may be slightly denser. For the anise, whole seeds are preferred over powder for texture. In summer, you might reduce the milk slightly as humidity can affect flour absorption.
Equipment Needed
You don’t need a fancy kitchen to make this bread. A large mixing bowl is essential. I use a heavy-duty ceramic bowl because it stays cool while you mix. A stand mixer with a dough hook is helpful but not required; you can knead by hand if you have the stamina.
A digital kitchen scale is the best tool for accuracy. Measuring flour by volume can lead to inconsistent results, so weighing it ensures your dough has the right hydration. A pastry brush is needed for the egg wash and glaze. Silicone brushes are easier to clean than bristle ones.
For baking, use rimmed baking sheets lined with parchment paper. This prevents sticking and makes cleanup easy. If you don’t have parchment, lightly grease the sheets with butter. A sharp paring knife or bench scraper is useful for shaping the dough and cutting the “bones.” A cooling rack is necessary to let the bread breathe after baking; leaving it on the hot pan can make the bottom soggy.
Preparation Method
Step 1: Activate the Yeast (10 minutes)
In a small bowl, combine the warm milk and 1 tablespoon of sugar. Sprinkle the yeast over the top and stir gently. Let it sit for 5-10 minutes until it becomes foamy. If it doesn’t foam, your yeast might be dead. Start over with fresh yeast. This step ensures your bread will rise properly.
Step 2: Mix the Dough (10 minutes)
In a large bowl, whisk together the flour, remaining sugar, salt, crushed anise seeds, and orange zest. Make a well in the center. Pour in the yeast mixture, the softened butter, and one egg. Mix with a wooden spoon or dough hook until a shaggy dough forms. If the dough is too sticky, add flour 1 tablespoon at a time. If too dry, add water 1 teaspoon at a time.
Step 3: Knead the Dough (10-15 minutes)
Turn the dough onto a lightly floured surface. Knead for 8-10 minutes until smooth and elastic. Push the dough away with the heel of your hand, fold it back, and turn. Repeat. The dough should pass the “windowpane test”—stretch a small piece thinly without it tearing. This develops gluten for a soft texture.
Step 4: First Rise (1-2 hours)
Place the dough in a greased bowl, turning once to coat. Cover with plastic wrap or a damp towel. Let it rise in a warm, draft-free spot for 1-2 hours, or until doubled in size. Press a finger into the dough; if the indent remains, it’s ready.
Step 5: Shape the Bread (15 minutes)
Punch down the dough to release air. Divide it into four equal portions for round loaves. Roll each portion into a smooth ball. Take small pieces of dough and roll them into thin strips for the “bones” and crosses. Place the round loaves on lined baking sheets. Arrange the strips on top to resemble bones and joints. Cover loosely and let rise again for 30-45 minutes.
Step 6: Bake (25-30 minutes)
Preheat oven to 350°F (175°C). Beat the second egg with 1 tablespoon of water for an egg wash. Gently brush the risen loaves. Bake for 25-30 minutes until golden brown. If the tops brown too quickly, cover with foil. The bread is done when it sounds hollow when tapped on the bottom.
Step 7: Glaze and Cool (20 minutes)
While the bread bakes, whisk powdered sugar, orange juice, and salt for the glaze. Once the bread is out of the oven, let it cool for 5 minutes, then brush generously with the glaze. Let cool completely on a rack before slicing. The glaze will set slightly as it cools.
How do I know when the dough is ready?
Look for the “poke test.” Gently press your finger into the dough. If it springs back immediately, it needs more time. If it stays indented, it’s perfect.
Can I use instant yeast?
Yes. Skip the activation step with milk. Mix instant yeast directly into the dry ingredients. You may need slightly less liquid, so add milk gradually.
Why is my bread dense?
This usually happens from over-kneading or under-proofing. Ensure you let the dough rise until doubled. Also, avoid adding too much extra flour during kneading.
What if I don’t have anise?
You can skip it, but the flavor will be different. Some people use a teaspoon of vanilla extract or lemon zest as a substitute, though it won’t be traditional.
How do I store the leftovers?
Store in an airtight container at room temperature for up to 3 days. For longer storage, freeze the unglazed bread. Glaze before serving.
Cooking Tips & Techniques
One common mistake I see is overworking the dough after the first rise. Handle it gently to keep those air bubbles intact. This ensures a light, airy crumb rather than a dense loaf. Another tip is to keep your kitchen warm. Yeast loves warmth. If your house is cold, place the dough in the turned-off oven with the light on for a cozy proofing environment.
When shaping the “bones,” don’t make them too thick. Thin strips bake through evenly and look more authentic. I learned this the hard way when my first attempt looked like a blob of dough with thick sticks on top. Practice makes perfect, but even imperfect shapes taste great.
For the egg wash, use only the yolk for a deeper golden color, or the whole egg for a shinier finish. I prefer the whole egg for this recipe because the glaze adds sweetness, so a richer crust balances it well. Be careful not to press too hard when brushing, or you’ll deflate the risen dough.
Timing is everything. If you’re baking multiple trays, rotate them halfway through for even browning. Also, let the bread cool completely before slicing. Cutting into warm bread releases steam and can make the texture gummy. Patience yields the best results.
Variations & Adaptations
This recipe is versatile. For a gluten-free version, use a 1:1 gluten-free flour blend with xanthan gum. Note that the texture will be slightly more crumbly. For a dairy-free option, use coconut oil or vegan butter and almond milk. The flavor remains delicious.
You can add chocolate chips to the dough for a sweet twist. Or, mix in chopped raisins for a traditional touch. Some people add a splash of rum or anise liqueur to the milk for an adult version. I’ve also tried adding a pinch of nutmeg to the dough, which complements the orange beautifully.
If you want a sweeter bread, increase the sugar to 3/4 cup. For a healthier option, substitute half the flour with whole wheat flour. This adds nuttiness and fiber but may require a bit more liquid. Experiment to find your favorite balance.
Serving & Storage Suggestions
Serve this bread warm or at room temperature. It pairs wonderfully with café de olla, spiced hot chocolate, or coffee. For a festive presentation, arrange the loaves on a wooden board with marigolds and candles. It makes a beautiful centerpiece for Day of the Dead altars.
Store leftovers in an airtight container at room temperature for up to 3 days. If you live in a humid climate, refrigerate to prevent mold, but bring to room temperature before serving. To freeze, wrap the unglazed bread tightly in plastic wrap and foil. Freeze for up to 3 months. Thaw overnight and glaze before serving.
For reheating, warm slices in the microwave for 10 seconds or in the oven at 300°F for 5 minutes. The flavors develop over time, becoming slightly more aromatic as the anise and orange meld. Enjoy it fresh for the best texture, but it stays good for a few days.
Nutritional Information & Benefits
This bread is rich in carbohydrates and provides energy. The eggs add protein, while the butter offers healthy fats. Anise seeds may aid digestion and reduce bloating, making this bread not just tasty but gentle on the stomach. The orange zest adds Vitamin C and antioxidants.
Each slice contains approximately 250 calories, depending on size. It is not gluten-free or dairy-free unless modified. For those with allergies, check your ingredient labels carefully. I enjoy this bread as a special treat, balancing it with a balanced diet. It’s a celebration of culture and flavor, meant to be shared and savored.
Conclusion
Making soft pan de muerto with orange glaze is more than just baking; it’s a act of love and remembrance. The process is meditative, and the result is deeply satisfying. I hope this recipe brings joy to your table and connects you to your own traditions. Feel free to customize it with your favorite flavors or family twists. The most important ingredient is the care you put into it.
If you try this recipe, I’d love to hear how it turned out. Share your photos and comments below. Did you add chocolate? Did your family like the anise? Let’s keep the conversation going. Happy baking, and may your days be filled with warmth and good food.
FAQs
Can I make this bread ahead of time?
Yes. You can shape the dough and refrigerate it overnight. Let it come to room temperature and rise before baking. This is great for busy schedules.
Why did my bread not rise?
Check your yeast expiration date. Also, ensure the milk wasn’t too hot, which kills yeast, or too cold, which doesn’t activate it. Proofing temperature is key.
Can I use honey instead of sugar?
Yes. Use 1/3 cup honey for every 1/2 cup sugar. Reduce the milk slightly as honey is liquid. The flavor will be richer.
How do I get the “bones” to stay on top?
Press them firmly into the dough. You can also brush a little egg wash on the spots where you place them to act as glue.
Is this bread sweet?
It is moderately sweet, especially with the glaze. The anise and orange balance the sugar. If you prefer less sweet, reduce the sugar in the dough and skip the glaze.
Pin This Recipe!

Soft Pan de Muerto with Orange Glaze

A soft, pillowy traditional Mexican bread enriched with butter and eggs, flavored with anise and orange zest, and finished with a bright citrus glaze. Perfect for Day of the Dead celebrations or any autumn gathering.
- Prep Time: 45 minutes
- Cook Time: 30 minutes
- Total Time: 2 hours 15 minutes
- Yield: 4 servings 1x
- Category: Bread
- Cuisine: Mexican
Ingredients
- 4 to 4.5 cups (500-550g) All-Purpose Flour
- 2 packets (about 4.5 tsp or 14g) Active Dry Yeast
- 1 cup (240ml) Warm Milk (110°F/43°C)
- 1/2 cup (115g) Unsalted Butter, softened
- 1/2 cup (100g) Granulated Sugar
- 2 large Eggs, room temperature
- 1 tablespoon Anise Seeds
- Zest of 1 large Orange
- 1 teaspoon Salt
- 1 cup Powdered Sugar (for glaze)
- 2–3 tablespoons Fresh Orange Juice (for glaze)
- Pinch of Salt (for glaze)
- 1 tablespoon Water (for egg wash)
Instructions
- Activate the yeast: In a small bowl, combine warm milk and 1 tablespoon of sugar. Sprinkle yeast over the top and stir gently. Let sit for 5-10 minutes until foamy.
- Mix the dough: In a large bowl, whisk together flour, remaining sugar, salt, crushed anise seeds, and orange zest. Make a well and pour in the yeast mixture, softened butter, and one egg. Mix until a shaggy dough forms.
- Knead the dough: Turn dough onto a lightly floured surface and knead for 8-10 minutes until smooth and elastic. It should pass the windowpane test.
- First rise: Place dough in a greased bowl, cover, and let rise in a warm spot for 1-2 hours until doubled in size.
- Shape the bread: Punch down dough and divide into four equal portions. Roll into balls. Roll small pieces into thin strips for ‘bones’. Place strips on top of the round loaves. Cover loosely and let rise again for 30-45 minutes.
- Bake: Preheat oven to 350°F (175°C). Beat the second egg with 1 tablespoon water for an egg wash and brush over risen loaves. Bake for 25-30 minutes until golden brown and hollow when tapped.
- Glaze and cool: Whisk powdered sugar, orange juice, and a pinch of salt. Let bread cool for 5 minutes, then brush generously with glaze. Cool completely on a rack before slicing.
Notes
Ensure yeast is fresh and milk is not too hot to avoid killing the yeast. For a deeper golden crust, use only the egg yolk for the wash. Store leftovers in an airtight container at room temperature for up to 3 days. For longer storage, freeze unglazed bread.
Nutrition
- Serving Size: 1 slice
- Calories: 250
- Sugar: 18
- Sodium: 350
- Fat: 8
- Saturated Fat: 4
- Carbohydrates: 40
- Fiber: 2
- Protein: 6
Keywords: pan de muerto, day of the dead, mexican bread, orange glaze, anise bread, holiday baking, traditional bread


