October 31st, and the only thing I want is a dessert that looks like it crawled out of the garden but tastes like pure comfort. The house is finally quiet after the trick-or-treating frenzy. The kids are asleep, and the hallway is littered with plastic bats, candy wrappers, and one very sad, half-eaten apple. It’s 10:30 PM, and I’m standing in the kitchen with a mixer that’s still humming from earlier.
You know that feeling when you’ve spent hours carving pumpkins and coordinating costumes, only to realize you forgot to make a dessert? That’s where I was. Honestly, I didn’t have time to bake. I didn’t have energy to whip up something elaborate. But I did have chocolate pudding and cookies. And somehow, that’s exactly what the moment called for.
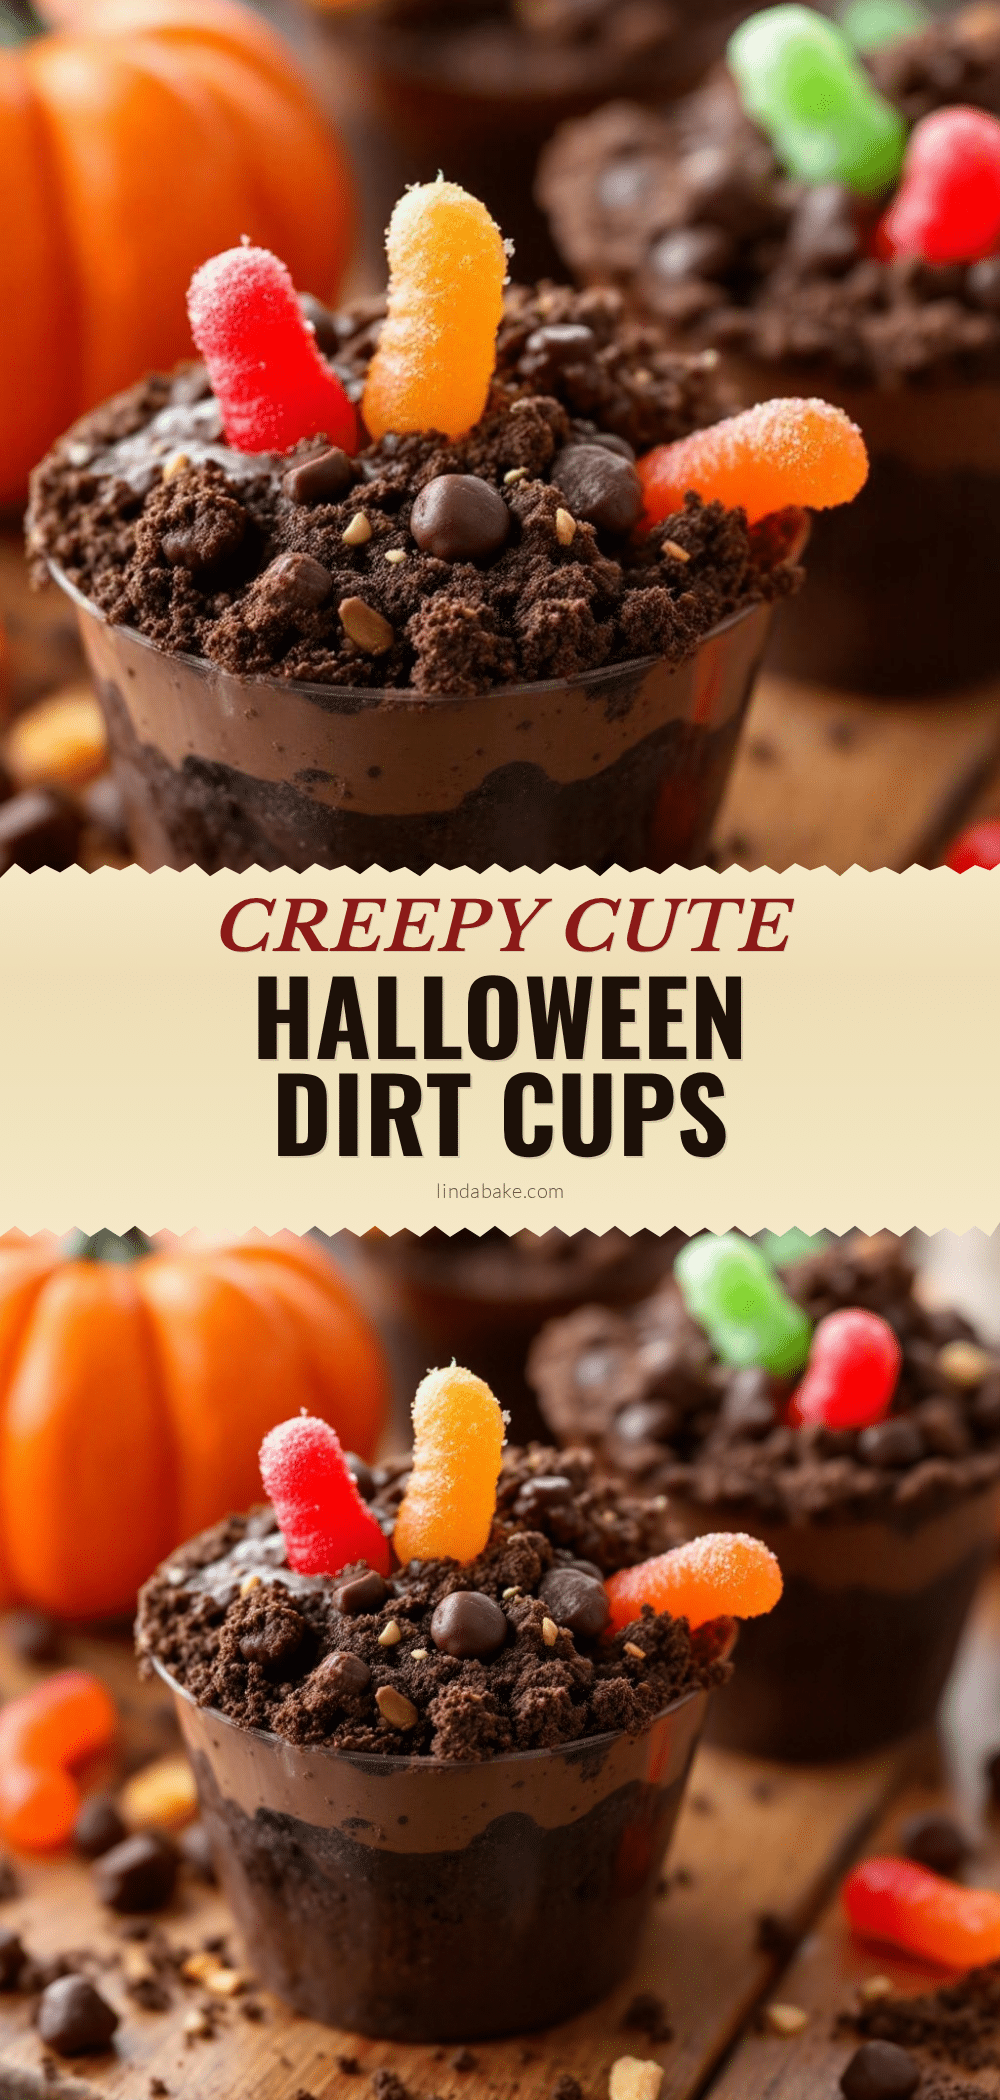
These Creepy Cute Halloween Dirt Cups are my saving grace every single year. They aren’t just a snack; they’re a little edible landscape. I love that you can make them look spooky and messy while actually being incredibly simple. There’s something deeply satisfying about layering dark crumbs over creamy filling until it looks like fresh earth. It’s weirdly therapeutic, you know?
I’ve made these for school parties, for the neighborhood kids who still stop by, and just for myself on late nights like this. The best part? They taste like a chocolate chip cookie in dirt form. It’s sweet, it’s creamy, and it has that crunch from the worms. It’s not a heavy, floury dessert that leaves you feeling sluggish. It’s light, fun, and totally forgiving.
I remember making these for the first time when my niece was five. She insisted on adding extra worms. We ended up with a cup that looked more like a bug infestation than a dessert. She loved it. That’s the magic of this recipe—it invites you to play. It’s not about perfection. It’s about the joy of creating something silly and delicious together. And let’s face it, life needs a little more play, especially in October.
So, if you’re staring at an empty fridge and a list of demanding guests, just grab some pudding, some cookies, and a handful of gummy worms. You’ll be glad you did. It’s a small ritual that ties the whole spooky night together.
Why You’ll Love This Recipe
Let’s be real for a second. Halloween desserts usually fall into two categories: either they are incredibly complicated to make and require a degree in pastry arts, or they are just a bowl of candy corn. Neither of these options is ideal for most of us. We want something that looks impressive enough to scare the neighbors but is easy enough to assemble while watching the spooky movies. These Creepy Cute Halloween Dirt Cups hit that sweet spot perfectly.
- Quick & Easy: This recipe comes together in under 15 minutes. No baking required, no oven preheating, and no waiting for layers to set for hours. It’s perfect for busy weeknights or those last-minute Halloween party prep scrambles. If you can mix pudding, you can make this.
- Simple Ingredients: You likely already have everything in your kitchen right now. Chocolate pudding mix, milk, vanilla wafers (or chocolate cookies), and gummy worms. No fancy grocery trips needed. It’s pantry-friendly comfort food at its finest.
- Perfect for Kids (and Adults): These are great for spooky dinners, potlucks, or just a late-night treat. The presentation is always a hit with kids who love the “gross” factor, but adults appreciate the actual taste. It’s not just sugar; it’s a textured dessert experience.
- Crowd-Pleaser: I’ve served these at school parties, office Halloween parties, and family gatherings. They always get rave reviews. People love pulling a worm out of their cup like a magic trick. It’s interactive food, which makes eating it more fun.
- Unbelievably Delicious: The texture combo is next-level comfort food. You get the creaminess of the pudding, the crunch of the cookie crumbs, and the chew of the gummy worms. It’s like eating a chocolate chip cookie dirt patch. It’s rich but not overwhelmingly heavy.
What makes this recipe different from the rest? It’s the balance. Many dirt cup recipes use just vanilla pudding and Oreos. While good, it can get monotonous. By using chocolate pudding and vanilla wafers, you get a classic contrast that mimics the actual experience of eating dirt (in a delicious way, of course). Plus, the visual impact of the red gummy worms against the dark brown crumbs is unmatched for the season.
This isn’t just a recipe; it’s a mood. It’s the kind of dessert that makes you close your eyes after the first bite and smile. It’s comfort food reimagined for Halloween—simpler, faster, but with the same soul-soothing satisfaction. Whether you are impressing guests without stress or just treating yourself after a long day of decorating, these cups deliver.
What Ingredients You Will Need
This recipe uses simple, wholesome ingredients to deliver bold flavor and satisfying texture without the fuss. The beauty of these dirt cups lies in the contrast between the creamy pudding and the crunchy cookie layers. You don’t need exotic spices or hard-to-find items. Everything here is standard fare, which is why I always keep these staples on hand for last-minute guests.
For the Dirt Base
- Vanilla Wafers or Chocolate Sandwich Cookies: These form the “dirt.” I prefer vanilla wafers for a classic look, but chocolate cookies make it look even more like rich, dark soil. Use about 20-24 cookies depending on size. If you want a gluten-free option, look for gluten-free vanilla wafers, though the texture might be slightly different.
- Butter (Optional): I usually skip this for a lighter texture, but if you want the “dirt” to clump together a bit more (like real moist soil), you can melt 1-2 tablespoons of butter and mix it into the crumbs. It adds a richer flavor too.
For the Creamy Filling

- Chocolate Pudding Mix: I recommend Jell-O Instant Chocolate Pudding & Dessert Mix for the classic taste. It’s sweet, smooth, and sets up nicely. For a richer version, you can use a custard-style pudding mix, but the standard instant one is what I’ve tested and trusted for years.
- Milk: Use cold whole milk for the creamiest texture. If you’re watching dairy, you can use a high-quality plant-based milk like oat or soy milk, but the pudding might not thicken quite as much.
For the Topping & Garnish
- Gummy Worms: These are the stars of the show. Get the long, red ones for the best visual impact. You’ll need about 10-15 worms for a batch of 6 cups. Look for brands that are chewy but not rock-hard.
- Extra Cookie Crumbs: You’ll need a little extra crushed cookie to sprinkle on top as the final “dirt” layer.
Substitution guidance: If you can’t find vanilla wafers, digestive biscuits work well too. They are slightly buttery and crunchy. For the pudding, if you want to avoid artificial colors, you can make homemade chocolate pudding, but it will take longer to cool. The key is to ensure the pudding is thick enough to hold its shape when layered.
Equipment Needed
You don’t need a lot of fancy gear to make these. The simplicity is part of the appeal. Here is what you’ll need to get the job done efficiently.
- Food Processor or Ziplock Bag: This is the most important tool. A food processor makes quick work of crushing the cookies into fine crumbs. If you don’t have one, a heavy-duty ziplock bag and a rolling pin work perfectly. Just be careful not to crush the cookies into dust; you want some texture.
- Mixing Bowls: You’ll need a medium bowl for whisking the pudding and a larger bowl for the cookie crumbs. Standard stainless steel bowls are fine.
- Whisk: A simple balloon whisk is all you need to mix the pudding until it’s smooth and lump-free.
- Serving Cups: Clear plastic cups, glass jars, or even small mason jars work best. Clear containers are essential because the whole point is to see the layers. I like using small, disposable plastic cups for parties because there’s no cleanup, but glass jars look more elegant for serving at home.
- Spatula: A small rubber spatula helps you scrape the pudding out of the bowl and into the cups neatly.
Personal tip: If you are making these ahead of time, ensure your serving cups are completely dry. Moisture can make the cookie crumbs soggy before you even start eating. Also, keep your food processor clean if you plan to reuse it for other recipes later; cookie crumbs can get stuck in the blades.
Preparation Method
- Crush the Cookies (5 minutes): Place your vanilla wafers or chocolate cookies into a food processor. Pulse until they turn into fine crumbs. If using the ziplock bag method, lay the cookies in a single layer, seal the bag, and roll a rolling pin over them until they are crushed. Transfer the crumbs to a medium bowl. If you are using butter, melt it now and drizzle it over the crumbs, mixing with a fork until the texture resembles wet sand. Set aside.
- Prepare the Pudding (5 minutes): In a separate medium bowl, combine the chocolate pudding mix with the cold milk. Whisk vigorously for about 2 minutes. The key here is to ensure there are no lumps. The pudding should be thick and smooth. If it looks too thin, let it sit for a minute to thicken up further. Do not skip this step; lumpy pudding ruins the layering effect.
- Assemble the First Layer (2 minutes): Take your serving cups. Spoon about 1-2 tablespoons of the cookie crumbs into the bottom of each cup. Press down gently with the back of a spoon to create a flat, compact base. This first layer anchors the dessert.
- Add the Pudding Layer (2 minutes): Spoon a generous amount of chocolate pudding over the cookie base. Fill each cup about halfway or slightly more. Use the spatula to smooth the top of the pudding so it’s even. This creates a clean line for the next layer.
- Add the Second Cookie Layer (2 minutes): Sprinkle another layer of cookie crumbs over the pudding. You don’t need to press this one down as hard; let it sit loosely on top of the cream. This layer should be thick enough to cover the pudding completely.
- Add the Top Cookie Layer (2 minutes): Add one final, thin layer of cookie crumbs on top. This is your “dirt” surface. It should look like a patch of dark earth.
- Insert the Worms (3 minutes): This is the fun part. Take your gummy worms and stick them into the top layer of crumbs. Push them in so they are partially submerged, leaving the heads or tails poking out. Arrange them in a messy, natural-looking way. Don’t make them too straight; real worms wiggle!
- Chill and Serve: If you have time, refrigerate the cups for 30 minutes to let the flavors meld and the crumbs soften slightly. If you’re in a hurry, serve immediately. The longer they sit, the more the crumbs absorb the moisture from the pudding, which changes the texture. Enjoy!
Personal tip: If you are making these for a large group, prepare the crumbs and pudding in bulk first, then assemble right before serving. This keeps the cookies crunchy. If you assemble them hours ahead, the bottom layer might get a bit soggy, which some people love, but others might find too soft.
Cooking Tips & Techniques
Even a simple recipe like this has a few tricks to make it stand out. Here are some professional techniques and lessons I’ve learned over the years of making these.
- Cookie Texture Matters: Don’t crush the cookies into powder. You want some small chunks. This adds a nice crunch that contrasts with the smooth pudding. If you use a food processor, pulse in short bursts. If you use a bag, check frequently so you don’t overdo it.
- Pudding Consistency: If your pudding seems too runny, add a little more pudding mix. If it’s too thick, add a splash more milk. You want it to be spreadable but not watery. Watery pudding will make the cookies soggy too quickly.
- Layering Height: Aim for equal layers. If one layer is too thick, the cup will be unbalanced. A good rule of thumb is a 1:1:1 ratio of cookie base, pudding, cookie middle, and cookie top. Adjust the worm insertion to fit the height.
- Worm Placement: Don’t just stick them in randomly. Try to create a sense of movement. Have some worms emerging from the side, some from the top. It makes the cup look more alive. I like to twist them slightly as I push them in to make them look like they are burrowing.
- Avoiding Sogginess: If you are making these more than a few hours in advance, consider putting a thin layer of chocolate chips between the pudding and the top cookie layer. The chocolate acts as a barrier, keeping the moisture from the pudding from softening the cookies too much.
I once made these for a party and used chocolate cookies for the base but vanilla pudding for the top. It looked weird and tasted bland. Stick to the classic chocolate pudding and vanilla wafer combo. It’s a proven winner for a reason. Also, don’t skimp on the worms. They are the visual hook that makes people stop and look.
Variations & Adaptations
While the classic version is my favorite, these cups are very adaptable. Here are a few ways to switch things up based on your preferences or dietary needs.
- Strawberry Dirt Cups: Swap the chocolate pudding for strawberry or vanilla pudding. Use chocolate sandwich cookies (Oreos) for the “dirt” instead of vanilla wafers. This creates a red and black contrast that is equally spooky but tastes like a strawberry shortcake. It’s a great option for kids who don’t like chocolate.
- Gluten-Free Option: Use gluten-free vanilla wafers and a gluten-free pudding mix. Most major pudding brands offer gluten-free versions. The texture might be slightly different, but the taste will be just as good. Just ensure your gummy worms are also certified gluten-free if cross-contamination is a concern.
- Healthy-ish Version: Use chocolate Greek yogurt instead of pudding. Mix in a little cocoa powder and honey to sweeten it. Use crushed gluten-free granola or almond flour for the “dirt” layer. It’s lighter and higher in protein, though it won’t have the same rich, dessert-like texture. It’s a good option for a post-dinner treat that isn’t too heavy.
- Mini Cupcakes: For a more elegant presentation, use mini muffin liners. Make the layers smaller and use mini gummy worms. These are perfect for individual serving sizes at parties. They look like little terrariums.
- Seasonal Twist: For Christmas, swap the gummy worms for red and green candy canes crushed up on top. For Easter, use vanilla pudding and chocolate cookies with mini marshmallow “bunnies” on top.
I’ve tried the Greek yogurt version for my kids when they’ve had too much sugar earlier in the day. It’s not as indulgent, but it still satisfies the craving for something creamy and chocolatey. The key is to keep the texture contrast, whether you use cookies or granola.
Serving & Storage Suggestions
These cups are best served chilled. The cold temperature enhances the flavor of the pudding and keeps the cookies crisp. If you’ve assembled them ahead of time, keep them in the refrigerator until the last moment.
Storage: You can store leftover dirt cups in the refrigerator for up to 2 days. Cover them tightly with plastic wrap or store them in an airtight container. Note that the cookies will continue to absorb moisture from the pudding, so they will become softer over time. This is actually preferred by some people who like a softer, cake-like texture.
Reheating: Do not reheat these. They are meant to be eaten cold. Reheating will melt the pudding and make the gummy worms slimy, which is not a good texture.
Complementary Dishes: These go well with hot chocolate or milk. If you’re serving them as part of a larger Halloween spread, pair them with savory snacks like bacon-wrapped little smokies to balance out the sweetness. The salty, smoky flavor of the smokies contrasts nicely with the sweet, creamy dirt cups.
Presentation: Place the cups on a dark plate or tray to enhance the “dirt” effect. You can sprinkle a few extra crumbs around the base of the cups for a rustic look. It makes the presentation feel more intentional and less like just a cup of food.
I usually make these the night before and keep them in the fridge. This allows the flavors to meld and makes for a stress-free Halloween night. Just pull them out, add the worms, and serve. It’s that easy.
Nutritional Information & Benefits
While these are definitely a treat, they are relatively light compared to dense cakes or pies. Here’s a general idea of what you’re getting in each cup (approximate values for a 6-ounce cup):
- Calories: Around 250-300 calories per cup.
- Fat: 10-12 grams (mostly from the pudding mix and butter if used).
- Carbohydrates: 40-45 grams (from the cookies and pudding).
- Sugar: 25-30 grams (primarily from the cookies and pudding).
- Protein: 4-5 grams.
The main ingredients, chocolate pudding and cookies, are high in sugar and simple carbohydrates. However, the portion size is controlled by the cup, which helps manage intake. For those with dietary restrictions, the gluten-free and dairy-free adaptations mentioned earlier make this recipe accessible to more people.
From a wellness perspective, I view these as a “fun food” rather than a health food. They are meant for enjoyment, especially during the Halloween season. There’s nothing wrong with treating yourself to something silly and sweet. The key is balance. Enjoy one or two cups as part of a varied diet, and don’t stress over the exact numbers. The joy of the ritual is worth the calories.
If you are watching your sugar intake, consider using a sugar-free pudding mix and low-sugar cookies. It’s not as traditional, but it’s a viable option for those who need to be mindful of their blood sugar levels.
Conclusion
These Creepy Cute Halloween Dirt Cups are more than just a dessert; they are a celebration of the silly, spooky spirit of Halloween. They are easy to make, fun to eat, and always a hit with kids and adults alike. I love that they require minimal effort but deliver maximum impact. Whether you are serving them at a party or just enjoying a quiet night in, they bring a little bit of magic to your kitchen.
I encourage you to try this recipe and make it your own. Feel free to swap the cookies, change the pudding flavor, or experiment with different candy toppings. The beauty of this recipe is its flexibility. It’s a blank canvas for your creativity. And don’t be afraid to add extra worms. We all love a good worm.
If you make these, I’d love to hear how they turned out. Please leave a comment below with your thoughts, or share a photo if you post it on social media. I always enjoy seeing your creations. And if you have any questions, feel free to ask. I’m here to help.
Happy Halloween! May your cups be creepy, your dirt be cute, and your night be full of fun. Enjoy every bite!
Frequently Asked Questions
Can I make these dirt cups ahead of time?
Yes, you can make them up to 2 days in advance. Store them in the refrigerator covered with plastic wrap. Just add the gummy worms right before serving to keep them looking fresh and prevent them from dissolving in the pudding.
What kind of cookies work best for the dirt?
Vanilla wafers are the classic choice, but chocolate sandwich cookies (like Oreos) also work great. Chocolate cookies make the “dirt” look darker and richer, while vanilla wafers provide a nice contrast with the chocolate pudding.
Can I use homemade pudding instead of instant?
Absolutely. Homemade chocolate pudding will give you a richer, more intense chocolate flavor. Just make sure it is completely cooled before assembling the cups. Instant pudding is convenient and sets quickly, which is why it’s popular for this recipe.
How do I keep the cookies from getting too soggy?
To minimize sogginess, add a thin layer of chocolate chips or crushed nuts between the pudding and the top cookie layer. This acts as a barrier. Also, try to assemble the cups no more than a few hours before serving if you prefer a crunchy texture.
Are there any nut-free options for this recipe?
Yes, this recipe is naturally nut-free if you use standard vanilla wafers and pudding mix. Always check the labels on your cookies and pudding mix to ensure they are processed in a facility that handles nuts, especially if you have severe allergies.
Pin This Recipe!
Creepy Cute Halloween Dirt Cups

A quick, no-bake Halloween dessert featuring layers of chocolate pudding, crushed vanilla wafers, and gummy worms for a spooky yet delicious treat.
- Prep Time: 10 minutes
- Cook Time: 0 minutes
- Total Time: 10 minutes
- Yield: 6 servings 1x
- Category: Dessert
- Cuisine: American
Ingredients
- 20–24 vanilla wafers or chocolate sandwich cookies
- 1 package (approx. 3.4 oz) instant chocolate pudding mix
- 2 cups cold whole milk (or plant-based milk for dairy-free)
- 1–2 tablespoons melted butter (optional, for moist crumbs)
- 10–15 long red gummy worms
- Extra crushed cookies for topping
Instructions
- Crush the vanilla wafers or chocolate cookies into fine crumbs using a food processor or a ziplock bag with a rolling pin.
- If using butter, melt it and mix it into the cookie crumbs until the texture resembles wet sand; otherwise, set crumbs aside.
- In a medium bowl, whisk the chocolate pudding mix with cold milk vigorously for 2 minutes until smooth and thick.
- Spoon 1-2 tablespoons of cookie crumbs into the bottom of each serving cup and press down gently to create a base.
- Spoon chocolate pudding over the cookie base, filling each cup about halfway, and smooth the top.
- Sprinkle another layer of cookie crumbs over the pudding, letting it sit loosely.
- Add a final thin layer of cookie crumbs on top to create the ‘dirt’ surface.
- Insert gummy worms into the top layer of crumbs, arranging them to look natural and messy.
- Refrigerate for 30 minutes if time permits, or serve immediately.
Notes
For best texture, assemble cups no more than a few hours before serving if you prefer crunchy cookies. To prevent sogginess, add a thin layer of chocolate chips between the pudding and the top cookie layer. Ensure serving cups are dry before assembling. Gummy worms should be added right before serving to prevent dissolving.
Nutrition
- Serving Size: 1 cup
- Calories: 275
- Sugar: 27
- Sodium: 180
- Fat: 11
- Saturated Fat: 4
- Carbohydrates: 42
- Fiber: 1
- Protein: 4.5
Keywords: Halloween dessert, dirt cups, no-bake dessert, easy Halloween treats, chocolate pudding, gummy worms, kid-friendly dessert


