I assumed that making candy corn flavor from scratch was going to be a nightmare of conflicting textures and weird chemical aftertastes. It took about twenty minutes for that assumption to fall apart completely. I was standing over my kitchen counter, staring at three separate bowls of hot liquid, wondering if I had made a terrible mistake by trying to replicate the iconic Halloween candy in gelatin form. The smell of artificial orange citrus was hitting me a little too hard, and I was ready to bail. But then I added the powdered gelatin, and the magic happened. It didn’t taste like candy corn, but it tasted like the *idea* of candy corn—the sweet, creamy, tangy promise of October.
Honestly, I never thought I’d find joy in layering liquids, but these fun candy corn layered jello cups have become my secret weapon for last-minute party platters. You know how it is when you’re hosting a Halloween gathering and you realize you haven’t bought a single dessert? This recipe saves the day without requiring any baking skills or complicated techniques. It’s colorful, it’s nostalgic, and it looks like you spent hours in the kitchen, even though you’re just waiting for water to set.
The contrast between the bright, artificial colors and the surprisingly smooth, creamy texture is what keeps me coming back. I used to think jello was just for kids’ parties, but adding a touch of cream cheese or condensed milk changes the game entirely. It turns a simple snack into something that feels festive and intentional. I remember serving these at a neighborhood trick-or-treat drop-off last year, and the parents were just as excited as the kids. There is something undeniably fun about eating a dessert that looks like a stack of yellow, orange, and white corn kernels.
I figured the layers would bleed into each other if I wasn’t careful. They didn’t. Once you get the timing right, you get these crisp, distinct bands of color that hold their shape perfectly. It’s satisfying to cut into them, knowing that the effort was minimal for such a high visual payoff. This isn’t just about the taste; it’s about the spectacle. It’s a dessert that brings a smile to your face before you even take a bite.
In the end, I realized that the best part of this recipe isn’t the flavor profile, but the ease. It’s forgiving. If your layers are a bit wobbly, it still tastes good. If the colors aren’t perfectly distinct, it still looks festive. That’s the beauty of fun candy corn layered jello cups. They are approachable, playful, and surprisingly sophisticated in their simplicity. I’ve stuck with this method because it works every single time, and now I want to show you how to make them yourself.
Why You’ll Love This Recipe
Let’s be honest, Halloween desserts usually fall into two categories: overly complicated sugar sculptures or cheap gummy worms. This recipe sits perfectly in the middle, offering a treat that feels homemade but requires zero advanced culinary skills. I’ve tested this layered jello method more times than I can count, and it consistently delivers that perfect wobble without the mess. Here is why this specific version has earned a permanent spot in my seasonal rotation:
- Quick & Easy: You can have these ready to eat in just a few hours, but the active prep time is less than fifteen minutes. It is the ultimate low-effort, high-reward dessert for busy weeknights or last-minute Halloween party planning.
- Simple Ingredients: You likely already have gelatin powder, cream cheese, and sweetened condensed milk in your pantry. No fancy grocery trips are needed to find exotic flavors or hard-to-source items.
- Perfect for Halloween: The yellow, orange, and white color scheme is instantly recognizable and festive. It fits any autumn theme, from classroom parties to office potlucks.
- Crowd-Pleaser: Kids love the bright colors, and adults appreciate the creamy texture that distinguishes it from standard hard jello. It gets rave reviews from both demographics.
- Unbelievably Delicious: The addition of cream cheese and condensed milk creates a rich, pudding-like consistency that is next-level comfort food. It’s sweet, tangy, and incredibly smooth.
What makes this recipe different from the rest is the texture. Standard jello is all about the snap and the water content. By incorporating dairy, we create a creamy, mousse-like layer that coats the palate. It’s not just a snack; it’s a dessert experience. Whether you are a fan of traditional gelatin or prefer a softer set, this balance is spot on.
This recipe isn’t just good—it is the kind that makes you close your eyes after the first bite. It’s comfort food reimagined for the fall season. It’s healthier in the sense that it’s lower in fat than a cheesecake, but it has the same soul-soothing satisfaction. Perfect for impressing guests without stress, or turning a simple meal into something memorable. It’s also great for meal prep; you can make them a day ahead, and they actually taste better after the flavors have had time to meld in the fridge.
What Ingredients You Will Need
This recipe uses simple, wholesome ingredients to deliver bold flavor and satisfying texture without the fuss. The key to success here is quality. Since the flavor profile is relatively mild, the ingredients you choose will shine through. I recommend using unflavored gelatin for the structure and high-quality flavored gelatin for the vibrant colors. You don’t need to buy expensive brands, but sticking to reputable names ensures consistent setting power.
Here is what you will need to make these fun candy corn layered jello cups:
- Unflavored Gelatin (1 packet): This is the base. I prefer Knox brand because it dissolves cleanly without leaving gritty bits. It helps bind the creamy layers together.
- Yellow Gelatin Powder (1 small box): Look for a bright, sunny yellow. This forms the bottom layer of your candy corn look.
- Orange Gelatin Powder (1 small box): This is the middle layer. Make sure it is a true orange, not too red, to mimic the classic candy.
- White Cream Cheese (8 oz block): Full-fat is non-negotiable here. It provides the richness and the opaque white color. Let it come to room temperature before mixing.
- Sweetened Condensed Milk (1 can): This adds sweetness and creaminess. It helps sweeten the tartness of the gelatin and creates that pudding-like texture.
- Heavy Cream or Whipping Cream (1 cup): This is folded in to lighten the mixture. It gives the layers a airy, mousse quality.
- Hot Water (1 cup total): Used to dissolve the gelatin powders. Be sure it is boiling for proper activation.
- Cold Water (1 cup total): Used to cool down the gelatin mixture so it doesn’t melt the cream cheese layer.
For the creamy layers, the ratio of cream cheese to condensed milk is crucial. I’ve tried using less cream cheese, and the result was too sweet and lacked body. Stick to the 8-ounce block for every two layers. If you need a dairy-free option, you can substitute the cream cheese with a vegan cream cheese alternative, though the texture will be slightly different. The heavy cream can be swapped for coconut cream for a richer, tropical note, but it will alter the traditional candy corn flavor profile.
Pro tip: If your gelatin powder is old, it might not set properly. Always check the expiration date. Fresh gelatin is the difference between a soupy mess and a perfect, wobbly cup. Also, ensure your cream cheese is completely smooth before mixing. Any lumps will show up in the final white layer, ruining the clean candy corn aesthetic.
Equipment Needed
You don’t need a lot of fancy gear to make these, but having the right tools makes the process much smoother.
- Small Glass Jars or Cups: Clear glass is essential so you can see the layers. I use 4-ounce glass jars with lids, but any small dessert cup works. Make sure they are heat-resistant if you pour warm liquid in.
- Measuring Cups and Spoons: Precision matters here. Use standard measuring cups for liquids and a scale for the cream cheese if you want to be exact.
- Mixing Bowls: You’ll need at least two bowls—one for the gelatin mixtures and one for whipping the cream cheese blend.
- Hand Mixer or Whisk: A hand mixer makes it much easier to get the cream cheese smooth and fluffy. A whisk works too, but it takes more arm power.
- Ladle or Measuring Cup: Use this to pour the gelatin layers evenly. A small measuring cup gives you more control over the pour.
- Refrigerator: Obviously, you need a fridge with enough space for your jars. Make sure they sit on a flat surface so the layers remain horizontal.
If you don’t have a hand mixer, a sturdy whisk will do the job. Just be prepared to mix for a few extra minutes. For the jars, avoid plastic containers if you can, as gelatin can sometimes stick to plastic and make unmolding or eating difficult. Glass is easier to clean and looks more elegant. Budget-friendly options include repurposed baby food jars or small mason jars you already have at home.
Preparation Method
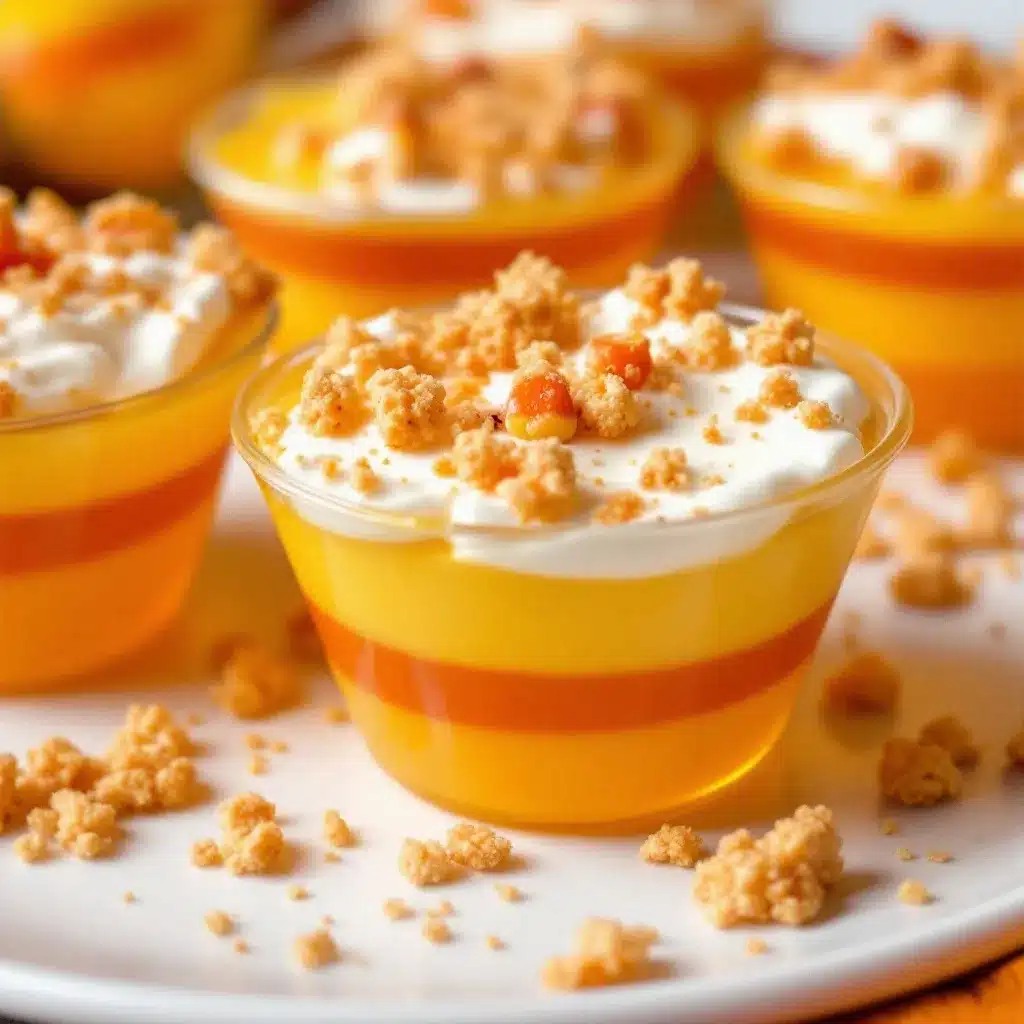
Making fun candy corn layered jello cups is a step-by-step process that requires patience but rewards you with beautiful results. Follow these steps carefully to ensure distinct, vibrant layers.
- Prepare the Yellow Layer (Gelatin Base): In a medium bowl, dissolve the yellow gelatin powder in 1/2 cup of boiling water. Stir until completely dissolved, about 2 minutes. Then, add 1/2 cup of cold water and stir again. Let this mixture cool to room temperature. This should take about 20 minutes. Do not skip the cooling step, or it will melt the previous layer.
- Prepare the Creamy White Layer: In a separate large bowl, beat the softened cream cheese until smooth and creamy. Add the sweetened condensed milk and mix until combined. In another bowl, whip the heavy cream until stiff peaks form. Gently fold the whipped cream into the cream cheese mixture. Be careful not to deflate the cream. This creates your white, mousse-like layer.
- Assemble the First Layers: Pour a layer of the cooled yellow gelatin into the bottom of your glass jars. Aim for about 1/2 inch height. Refrigerate for 30-45 minutes until set. Once set, spoon a layer of the white cream cheese mixture on top. This should be the same height as the gelatin layer. Refrigerate for another 30-45 minutes until firm.
- Prepare the Orange Layer (Gelatin Base): Repeat the process from step one with the orange gelatin powder. Dissolve in 1/2 cup boiling water and 1/2 cup cold water. Let it cool to room temperature. This is your middle layer.
- Assemble the Middle Layers: Once the white layer is set, pour the orange gelatin mixture on top. Refrigerate for 30-45 minutes until set. Then, add another layer of the white cream cheese mixture. Refrigerate again for 30-45 minutes.
- Prepare and Add the Top Yellow Layer: Repeat the gelatin process one last time with the yellow gelatin. Cool to room temperature. Pour this final yellow layer on top of the second white layer. Smooth the top with a spoon.
- Final Set: Refrigerate the cups for at least 4 hours, or overnight, to ensure all layers are fully set and the flavors have melded. Serve chilled.
Troubleshooting tip: If your gelatin layers are not setting, check your water temperature. It must be hot enough to dissolve the powder completely. If the cream cheese layer is too runny, make sure you whipped the heavy cream properly. It needs to be stiff before folding.
Cooking Tips & Techniques
Getting the layers to stay distinct is the hardest part of this recipe. Here are some professional tips to ensure success.
- Cooling is Key: The most common mistake is pouring warm gelatin over a set layer. It will melt the layer below. Always taste the gelatin mixture; it should feel cool to the touch, not warm, before pouring.
- Use a Ladle: Pouring slowly and gently helps prevent the layers from mixing. You can pour the gelatin over the back of a spoon to disperse the flow.
- Room Temperature Cream Cheese: Cold cream cheese creates lumps. Make sure it is fully softened before beating. This ensures a smooth, creamy texture that contrasts nicely with the gelatin.
- Don’t Overmix: When folding the whipped cream into the cream cheese, do it gently. Overmixing deflates the air, resulting in a dense, heavy layer instead of a light, airy one.
- Timing: Plan your time wisely. Each layer requires setting time. If you are short on time, you can use the freezer for 15 minutes to speed up the setting process, but watch it closely to avoid freezing.
I learned this the hard way after my first attempt, where I rushed the cooling process and ended up with a muddy orange-brown mess. Patience pays off here. The layers should be crisp and clear.
Variations & Adaptations
While the classic candy corn colors are iconic, you can easily adapt this recipe to suit different tastes or occasions.
- Seasonal Colors: For Thanksgiving, use orange and brown gelatin. For Christmas, try red and green. The technique remains the same.
- Flavor Swaps: Use lime gelatin for a tangy twist, or berry gelatin for a fruity flavor. Just adjust the colors to match your theme.
- Dairy-Free: Use coconut cream instead of heavy cream and a vegan cream cheese alternative. The texture will be slightly different but still delicious.
- Low-Sugar: Use sugar-free gelatin and condensed milk substitutes. This makes the recipe more accessible for those watching their sugar intake.
I once made these with raspberry and lime gelatin for a spring party, and they were a huge hit. The tartness complemented the creamy cheese layer perfectly. Feel free to experiment with flavors, but stick to the layering technique for the best results.
Serving & Storage Suggestions
These cups are best served chilled. They hold their shape well at room temperature for short periods, but they are definitely a cold dessert.
- Serving: Garnish with a small piece of candy corn or a sprig of mint for a festive touch. Serve with a small spoon, as the layers are delicate.
- Storage: Store in the refrigerator for up to 5 days. Keep them covered to prevent them from absorbing fridge odors. They do not freeze well, as the texture can become grainy upon thawing.
- Reheating: Do not reheat. This is a cold dessert. If the layers separate slightly, a gentle stir can help, but it’s best to serve them as set.
The flavors develop over time, so making them a day ahead is recommended. The cream cheese layer becomes richer, and the gelatin layers become more distinct.
Nutritional Information & Benefits
These fun candy corn layered jello cups are a lighter dessert option compared to cakes or pies. The gelatin layers are low in calories, while the cream cheese and condensed milk provide richness and sweetness.
- Calories: Approximately 250-300 calories per cup, depending on the size.
- Protein: The cream cheese adds a good amount of protein, making it slightly more filling than standard jello.
- Dietary Notes: Not gluten-free if using certain gelatin brands, but generally gluten-free. Contains dairy and sugar.
From a wellness perspective, this dessert is a treat, not a health food. However, it is a great way to satisfy a sweet tooth without overindulging in heavy fats. The portion control is built-in with the small cup size.
Conclusion
Making fun candy corn layered jello cups is a simple yet impressive way to add some Halloween magic to your table. The combination of creamy cheese and tangy gelatin is a flavor profile you will love. I encourage you to try this recipe and customize the colors to fit your party theme. It’s a dessert that brings joy and nostalgia to everyone who tries it.
Please share your creations with me in the comments below. I’d love to see your color combinations and hear how they turned out. If you enjoy this recipe, you might also like my easy apple nachos with peanut butter drizzle for a fall-themed snack. Or, if you need something savory, check out my ultimate creamy buffalo chicken dip for game day.
Thank you for trying this recipe. Happy Halloween!
FAQs
Can I use flavored gelatin for the white layer?
No, the white layer is made from cream cheese, condensed milk, and whipped cream. It is naturally white and creamy. Flavored gelatin would add color and sugar, changing the texture and taste.
Why did my layers mix together?
This usually happens if the gelatin layer was not fully set before adding the next layer, or if the new gelatin layer was too warm. Always wait until the layer is firm to the touch and cool before pouring the next one.
Can I make these ahead of time?
Yes, you can make them up to 5 days in advance. In fact, they taste better after sitting in the fridge for a day, as the flavors meld together.
Is there a substitute for sweetened condensed milk?
You can use evaporated milk mixed with sugar, but the consistency will be thinner. For the best texture, stick to sweetened condensed milk.
Can I use plastic cups instead of glass?
You can, but glass is recommended for better clarity and easier cleaning. Plastic may absorb odors and stains from the gelatin colors.
Pin This Recipe!
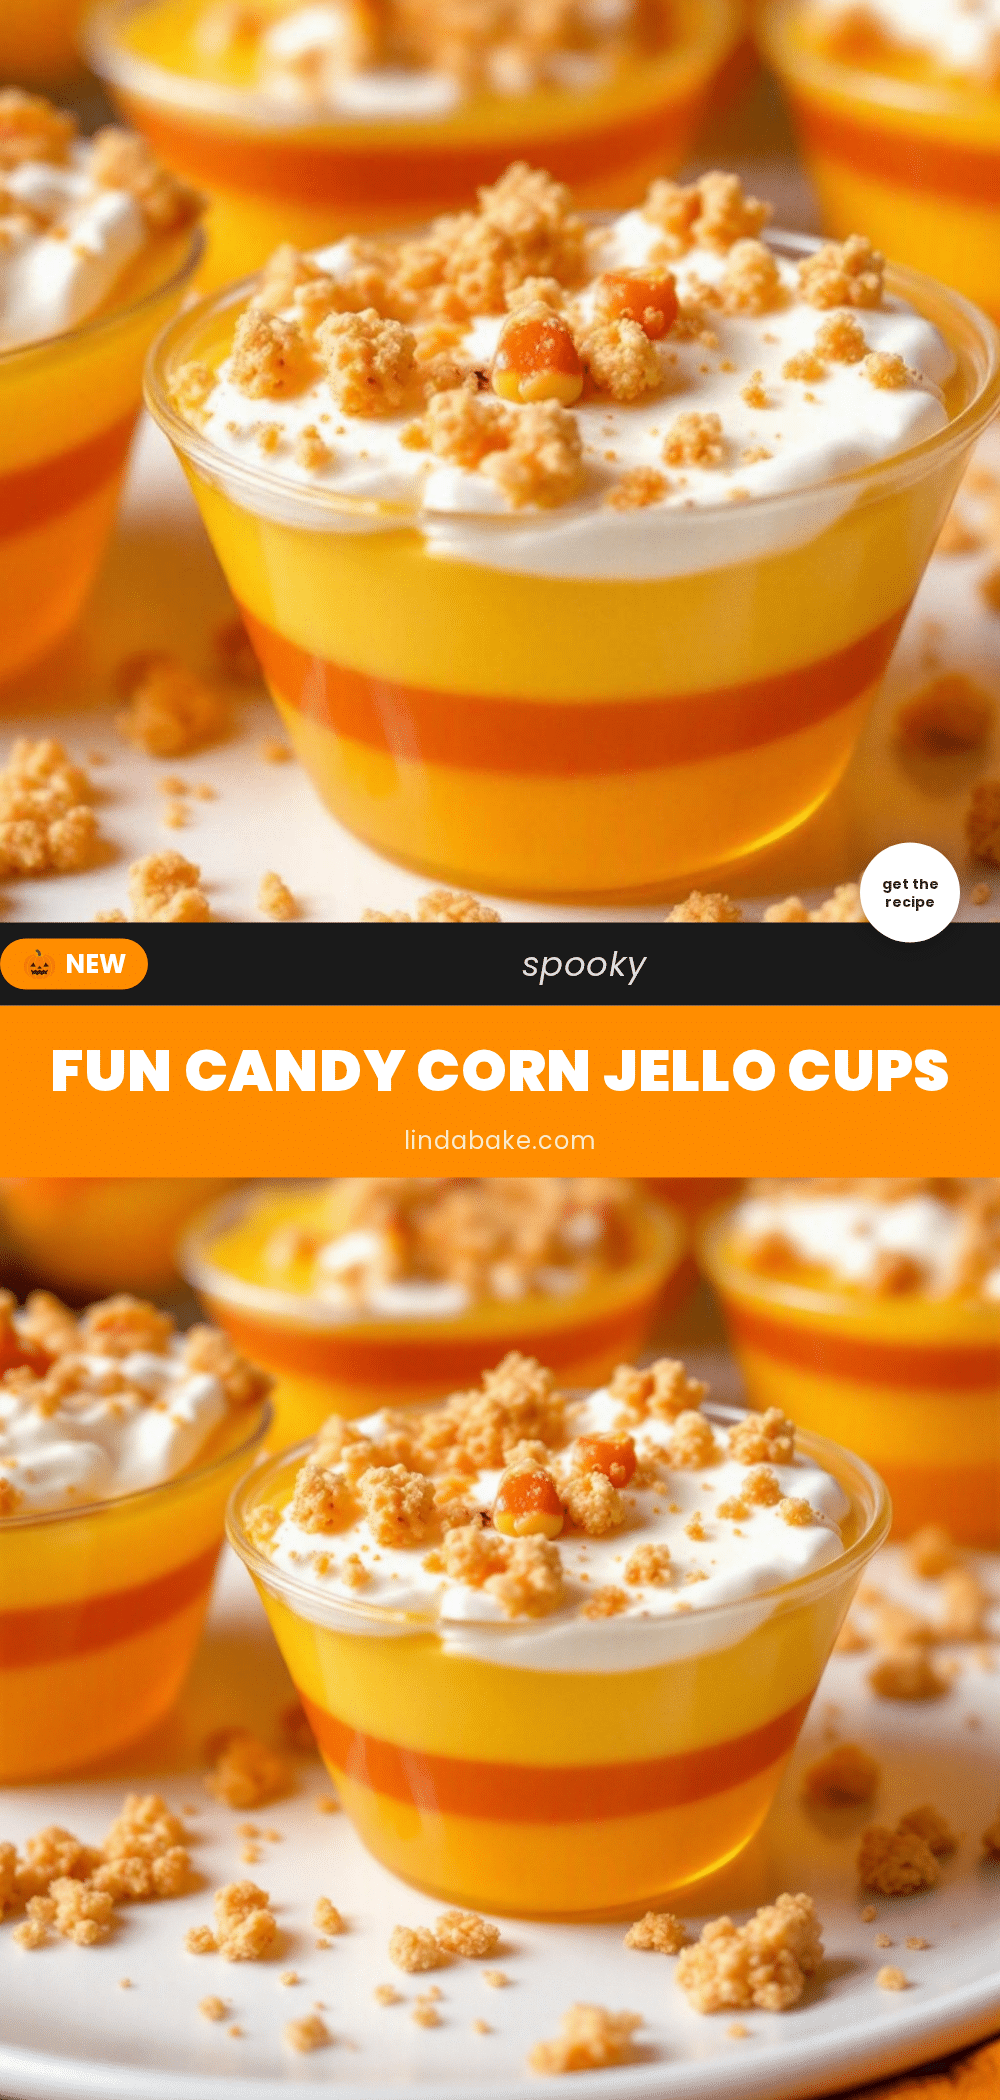
Fun Candy Corn Layered Jello Cups: Easy 3-Step Halloween Dessert

A festive, creamy, and colorful Halloween dessert featuring distinct layers of yellow and orange gelatin alternating with a rich white cream cheese mousse. This easy, no-bake treat is perfect for parties and requires minimal active prep time.
- Prep Time: 15 minutes
- Cook Time: 0 minutes
- Total Time: 4 hours 15 minutes
- Yield: 4 servings 1x
- Category: Dessert
- Cuisine: American
Ingredients
- 1 packet unflavored gelatin (e.g., Knox)
- 1 small box yellow gelatin powder
- 1 small box orange gelatin powder
- 8 oz block full-fat cream cheese, softened to room temperature
- 1 can sweetened condensed milk
- 1 cup heavy cream or whipping cream
- 1 cup hot water (divided)
- 1 cup cold water (divided)
Instructions
- Dissolve yellow gelatin powder in 1/2 cup boiling water, stirring for 2 minutes until clear. Add 1/2 cup cold water and stir. Let cool to room temperature (approx. 20 minutes).
- In a large bowl, beat softened cream cheese until smooth. Add sweetened condensed milk and mix until combined.
- In a separate bowl, whip heavy cream until stiff peaks form. Gently fold whipped cream into the cream cheese mixture to create a light, mousse-like white layer.
- Pour a 1/2-inch layer of cooled yellow gelatin into the bottom of small glass jars or cups. Refrigerate for 30-45 minutes until set.
- Spoon a 1/2-inch layer of the white cream cheese mixture on top of the set yellow layer. Refrigerate for another 30-45 minutes until firm.
- Repeat the gelatin process with orange gelatin powder (dissolve in 1/2 cup boiling water and 1/2 cup cold water). Let cool to room temperature.
- Pour the cooled orange gelatin on top of the set white layer. Refrigerate for 30-45 minutes until set.
- Add another layer of the white cream cheese mixture on top of the set orange layer. Refrigerate for 30-45 minutes until firm.
- Repeat the gelatin process one last time with yellow gelatin. Cool to room temperature.
- Pour the final yellow gelatin layer on top. Smooth the surface with a spoon.
- Refrigerate the cups for at least 4 hours, or overnight, to ensure all layers are fully set. Serve chilled.
Notes
Ensure gelatin layers are completely cool to the touch before pouring over previous layers to prevent melting. Cream cheese must be fully softened to avoid lumps. For best results, make these a day ahead to allow flavors to meld. Do not freeze as texture may become grainy.
Nutrition
- Serving Size: 1 cup
- Calories: 275
- Sugar: 20
- Sodium: 80
- Fat: 18
- Saturated Fat: 11
- Carbohydrates: 22
- Protein: 5
Keywords: Halloween dessert, candy corn jello, layered gelatin, no bake dessert, cream cheese jello, easy party dessert, fall treats


