I had been looking for a chicken thigh recipe that actually delivered on the crispy skin promise without a deep fryer or a half-hour of stovetop babysitting. Every version I tried either turned out soggy or required so much oil that the whole kitchen smelled like a fast food joint for two days. The air fryer sat on my counter looking promising, but most recipes for chicken thighs in it came out dry on the inside or rubbery on the outside. Not terrible, but not the kind of thing you’d get excited about making again.
This one started as a Tuesday night experiment when I had a package of chicken thighs thawing and a head of garlic that needed using. I figured the garlic would burn in the air fryer (it usually does), but I tossed it in anyway, hoping for the best. The result was one of those rare kitchen moments where you take a bite and just stop talking for a second. The garlic had softened into these sweet, jammy pockets, the Parmesan had melted into a lace-like crust, and the chicken was somehow both juicy inside and genuinely crunchy on the outside.
I’ve made these crispy garlic Parmesan chicken thighs at least a dozen times since that first attempt, tweaking the temperature and timing until they came out perfect every single time. They’re the kind of dinner that feels like you put in way more effort than you actually did. And honestly, that’s my favorite kind of meal.
Why You’ll Love This Recipe
These air fryer chicken thighs solve the crispy skin problem once and for all. Here is why this version actually works where others fall short:
- Ready in under 30 minutes: From fridge to plate in about 25 minutes, which is faster than preheating a regular oven.
- No flipping required: The air fryer circulates heat so evenly that you can set it and forget it until the timer goes off.
- Pantry-friendly ingredients: You likely have everything except maybe the chicken itself already in your kitchen.
- Juicy meat, crispy skin: The high heat renders the fat quickly while keeping the interior tender and moist.
- Minimal cleanup: One bowl for the seasoning mixture, one air fryer basket to rinse afterward.
What makes these different from other air fryer chicken recipes is the Parmesan situation. Most recipes have you sprinkle cheese on top, where it either burns or slides off. Here, the Parmesan gets mixed with the seasonings and pressed into the skin, creating a crust that actually stays put. The garlic powder and fresh garlic work together too, the powder infuses the meat while the fresh cloves soften into buttery little bites.
This is the kind of recipe you make on a busy weeknight when you need something satisfying without a lot of fuss. It is also the kind of recipe you make for company because it looks impressive on a platter with some lemon wedges and fresh herbs. I have served these at casual dinners and watched people go back for thirds.
What Ingredients You Will Need
This recipe relies on simple, everyday ingredients that work together to create big flavor without any complicated techniques. Here is what you will need:
- Chicken thighs (bone-in, skin-on): 4 to 6 thighs, about 2 pounds total. Bone-in keeps the meat moist during cooking, and the skin is what gets that gorgeous crispy texture. You can use boneless thighs, but reduce cooking time by about 5 minutes.
- Grated Parmesan cheese: ½ cup, finely grated (not the pre-shredded stuff in bags). The powdery kind from a green can works fine here, but freshly grated Parmigiano-Reggiano gives a nuttier flavor and crisps up better.
- Garlic cloves: 4 to 5 cloves, peeled and smashed slightly. Leave them whole so they soften without burning. If you slice them, they will burn in the air fryer.
- Garlic powder: 1 teaspoon. This is different from fresh garlic, it adds a savory depth that the fresh cloves do not provide.
- Paprika: 1 teaspoon. Use smoked paprika for a deeper flavor or sweet paprika for a milder taste.
- Dried oregano: ½ teaspoon. Italian seasoning works as a substitute.
- Salt: 1 teaspoon kosher salt (use ½ teaspoon if using table salt).
- Black pepper: ½ teaspoon, freshly ground.
- Olive oil: 1 tablespoon, for coating the chicken. Helps the seasoning stick and encourages browning.
- Fresh parsley (optional): For garnish, adds color and freshness.
- Lemon wedges (optional): For serving, the acidity cuts through the richness beautifully.
I recommend using Bell & Evans or Mary’s Free Range Chicken if you can find them. The quality difference shows in the texture, and the skin crisps up more reliably. For the Parmesan, I have tested this with Kraft grated Parmesan and with a wedge of Parmigiano-Reggiano I grated myself. Both work, but the fresh stuff creates a more delicate, lacy crust.
If you want to swap the oregano for thyme or rosemary, go for it. The recipe is forgiving. Just keep the garlic powder and paprika, those two are non-negotiable for the flavor base.
Equipment Needed
You do not need much for this recipe, which is part of why I make it so often:
- Air fryer: Any brand works, I use a 5.8-quart Cosori, but a smaller basket just means cooking in batches.
- Mixing bowl: Medium size, for combining the seasoning mixture.
- Tongs: For handling the chicken without tearing the skin.
- Paper towels: For patting the chicken dry, a crucial step.
- Instant-read thermometer: Not strictly necessary but helpful for peace of mind. Chicken is done at 165°F internally.
If you do not have an air fryer, you can make these in a convection oven at 400°F for about 35 minutes. The skin will not get quite as crispy, but it will still be good. A regular oven works too, just add 5 to 10 minutes to the cooking time and expect less browning.
I have learned the hard way that overcrowding the air fryer basket ruins the crispiness. The chicken needs space for the hot air to circulate. If you are cooking for more than four people, cook in two batches and keep the first batch warm in a low oven.
Preparation Method
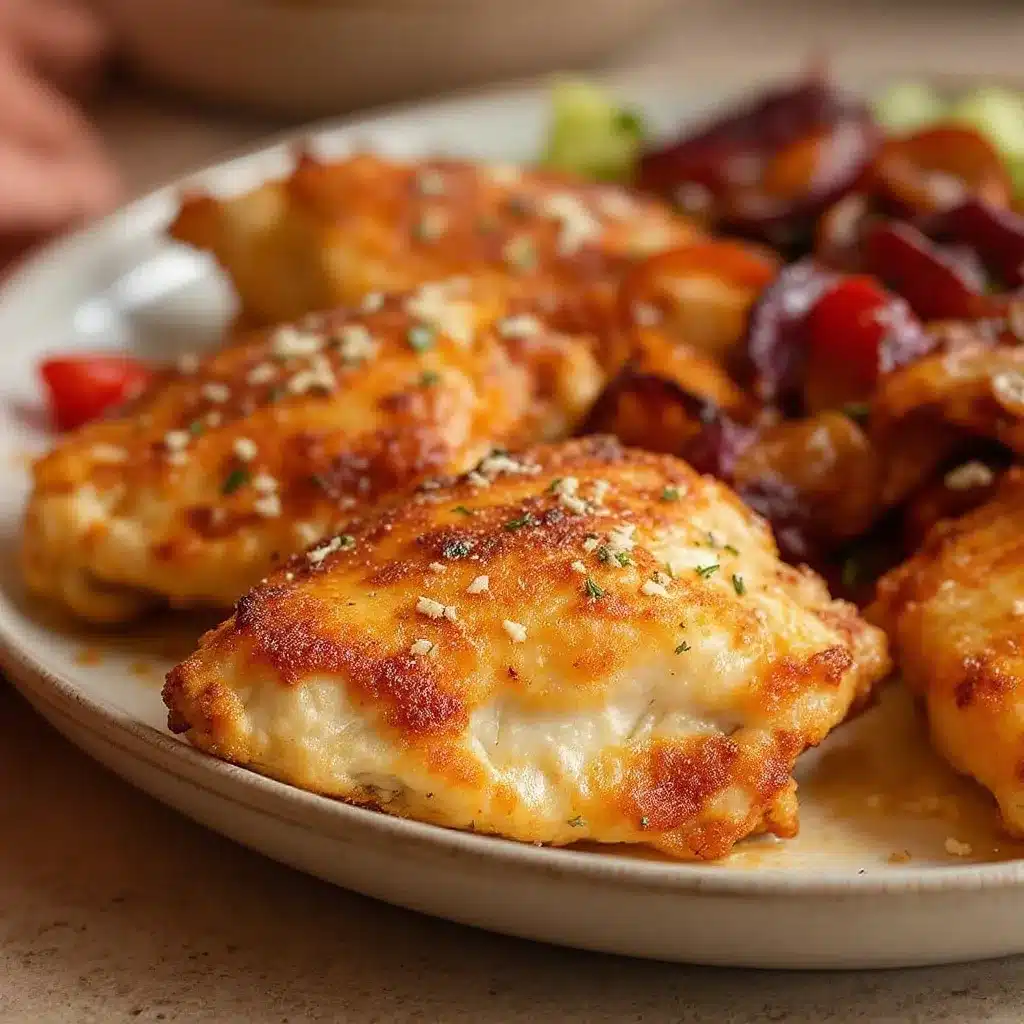
This recipe moves fast once you start, so have everything ready before you begin. Here is how it goes:
- Pat the chicken dry: Use paper towels to dry each thigh thoroughly. This is the most important step for crispy skin. Wet skin steams instead of crisping. Let the chicken sit uncovered on a plate for 5 minutes after patting to air-dry slightly.
- Mix the seasoning: In a medium bowl, combine the grated Parmesan, garlic powder, paprika, dried oregano, salt, and black pepper. Stir with a fork to break up any clumps. The mixture should look like a coarse, sandy texture.
- Coat the chicken: Drizzle the olive oil over the chicken thighs and rub it into the skin with your hands. Then press each thigh into the Parmesan mixture, skin-side down first, making sure the seasoning adheres well. Do not shake off the excess, you want a generous coating.
- Preheat the air fryer: Set your air fryer to 380°F (193°C) and let it preheat for 3 minutes. Preheating ensures the chicken starts cooking immediately, which helps the skin crisp up.
- Arrange in the basket: Place the seasoned chicken thighs skin-side up in the air fryer basket, leaving at least ½ inch between each piece. Tuck the smashed garlic cloves in between the thighs.
- Cook for 18 minutes: Set the timer for 18 minutes. Do not open the basket during cooking. The air fryer does the work, trust it.
- Check for doneness: At 18 minutes, the skin should be golden brown and crispy. Insert an instant-read thermometer into the thickest part of a thigh (avoiding the bone). You are looking for 165°F (74°C). If it needs more time, cook in 2-minute increments.
- Rest before serving: Let the chicken rest in the basket for 3 minutes after cooking. This lets the juices redistribute. Transfer to a serving plate, scatter the roasted garlic cloves over the top, and garnish with fresh parsley and lemon wedges.
A note on timing: Thigh thickness varies a lot. A 6-ounce thigh cooks faster than an 8-ounce one. If your thighs are on the smaller side, check them at 15 minutes. If they are huge, expect 20 to 22 minutes. The visual cue matters too, the skin should be deep golden brown with some darker spots where the Parmesan has caramelized.
Cooking Tips & Techniques
I have burned a lot of garlic in my air fryer journey. Here is what I learned so you do not have to repeat my mistakes:
Keep the garlic whole. Sliced or minced garlic burns at air fryer temperatures. Smashed whole cloves soften into a spreadable, sweet paste. If you love garlic as much as I do, add extra cloves, they are like little flavor bombs when they are done.
Do not overcrowd the basket. This is the number one reason air fryer chicken turns out soggy. The hot air needs room to circulate. If your basket is small, cook in two batches. The extra 10 minutes is worth it for crispy results.
Let the chicken come to room temperature. If the chicken is straight from the fridge, the outside will overcook before the inside reaches 165°F. Let it sit on the counter for 15 minutes before seasoning. This small step makes a noticeable difference in evenness.
Resist the urge to flip. Unlike oven-roasted chicken, air fryer chicken does not need flipping. The circulating air cooks both sides evenly. Flipping can dislodge the Parmesan crust, and you worked hard to get it on there.
Use a thermometer. I know, it is an extra step. But chicken thighs can look done on the outside while still being undercooked near the bone. An instant-read thermometer takes the guesswork out. I use a Thermapen and it has saved me from serving undercooked chicken more times than I can count.
One more thing: if your air fryer runs hot (they vary by brand), reduce the temperature to 370°F for the first batch and adjust from there. My first Cosori ran hot, and I learned to trust my instincts over the recipe card.
Variations & Adaptations
This recipe is flexible. Here are some ways to change it up:
- Spicy version: Add ½ teaspoon cayenne pepper and 1 teaspoon red pepper flakes to the seasoning mix. Serve with a side of ranch or blue cheese dressing for dipping.
- Lemon herb version: Add the zest of one lemon to the Parmesan mixture and replace the oregano with fresh thyme leaves. Squeeze lemon juice over the finished chicken before serving.
- Keto/low-carb friendly: This recipe is naturally low in carbs (about 2g per serving). Serve with roasted broccoli or a simple arugula salad instead of potatoes or rice.
- Dairy-free adaptation: Skip the Parmesan and use ¼ cup nutritional yeast mixed with ¼ cup almond flour. The texture will be less crispy but still delicious.
- Boneless thigh option: Reduce cooking time to 12 to 14 minutes. The boneless version cooks faster and works great for meal prep, just slice it up and add to salads or grain bowls.
I tried a variation with fresh rosemary and lemon zest last month, and it was fantastic. The rosemary got slightly crispy in the air fryer, which added a lovely texture contrast. If you try that, just chop the rosemary finely so it does not burn.
For a different cooking method, you can make these in a cast iron skillet on the stovetop. Start them skin-side down in a cold skillet, then cook over medium heat for 12 minutes without moving them. Flip and finish in a 400°F oven for 10 minutes. The result is similar to the air fryer version but with a slightly thicker crust.
Serving & Storage Suggestions
These chicken thighs are best served hot and fresh from the air fryer, but they hold up well for leftovers too.
Serving temperature: Serve immediately after the 3-minute rest. The skin stays crispy for about 10 minutes, so have your sides ready before you start cooking. I like to serve these with fresh quinoa avocado sushi salad bowl for a light, refreshing contrast to the rich chicken.
Presentation idea: Arrange the thighs on a large white platter. Scatter the roasted garlic cloves around them, then add lemon wedges and a sprinkle of fresh parsley. A drizzle of honey over the top (just a little) adds a beautiful sheen and a touch of sweetness.
What to serve alongside: These pair well with roasted vegetables (asparagus, Brussels sprouts, or zucchini), a crisp green salad with lemon vinaigrette, or simple mashed potatoes. For a complete meal, try serving them with creamy hatch green chile chicken enchiladas for a double chicken dinner situation that everyone loves.
Storage: Refrigerate leftovers in an airtight container for up to 4 days. The skin will lose its crispiness in the fridge, but the flavor remains excellent.
Reheating: The air fryer is the best way to reheat these. Set it to 350°F and cook for 4 to 5 minutes. The skin will crisp back up almost like fresh. A microwave works in a pinch, but the skin will be soft. If you use the microwave, remove the skin first, reheat the meat, then crisp the skin separately in a dry skillet for 2 minutes.
I have also shredded leftover chicken thighs and used them in tacos or on top of salads. The Parmesan seasoning adds so much flavor that you barely need additional seasoning.
Nutritional Information & Benefits
Here is the approximate nutritional breakdown for one serving (one thigh, assuming 5 thighs total from 2 pounds):
- Calories: 345
- Protein: 28g
- Fat: 24g (saturated: 7g)
- Carbohydrates: 3g
- Fiber: 0g
- Sugar: 1g
- Sodium: 580mg
Chicken thighs are higher in fat than chicken breasts, but that fat is what keeps them juicy and flavorful. They are also rich in selenium, niacin, and vitamin B6, all of which support immune function and energy metabolism.
Garlic is the unsung hero here. It contains allicin, a compound with anti-inflammatory and antimicrobial properties. When you roast the garlic cloves alongside the chicken, you get the benefits without the harsh raw bite.
This recipe is naturally gluten-free and can be made dairy-free with the nutritional yeast swap mentioned above. It fits into keto, low-carb, and paleo diets as written. If you are watching your sodium, reduce the salt to ½ teaspoon and skip the salted butter if you add any.
I like serving these thighs as part of a balanced plate with lots of vegetables. The protein and fat keep you full for hours, which makes it a great dinner for busy weeknights when you do not want to snack later.
Conclusion
These crispy garlic Parmesan chicken thighs have become my go-to answer for the “what’s for dinner?” question that pops up around 5 PM every day. They are fast enough for a weekday, fancy enough for a weekend, and forgiving enough for a beginner cook.
The combination of juicy dark meat, crunchy Parmesan crust, and sweet roasted garlic is one of those flavor combos that just works. You do not need a dozen ingredients or complicated techniques. Just good chicken, a few pantry staples, and an air fryer that does most of the work.
I would love to hear how these turn out for you. Did you try a variation? Add extra spice? Serve them with something unexpected? Drop a comment below and let me know. And if you are looking for another quick dinner idea, try my Thai coconut curry pulled pork, it is another one of those set-it-and-forget-it recipes that makes weeknight cooking feel effortless.
Happy cooking, and do not forget the lemon wedges. Trust me on that one.
Frequently Asked Questions
Can I use boneless skinless chicken thighs for this recipe?
Yes, but reduce the cooking time to 12 to 14 minutes and expect a different texture. The skin is what gets crispy, so without it, you will have a tender, seasoned thigh without the crunch. Consider adding a light breading or extra Parmesan to compensate.
How do I keep the Parmesan from burning in the air fryer?
Keep the temperature at 380°F rather than higher. Finely grated Parmesan browns quickly, so the moderate temperature gives it time to crisp without burning. If your air fryer runs hot, try 370°F for your first batch.
Can I prep these ahead of time?
You can season the chicken up to 8 hours in advance and keep it covered in the refrigerator. Let it sit at room temperature for 15 minutes before air frying. Do not coat it more than 8 hours ahead, or the salt will draw out moisture and make the skin less crispy.
What if I do not have an air fryer?
Bake the chicken thighs in a 400°F oven for 35 to 40 minutes, or until the internal temperature reaches 165°F. Place them on a wire rack set inside a baking sheet to allow air circulation underneath. The skin will be less crispy than the air fryer version but still delicious.
How do I make the skin extra crispy?
Pat the chicken very dry with paper towels and let it air-dry for 5 minutes before seasoning. Do not overcrowd the air fryer basket. And do not skip the resting time after cooking, it lets the skin set and stay crunchy instead of steaming soft on the plate.
Pin This Recipe!
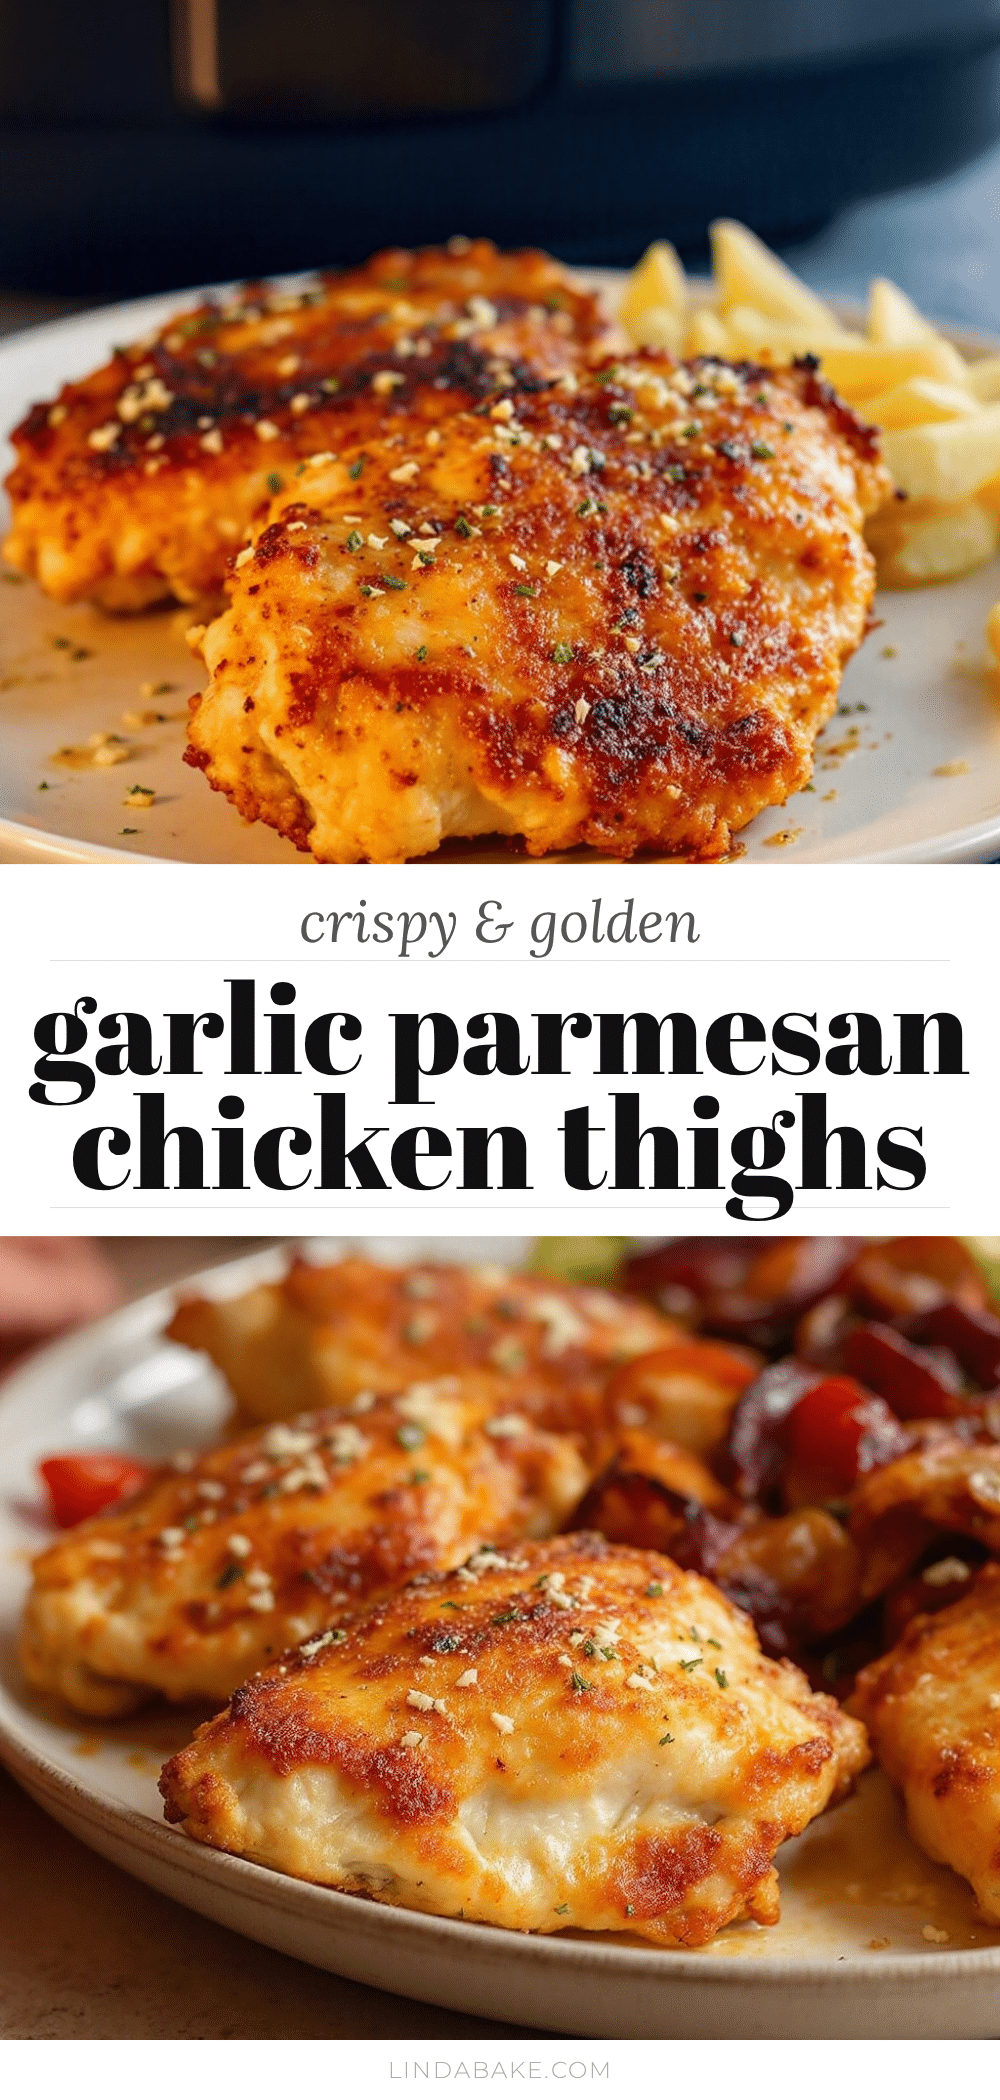
Crispy Garlic Parmesan Chicken Thighs (Easy Air Fryer Recipe)

Juicy bone-in chicken thighs with a crunchy Parmesan crust and sweet roasted garlic, ready in under 30 minutes using an air fryer. This easy recipe delivers crispy skin without deep frying or stovetop babysitting.
- Prep Time: 10 minutes
- Cook Time: 18 minutes
- Total Time: 28 minutes
- Yield: 4 to 6 servings 1x
- Category: Main Course
- Cuisine: American
Ingredients
- 4 to 6 bone-in, skin-on chicken thighs (about 2 pounds total)
- ½ cup finely grated Parmesan cheese (freshly grated preferred)
- 4 to 5 garlic cloves, peeled and smashed
- 1 teaspoon garlic powder
- 1 teaspoon paprika (smoked or sweet)
- ½ teaspoon dried oregano
- 1 teaspoon kosher salt (or ½ teaspoon table salt)
- ½ teaspoon freshly ground black pepper
- 1 tablespoon olive oil
- Fresh parsley for garnish (optional)
- Lemon wedges for serving (optional)
Instructions
- Pat the chicken thighs dry thoroughly with paper towels. Let them sit uncovered on a plate for 5 minutes to air-dry slightly.
- In a medium bowl, combine the grated Parmesan, garlic powder, paprika, dried oregano, salt, and black pepper. Stir with a fork to break up any clumps.
- Drizzle the olive oil over the chicken thighs and rub it into the skin with your hands. Press each thigh into the Parmesan mixture, skin-side down first, ensuring a generous coating.
- Preheat the air fryer to 380°F (193°C) for 3 minutes.
- Place the seasoned chicken thighs skin-side up in the air fryer basket, leaving at least ½ inch between each piece. Tuck the smashed garlic cloves in between the thighs.
- Cook for 18 minutes without opening the basket.
- Check for doneness: the skin should be golden brown and crispy. Insert an instant-read thermometer into the thickest part of a thigh (avoiding the bone); it should read 165°F (74°C). If needed, cook in 2-minute increments.
- Let the chicken rest in the basket for 3 minutes. Transfer to a serving plate, scatter the roasted garlic cloves over the top, and garnish with fresh parsley and lemon wedges.
Notes
Pat the chicken very dry for maximum crispiness. Keep garlic cloves whole to prevent burning. Do not overcrowd the air fryer basket; cook in batches if needed. Let chicken come to room temperature for 15 minutes before cooking for even results. If your air fryer runs hot, reduce temperature to 370°F. For boneless thighs, reduce cooking time to 12-14 minutes. Leftovers can be reheated in the air fryer at 350°F for 4-5 minutes to restore crispiness.
Nutrition
- Serving Size: 1 thigh
- Calories: 345
- Sugar: 1
- Sodium: 580
- Fat: 24
- Saturated Fat: 7
- Carbohydrates: 3
- Protein: 28
Keywords: air fryer chicken thighs, crispy chicken thighs, garlic parmesan chicken, easy chicken recipe, weeknight dinner, keto chicken, low carb chicken


