I didn’t want to love these. Let’s just get that out there first.
I’m not a candy corn person. Never have been. Every October, those little waxey triangles show up in little mesh bags and I politely smile while everyone else dumps them into bowls. To me, they always tasted like straight sugar with a texture that feels more like a candle than a candy. So when my kid asked if we could make candy corn rice krispie treats for their Halloween class party, I honestly hesitated. I almost said no.
But then I thought—fine. Let’s try it. Worst case, I’d end up with a pan of weirdly colored cereal bars nobody wanted. Best case? Maybe I’d finally figure out what people see in that little orange-and-yellow candy.
I grabbed a box of Rice Krispies, a bag of marshmallows, and a bag of candy corn from the clearance aisle (because I wasn’t about to invest real money in something I was skeptical about). I melted the butter, stirred in the marshmallows, and tossed in the candy corn at the very last second before pressing it all into the pan. I didn’t even stir it all the way—just folded it a couple times so you’d get these little pockets of melted orange and yellow running through the white cereal.
And then I tried one.
And okay. I get it now.
The candy corn melts down just enough to create these chewy, almost caramel-like streaks throughout the treat. It’s not cloying the way straight candy corn is. It’s softer, more buttery, with this subtle vanilla-honey thing going on that pairs perfectly with the marshmallow. I ate three before the pan was fully set. My kid ate four. My husband, who also claims to hate candy corn, ate two and then pretended he didn’t.
These easy 3-ingredient candy corn rice krispie treats ended up being the surprise hit of the party. And honestly? They changed my mind about a candy I’ve dismissed for thirty years. Sometimes the best recipes come from being wrong about something.
Why You’ll Love This Recipe
Let’s be real—you don’t need another complicated dessert in your life. What you need is something that looks like you tried way harder than you actually did. These treats deliver exactly that.
- Only 3 Ingredients: Butter, marshmallows, and candy corn. That’s it. No fancy extracts, no specialty stores, no hunting down obscure baking supplies. You can grab everything at the grocery store in under five minutes.
- No Baking Required: This is a stovetop recipe from start to finish. No oven preheat, no waiting for things to rise. You’re looking at about 10 minutes of active work and then just letting them set.
- Perfect for Halloween Parties: The colors naturally mimic candy corn’s signature orange, yellow, and white—but without any artificial coloring beyond what’s already in the candy. They look festive without needing food dye or sprinkles.
- Kid-Friendly: My seven-year-old helped me stir everything. There’s no hot oven involved, just a warm pot on the stove. Supervision is still needed, but this is genuinely one of those recipes kids can feel proud of making themselves.
- Crowd-Pleaser: Even people who swear they hate candy corn (like me) end up reaching for seconds. Something about the way the candy melts into the marshmallow changes the whole flavor profile.
What makes this different from every other rice krispie treat recipe out there? It’s the texture. Most versions use extra butter or vanilla to boost flavor, but here the candy corn does all the heavy lifting. It melts into these little chewy pockets that give you two textures in one bite—crunchy cereal, soft marshmallow, and then these surprise ribbons of caramel-like sweetness. It’s not just another version. It’s the version that finally makes candy corn make sense.
What Ingredients You Will Need
This recipe uses exactly three ingredients. That’s not a gimmick—it’s genuinely all you need. Here’s what to grab and why each one matters.
- 3 tablespoons unsalted butter: Butter is what gives these treats their richness and helps the marshmallows melt smoothly without burning. I prefer unsalted here because candy corn is already pretty sweet, and salted butter can throw off the balance. If all you have is salted butter, just cut back to 2 tablespoons to compensate for the extra saltiness. (Adds richness and prevents sticking)
- 10 ounces marshmallows (about 4 cups mini marshmallows or 40 large): Standard marshmallows work perfectly. Avoid using mini marshmallows labeled “for hot cocoa”—those are smaller and can melt too fast. If you want to get fancy, jet-puffed is my go-to brand because they melt evenly and don’t leave weird graininess. (Binds the cereal together)
- 1 cup candy corn: This is the star ingredient. Don’t use the seasonal autumn blend with the little pumpkins and leaves—stick with straight candy corn. The texture melts differently when you mix in other shapes. Brach’s is the most widely available and works great. Store brands tend to be harder and don’t melt as well, so if you can, spring for name brand. (Creates those signature caramel-like streaks)
- 6 cups Rice Krispies cereal (or any crispy rice cereal): The original is always reliable, but store brands work fine too. Just make sure it’s fresh—stale cereal will give you sad, chewy treats instead of that satisfying snap. (Provides the classic crunch)
That’s genuinely it. No vanilla extract, no salt, no food coloring. The candy corn handles both the flavor and the color. If you’re feeling adventurous, you can add a pinch of flaky sea salt on top before the treats set—it cuts the sweetness beautifully—but it’s completely optional.
Equipment Needed
You don’t need a professional kitchen setup for this. Here’s what you’ll actually use.
- Large pot or Dutch oven: You need something big enough to stir everything without cereal flying everywhere. A 5-quart pot is ideal. If you only have a smaller pot, work in batches.
- Rubber spatula or wooden spoon: A silicone spatula is my preference because it scrapes the sides cleanly and doesn’t scratch your pot. Wooden spoons work fine but tend to leave marshmallow stuck in the grain.
- 9×13-inch baking pan: This gives you the perfect thickness—not too thin, not too thick. An 8×8 pan will give you taller treats, just adjust the pressing technique so they’re even.
- Parchment paper or foil: Absolutely line your pan. If you don’t, you’ll be chiseling treats out with a butter knife and cursing my name. Leave overhang on two sides for easy lifting.
- Butter or cooking spray: You need to grease everything—the spatula, your hands, the parchment. Marshmallow sticks to everything like it has a personal vendetta.
I’ve made these in a cheap nonstick pot from Target and they turned out fine. You don’t need fancy equipment. Just make sure whatever pot you use is big enough—overflowing marshmallow is a nightmare to clean.
Preparation Method
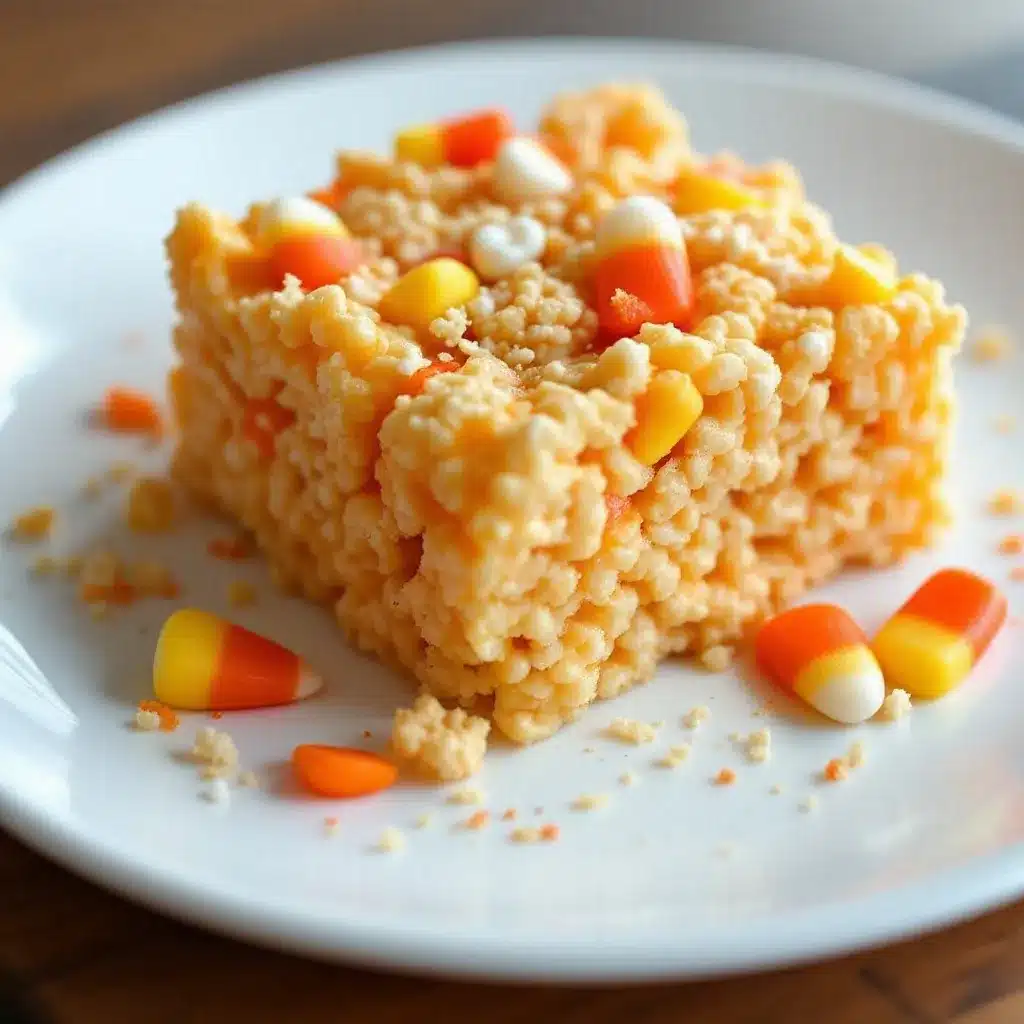
This is one of those recipes where timing matters more than technique. Read through all the steps before you start, because once the marshmallows are melted, you need to move fast.
- Prepare your pan. Line a 9×13-inch baking pan with parchment paper or foil, leaving about 2 inches of overhang on the long sides. Lightly grease the parchment with butter or cooking spray. Set it aside. Do not skip this step—I’ve made that mistake and spent 20 minutes scraping marshmallow off metal.
- Melt the butter. Place your large pot over medium-low heat. Add the 3 tablespoons of unsalted butter and let it melt slowly. Don’t crank the heat—butter burns fast and burnt butter ruins the whole batch. Swirl the pot occasionally so it melts evenly. (About 2 minutes)
- Add the marshmallows. Once the butter is fully melted, pour in all 10 ounces of marshmallows. Stir constantly with your rubber spatula. The marshmallows will start to puff up and then collapse as they melt. Keep stirring until the mixture is completely smooth and glossy. This takes about 3-4 minutes. If you see any lumps, keep stirring—they’ll eventually melt.
- Remove from heat immediately. As soon as the marshmallows are smooth, take the pot off the burner. Leaving it on the heat will cause the mixture to seize up and turn into a hard, sticky mess. I’ve done this before and ended up with something closer to taffy than treat base.
- Add the cereal. Pour in the 6 cups of Rice Krispies all at once. Fold gently—don’t stir aggressively or you’ll crush the cereal into dust. Use a folding motion: scoop from the bottom, lift, and turn. About 10-12 folds should get everything mostly combined.
- Add the candy corn. Here’s the key: don’t stir the candy corn in completely. Add 1 cup of candy corn on top of the cereal mixture and fold just 3-4 times. You want visible streaks of orange and yellow running through the white marshmallow. If you overmix, the candy corn melts completely and you lose that beautiful marbled effect. (About 30 seconds)
- Transfer to the pan. Scrape the mixture into your prepared pan. Don’t dump it all in one spot—try to spread it evenly as you pour. Use your greased spatula to gently push it into the corners.
- Press evenly. Here’s where most people go wrong. Grease your hands lightly with butter or cooking spray. Press the mixture down firmly but gently. Don’t smash it flat—you want some air pockets for texture. If you press too hard, the treats turn into dense bricks. I aim for about 1 inch thick, pressing just until the top looks even.
- Let them set. Allow the treats to cool at room temperature for at least 30 minutes. Don’t rush this by putting them in the fridge—condensation will make them soggy. The candy corn needs time to firm back up after melting.
- Cut and serve. Lift the whole block out using the parchment overhang. Place on a cutting board. Use a sharp knife to cut into squares. Wipe the knife clean between cuts for neat edges. I usually get 12-16 squares depending on how big I cut them.
One thing I learned the hard way: if the mixture starts getting too stiff while you’re pressing it, your marshmallow base was overcooked. Next time, take it off the heat sooner. For this batch, just press as best you can and accept slightly irregular shapes—they’ll still taste amazing.
Cooking Tips & Techniques
I’ve made these treats at least a dozen times now, and I’ve messed up more batches than I care to admit. Here’s what I’ve learned.
Low and slow is non-negotiable. I burned my first batch because I thought “medium heat” meant I could walk away. Nope. Medium-low heat, constant stirring, and patience. The marshmallows should melt into a silky pool, not a bubbling volcano. If you see steam rising aggressively, your heat is too high.
Don’t overmix the candy corn. This was my biggest failure. I stirred and stirred, trying to distribute the candy corn evenly, and ended up with orange-tinted treats that tasted fine but looked like a muddy mess. The whole point is those visible ribbons of color. Three or four folds max. Let the candy corn stay in clumps.
Use fresh marshmallows. Stale marshmallows get hard and don’t melt smoothly. If your bag has been sitting in the pantry for six months, buy a new one. Same goes for the cereal—stale Rice Krispies don’t snap, they just bend sadly.
Timing is everything. You have about 60 seconds from when you take the pot off the heat to when the mixture starts setting up. Have your pan prepped, your cereal measured, and your candy corn ready to go before you even turn on the stove. There’s no time to search for a measuring cup once things get moving.
Wet your hands. If you’re pressing the mixture down and it keeps sticking to your fingers, wet your hands with cold water. The moisture creates a barrier between the marshmallow and your skin. Just don’t use too much water or you’ll end up with soggy spots.
Variations & Adaptations
This recipe is flexible even with just three ingredients. Here are some ways I’ve played around with it.
Chocolate Drizzle: After the treats set, melt 1/2 cup of dark chocolate chips with a teaspoon of coconut oil and drizzle it over the top. The bitterness of dark chocolate balances the candy corn’s sweetness perfectly. I did this for a Halloween party and people lost their minds.
Peanut Butter Swirl: Before adding the candy corn, drop spoonfuls of creamy peanut butter over the cereal mixture and fold twice. You get these salty, nutty ribbons running through the sweet marshmallow. My husband’s favorite version.
Vegan Adaptation: Use vegan butter (Earth Balance works great) and vegan marshmallows (Dandies are my go-to). Candy corn is naturally gelatin-free, so you’re good there. The texture is slightly less chewy but still delicious.
Gluten-Free: Rice Krispies are naturally gluten-free, but some generic brands use malt flavoring that contains gluten. Check the label. If you need certified gluten-free, look for the brand “Malt-O-Meal” or use a gluten-free crispy rice cereal.
Spiced Version: Add 1/2 teaspoon of pumpkin pie spice to the marshmallow mixture before adding the cereal. It gives the treats a subtle fall flavor that pairs beautifully with the candy corn. I tried this last October and it’s become my go-to for Thanksgiving leftovers.
Salty-Sweet: Sprinkle flaky sea salt (like Maldon) over the top immediately after pressing. The salt crystals sit on top and hit your tongue first, followed by the sweetness. It’s a simple tweak that makes these taste way more sophisticated than three ingredients have any right to be.
Serving & Storage Suggestions
These treats are best served at room temperature. The marshmallow softens slightly as it warms up, giving you that perfect chewy texture. If they’re cold, the candy corn gets hard and the whole thing feels more like a granola bar than a treat.
Presentation ideas: Cut them into triangles instead of squares to mimic candy corn shapes. Or use a Halloween-themed cookie cutter (pumpkin, ghost, bat) for fun shapes. Just spray the cutter with cooking spray first or it’ll stick.
What to serve with them: These pair surprisingly well with a warm mug of apple cider or a cold glass of milk. If you’re serving them at a party, set them next to a bowl of popcorn or alongside some spicy Korean Mexican street corn dip for a sweet-and-savory combo that always surprises guests.
Storage: Keep them in an airtight container at room temperature for up to 5 days. Don’t refrigerate—the marshmallow gets hard and the candy corn turns into little rocks. If your kitchen is humid, add a piece of bread to the container to absorb excess moisture. Replace the bread every two days.
Freezing: You can freeze these for up to 3 months. Wrap each square individually in plastic wrap, then place them in a freezer bag. Thaw at room temperature for about 30 minutes before serving. The texture won’t be quite as good as fresh, but they’re still delicious.
Reheating: If they’ve gone a bit stale, pop a square in the microwave for 8-10 seconds. It softens the marshmallow and brings back that fresh-from-the-pan texture. Just don’t overdo it or you’ll end up with a puddle.
One thing I’ve noticed: these treats actually taste better on day two. The flavors meld together overnight, and the candy corn’s sweetness mellows out. If you can resist eating them all on day one, you’re in for a treat.
Nutritional Information & Benefits
Let’s be honest—these are a treat, not a health food. But here’s what you’re working with per square (based on 12 servings).
- Calories: approximately 220
- Total Fat: 5g
- Saturated Fat: 3g
- Carbohydrates: 44g
- Sugar: 28g
- Protein: 2g
- Sodium: 180mg
Potential allergens: This recipe contains dairy (butter). Candy corn is typically dairy-free and gluten-free, but always check the label. Rice Krispies are gluten-free but some generic brands may contain malt.
Health perspective: Is this a nutritious snack? No. But it’s a Halloween treat meant to be enjoyed in moderation. The Rice Krispies do provide some iron and B vitamins (they’re fortified), and the butter adds a small amount of vitamin A. Mostly, this is about joy, not nutrition. And sometimes that’s exactly what you need.
If you’re looking for something lighter to balance out the sugar, try serving these alongside a refreshing mango jalapeño agua fresca—the acidity and heat cut through the sweetness beautifully.
Conclusion
I never thought I’d be the person evangelizing candy corn. But here we are. These easy 3-ingredient candy corn rice krispie treats converted me, and I think they might convert you too.
The beauty of this recipe is how simple it is. Three ingredients, one pot, ten minutes of work. You don’t need special skills or fancy equipment. You just need to trust the process—and maybe give candy corn a second chance.
These treats are perfect for Halloween parties, classroom celebrations, or just because you’re craving something sweet and nostalgic. They’re the kind of recipe that disappears fast, gets requested every year, and makes people smile when they realize how easy they are to make.
If you try these, let me know how they turn out. Did you add the chocolate drizzle? Did your kids help press them into the pan? Did you, like me, eat three before they even set? Drop a comment below or tag me in your photos—I genuinely love seeing how people make these their own.
And hey, if you’re looking for more easy no-bake desserts, check out our easy matcha green tea tiramisu parfaits for another quick sweet fix. Happy Halloween, friends. Go make some treats.
Frequently Asked Questions
Can I use stale candy corn?
You can, but it won’t melt as smoothly. Fresh candy corn is softer and creates those beautiful streaky ribbons. Stale candy corn tends to stay in hard little chunks that don’t integrate well. If your candy corn is rock hard, try microwaving it for 5 seconds before adding it to the mixture.
Why did my treats turn out hard?
You likely overcooked the marshmallow mixture. Once the marshmallows are fully melted, take the pot off the heat immediately. Leaving it on the stove causes the sugar to crystallize, which makes the final treats tough and dense. Also, pressing too firmly when shaping can make them brick-like.
Can I use regular cereal instead of Rice Krispies?
Absolutely. Fruity Pebbles or Cocoa Pebbles give you fun flavor variations. Corn flakes work but crush more easily. Just keep the ratio the same—6 cups of cereal to the marshmallow mixture. Avoid anything too dense like Grape Nuts—that’s a different texture entirely.
How do I prevent sticking when cutting?
Spray your knife with cooking spray before each cut. Wipe the blade clean between cuts to remove sticky residue. For the cleanest edges, let the treats set fully (at least 30 minutes) before cutting. If you’re in a hurry, you can refrigerate for 15 minutes, but watch for condensation.
Can I double this recipe?
Yes, but use a larger pot. A 7-quart Dutch oven works well for a double batch. Don’t try to double it in a standard 5-quart pot—the mixture will overflow and you’ll have marshmallow all over your stove. Also, work quickly once the marshmallows are melted; double batches set up faster than single batches.
Pin This Recipe!
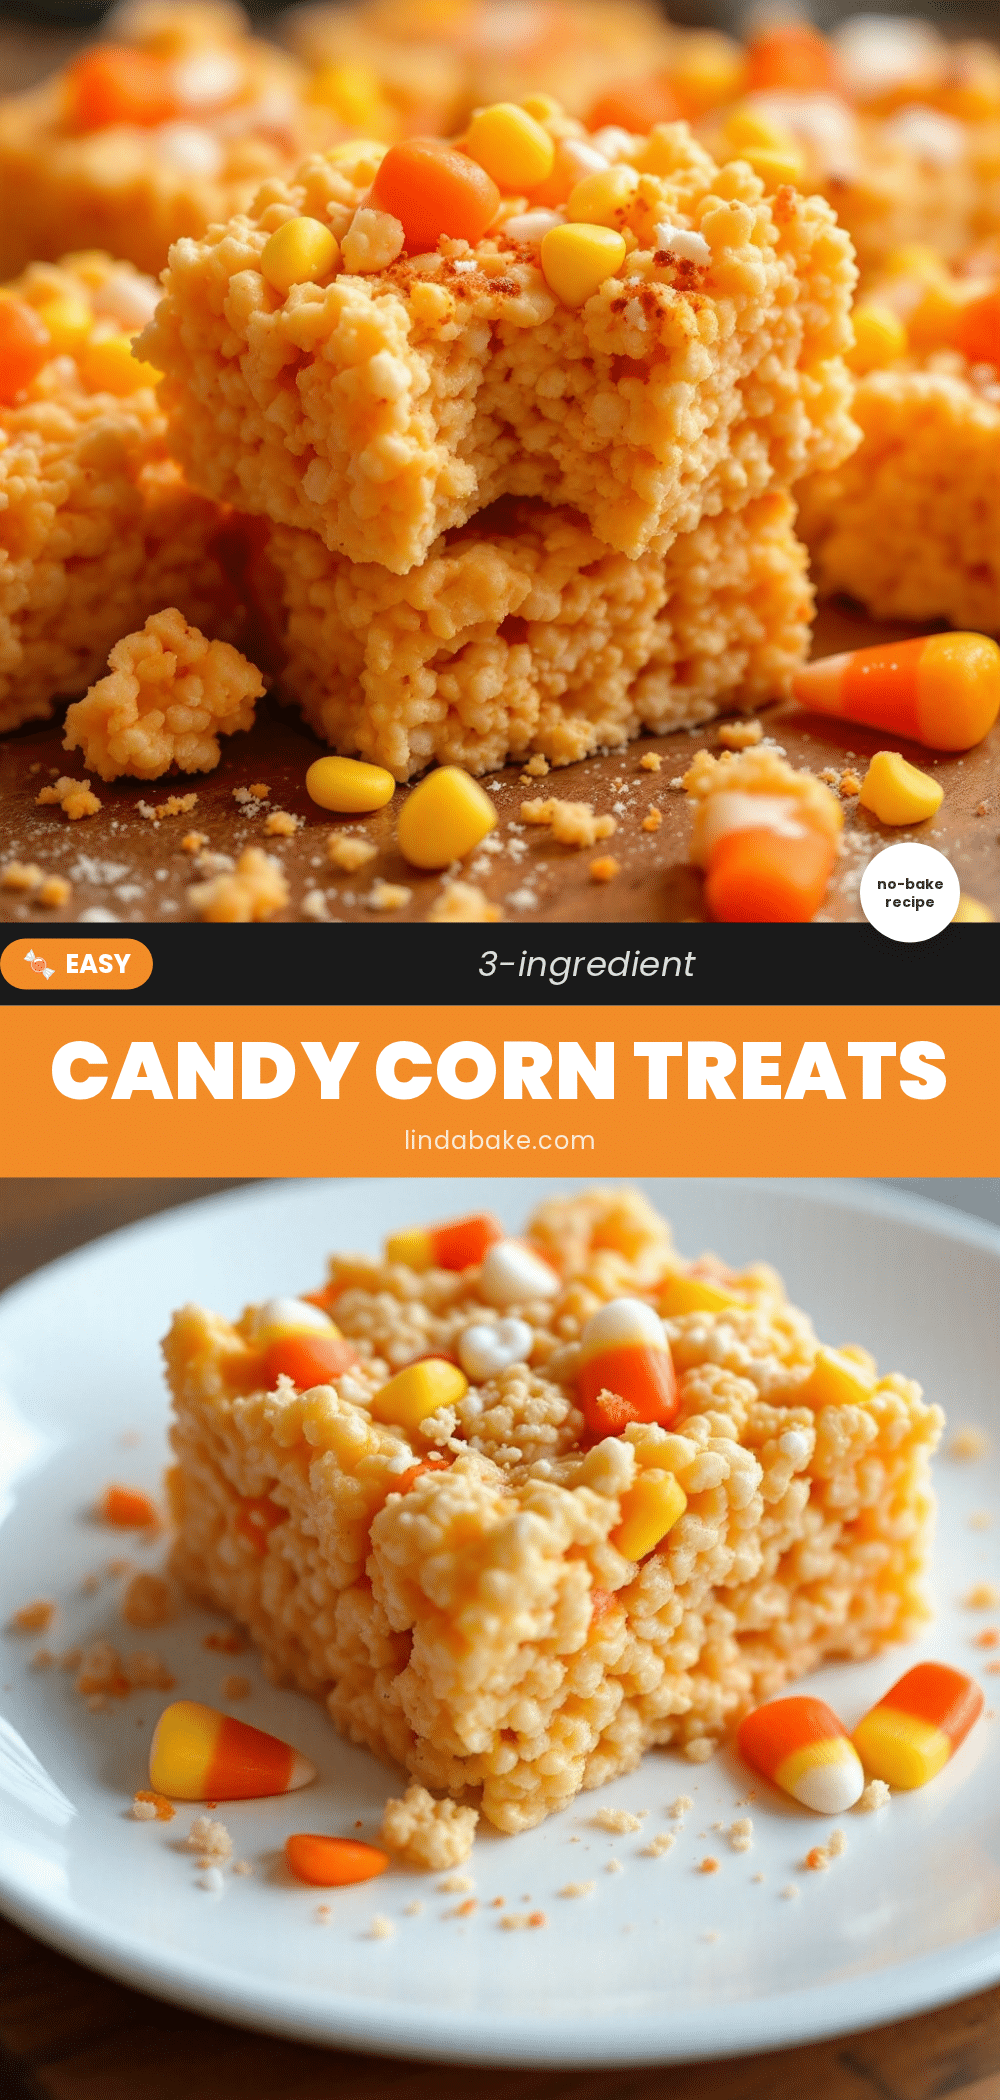
Easy 3-Ingredient Candy Corn Rice Krispie Treats
These easy 3-ingredient candy corn rice krispie treats are a no-bake Halloween dessert that converts even candy corn skeptics. With butter, marshmallows, and candy corn, they create chewy, caramel-like streaks in a classic crispy rice treat.
- Prep Time: 10 minutes
- Cook Time: 5 minutes
- Total Time: 45 minutes
- Yield: 12-16 servings 1x
- Category: Dessert
- Cuisine: American
Ingredients
- 3 tablespoons unsalted butter
- 10 ounces marshmallows (about 4 cups mini marshmallows or 40 large)
- 1 cup candy corn
- 6 cups Rice Krispies cereal (or any crispy rice cereal)
Instructions
- Prepare your pan. Line a 9×13-inch baking pan with parchment paper or foil, leaving about 2 inches of overhang on the long sides. Lightly grease the parchment with butter or cooking spray. Set it aside.
- Melt the butter. Place your large pot over medium-low heat. Add the 3 tablespoons of unsalted butter and let it melt slowly. Swirl the pot occasionally so it melts evenly. (About 2 minutes)
- Add the marshmallows. Once the butter is fully melted, pour in all 10 ounces of marshmallows. Stir constantly with your rubber spatula until the mixture is completely smooth and glossy. This takes about 3-4 minutes.
- Remove from heat immediately. As soon as the marshmallows are smooth, take the pot off the burner.
- Add the cereal. Pour in the 6 cups of Rice Krispies all at once. Fold gently—don’t stir aggressively or you’ll crush the cereal into dust. About 10-12 folds should get everything mostly combined.
- Add the candy corn. Add 1 cup of candy corn on top of the cereal mixture and fold just 3-4 times. You want visible streaks of orange and yellow running through the white marshmallow.
- Transfer to the pan. Scrape the mixture into your prepared pan. Try to spread it evenly as you pour. Use your greased spatula to gently push it into the corners.
- Press evenly. Grease your hands lightly with butter or cooking spray. Press the mixture down firmly but gently. Don’t smash it flat—you want some air pockets for texture. Aim for about 1 inch thick.
- Let them set. Allow the treats to cool at room temperature for at least 30 minutes. Don’t rush this by putting them in the fridge—condensation will make them soggy.
- Cut and serve. Lift the whole block out using the parchment overhang. Place on a cutting board. Use a sharp knife to cut into squares. Wipe the knife clean between cuts for neat edges. I usually get 12-16 squares depending on how big I cut them.
Notes
Don’t overmix the candy corn—3-4 folds max to keep visible ribbons. Use fresh marshmallows and fresh cereal for best texture. If the mixture gets too stiff while pressing, the marshmallow base was overcooked. These treats taste even better on day two. For clean cuts, spray knife with cooking spray between cuts.
Nutrition
- Serving Size: 1 square
- Calories: 220
- Sugar: 28
- Sodium: 180
- Fat: 5
- Saturated Fat: 3
- Carbohydrates: 44
- Protein: 2
Keywords: candy corn rice krispie treats, 3-ingredient dessert, no-bake Halloween treats, easy rice krispie treats, candy corn dessert


